Water under the passenger mat of a VAZ 2114 can appear for various reasons. Every owner takes care of his own car, and as soon as even a small malfunction occurs, he immediately begins to sound the alarm, trying to quickly “cure” the car. It would seem that water under the passenger mat of a VAZ 2114 does not cause much concern, but this must be eliminated immediately so that there are no more serious problems in the future.
When water gets under the passenger mat of a VAZ
If moisture appears in the car interior, then the driver has no peace of mind until he figures out what’s wrong and fixes the leak. Most often, such a nuisance happens after rain. The most common cause is a windshield that is not sealed properly, which allows raindrops to enter the cabin.
It happens that you have to disassemble the door in order to make sure that the plastic screens, whose function is to close the technological windows, are in order. You can check the windshield by having someone spray it while watching from below what is happening.
The following can happen if the channels are clogged: the water flow will split, one part will go to the driver's side, the other to the passenger's seat. Then, under the hood, the water will go into the drain hole, and through the body it will begin to flow to the stove pipes.
But in VAZ 2114, 2107, water can accumulate on the floor if the rubber seals, which are located on the inside along the perimeter of the door, are worn out. Worn seals, which now do not fit tightly, can be identified immediately - the rubber becomes torn and shrunken.
So it's time to replace them. In this case, professionals advise installing double seals, so before disassembling half the machine in search of the cause, you need to check if there are any cracks that allow moisture to pass through. During assembly, they can also make a mistake and install them incorrectly, therefore, even if the car is completely new and water appears in the cabin, the seals should be checked first. The main thing is that the glass and the body are one.
Clogged drainage holes in the bottom may leak water. In this case, it is enough to clean them. Previously, they were made of rubber, but now they are using plastic, which allows water to pass through.
It happens that it is poorly adjusted, then, especially during a trip in rainy weather, it is very easy to get water into the cabin through the resulting gaps.
How moisture accumulates in a car
She gets there in several ways:
- The first way moisture gets in is the absence of rubber plugs in the lower part of the body that cover the drainage holes. Any trip in the rain will result in water in the lower parts of the body.
- Sunroof. A poorly closed sunroof during rain or car washing will also lead to water in the cabin. The rubber bands that seal the hatch can dry out from age, so water can seep through them.
- If the trunk seal is not doing its job, water will accumulate under the spare tire.
- Another way water forms in body cavities is through condensation. But in order to harm the car, there must be a lot of condensation, and it forms only under certain conditions.
- Water also gets into the car when the drain holes under the windshield are clogged. Rainwater is collected like in a bathtub and poured into the air intake of the stove. Through the filter it enters the passenger compartment on the passenger side.
All car enthusiasts are well aware of how water affects body parts. In those places where water stagnates, rust forms, and then corrosion. If nothing is done, the car will rot from the inside.
Where are the drainage holes located?
Drainage holes are located in the lower part of the body. There are small holes at the bottom of each door (including the trunk). Photo: drive2.ru
Some of them are closed with a rubber seal, while others are closed with small rubber plugs. These are the drainage holes on the doors.
There are also drainage holes at the bottom of the thresholds. The largest drain is located in the trunk under the spare tire. It is located in the center. There are smaller drains in the side compartments of the trunk. There are drainage holes under the windshield in the body that are supposed to drain water from the wipers.
Here you will find detailed information about the presented Maybach Ultimate Luxury
You will learn about the features of checking a car through the automobile registry of pledges from this material.
How often should drain holes be checked?
As a rule, holes should be checked at least twice a year - in spring and autumn. In the fall - a must! But if this happens, the driver drove along shallow rivers or deep puddles, then the car must be checked immediately after the trip.
Not all drainage holes are sealed with plugs. Small ones are left open specifically to allow moisture to drain. But such holes are also worth checking, as they can become clogged with dirt, dust, leaves and not perform their function.
How to tell if the drain holes are not working
There are several signs that can help you determine that there is something wrong with your drainage holes.
- Wet floor in the cabin after every rain.
- Spread of mold and mildew throughout the lower part of the cabin.
- Unpleasant, musty smell.
- Fogging of windows at any time of the year and in any weather, despite the fact that the stove cannot cope.
- Strange squelching sounds when driving that shouldn't exist.
- Excessive spread of corrosion throughout the lower parts of the body.
- Water in the passenger's feet during rain or after washing.
- The smell of mustiness and rot after turning on the stove.
Cleaning and flushing the radiator of the VAZ 2114/15 stove
You can increase the efficiency of the stove by cleaning and flushing the radiator. The procedure can be performed without dismantling the radiator or with dismantling it. In the first case, you will need to remove the outlet and inlet pipes from the heater and pour a cleaning solution into it. Citric acid, plumbing cleaners (for example, “Mole”), etc. are used as such a solution. Then the radiator is washed with running water and coolant is added. You can clean the radiator better by removing it from the car. This will allow you to wash it not only from the inside, but also from the outside, removing dirt between the honeycombs. Washing is usually carried out with running water.
If after performing these procedures the stove does not work better, the radiator must be replaced.
Video: flushing the stove radiator
Thus, diagnosing a malfunction and determining the cause of poor heating of the VAZ 2114/15 interior with your own hands is quite simple. Self-repair and replacement of individual elements of the heating system are also not very difficult. It is enough just to strictly follow the recommendations of specialists.
Didn't find the information you are looking for? on our forum.
We recommend reading:
VAZ 2114 antifreeze under the driver's mat
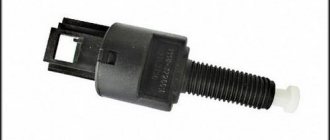
How to change the frog on a VAZ 2107, causes of the malfunction, where the sensor is located
VAZ 2114 how to adjust the clutch
VAZ 2114 lock from viburnum on
Vacuum electrovalve VAZ
VAZ 2110 takes a long time to warm up, why does this happen?
VAZ fuel pump check
Electrical diagram of VAZ 21213 Niva carburetor
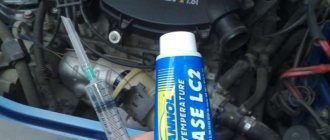
Lubricate body seals
To prevent doors from freezing in winter and extend the service life of rubber seals, we apply silicone grease to the external and internal seals:
- Door seals
- Glass guides
- Trunk seal
An example of cleaning the drainage holes on a Lada Vesta car:
How often do you clean the drainage holes and lubricate the rubbing parts of the body? Do not forget to follow other recommendations during regular maintenance (see plan for XRAY, Vesta, Largus, Granta/Kalina, Priora, Lada 4×4).
AvtoVAZ recommendations: the standard protective complex (anti-corrosion treatment) is sufficient to protect the body from corrosion during average vehicle operation. It only makes sense to use additional anticorrosion protection (2 years after purchase) if you intend to use the car for 8-10 years.
Water under the passenger mat of a VAZ 2114 can appear for various reasons. Every owner takes care of his own car, and as soon as even a small malfunction occurs, he immediately begins to sound the alarm, trying to quickly “cure” the car. It would seem that water under the passenger mat of a VAZ 2114 does not cause much concern, but this must be eliminated immediately so that there are no more serious problems in the future.
Reasons for decreased performance
Despite the simplicity of the design, problems with the VAZ-2114 stove often arise. They are mainly associated with a drop in the performance of the heating system - the stove heats the air poorly, blows cold or slightly warm air. In this case, the reasons for poor operation of the stove can be both general (warming up is weak at any control unit settings) and when operating in a certain mode, for example, at idle. Or, for example, cold air or slightly warm air blows only on the side windows, and in other modes the heating works normally.
Common reasons why the stove stops heating:
- the heater radiator is clogged or an air lock has formed in it;
- when switched to heating mode, the heater damper does not fit tightly to the body, which is why part of the air flow moves bypassing the radiator and enters the cabin cold;
- the tap does not open completely - this is one of the main reasons for a poorly heating stove;
- the formation of cracks at the joints of the housing and air ducts, which causes strong dispersion of the air flow.
It is not difficult to determine the cause of a general decrease in the efficiency of the heating system. To find out why the VAZ-2114 stove does not heat well, you need to remove the side decorative panels from the center console, and then warm up the engine and turn on the stove at maximum power. After this, we try the antifreeze supply pipe to the heater radiator up to the tap and behind it. The same heating temperature of the tube on both sides indicates that the tap is working properly and the problem lies in the radiator. If after the tap the pipe is less warmed up, the tap is jammed or does not open completely.
After this, we determine the temperature at the inlet and outlet pipes of the radiator. If the heat exchanger is not clogged and there is no plug in it, then the temperature of the outlet pipe will be lower than the inlet pipe. But if the outlet tube is cold, antifreeze does not circulate through the radiator, which indicates the formation of an air lock (airing) or clogging.
A common cause of failure of the VAZ-2114 stove is wear and play in the sliders. Because of this, even when they are moved to their extreme positions, the cables do not bring the valve and dampers to the stop (the valve remains closed, and the dampers do not block the air flow channels). This problem can be easily resolved - you need to make an adjustment and shorten the cables a little.
The problem of insufficient heating of one of the zones is associated with a violation of the damper control. This happens due to the same wear on the sliders, the cable jumping off the damper levers, the damper axes jumping out of the seats in the body, which is accompanied by clicks.
In addition to weak warming up, VAZ-2114 car owners are faced with the fact that the intensity of air flow decreases. This happens due to the dispersion of air through the cracks at the junction of the body and air ducts, clogging the latter with debris - many owners do not install cabin filters, so leaves get into the air ducts and interfere with air movement.
Additional rubber bottom plugs (tenth family and priora)!
Hello everyone) I decided to get rid of several huge holes in the body. The first pair in the front “jacks” of the VAZ 2110 right/left. The second pair in the floor spar of the VAZ 2110 average lion/pr. Several times I came across discussions about how and what was done here from the factory, and it seems that everyone here is empty from the factory) The topic is relevant for both the Tens and the Lada Priora. Let's start from the front:
It’s not clear why this piece of hardware was called that; it’s not suitable for these purposes, but that’s not the point now. Earlier in the comments I recommended the following rubber band: VAZ-2108 plug for holes in the floor of the BRT body Article: 2108-5112090
Before this, there were assumptions, but in reality it is not clear whether it will fit or not? Now I definitely say it fits!) Structurally, only this plug has a high side, that’s what we need) The others couldn’t be inserted over the edge of the metal.
All that remains is to drill a small hole at the lowest point to drain condensate. 11/13/2015 I checked the plug, it was dry! I didn't make a hole. perhaps it is not necessary.
Before installation, I warmed the rubber with a hairdryer, it’s much easier. On the left I managed to push it in with my hands, on the right I pressed a little with a jack: D I didn’t use screwdrivers so as not to damage the paintwork. The edges of the holes were treated with prim ML.
On the Internet I accidentally came across a piece of iron without a hole:
Apparently there are such things)
Next is the middle floor spar:
And finally, I closed the remaining small holes; previously they were under factory vibration isolation. I didn’t have rubber bugs of that size on hand, so I took the pistons for fastening the trunk lid lock trim.
From the street side in the same way:
The tube dried out, somehow I squeezed it out... I smeared it with my hands(
Maybe someone will find this information useful) Bye and good luck)
Why does water get under the passenger's carpet?
Water may appear under the rug if the heater leaks, and then moisture will pass through the engine into the cabin.
The air intake of the stove can also bring a lot of trouble, since in order to eliminate constant puddles under your feet, you will have to clean the technical drain holes, which are located in the niche under the hood. Then it will be necessary to carry out additional repair work - seal the joints of the air duct and the body with high-quality sealant. It’s better not to waste money on it so that it lasts a long time.
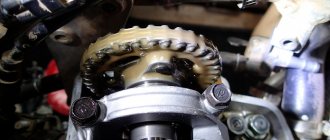
When moisture constantly appears in the direction where the stove is located, it is advisable to figure out whether it is ordinary water or antifreeze. In this case, a damaged faucet is often to blame, and this can be determined by the steam that appears in the cabin; the antifreeze level sensor will also indicate a breakdown - it will definitely light up. Here are other reasons why puddles may form:
- Dampness may occur in the cabin if there is leakage in the area of the mounting block and fuses through the gasket;
- the resulting puddle under the driver’s feet may appear, flowing down the steering rack and along the cables;
- if the fault still cannot be found, you need to check the injectors, don’t be too lazy to ring them - is everything in order here, is there a wire break.
Air conditioning is good to have in the cabin, but it can affect the accumulation of water under the passenger mat. The air conditioner has such a device - a condensate drain pipe, and sometimes it can simply fall out of its place, and then water will begin to get behind the seat trim. The consequences are not noticeable - constant dampness, you have to remove the seat, change the upholstery and seal.
A crack may appear in the fuse box, causing water to appear under the mats. You need to check the pedal from which the cable runs to the motor.
In any case, the leak must be eliminated, otherwise corrosion of the body will begin, which will be difficult to stop.
Where does water come from?
Water can be poured through the stove air intake (depending on the model, it appears both on the left and on the right side of the tunnel at the feet). In such a situation, you need to clean the drain holes in the engine compartment, and then coat the joint of the body and the air duct with sealant . If the liquid is from the side of the stove, then first of all it is worth checking whether it is antifreeze (the faucet often leaks simply through clamps and pipes or the heater radiator). The heater can also leak through the engine.
This is where water can flow into the Hyundai Accent
It is possible that water may leak through the gasket in the mounting block and fuse box. Also, in domestic cars, liquid leakage through the windshield frame can occur ( water leaks in the corners ). This situation can arise for several reasons:
- First, the drain holes may be clogged (they need cleaning).
- Secondly, the seal may not adhere tightly to the glass (due to drying out or cracking).
- Thirdly, perhaps the formation of a gap between the glass and the body.
It is not uncommon for water to seep through rubber door seals (torn, shriveled rubber) that need to be replaced. How simple would it be? But a lot also depends on the installation of the seal; it happens that it was simply installed incorrectly, here you need to be extremely careful. Or because the doors have sagged or are not adjusted correctly. This results in water pouring in through the doorways. In rare cases, water gets into the steering rack or cables from the driver's side.
Water under the rug
Heater fuse and reasons for its failure
Often the cause of malfunction of most components and systems of a car is a blown fuse. The stove is no exception. Failure of a 30A heating system fuse causes the fan motor to stop and air to stop flowing into the cabin. In this case, find an element marked F7 in the fuse block and replace it. The new fuse should also be rated 30A. If the fan does not work after this, the problem should be looked for elsewhere.
Heater fuse F7 is located in the mounting block under the hood on the driver's side
It is often difficult to determine that it is the fuse that has blown. It can fail due to a short circuit in the electrical wiring, a malfunction of the electric motor, severe clogging of the cabin filter and in a number of other situations. The difficulty lies in the fact that fuse F7 is simultaneously included in the rear window heating electrical circuit and is responsible for the cigarette lighter, glove compartment lighting and headlight washer motor. If it fails, all these components will not work.
conclusions
The reasons and methods for eliminating the effect of antifreeze leaks on the interior mats in the VAZ-2114 are considered. So, when a motorist discovers such a problem, he must eliminate it immediately, because the consequences can be very diverse. If the car owner is unable to solve the problem, it is recommended to contact a car service center.
I came across this problem, yesterday I drove all day in the rain and in the cabin where the front passenger seat is at the feet, water formed under the rug from nowhere. what could it be??
- Need advice on headlight repair! BMW M6 E64 Cabrio
- help out
- repair assistance
- Reverse light does not work
- Long-term storage (1.5-2 years)
- The hazard lights come on when the engine is off and the doors are closed. BMW 3 E46
Alternatively, the windshield seal may be leaking. I had the same problem and was cured by replacing the seal.
Windshield seal, gasket seal under the fuse block, on the heater motor side, but unlikely.
The seal is unlikely, I checked it. the fact is that it was wet where the feet were, everything was dry near the stove and even from the door.
Well then, look from below, the rubber plugs in the bottom are in place.
Take a good look at the fuse block, maybe there is a crack somewhere and it is leaking. Get into the pedal and look at the cable going to the motor, it’s sealed in the body so water can get in there. Well, as an option, where the casing for the stove is located under the hood, there should be a sealant or some type of plasticine, because it can fly in from there.
I had the same thing, the channels under the hood were clogged with water draining, water got into the cabin through the stove - one of the options is the fuse box, from the seal, from the bottom from the plugs, the window was open, there are no other options. Well, maybe the stove is leaking or the stove faucet is leaking, then the stove will be dry.
Why the stove does not work or does not heat the air
If the stove fails, it either does not work at all, or it works but does not heat the air. In the first case, first check the fan wiring, starting with fuse F7. If the fuse is blown, replace it. Then they check the relay, which may not turn on the first time or only when the engine is warm. In this case, the relay is replaced with a new one.
Then the serviceability of the electric motor is assessed. To do this, power is directly supplied to its contacts from the battery. If the electric motor starts to operate at maximum speed, then it is in good condition. Otherwise, it will need to be repaired or replaced.
The intensity of the air flow is adjusted using a resistor having two spirals with resistances of 0.82 Ohm and 0.23 Ohm. In the first mode, the current flows through both spirals, in the second - only through a spiral with a resistance of 0.23 Ohms, in the third - bypassing the spirals, that is, without resistance at all. If the resistor is faulty, the fan will only operate in the third mode at maximum speed (handle in the extreme right position). The problem is solved by replacing the resistor, which is located on the driver's side above the accelerator pedal.
If the resistor is faulty, the heater fan will only be able to operate at maximum speed.
If cold air enters the cabin, this may be due to:
- Airlock. It could have formed when replacing the coolant, when the system was depressurized, or because there was insufficient amount of coolant in the system. To remove the plug, remove the heater radiator pipe, use a watering can to add antifreeze to the maximum and put the hose back in place. After starting the engine, coolant under pressure will displace the remaining air from the system.
- Stove tap jammed. This happens if the tap was not initially opened all the way, and during operation, oxide and scale formed on the inner surface, preventing the normal circulation of the liquid. You can try to open the tap using pliers or immediately replace it with a new one.
- The stove radiator is clogged. When using low-quality coolant, the radiator honeycombs may become clogged. The problem is solved by flushing or replacing the heat exchanger. The feasibility of washing is determined by the scale of contamination.
- Installation of a low-quality radiator. In a defective product, the honeycomb may be incorrectly soldered. The radiator should be replaced.
- Low pressure in the cooling system. If heat transfer increases at higher speeds, the pump needs to be replaced.
- Low coolant level. It is necessary to check the level and add antifreeze if necessary.
- Damage to the heater fan impeller. The impeller is carefully inspected and replaced if mechanical damage is detected.
- Cabin filter dirty. If it is heavily polluted, the power of the electric motor will not be enough to pump warm air into the cabin. The filter is replaced with a new one.
- Damage to the cylinder head gasket. If the cylinder head gasket is blown, white smoke will come out of the exhaust pipe. The problem is solved by replacing the gasket and dismantling the cylinder head.
If the stove is clogged, warm air will stop flowing into the cabin.
Why is antifreeze leaking from the stove?
A coolant leak in the heating system can occur from:
- stove radiator;
- stove tap;
- stove pipes.
If a coolant leak occurs from the radiator, it is usually replaced with a new one. Repairs to restore tightness are usually complex and labor-intensive. In addition, if the radiator has been in use for a long time, its tubes become clogged with deposits and dirt, and, as a result, heat transfer decreases.
The valve opens and closes the coolant supply to the radiator, thereby regulating the heat in the cabin. Over time, it may begin to leak, as evidenced by the characteristic smell of antifreeze in the cabin, a puddle on the floor on the passenger side and a decrease in the coolant level in the expansion tank. The faucet cannot be repaired and in such cases is replaced entirely.
If the heater radiator starts to leak, it is usually replaced with a new one.
The cause of coolant leakage from the pipes is usually their wear - the rubber ages and cracks over time. When diagnosing a problem, you need to wipe the suspected leak areas with a rag and observe the outlet and inlet pipes on a warm engine. Worn hoses are always replaced with new ones.
Body drainage holes
Condensation may form in the internal cavities of the body. To prevent moisture from causing corrosion, drainage holes are provided in the car body. Over time, they can become clogged with dirt. Check the condition of the drainage holes regularly (preferably after each wash) and clean them if necessary.
There are two drainage holes at the bottom edge of each door. To clean them, remove the edge of the rubber seal. The drainage holes in the trunk lid are also located at the bottom edge.
Regularly check the drainage holes in the engine compartment, which are located around the edges:
Reasons for the appearance of antifreeze under the rug
What are the reasons for such a dangerous effect:
- The stove tap broke.
- Rupture of the material structure or surface of the heater radiator.
How to fix
Now that the causes have been identified, it is worth considering possible solutions to the problem. Before we begin, it should be noted that these reasons can easily be eliminated independently and it is not necessary to contact a car service. Let's look at how to solve the problem of antifreeze on the interior carpet.
Stove faucet
In the process of replacing the stove valve
In this case, the leakage of antifreeze may be caused by the fact that the heater faucet has worn out. Mostly, the leak will form under the driver's mat and occurs only in a certain operating mode of the heater. This malfunction can be treated simply by replacing the heater tap.
Heater radiator
Faulty heater radiator
The second most common reason is a leak from the heater core. Here you need to be careful and quickly fix the problem, since antifreeze gets not only onto the interior mats, but also affects its location.
Buy with this product
In warehouses: 1872 pcs.
In warehouses: 302 pcs.
In warehouses: 1717 pcs.
In warehouses: 166 pcs.
In warehouses: 284 pcs.
In warehouses: 511 pcs.
In your personal account settings, you can specify the default shipping territory to quickly receive a list of current balances.
We are open to cooperation and accept orders for any volume of products.
Full or partial use of any materials or their copying is permitted only with the written consent of the site administration.
Source
Is it worth changing the oil and antifreeze?
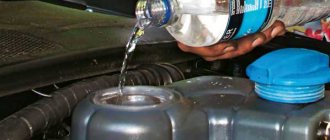
If both fluids have changed color and consistency, they must be replaced. This is the only way to completely remove water from the engine. But don’t rush to fill in good liquid right away.
It is important to flush the system thoroughly. These can be specialized cleaning fluids (so-called
“five minutes”), or cheap oil and antifreeze. The latter option is more gentle and is suitable for cars with a complex internal combustion engine. After filling the liquid, turn on the engine for 15-20 minutes, keeping it at different speeds. Afterwards, the flushing oil and antifreeze can be drained. Moisture will be completely removed from the system.
Engine compartment
Open the hood. In the niche where the windshield wiper motor is located, there is a large hole on the side. Passes through the engine shield. It is connected to a pipe that exits above the vacuum brake booster. In some models, its location may differ slightly, but not dramatically.
This cavity typically collects leaves and debris. It is advisable to clean it so that moisture does not accumulate there. Water will flow freely through the drain hole out into the engine compartment.
In addition, in the corners of the junction of the wing and the windshield pillar there are small holes on both sides. They are designed to drain water from under the hood and the flat area of the fender. Moisture leaks out in the space between the front wheel mudguard and the fender. If this distance becomes clogged with dirt, then the lower part of the wing begins to rot, the water has nowhere to drain, and it stagnates there.
To Contents...
Lada 2112 Angel of QuartZ › Logbook › Water in the cabin (Possible causes)
This article was written with my own hand, so that you don’t suffer like I did :))
To start looking for a water problem, do you need to analyze the problem?
1. Water enters ONLY when moving
car in rain/wet weather2.
Water gets in CONSTANTLY
If this is option 1, then you need to check
all rubber door seals, especially the lower part.
Inspect the door upholstery after “bad weather.” If the upholstery is damp, most likely there is no plastic film in the door that seals it from the upholstery. If it is in place, then we go to the store and buy a door seal and an upper drain, adjust the locks, ensuring that the door is pressed tightly against the rubber seal. Tip:
For tighter contact between the seals and the door, you can insert a silicone hose inside the seal along the entire length of the seal. You can read how to do this here (Refinement of seals 2110)
If in your case water gets into the cabin even when parked in rainy weather, then read below:
Water under sound insulation in the cabin under standard sound insulation may appear for the following reasons.
1. Poorly glued/unstuck windshield
One of the most common causes of water leaking into the cabin. This defect is quite difficult to see; it mainly flows in the lower corners. In the upper ones everything is much simpler, water flows along the windshield pillars or through the sun visors
2. Absence of plugs for the hydraulic corrector/clutch/wire harness going from the ECU to the engine compartment.
This defect can be determined by visual inspection.
Hydrocorrector plug
- may be missing or hanging on the hydraulic corrector pipes, for the reason that there are crooked craftsmen who conduct wiring for the alarm system through this hole, thereby removing the plug and forgetting to put it in. You can find it from the inside if you open the mounting block and feel hydraulic corrector pipes and follow their direction, behind the standard Shumka you can feel the hole. From the outside the process is more complicated, but much more reliable.
We remove the frill, move aside the coolant expansion tank, crawl up to the trapezoid drive mounting bracket (I don’t know what its scientific name is) and you will see a technological hole under it. You can put a plug and fill it with sealant for reliability. The clutch plug
is a sick part of the 10th family, frequent cable breaks.
If you replace it yourself, you may not install the plug tightly or even not install it at all. The wiring harness
going to the ECU from the engine compartment can be found just below the steering rack. A common problem is that this harness is wrapped in corrugation, which in turn is cut in half, the cut is directed towards the top :)) It may also have a plug missing or not fit tightly into the body.
3. Drain plugs in the bottom
This is actually a controversial point. There are myths that if you do not install plugs, the condensate can drain on its own. But logically, standard sound insulation can absorb water.
4. Holes in the bottom
. I think no comment
5. Maybe coolant?
Make sure that in your situation it is water that is flowing onto the floor, and not coolant. The coolant has a characteristic odor in the cabin and the liquid itself. Possible reasons: The heater pipe, faucet, radiator are leaking.
6. The clutch pedal housing is not sealed
And what to do if water does get into the cabin?
June 19, 2012 16:06 Administrator / Views: 5840
In view of the recent hurricanes and downpours, it will be useful to remind you how you can avoid car flooding and what to do if water does get into the cabin.
One day it may happen that when you go out into the parking lot, you will see a drowned car standing in the place of your beloved beauty. To reduce the risk of such an emergency to a minimum, do not be lazy to take the preventive measures that Autocenter talks about.
The only thing you will have to spend significant time on is a trip to a company service station, whose technicians will show you the drains, the cleanliness of which must be monitored to avoid flooding of the car. Typically these channels or tubes are located in the rear of the engine compartment in front of the windshield. Dry leaves, fluff, dried insects, inflorescences of shrubs and trees, and other debris can obstruct the flow of water through them. The accumulation of water in the “wrong” place can lead to its entry through the ventilation system into the cabin.
Download - Water under the passenger mat Priors
Video comments
Thank you, I also had the same problem, saw the video and fixed it, thanks
Thanks for the review, most likely mine is also leaking from this place. I will try.
I encountered the same problem on a Honda SRV, I will cover it up. Tell me, is it no longer leaking?
the same thing, but I talked to friends and acquaintances, it turned out in 2 cars out of three, either immediately or over time, but this happens.
Today I watched the video, there’s a leak in this place, I covered it up, and we’ll see what happened on top and bottom
Both on grants and on Kalinas, exactly such problems occur, maybe not often, but they do occur, and I came across exactly such a grant, I spent a long time looking for where it was leaking, the AvtoVAZ bitch is simply a disgrace, it’s just cruel, and even asking such money for this designer, the whole suspension and The behavior of the chassis is completely without logic, on the highway it’s like in a caravan, and on a gravel road it’s like in a chaise, that’s how you could even create this.
And it’s wet on my driver’s side((I’ll look
It's also in the corner on my driver's side.
With Nutri, if you cover it up, stop? It's not possible from above
Today I discovered a leak in the same place ((this weekend I’ll go and seal it with silicone
On a Tavria with 3 tons of mileage, I also noticed this when I installed the speakers, we will fix it before it starts leaking too much. The car is new, but it’s already leaking, poor thing.
It leaked after six years of use, I’ll go take a look tomorrow, thank you!
My brother and I have the same thing. Buy Body 950, this is a rubber aerosol in liquid form. There may also be a leak from under the glass Velvet covers, and after the rain, check if the water collects there.
⇥ Autoplay
Large anti-corrosive agent, replacement of underbody plugs, standard front fender liners (2017)
The car is not much, not less, 10 years old this year. The time has come for major maintenance, namely anti-corrosion treatment. I was most concerned about the places where the bottom plugs were installed. Ours are made of plastic and over time they warped and began to leak water. And this, in turn, causes rust. I bought rubber plugs to replace the standard ones. Based on these numbers (bought all rubber): Repair kit for underbody plugs VAZ-2110 (plastic): 1. 2110-00-5007091-00 - plug (analogous to the rubber plug 2101-00-6203232-00) - 4 pcs. 2. 2110-00-5007092-00 — plug (analogous to the rubber plug 2101-00-5002092-00) — 11 pcs. 3. 2110-00-5007093-00 — plug (analogous to the rubber plug 2101-00-5112090-00) — 7 pcs. 4. 2114-00-5007096-00 — plug (analogous to the rubber plug 2108-00-8403276-00) — 2 pcs. 5. 2110-00-5007096-00 — plug (analogous to the rubber plug 2108-00-5112092-01) — 22 pcs. 6. 2110-00-5007090-00 - plug (analogous to the rubber plug 2101-00-5007090-00) - 16 pcs. I removed the standard plugs and cleaned everything around them with a brush using a drill. There was a lot of rust, about 10 centimeters in diameter around the large plugs. Afterwards I sprayed everything with zinc, then degreased it and applied Body 910 mastic. It is for interior work. Dries quickly. I smeared it all over the bottom from the inside.
After drying, I installed rubber plugs. And he coated the whole bottom with gun fat. The jar was worth 2 kg.
I also cleaned everything underneath the bottom where it was necessary and applied Body 930 polymer-bitumen mastic.
I also removed the door sill covers and also treated them with mastic, coated them with gun fat on top and closed them back up.
I removed the front fender liners using self-tapping screws and also treated them with anticorrosive. Movil from a can was applied on top of the anti-corrosion agent.
And this is for hard-to-reach places:
Naturally, I was not going to install the fender liners back on screws. I bought standard fender liners in advance, which are attached to standard studs. Articles: Left shield - 21108403363, right shield - 21108403362
Everything fit perfectly, taking into account the large layer of anti-corrosive, the fit on the arch is tight. I like it.
These are the old fenders:
I did the same with the rear arches and fenders as with the front ones:
Now all that remains is to try the fender liners, without drilling Novline. I'll write about them soon))
Relationship between weather outside and water inside the car
During the wet season, water constantly gets into the car interior along with shoes and clothes. After some time, the water flows onto the floor of the car and begins to slowly evaporate. At the same time, a layer of condensation and an unpleasant odor form on the glass.
To speed up the process of water evaporation in this case, you will need to turn on the heating devices to maximum when getting into the car. They must be kept in this state for several minutes, and sometimes for about an hour. Heating devices include anything that will emit an increased amount of heat, and this includes, in addition to the stove, various heated windows and seats. To increase drying efficiency, you should wipe the glass with a dry cloth after a while.
To minimize damage from condensation in wet weather, it is worth limiting the flow of air from the street through ventilation devices.
It is worth noting that a bag of special salt can effectively combat moisture introduced with clothing. By placing such an item in the cabin, it will begin to intensively absorb excess condensation. However, you should not forget about it, and after some time it will need to be replaced or dried on a warm radiator.
A folk remedy for dealing with water from shoes is:
- laying out newspapers,
- towels,
- installation of special rubber mats on the car floor.
They significantly reduce the content of condensation in the cabin by absorbing water. However, you should remember to periodically throw wet objects out of the car. It is best to do this in a warm garage, since if you go out into the cold, the water will quickly freeze and the paper will most likely stick firmly to the carpets.
Consequences of water accumulation in the body or interior
Water in the body and interior is dangerous not only for car parts, but also for the people who operate the vehicle. The most common consequences are listed below:
- The prolonged presence of water in the internal cavities of the car leads to the formation of corrosion of body parts. If nothing is done, the car will begin to rot.
- Moisture in the interior causes mold and mildew to develop in the interior. If the cause is not eliminated, the upholstery will become unusable.
- Accumulated water in the cabin in the summer is an excellent habitat for various pathogenic bacteria. In a warm and humid place they spread quickly and can cause illness in the person using the car.
- In the off-season in urban conditions, it is not water that gets into the car, but brine from reagents. This is the cause of the development of allergies, especially in children.
- Water that accumulates under the windshield and enters the heater air intake can cause a short circuit in the wiring.
- Also, water from under the windshield accumulates on the filter, where bacteria multiply. When you turn on the stove, all bacteria scatter throughout the cabin. People in the car breathe it. Such bacteria can cause rapid pneumonia or severe bronchitis.
You can learn how to clean the drainage holes from the video:
There should be no water present in the cavities of the car at all. This should not be taken lightly. Even a small amount of moisture over a long period can turn your favorite vehicle into a rotten trough that no one will buy in the future.
initial stage
Before applying any selected drying, you should try to remove the maximum amount of water from the interior. For this:
- We remove the rugs (at the same time you can check whether they have become moldy and wash them);
- Raise the carpet and lay several layers of toilet paper underneath it. The option with newspapers is cheaper (they put a lot of spam out the window), but less effective - such paper absorbs worse. The feminine pads used by some originals are more effective, but they will hit your pocket hard. You can fill the space with hygienic litter for a cat litter box - it absorbs perfectly, but then you will be bothered to pick it out from under the upholstery. Those whose carpet is firmly fixed can take such a step only after serious dismantling, which not everyone will decide to do. If you skip it, further actions will take more time;
- The carpet is laid in place and covered with the same toilet paper, as thick a layer as possible;
- Next, the resulting “pie” must be carefully trampled, squeezing out the water. Several approaches may be needed. Our goal is to remove as much water as possible from the floor. The carpet and the top of the bottom will still remain wet, but drying them in the future will be easier, since a certain amount of water will not need to evaporate.
Variety of methods
If we had a heated garage on hand, we could simply leave the doors open overnight (with the power turned off, of course). Since there is no such luxury, you will have to work with your hands.
The method is fast
. Take a hairdryer (preferably a construction one, not one borrowed from your wife) and dry the entire surface section by section. Vigilance is the highest - the temperature of the unit is about 400°C, so a fire can easily be started if you are not careful.
A method for the lazy
. The fan heater turns on, the doors close - and so on for about 3 hours. The disadvantages include: the need to connect it somewhere (so there must still be a garage, even if it is cold); uneven drying; Difficulty in directing it towards the floor. However, the latter can be overcome simply by running the fan longer.
A method for those who have air conditioning
. The car starts, the heater turns on, the air conditioner turns on to recirculate, the windows and doors close, and the owner walks around, breathes deeply and explores the familiar surroundings for a long time. The heater alone will not save you: humid air will circulate throughout the cabin, since the vapors simply have nowhere to go. The air conditioner will extract them and remove them overboard.
If you take care of dryness regularly, and not in emergency mode, then the standard stove found in every car will be enough. Just before leaving the car, you need to wrap or remove the floor mats, roll up the windows and turn on the heater for 10-15 minutes at maximum. Then one window is left slightly open (1-2 mm, so that it is not visible from the side and new water does not flow in), and the owner can go to sleep.
Replacing and connecting the stove
Installing a new heater radiator is done in the reverse order. When installing rubber hoses, it is recommended to treat them with sealant. When connecting electrical connectors, use the markings applied during disassembly.
After assembly, coolant is poured into the system. To prevent an air lock from forming, remove the hose from the throttle assembly after loosening the clamp. Antifreeze should be poured into the expansion tank slowly, observing the disconnected hose. As soon as coolant flows out of it, the hose should be put back on the fitting and tighten the clamp. If everything is done correctly, the operation of the stove will not cause any complaints.
When installing a new heater radiator, it is recommended to pre-treat the pipes with sealant
When installing a new heater radiator, it is recommended to pre-treat the pipes with sealant
Step-by-step draining of coolant from the engine block
You can drain the liquid from the engine block yourself without a pit, performing this process in stages:
- The container for antifreeze or antifreeze must be installed exactly under the block.
- Find the drain plug on the cylinder block and carefully unscrew it. Finding the drain plug is quite simple; this element is located under the car ignition module.
- We wait about 15-20 minutes for the coolant to drain completely, and then screw the plug into its original place.
- Experts recommend thoroughly wiping all drain holes with a clean rag to remove all kinds of dirt.
Article: 2108-51120**
Data updated: 09/21/2021 at 07:33
Characteristics
Options
Shipping territory
Other partner warehouses and stores
+7 [email protected] Shipments only for legal entities by pre-order
Mon-Fri: from 9:00 to 18:00, Sat, Sun: closed
+7 [email protected] Mon-Fri: from 9:00 to 20:00, Sat: from 9:00 to 18:00, Sun: from 9:00 to 16:00
+7 [email protected] OPT: Mon-Fri: from 9:00 to 18:00, Sat-Sun: closed. Retail: Mon-Fri: from 8:30 to 17:30, Sat: from 10:00 to 16:00, Sun: closed
+7 [email protected] Mon: from 8:30 to 18:00, Tue-Thu: from 9:00 to 18:00, Fri: from 9:00 to 17:30, Sat-Sun: closed
What to do if water gets into the engine
If the car suddenly stalls after passing a water obstacle, you should not try to start it again. There is a risk that there is a water lock in one of the cylinders. In this case, you need to get to the repair site by tow truck or tow truck.
What to do next? You should open the hood and inspect which components have gotten wet.
It is important to dry the ignition system
Plugs and ignition coils
It is necessary to unscrew the spark plugs and coils and allow them to air dry. It is recommended to check and dry the air filter as well as the hose. Blow out the spark plug wells with compressed air, or crank the engine starter without installed spark plugs. So, some of the water will be pushed out.
Water gets into the interior of the VAZ 2114
- Registration
- Entrance
- To the beginning of the forum
- Forum Rules
- Old design
- FAQ
- Search
- Users
Guys! Found! I'm the one who fainted. The outermost drain hole is clean, but near the stove and the black box it is completely clogged with some kind of black soil. I washed the car and saw that the carpet was full of water. I opened the hood, and there was a swamp, but the frogs weren’t croaking. I cleaned it, now I need to check how much has accumulated in the Shumka.
It's probably leaking under the chest!?
Not! The china and the stove just disappeared! I was shocked by such a swamp!
Has anyone encountered water near the passenger’s right leg? I noticed that it was leaking along the pillar to which the front right door is attached. The sound insulation covering the stand is all wet and is also leaking onto the floor under the insulation.
I have the same! If anyone finds the reason, please post!
Looks like I need to look at the seal.
What could happen to the seal? The car isn't even a year old. There were no such problems on the old eight
Placed crookedly. Doesn't fit tightly.
Where should you look? At the point of contact with the glass or the body?
It seems to fit snugly on the outside. But here’s what makes me doubtful: When I bought the car, I didn’t stick the OSAGO coupon on the glass, but stuck it under the glass seal on the right pillar. When inserting it, I had to pull the seal towards myself so that a gap appeared between the glass and the seal (otherwise it would not fit there). A gap appeared, but it remained; the seal did not tighten back to the seal. I tried to press him back, to no avail. I also have a leak on my right side. So I wonder if this is the reason? Or just a coincidence?
How to fix the situation yourself
In half of the cases, repairs are possible with your own hands. This should be done if:
- the drainage channel is clogged;
- crack in the seal;
- The rubber seal has come off due to poor quality or old sealant.
How to eliminate a leak if the drainage channel is clogged - use a toothpick or thin wire to clear the gap, rotating the device, as if clearing a sewer pipe.
If the reason is a loose seal, then it’s easy to seal the leak with sealant:
- Wipe the elastic band where the glue layer has come off with alcohol.
- Use a spatula to pry off the seal.
- Coat the gap with sealant.
- Press firmly.
- Remove excess glue from the glass.
If you need to replace a worn rubber band, you cannot do without dismantling it. You will need suction cups to remove the glass, or a qualified assistant:
- Use a knife or thin string to cut through the sealant and pull out the glass.
- Clean the opening, wash and degrease the shield before re-gluing.
- Apply sealant.
- Install the transparent part.
- Dry and check for leaks.
Rubbing body parts
To increase the life of the rubbing parts of the body, they should be lubricated at every maintenance. If creaks or jamming are detected, the body fittings must be cleaned before lubrication.
Lubricate the rubbing parts of the doors
:
- Side door hinges (silicone spray lubricant).
- Door limiter rods (silicone lubricant in aerosol packaging).
- Driver's door lock cylinder (silicone lubricant in aerosol packaging).
- Door locks (silicone spray lubricant).
Lubricate the hood
:
- Hood hinges (silicone spray lubricant or motor oil).
- Hood latch (silicone spray lubricant or motor oil).
Lubricate the trunk lid
:
- Trunk lid hinges (silicone spray lubricant).
- Trunk lid lock cylinder (silicone lubricant in aerosol packaging).
- Trunk lid lock (spray silicone lubricant or motor oil).
Lubricate other body parts
:
- Hinges of the gas tank filler hatch (silicone aerosol lubricant or motor oil).
- Windshield wiper arm joints (silicone aerosol lubricant). Cover the glass with paper.
- Exterior mirror bracket hinges (silicone spray lubricant).
Starting after removing moisture
After the oil has been successfully changed, rushing to start the engine as quickly as possible is wrong. If the car is an old model and does not have an electronic control unit, then it is enough to unscrew the spark plugs, switch or coil and distributor. If you have an ECU, it is better to wait for the moisture to evaporate naturally. After removing the spark plugs, you can safely crank the engine using the starter, thereby drying the cylinders. For a full start, it is better to leave the car for a couple of days to completely evaporate any remaining moisture and ventilate it.
After a few days, you can put the spark plugs back in place and try to start the engine. If you can’t do this, you shouldn’t use any kind of sophistication for this. It is better to immediately call a tow truck or tug and go to the nearest car service center, where they will determine the cause as accurately as possible and eliminate the consequences using more technologically advanced methods.
Now, having found yourself in such an unpleasant situation, you also know what to do if there is moisture in the engine. There is no need to panic, turn off the engine immediately and do not wait for it to stall on its own due to water hammer.
Reasons why water gets into oil
As mentioned above, one of the signs is a decrease in coolant. If this is the case, then there are several options:
- Leaking cylinder head. It happens that the gasket “breaks”, accompanied by a characteristic whistle, so it can be diagnosed quite easily.
- Leakage of pipes. This is also a common problem, but there are quite a few places where the coolant comes into contact with the oil. It's also easy to determine.
- Crack in the engine jacket. There is nothing you can do to help here, such details only need to be changed.
But it also happens that water in oil is not a consequence of a malfunction, but the natural course of things. This often manifests itself during short trips, especially in winter, and in summer not everything is so smooth. So, let's look at each season separately.
Operation in winter
The problem with winter is the low outside temperature. We started the engine, warmed it up, drove where we needed to go, returned and parked the car. This is perhaps the most common scenario for using a car.
So, above the oil level in the engine there is free space that is filled with air
It doesn't matter where he comes from, he just exists. But at the same time, its humidity is usually higher than in the external environment, because the oil covers all internal parts
And it uses so-called esters, they are designed to play the role of a kind of silicone in order to maintain lubricating properties. So these same esters are very hygroscopic. This means that they absorb moisture. Thus, over time, the air humidity in the engine crankcase reaches 90 percent.
The fact is that circulating the same amount of water in the crankcase is not as critical as constant replenishment. Crankcase gases that break through the piston rings also have a certain amount of moisture, which means the overall concentration increases.
Operation in summer
In summer, as it may seem, there is no such disease, because there are no temperature changes. In fact, this is partly true. But there is another problem. And it lies in the fact that air humidity in the summer is much higher, which means water accumulates in the crankcase faster. Now let's look in general. Initially, the normal amount of water in oil is up to 5 grams per 1 liter (0.5%).
This is exactly how it is sold in the store. If the norm is exceeded, the batch is sent to scrap. About 500 grams of water will settle from one cubic meter of air at a temperature of 90 degrees (operating temperature).
The average volume of air in the crankcase is approximately 20 liters. This means that at 60% humidity the engine will gain about 6 grams per cooldown. Let's take the average volume of oil in the engine to be 6 liters. In total, we obtain a concentration of water in oil of 0.01%. These are average numbers. There are 365 days in a year, respectively, the engine will receive a moisture dose of 0.365%. We do not include days with high humidity here. Thus, water in oil can appear simply from time to time.
Product delivery options
Note! Below are the shipping methods available specifically for this product. Payment options may vary depending on the delivery method.
Detailed information can be found on the “Delivery and Payment” page.
Parcel by Russian Post
Available payment methods:
- Cash on delivery (payment upon receipt)
- Using cards Sberbank, VTB, Post Bank, Tinkoff
- Yandex money
- QIWI
- ROBOKASSA
Shipping throughout Russia. Delivery time is from 5 to 12 days.
Parcel by Russian Post 1st class
Available payment methods:
- Cash on delivery (payment upon receipt)
- Using cards Sberbank, VTB, Post Bank, Tinkoff
- Yandex money
- QIWI
- ROBOKASSA
Shipping throughout Russia. Delivery time is from 2 to 5 days. More expensive than regular delivery by Russian Post, approximately 50%. Parcel weight up to 2.5 kg
Express Parcel EMS
Available payment methods:
- Cash on delivery (payment upon receipt)
- Using cards Sberbank, VTB, Post Bank, Tinkoff
- Yandex money
- QIWI
- ROBOKASSA
Shipping throughout Russia. Delivery time is from 3 to 7 days. More expensive than regular delivery by Russian Post, approximately 100%.
Transport companies
Available payment methods:
- Using cards Sberbank, VTB, Post Bank, Tinkoff
- Yandex money
- QIWI
- ROBOKASSA
Delivery is possible to any locality where there is a representative office of the transport company. Delivery time is from 2 to 10 days. Sending large parcels is approximately 50% more profitable than by Russian Post.
Pickup from our warehouse
Available payment methods:
- Cash upon receipt
- Credit, installments
- Using cards Sberbank, VTB, Post Bank, Tinkoff
- Yandex money
- QIWI
- ROBOKASSA
Pickup times must coincide with store opening hours.
The floor carpet is one of the most contaminated parts of a car interior. No rubber mats will protect the floor covering of VAZ 2108, 2109, 21099 and VAZ 2113, 2114, 2115 from dust contamination during long-term use of the car. Therefore, sooner or later you will have to buy a new carpet for the Lada Samara and Samara 2.
To dismantle the old carpet and install a new one in VAZ 2108, 2109, 21099 and VAZ 2113, 2114, 2115, you will need to disassemble the interior, and in particular, remove the seats, disassemble the floor tunnel and the lower part of the dashboard.
The carpet itself, which is presented on this page, is a standard pile material, the same as what was installed at AVTOVAZ when these cars rolled off the assembly line. The color of the pile carpet is black. The carpet is molded to a specific model and has technological holes.
Low price, original design and good quality carpet will breathe new life into the interior of VAZ 2108, 2109, 21099 and VAZ 2113, 2114, 2115.