Until recently, the domestic giant of the automotive segment AvtoVAZ did not apply the practice of installing a multimedia complex in its own models, including the LADA Vesta. But the situation has changed, and the devices have become exquisite attributes that decorate the interior. Unlike MMC versions, which are widespread in foreign cars, such devices in products of domestic origin can be flashed at the request of the LADA Vesta owner. Updating the MMS for the Lada Vesta audio complex is not always successful.
Assembling the radio requires the presence of the following components:
- seven-inch panel with touch technology;
- switching output with a USB connector;
- slots for integrating SD media;
- Bluetooth module, etc.
How to use the Lada Vesta head unit
At the moment, two types of Lada Vesta radios are installed in VAZ cars. This is the standard Vesta radio, which is included in the starting configurations, and the MMC, which is typical for the TOP models. And although the standard model looks very modest in appearance, thanks to its functions it also allows you to fully enjoy musical works.
Description of the radio and controls
The radio for the Lada Vesta is located, as always, in the center of the front panel. The description of the characteristics of the standard Lada Vesta radio is as follows:
- there is a button to turn on the radio;
- it is also equipped with a monochrome display;
- The Lada Vesta device also has functional radio control buttons (that is, you can turn on both the track playing before and the next version);
- there is MUTE, which allows you to completely turn off the music;
- SCAN allows you to perform several functions at once;
- DISP allows you to show the time;
- there are also keys responsible for switching the Lada Vesta push-button radio from the radio playback mode to the playback mode of internal and external media and back;
- buttons corresponding to a serial number from one to six are responsible for switching radio stations, setting the time and other functions;
- Additionally, there is a washer that rotates and performs several functions at once;
- buttons responsible for starting a call and connecting with the phone and ending the call;
- RESET allows you to reset the settings that are already on the standard radio and reboot the system;
- if necessary, you can use the microphone built into the system;
- there is a slot for an SD memory card;
- the available AUX connector makes it possible to work with external speakers;
- The USB connector available here makes it possible to connect devices such as a player, cell phone, and so on.
Interestingly, if we talk about the battery of the radio, it is capable of storing radio settings for a maximum of ten days, and this without a connected battery.
It is interesting that if we talk about the multimedia system on the Lada Vesta, it has only three control keys. In order for the MMC to start working, you need to press the rotating encoder, which is designed for several functions at once.
A large number of commands on Vesta multimedia are performed by pressing a special touch screen. In addition, the radio processor can also perform several actions at once.
MMS Lada Vesta in the form of an update provides that here, in addition to the main one, you can also install additional software (various applications, navigation, etc.), which can be purchased both from an official dealer and through the website.
Setting up the radio
Installation of the Lada Vesta radio and its configuration is carried out in three frequency ranges: VHF, AM and FM. To make it more convenient to search for radio stations on the radio, there are six buttons, each of which can be assigned a specific radio station. For example, for FM it is possible to store eighteen stations at once.
Yandex Auto price for Lada Vesta
The cost of the system is 29,900 ₽. But there is a special price for Sberbank clients: from 1081 rubles per month.
What do you get for this amount without additional payment:
- Delivery and installation
- Six months of subscription to Yandex.Music
- Six months of free internet
How does the multimedia system work?
Voice control is one of the main features. Also interesting is the typical Yandex interface, which is maximally adapted to the psychology of users. You won’t need to get used to the Yandex.Auto multimedia system for Lada Vesta for a long time, since it is built like widgets from a computer desktop. It is possible that you run several applications at once that work simultaneously without problems.
Which voice assistant do you think is the best?
AliceSiri
The main thing that captivates us about the Yandex.Auto system is the emphasis on the convenience of drivers. It is for them that the development was made. Let's look at the main functions and services built into the on-board computer.
Navigator
Allows you to see the optimal routes on a large screen. You won't have to strain to figure out where to go and ask the neighbor on the right for help. The system takes into account traffic jams and even repair work. It warns about the presence of cameras and road signs. Read more about the features of Yandex.Navigator.
Voice control with Alice
The well-known assistant Alice is a convenient alternative to managing services. Previously, it was necessary to take your attention from the road and adjust the necessary functions manually, which to some extent created the risk of an accident. Now it will be enough to give the voice command “Listen, Alice” and interact with the robot as quickly as possible. For example, you can dictate an address, give a command (find the nearest gas station or parking), or search for something on the Internet.
Music and radio
Convenient tuning of music and radio stations. It is even possible to select it to suit the mood or style of a certain era.
For everything to work well, you need an Internet connection, but routes can be easily built without it. You can always connect from your mobile device. However, in the future, in some cases, routers will be built in during production. Updates are downloaded while driving on the road.
Transfer route from phone
You can create a route in Navigator on the way to the car. To do this you need to use your mobile device. The display will show it immediately after you start the car.
See where the car is parked
If the car was left far from the place where you were going, it doesn’t matter. Searches will no longer waste precious time. The app will tell you where the vehicle is located.
Open a window or trunk
If you don’t want or have the ability to get the keys, give a voice command to Alice or use the corresponding function of your smartphone.
Start the engine from a distance
To save time on warming up your car in winter, you can now start the engine right from home while you're still getting ready to go out. However, the function is relevant at any time of the year. Cooling or heating is done via a smartphone and the Station.
Pay the parking fee
Yandex.Auto eliminated the need to worry about paying for parking. The system fully automates the process, accurately determining the location, price and writing off the required amount.
Find out about evacuation
If the car begins to be towed or moves for some reason, the system will send a corresponding notification.
Pay for refueling
Paying for fuel at gas stations has also become easier. This is especially nice in cold or rainy times, since you don't even have to leave the vehicle.
Determine location without GPS
If there is no signal, Yandex.Auto will not stop “understanding” the location of the car. The data will come directly from the wheels.
Vesta's standard MMS
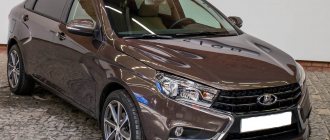
Lada Vesta Cross 2020
All versions of Vesta, except the basic one, have MMC installed. The minimum configuration of the car is equipped only with an audio system. The main functions of the MMC are playback of audio files from removable media, radio signal reception, navigation, parking assistance with video playback from the rear view camera. The MMC on the Lada Vesta is located in the central upper part of the console and complements the updated modern design. The system is equipped with a good filling with the following characteristics:
- processor CSR S3681 B036BK K609B CPU SiRFatlas VI 800mhz Cortex A9;
- RAM Micron D9PSK 2X 256MB DDR3-1600 Clock Rate 800 MHz MT41K128M16JT-125 IT:K;
- internal memory 2 GB Micron NQ283 NAND FLASH 2gb MT29F2G08ABAEAH4-IT;
- internal memory 8 GB SDMMC 8GB SAMSUNG KLM8G1WEMB-B031;
- bluetooth CSR 8311 Bluetooth v4.1 BlueCore CSR8311 QFN Automotive;
- WI FI CSR 6030 Wi-Fi IEEE 802.11b/g and n;
- digital video decoder AKM8859 DIGITAL VIDEO DECODER PAL/SECAM/NTNC AK8859VN;
- audio AK7757VQ Audio DSP with 24bit 3ch ADC + 4ch DAC + MIC Amp;
- power controller MPS MP4570 Automotive Power Systems;
- TPS65150 Low Input Voltage, Compact LCD Bias IC With VCOM Buffer;
- TJA1042 high-speed CAN transceiver;
- CAN and K-Line controller Freescale S9S12G96F0CLF;
- controller Fujitsu 32-bit ARMTM CortexTM-M3 based Microcontroller.
The following elements are used to manage and play files:
- seven-inch touch screen;
- “Mode” key – select modes;
- “MUTE” – mutes all sounds;
- Volume control – pressing once turns the device on or off;
- microphone for the ability to talk on the phone without hands - Handsfree;
- “Reset” – button to reboot the device;
- slot for reading a removable SD card;
- connector for reading information from removable USB media and connecting various gadgets;
- AUX connector for connecting headphones or external audio devices.
MMC Lada Vesta, connecting a smartphone, outputting sound when playing on a smartphone to Vesta speakers
AUX and USB connectors are located near the glove compartment at the bottom of the panel. Thanks to this, connecting external devices has become more convenient.
Additional control
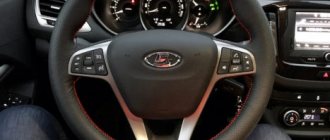
In addition to the buttons near the touch screen, MMS functions on the Lada Vesta are controlled using duplicate buttons located on the steering wheel:
- volume control;
- selection of file and radio playback modes;
- turning off all sounds;
- button for navigating through folders and tracks on removable media; in another mode, the buttons are responsible for accepting/ending an incoming call.
Photo 2 (Additional controls on the steering wheel)
Such equipment first appeared on AvtoVAZ cars. Previously, a standard audio system and MMC without duplication on the steering wheel were offered. Thanks to this, Vesta can compete with budget foreign cars of the same class in approximately the same price segment.
Key Features
The system combines several different devices that should be in every modern car. The main one is the audio system, consisting of a 7-inch touch screen. Its peculiarity is its resistive base and the need to press with a stylus or other similar object. The input method is not the most progressive, but in weather conditions with sudden temperature changes, the resistive screen works without failure. The sound is reproduced through six speakers to create surround sound.
The system recognizes most SD and USB drives, but with a limitation - the media should not contain more than 1024 files and 256 folders. The flash drive must be formatted to FAT 16 or 32 with a maximum number of partitions - 4. Cards supported by MMC Lada Vesta:
- SDHC no more than 32 gigabytes;
- SD no more than 4 gigabytes;
- USB 2.0 and 3.0 no more than 64 GB.
Lada Vesta. Treating MMC and watching videos on the go.
The user is warned by the instructions that the download speed depends on the number of files on the drive. The optimal solution would be a medium that contains only audio and video files.
Files with the .bin extension cannot be placed on removable media. The multimedia firmware has a similar extension. Duplication can lead to its failure or malfunction.
Files supported by MMC:
- WMA audio codec, bitrate no more than 128 kbps, sampling 44100 Hz;
- video codec WMV3 with a frame rate of 25, bitrate 750 kbps.
Before use, it is recommended to convert all files to the required parameters. For these purposes, the manufacturer recommends the free Freemake Video Converter program. When playing back, keep in mind that the files will be played in the order they were recorded.
Where to download firmware
Update city guide for mms Lada Vesta
You need to download the files on the official website of the dealer or Lada.online, where the global version is posted. To access files, registration on the virtual portal is required. There are several firmwares. Files are downloaded depending on the factory version.
What is an alt menu for Lada Vesta: varieties
The alt menu for MMS Lada Vesta is varied. It is used by the manufacturer not only for the VAZ 2180, but also for other models. An alternative menu allows you to comfortably use available programs and applications. The list of functions that are specified in the menu depends on the variety of functions that are built into the system.
There are several alternative menu options.
Kinds
Initial configuration. The menu contains a standard set of functions: listening to audio songs, radio.
Comfortable equipment. The sound system has been improved. Enlarged touch screen. The system reads several file formats and you can view videos.
Luxury equipment. High-quality image, high resolution, Internet access, television programs available.
Rating package. In addition to the listed functions, the menu contains a navigator, playback of files from several memory cards, Bluetooth, and connecting a smartphone. You can view photos.
Screen
Another wave of outrage hit one of the modules of the Lada Vesta multimedia system, namely the touch screen. The resistive type of sensor was not to the liking of many car owners. And this is not only in Vesta - such panels have long been used in foreign cars and the latest VAZ models. The resistive type of sensor can rightfully be considered the most successful option for use in a car, since it has a number of advantages. It does not respond to changes in temperature and atmospheric conditions.
Pressing can be done with any (but not sharp) object, which is certainly convenient, since when moving it is not always possible to pay attention only to the radio. For example, you just got into a car in thirty-degree frost
They started it up and turned on the stove, but somehow they were reluctant to take off their gloves. And you want to listen to the latest news broadcast on the radio or the weather forecast. This is where the resistive type of screen shows its best side. You can safely click your finger on the screen without taking off your gloves.
How to install an application on MMS
Replacing the standard acoustics of the Lada Vesta
Procedure:
- Copy the installation file (with the extension cab) to the SD card.
- Insert the SD card into the MMC.
- Exit to desktop.
- Go to “My Computer” -{amp}gt; SD card.
- Start installing the application by double clicking on the cab file.
It is more convenient to install and launch applications through AppLauncher:
- Launch Total Commander
- Open the SD card and start installing the application by double clicking on the cab file.
Let us remind you that we previously talked about other applications that expand the functionality of Vesta’s multimedia system:
- AppLauncher - allows you to launch applications without going to the desktop.
- A patch that allows you to watch videos while driving.
- Altmenu - allows you to comfortably use several navigation programs at once.
- Improved CityGuide - will make the program interface more convenient, and will add data about cameras, ambushes, etc. to the maps.
- Navitel
- Yandex maps
Key words: cassette player Lada Vesta
Found an error? Select it and press Ctrl Enter..
The door card is attached to self-tapping screws and 4 “hedgehogs”. To install the speaker system correctly, you will need to remove the door trim.
When doing this, you need to be careful not to accidentally damage the plastic. The use of screwdrivers or other metal products of suitable shape is unacceptable. For these purposes, a regular plastic bank card is used.
To remove the plugs on the doors, you need to pry them off by one edge. The power window buttons are removed using the same method.
For these purposes, a regular plastic bank card is used. To remove the plugs on the doors, you need to pry them off by one edge. The power window buttons are removed in the same way.
This is how the casing on the left side is dismantled. Removing the door cards on the right is slightly different. There is no need to remove the window lifter buttons - you just need to remove the opening handle cover. Underneath there are two mounting screws. The plugs are removed with a plastic card. Next, the process of removing the door card repeats the manipulations with the left door.
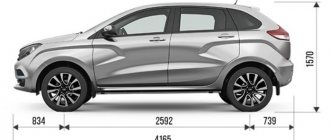
The size of the seat in Vesta's doors is designed for 12-inch speakers. Since the mounting is carried out using three self-tapping screws, installing 16-inch speakers requires that you need to install special spacers for the Lada Vesta speakers. Their size depends on the size of the speaker system. No special adjustments are needed. The main thing is to avoid possible contact with the metal of the doors - there should be a gap of at least 10 mm between it and the speaker magnet. Installation of speakers in the rear doors is carried out according to the same scheme.
Multimedia for Lada Vesta
Manufacturers of Lada Vesta equip vehicles with entertainment and information acoustics. At the same time, car enthusiasts independently decide which configuration to prefer.
- Basic. In this case, listening to music and radio is allowed.
- Comfort. It is possible to install multimedia mmc, which includes a monochrome monitor, connectors for various devices and cards, and a radio. The composition includes 3-4 speakers, with the help of which they listen to various compositions.
- Luxury In this case, a large touchscreen monitor and 6 speakers are included. The functionality of the presented multimedia has also been expanded.
- Top multi-complex. Its functionality has been expanded. There is a navigation program, which includes new maps. It is possible to connect smartphones and memory cards, as well as subsequently listen to music.
conclusions
- The City Guide navigator, which Lada Vesta cars are equipped with, is a convenient and functional program. It helps you get from one point to another without any problems along the optimal route, taking into account the traffic situation and the driver’s wishes.
- The application must be updated periodically.
This must be done in order to have up-to-date information about roads and buildings. In each new version, minor inaccuracies and errors are eliminated, and the interface becomes more understandable and pleasant.
- For those who are not satisfied with the accuracy and reliability of standard maps, it is possible to install third-party maps. But such manipulations automatically remove the warranty from Vesta software.
Replacing the standard audio system
- 7010B and 7023B. Radio tape recorder made in China. The cheapest option will cost about 3 thousand rubles. Equipped with a 7-inch screen with a resolution of up to 800x480 and 1 GB memory. Runs under Windows CE OS.
- 7021G. Operated by Windows CE 6 OS. Seven-inch screen with a resolution of 800x480, F1C500TM processor. Estimated price – 4-5 thousand rubles.
- RK-A701. Chinese radio, 7-inch screen with a resolution of 1028x600, 4-core RK3188 processor, 1 GB of memory, OS – Android 5. Price – up to 8 thousand rubles.
- AD-UNI707. Manufacturer – China, OS – Android 6, seven-inch touch screen resolution – 1024×600, 2 GB of memory, processor – AllWinner Quad Core T3. Cost – up to 13 thousand rubles.
- Prology DNU-2630. The 6.2-inch screen with a resolution of 800x480 has high operating speed and excellent sound. The average price is no more than 13 thousand rubles.
- MEKEDE MKD. Radio tape recorder on the Android operating system, eight-inch touch screen with a resolution of 1024x600, memory capacity - 2 GB, cost - 16 thousand rubles.
- NaviPilot DROID4. 8-inch touch screen, resolution – 1024x600, memory – 2 GB, cost – 28 thousand rubles.
DVM 2117IQ. Equipped with a solid ARM11 600MHz processor, 8-inch touch screen and Windows operating system. At a price of more than 30 thousand rubles - only 256 MB of memory, screen resolution - 800x400.
To install any radio on the Lada Vesta, you will need an adapter frame for a 2DIN radio. You can buy it at any auto store.
Installing a standard radio
The depth of the standard seat for the MMC is 150 mm. If the dimensions of the new radio exceed this figure, then using a hacksaw blade or any other similar tool you will need to cut down the mount in the dashboard. The manufacturer has prepared all the wire blocks for connection in advance.
To install the multimedia system, you need to remove the plastic blanking strip from the dashboard. Immediately behind it are the ISO, USB, AUX connectors, as well as Fakra – connecting the radio antenna. Next, a standard MMC or any 1DIN radio is inserted into the hole. Things are more complicated with the installation of 2DIN media systems - you cannot do without modifications.
Installing an alternative MMC
First you need to carefully inspect the seat. In most cases, the installation of a 2DIN radio on the Lada Vesta will be prevented by a plastic partition in the depth. This partition must be removed.
INSTALLING THE LADA VESTA RADIO LADA VESTA on Android MMC Android 6.0.1
To do this, you can use a file and sandpaper to level the surface. From the standard plug you may only need a frame with which to adjust the width. For connection, a standard ISO connector is used, which is available on all Vesta trim levels. Next, you need to turn on the radio and check the operation of the modes. In addition to the new audio system, it is recommended to install speakers in the door cards. The process will not take much time.
Steering wheel equipment
Lada Vesta standard radio with screen
The steering wheel, being at hand, simply must be equipped with controls for the multimedia system, which is what the Lada Vesta actually has.
We will immediately notice the good location of a large number of switches. Here the engineers thoroughly worked on the mechanics, which is confirmed by reviews from car owners: finding the right menu on the highway is not difficult.
General description of the steering wheel:
- MUTE and MODE buttons;
- receiving calls or initiating calls; when switching to another mode, they are responsible for the music player and scrolling through tracks;
- volume rocker.
I like the LADA Vesta with this equipment. Stop paying tribute to the old generations of multimedia with the absence of buttons on the steering wheel. Regardless of your driving experience, duplicate buttons increase the comfort of driving. By paying a little extra for the transition from the base to other trim levels, you get a completely new domestic class of the European budget level.
Tips for selecting and installing a speaker system
For better surround sound, it is recommended to use a two-component system. These speakers use both a high-frequency tweeter and a mid-bass speaker. With their help, you can competently arrange the sound stage. It is recommended to install such speakers in the front. A coaxial speaker system is installed at the rear, which is used to complement the front speakers. Installing tweeters will require additional wiring.
Tweeters are best mounted in the triangle of the rear view mirror. If such a scheme seems too expensive, you can get by with a cheaper coaxial speaker system. In all cases, no additional adjustments are required, with the exception of adjusting the equalizer.
Even a beginner can install sound systems on Lada Vesta cars. It is enough to follow just a few simple rules:
dismantling work should be carried out as carefully and accurately as possible so as not to damage the plastic casing; the manufacturer has already taken care of the audio preparation, so there is no need to connect and install the connectors yourself; It is impossible to cut off standard pads if they do not fit the new radio; it is better to purchase a special adapter. Flashing a multimedia system should only be done as a last resort.
It is better to entrust this procedure to specialists or contact the service center of an authorized dealer
Flashing a multimedia system should only be done as a last resort. It is better to entrust this procedure to specialists or contact the service center of an authorized dealer.
Updating maps using the utility
Required
Attention
: The utility is at the beta stage.
1. Unpack the archive and run the executable file wince_uploader_vesta.exe if you want to update maps for LADA Vesta or wince_uploader_vaz.exe if the update is necessary for other LADA models. 2. Insert any SD card you already use (or will use) to update the maps. 3. Click the Auto Detect button.
4. Check the countries you want to add, uncheck the countries you want to remove, leave the check mark on the countries you want to update.
Read also: You intend to reverse your actions traffic controller
5. Start the map update process on the SD card and wait for it to complete.
6. If there are no updates, the message “No updates found” will appear.
7. If the process ends with the message “Completed, insert the SD card into the MMC and start the update,” you can exit the program, remove the SD card and go directly to updating the maps in the car.
8. After the process is completed, the Updates directory will appear on the SD card with all the data necessary to update the cards in the MMC. Insert the SD card into the MMC and start updating the maps (2) (optionally, you can delete all maps before updating (1) if you changed the set of maps when using the utility - for example, unchecked some countries and regions).
Key words: cassette player Lada Vesta
FakeHeader
Comments 51
I mean, I have a cool firmware, but I'm wondering about installing it
You're right, they are only similar in appearance, as far as I know the firmware and hardware are different
Hello, what will happen if you install Grant firmware on the West?
99.9% that she will become a brick
Got it. EasyConnected works with Android 6.
I just came to this myself...
Got it. EasyConnected works with Android 6.
what did I do it doesn’t load
EasyConnected 1. Install 2 files on your smartphone. 2. Allow USB debugging on the smartphone 3. Connect the smartphone and the MMC with a cord. 4. Give permissions on the smartphone (all sorts of windows pop up) 5. To transmit sound to the MMS, you need a BT connection or an AUX cable. With a BT connection there is a delay in sound when watching a video.
Until recently, the domestic giant of the automotive segment AvtoVAZ did not apply the practice of installing a multimedia complex in its own models, including the LADA Vesta. But the situation has changed, and the devices have become exquisite attributes that decorate the interior. Unlike MMC versions, which are widespread in foreign cars, such devices in products of domestic origin can be flashed at the request of the LADA Vesta owner. Updating the MMS for the Lada Vesta audio complex is not always successful.
Assembling the radio requires the presence of the following components:
- seven-inch panel with touch technology;
- switching output with a USB connector;
- slots for integrating SD media;
- Bluetooth module, etc.
Basic principles of successful MMS firmware in Lada Vesta
To reflash mms without any problems, follow the algorithm:
— select the software as specified by the manufacturer;
— use the official version of the software;
— download files from an official car dealer;
- act according to instructions, follow the queue in actions;
— wait until the end, do not interrupt the process;
— do not touch the keys during reboot, do not turn off the power;
— if you are not sure that you can perform the procedure yourself, contact the service center.
Remember that the official dealer is not responsible for errors caused by unsuccessfully performing the procedure on your own, and will not correct defects under warranty service.
Powerful audio player
SinglePlayer is a powerful audio player for consoles running WINCE 6.0. Made for an alternative shell for SingleMenu and NewMenu.
Using an audio player will make the sound more interesting (there is an equalizer). The player also has an Internet radio (an access point can be made using a smartphone). You can also listen to radio stations on your smartphone and transmit them to MMS via bluetooth.
- High performance and speed - Finger-oriented - Powerful design engine, allows you to create any skins - 13-band equalizer. Fine-tuning equalizer parameters. - Effects: reverb, echo, horror, flanger, tempo, pitch, compressor, distortion, phaser, freeverb, autowah. Fine-tuning effects. - Filters: high, low, bandpass, peakingEQ, notch. Fine-tuning filters. - Anti-banner corrector - Full playlist (adding, moving, sorting, deleting from disk, playback, navigation, cleaning) - Track search, allows you to search for tracks in the current or all playlists, in titles and tags.
- Built-in keyboard, supports up to 10 layouts. - Play queue, allows you to create a list of tracks that will play regardless of the playlist. - Supports multiple playlists, up to 20 - Supports id3v1, id3v2, vorbis(flac) tags - Rewinding tracks - Favorite tracks in playlist - Favorite tracks in a separate folder - Switching playback of tracks by album - Multiple selection of directories and tracks to add to a playlist - Saving the position and track number for each playlist and automatic playback when switching to the desired playlist - Swipes through Explorer and playlist - Search for USB drives and fast playback of their contents - Playing mp3, flac, wav, ogg, aiff, m4a (aac, alac), mpc formats - Outputting the album cover and Internet radio logo in the screensaver/player - Adding one track, directory, subdirectories to the playlist.
- Sorting the playlist using the quick sort method - Saving the position of the track when exiting - Playing tracks scattered, in a row, one track - Playing playlists scattered or in sequence - Removing a track immediately from the disk - Internet radio - Smooth sound fading when you stop playback and increasing at the start of playback - Fast and convenient navigation through the file system, displaying files and folders in a grid or list - Playing tracks according to the set genre in the equalizer. The genre is read from the tags and if it matches the current equalizer style, it is played. - Automatic adjustment of the equalizer to the track genre - Output of visualization, in the form of a Spectrum, in the splash screen and the main window of the player - Support for skins (set via the menu) - Display of processor load - Broadcasting and receiving control messages
Malfunctions of MMC Vesta and methods for their elimination
MMC Lada Vesta is the first of its kind on AvtoVAZ cars. It is still far from ideal - sometimes various malfunctions can occur. For example, the radio cannot boot, hanging on the “LADA” logo. To resolve this issue you need to do the following:
- remove removable media from the USB port;
- disconnect the battery terminals and turn off the power to the on-board network for a few minutes;
- format the USB or SD card in FAT 32 format and create an empty text file explorer.txt in the root directory;
- connect the battery terminals and reboot the system (the desktop should appear).
If this method does not help, then you will need to change the software - flash the radio. The next problem is related to navigation - the device cannot find satellites. To fix the problem, you will need to restart the MMC. Then you need to disconnect the battery terminals for a few minutes, reset the settings to factory settings or reflash the device. This method is applicable if the display turns white, the sound disappears, the backlight does not work, or the radio freezes when trying to connect a smartphone.
To reset to factory settings, you need to hold the “Power” button for 15 seconds. Please note that the radio may not play files due to an unsupported format.
If you do repairs or firmware yourself, you can forget about the warranty. In most cases, systematic malfunctions can be eliminated by installing fresh software from the manufacturer.
Possible problems
Lada Vesta firmware often does not load after completing all the procedures. To cope with this problem, experts advise following these steps:
- Initially, motorists check that the tape recorder outputs are not in use.
- After this, power is turned off from the multimedia system. To do this, remove the negative terminal from the power source. The power off period is from 5 to 10 minutes.
- As soon as the corresponding file is generated in the root system, the system reboots. The desktop appears on the touchmonitor.
When formatting a card, it is possible to use another file system. Before flashing multimedia, you can prepare another card in order to perform all the above steps.
Downloading and installing maps in CityGuide
The folder with maps can be downloaded from the same site as CityGuide updates.
- The files need to be unzipped
- Find the CGMAPS directory in the Update folder
- Move there a folder called SpeedCam.bkm.
- Turn on the device and insert a memory card into it.
- Wait for the complete installation without interrupting the process.
- Restart MMS
The original CityGuide maps are not suitable for all drivers. Often they may be incomplete (especially in remote regions), out of date or not correctly reflect the situation on the road. The most common alternative is to install an OSM (Open Street Maps) map. This can be done without MMS firmware.
Installation steps:
- Download the CityGuide program. Or update it on the Lada Vesta to a version that supports Cgnet format cards
- Download OSM maps from the site cgmap-osm.ru (you need to download maps for SitGuide) Unpack the archive on your computer.
- We transfer OSM cards to the CGMAPS folder, which is located in Update. If native cards are not needed, you can delete them.
- Copy the Update to the memory card and transfer the data to the MMS (the navigator must be turned off)
- Turn on the application and select “Full update”. Before this, you need to manually erase all old cards if your version is older than 7.9.7.238. If the CityGuide on the Lada Vesta is new, you just need to click “Update”.
This simple installation is also good because it is very easy to remove without leaving any traces, so that the software does not void the warranty.
Several ways to get directions
As in other navigation systems, the route in CityGuide is laid from the starting point to the finishing point. It is compiled taking into account the shortest and most convenient route, and also allows the driver to make his own adjustments if he needs to stop at a gas station, store or any other place along the way.
You can get directions using one of the following methods:
- By typing the name of a street or locality into the search bar;
- By selecting the name of the starting and finishing point from the list in the search;
- By pointing at a point on the touch screen by pressing your finger;
- Using history data (if you've been down this path before).
Related link:
Installing a radiator mesh on Lada Vesta. Recommendations for selection and installation
How to properly install speakers in doors
The door card is attached to self-tapping screws and 4 “hedgehogs”. To install the speaker system correctly, you will need to remove the door trim.
When doing this, you need to be careful not to accidentally damage the plastic. It is not permissible to use screwdrivers or other metal products of suitable shape.
For these purposes, a regular plastic bank card is used. To remove the plugs on the doors, you need to pry them off by one edge. The power window buttons are removed in the same way.
This is how the casing on the left side is dismantled. Removing the door cards on the right is slightly different. There is no need to remove the window lifter buttons - you just need to remove the opening handle cover. Underneath there are two mounting screws. The plugs are removed with a plastic card. Next, the process of removing the door card repeats the manipulations with the left door.
No major modifications are required to install the front speakers. These places have already been prepared in advance; all that remains is to remove the insulating material at the fastening sites and cut out the gaskets. If standard speakers are used, the gaskets are made of felt.
The size of the seat in Vesta's doors is designed for 12-inch speakers. Since the mounting is carried out using three self-tapping screws, installing 16-inch speakers requires that you need to install special spacers for the Lada Vesta speakers. Their size depends on the size of the speaker system. No special adjustments are needed. The main thing is to avoid possible contact with the metal of the doors - there should be a gap of at least 10 mm between it and the speaker magnet. Installation of speakers in the rear doors is carried out according to the same scheme.
AUDIO MODE
The audio player window is intuitive. All audio files are played on 6 speakers, the sound of the acoustics is at a decent level. You can adjust the sound using the equalizer (there are 6 pre-programmed settings for Jazz, Rock, Voice, etc.).
It is possible to listen to music via Bluetooth from your phone. One drawback worth noting here is that information about the file being played is not displayed on the MMC screen.
Requirements for MP3 files with constant or variable bitrate:
- 32-320 kbit/s at sampling rates of 32000 Hz, 44100 Hz and 48000 Hz for MPEG-1 Layer 3;
- 16-160 kbit/s at sampling rates of 16000 Hz, 22050 Hz and 24000 Hz for MPEG-2 Layer 3;
- 8-160 kbit/s at sampling rates 8000 Hz and 11025 Hz for MPEG-2.5 Layer 3.