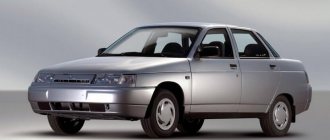
VAZ 2110 cars, also known as Lada 110, have gained popularity among many car enthusiasts both in our country and abroad. These cars were produced in Tolyatti from the mid-1990s until 2007. They were produced abroad, under license, until 2015.
The VAZ 2110 was designed in the second half of the 1980s, back in the Soviet Union. Its release was planned for 1990, but due to financial disasters in the post-Soviet space, it took place five years later. For its time, this car was an excellent representative of its class and price category. And despite a number of complaints about build quality in the 1990s, the VAZ 2110 has earned a reputation as a reliable and inexpensive car with a modern design.
What kind of lamps are in the headlights of the VAZ 2110
VAZ 2110 cars, also known as Lada 110, have gained popularity among many car enthusiasts both in our country and abroad. These cars were produced in Tolyatti from the mid-1990s until 2007. They were produced abroad, under license, until 2015.
The VAZ 2110 was designed in the second half of the 1980s, back in the Soviet Union. Its release was planned for 1990, but due to financial disasters in the post-Soviet space, it took place five years later. For its time, this car was an excellent representative of its class and price category. And despite a number of complaints about build quality in the 1990s, the VAZ 2110 has earned a reputation as a reliable and inexpensive car with a modern design.
Causes of malfunction
Bulbs in the rear lights of a VAZ 2110
There may be several reasons why the lighting does not work. Each malfunction requires an individual approach and implies its own troubleshooting methods. Causes of the malfunction and methods for eliminating them (if some lamps of flashlights and headlights do not work):
- burnt fuses - replace them (see VAZ 2110: how to replace fuses);
- lamp filaments are burnt out - change the lamps;
- contacts on relays or switches have oxidized - clean them;
- the wires are damaged, their tips are oxidized or the connections are loose - replace the faulty wires, clean the tips;
- The contact jumpers at the location of the lamp control relay have oxidized - clean them.
Rear fog lamp bulbs for VAZ 2110
Sometimes the headlight lens fogs up a lot. What are the reasons and what to do in this case:
- leaky adhesion of the lens to the body - immerse the headlight unit in water, if liquid penetrates, replace the headlight;
- moisture enters in the direction from the engine compartment during the process of washing the car - eliminate the liquid from the headlight unit.
Types of headlights for VAZ 2110 (Lada 110)
For VAZ 2110 cars, two main headlight designs are available:
- from "AL-Automotive Lighting" - these headlights are produced under license from Bosch in the city of Ryazan. The design is unremarkable. The block of high and low beam lamps is covered with a glass cap with notches. Material: glass. Fastening is on brackets, which is convenient for repairs and routine maintenance.
- from ZAO Avtosvet Plant - production is located in the city of Kirzhach, and car enthusiasts themselves often call the design by it. The design is distinguished by the presence of lenses for the high beam lamp, while the cap opposite the low beam lamp is standard - corrugated. Material: impact-resistant glass. The fastener is not very successful - sealant. This creates difficulties during repairs.
Types of lamps
For the VAZ 2110, the manufacturer provides for the installation of only one type of lamp - halogen. Structurally, they are a glass container filled with iodine or bromine gas (these chemical elements belong to the halogen group, hence the name of the lamps). The gas in the cylinder is under pressure, this guarantees against air getting inside and premature failure of the lamp. The light is emitted by a tungsten metal spiral. Currently, this type of lamp is considered obsolete.
You can familiarize yourself in detail with the types of lamps used and their characteristics in the table below.
Comparison of halogen, xenon and LED lamps
From the point of view of purely consumer properties, the primacy of automobile lamps is as follows:
- LEDs are the most modern automotive lighting products. They surpass their competitors in all respects - durability (capable of operating with a reduction in the brightness of the luminous flux by a maximum of 10% for more than 25 thousand hours), energy efficiency (consume a minimum of energy, most of which is converted into light radiation), cost (initially they were expensive, but Now they are significantly cheaper than competitive designs).
- they are also called gas-discharge. Outwardly, they are similar to halogen ones, but they differ sharply in the principle of operation and internal design. In xenon lamps, the interior of the cylinder is filled with the noble gas xenon (hence the name), and the light does not arise from the glow of a metal arc, but as a result of the glow of the gas in the cylinder. The difference between the operation of xenon lamps is the release of a significant amount of heat and light radiation from that part of the spectrum, which leads to burnout of the reflective coatings of the reflectors. The service life of these lamps is about 4-5 thousand hours; their installation requires a headlight of a special design with a lens, position corrector and washer. The cost is significantly higher than halogen ones. It is true that the brightness of the light flux, and therefore the range of the illuminated section of the road, is higher.
Xenon
— this type of lamp was originally intended by the manufacturer of the VAZ 2110. Both manufactured headlight designs were designed for halogen lamps. The service life is quite modest - about 500-1000 hours. The brightness and range of illumination are also much inferior to competitors. The advantages are proven design and affordability.
Halogen
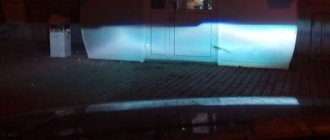
Important! In the late 1990s and early 2000s, it became popular among many car enthusiasts to install xenon lamps that were not provided for in their headlights. It was enough to purchase an installation kit and use the simplest tools. The brightness of the headlights increased significantly, but due to the unforeseen nature of such an upgrade, the risk of blinding oncoming drivers and oneself during snowfall increased, and visibility decreased (to a level below standard halogen ones) during rain and fog. Now such a replacement is directly prohibited by law and can lead to serious consequences for the car owner.
Lamp manufacturers - the choice of users and experts
As of the beginning of 2022, the following brands of lamps for VAZ 2110 headlights are available on the Russian market (in descending order of quality and cost):
| Philips X-treme Vision +130% - the luminous flux, according to the manufacturer, is increased by 30%, there is a so-called xenon imitation. Price - from 800 to 1000 rubles. | |
| OSRAM Nightbreaker UNLIMITED + 110% - this lamp has a luminous flux increased by 10%, its cost is about 900 rubles. | |
| OSRAM ULTRA LIFE - lamps are characterized by durability and a price from 500 to 650 rubles. | |
| Beacon H1 12V 55W Super Light +50% - the manufacturer positions its products as an affordable product for a wide range of car enthusiasts. The luminous flux is sufficient. The cost ranges from 250 to 350 rubles. |
How to replace lamps on a VAZ 2110 (Lada 110)
It is quite easy to replace the lamps in the headlights of a VAZ 2110 yourself.
To do this you need to follow a simple algorithm:
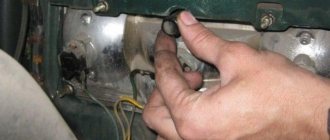
- Open the hood and find the headlight housings.
- Carefully open the dust covers by pressing the latches (they can be either plastic or rubber).
- In the opened cavity of the headlight, loosen the latch on the large terminal.
Important! Under no circumstances should you remove the lamp by its wires!
Still have questions about replacement? Then watch a video on replacing all the light bulbs in a VAZ 2110 car:
Currently, on the VAZ 2110 the law allows the installation of only halogen lamps - with a power of 55 W, a voltage of 12 V and an H1 base. Xenon ones are directly prohibited, and LED ones are not prescribed by law in any way. The latter does not guarantee the absence of claims from regulatory authorities. Despite the fact that halogen lamps are already obsolete, they are distinguished by ease of installation, low cost and proven design.
Replacing or installing a halogen lamp yourself
OsramH1 halogen lamps
As a rule, installing a halogen lamp is practically no different from the usual process:
- The hood of the car opens;
- The mounting bolts of the headlight unit become loose;
- The headlight is removed (see Replacing headlights on a VAZ 2110: we do it ourselves);
- The power plug that goes to the back of the headlight is disconnected;
- A special cover is removed that protects the light bulb from dirt or moisture (to remove it, turn the cover counterclockwise);
Now you need to unfasten the metal fastener holding the lamp in the headlight hole (it is recommended to press the end of the fastener and slide it up); Remove the lamp with base; Carefully remove the old lamp, remembering the location of the contacts on the base; We insert the halogen lamp so that the contacts are the same; We assemble everything in reverse order.
That's it. The instructions presented in the article are a practical guide that provides a lot of useful information. It is recommended to view photos and video materials before replacing it yourself. The price of halogen lamps today is not so high and anyone can afford to install them.
- Luminous flux: 1500 lm
- Power: 15 W
- Warranty period: 1 year
- Luminous flux: 1800 lm
- Power: 18 W
- Warranty period: 1 year
- Luminous flux: 1600 lm
- Power: 20W
- Warranty period: 1 year
- Luminous flux: 2000 lm
- Power: 22 W
- Warranty period: 1 year
- Luminous flux: 300 lm
- Power: 2.5W
- Warranty period: 1 year
- Luminous flux: 800 lm
- Power: 21 W
- Warranty period: 1 year
- Luminous flux: 400 lm
- Power: 2.5W
- Warranty period: 1 year
- Luminous flux: 150 lm
- Power: 1.3W
- Warranty period: 3 years
- Luminous flux: 150 lm
- Power: 1.3W
- Warranty period: 3 years
- Luminous flux: 300 lm
- Power: 3W
- Warranty period: 1 year
- Luminous flux: 2000 lm
- Power: 17 W
- Warranty period: 3 years
- Luminous flux: 400 lm
- Power: 2.5W
- Warranty period: 1 year
- Luminous flux: 800 lm
- Power: 21 W
- Warranty period: 1 year
- Luminous flux: 800 lm
- Power: 5W
- Warranty period: 2 years
- Luminous flux: 400 lm
- Power: 2.5W
- Warranty period: 1 year
- Luminous flux: 260 lm
- Power: 4.3 W
- Warranty period: 1 year
- Luminous flux: 150 lm
- Power: 1.3W
- Warranty period: 3 years
- Luminous flux: 300 lm
- Power: 3W
- Warranty period: 1 year
What headlights are installed on the VAZ-2110
At different times, a dozen were equipped with headlights from different manufacturers, or rather, two - domestic headlights from the city of Kirzhach and German Bosch headlights. They are slightly different in design:
- In Kirzhach headlights, a lens is provided for the low beam lamp, and a reflector is provided for the high beam.
- Bosch offers only reflectors for low and high beam lamps, but, according to owner reviews, the quality of the luminous flux is better with German headlights, regardless of the installed lamp. In addition, the reflector surface for the low beam lamp on Bosch headlights is larger, which improves illumination in difficult weather conditions.
Nevertheless, many find advantages in domestic headlights, one of which is a lensed shade for the low beam lamp. Whatever headlights are installed, the quality of light is greatly influenced by the lamps.
Types of headlight bulbs
Marking of lamps according to GOST and EEC.
Since the front optics of the car are designed for a four-headlight lighting scheme, halogen single-filament lamps with an H1 type socket are used for low and high beam. This is an outdated scheme, but if you choose the right lamps, you can achieve good results. The following lamps are installed in the front optics from the factory:
- High beam - lamp AKG12-55-2 with a power of 55 W with H1 socket.
- The same lamp is installed on the low beam
- The direction indicator has a 21 W lamp, type PY21W. The A12-21-4 lamp with a power of 21 W is installed from the factory.
- W5W - 5 W lamp installed in side lights . The domestic lamp A12-5-2 comes from the factory.
Types of lamps installed in the VAZ-2110 headlight.
Which lamps are better?
The editorial car has conventional headlights with lamps from a domestic manufacturer.
Naturally, the factory light combined with the block headlight from Kirzhach shines so-so. Therefore, many immediately consider alternative lamp options, among which there are sure favorites:
- for those who like to save money, the Chinese Nord YADA “Clear” is suitable for a price of one hundred rubles per piece, nothing more good can be said about it;
- Bosch P1+90 , costs exactly ten times more, is durable and has a classic shade, can be installed for both low and high beam.
- Osram H1 Cool Blue Hyper 5000K is the best option for tens of not the most advanced optics, the price is in the range of 800-900 rubles per piece;
- Osram H1 Night Breaker + 90% is an excellent option, they shine a little dimmer than the previous ones, but in rainy weather they have no equal;
- Sho-me H1 B4 Xenon White +120% , a lamp for everyone, with a slight yellowish tint, price around 1300 rubles;
- Philips X-treme Vision , many people like the effect of these lamps, they are quite durable and bright, the price is about 700 rubles;
- Koito “Whitebeam” H1 , with a power of 55 W, produces a luminous flux corresponding to a 100-watt lamp, the price is about 1,300 rubles per piece.
Description of the VAZ 2110 dashboard buttons
Well, let’s immediately move on to the description of the buttons on the dashboard of the VAZ 2110.
Device panel of the VAZ 2110 car - the arrows indicate the buttons located on it
As you can see from the screenshot, there are only 4 buttons on the device panel of the VAZ 2110 - let's move on to their description.
- Button to turn on/off the front fog lights.
- Turn on/off outdoor lighting.
- Heated rear window
- Button for turning on/off the rear fog lights.
In addition to the buttons located on the dashboard, there are others that are located under the stove, next to the radio in the cabin. Let's find out their functions:
VAZ 2110 device panel - description of the buttons next to the stove
Many VAZ 2110 owners wonder why these 4 buttons, which are located on the dashboard under the stove, are needed. The answer will seem quite obvious to you:
These buttons essentially do not play any function; I think the engineers working on the 10 wanted to add electric windows to the car, but for some reason they forgot to do this.
Okay, it was a joke! Essentially, these buttons are responsible for the following:
- Turning recirculation on/off
- Button for installing additional equipment (for example, window regulators)
- Turning the hazard warning lights on/off
- Button for installing additional equipment (for example, window regulators)
Xenon PTF
Difficult to install and expensive lighting devices.
Standard PTFs converted to xenon fog lights.
The old xenon PTFs worked on lamps D1 and D2, the new ones received lamps D3 and D4 without the introduction of mercury vapor. At a theoretical level, the efficiency of such fog lights and the luminous intensity are higher than those of halogens. But we should not forget about the specificity of PTF - not to cause reflection of the beam from the water suspension. And all cheap xenon headlights require a very clear beam option and are not able to provide a low horizontal stripe to combat fog.
In addition, the highest color temperature for the effectiveness of fog lights is 3000-4500 K. Otherwise, they will be of no use and blinding light will be provided for oncoming drivers. The prices of such fog lights are not lower than 5-7 thousand (Hella Micro DE. For example). Anything cheaper is useless and even unsafe.
Installation and connection of PTF in VAZ 2110
Recently, I finally got around to installing and connecting the PTF.
Fog lamp VAZ-2110 (for H1 lamp) Kirzhach (Avtosvet) 2110-3743010-03 — 800 rub; 2. Wiring VAZ-2110-12 fog lights SB set AENK - 350 rubles 3. Frame fog lights VAZ-2110-2112 right left 2111-28031922803193 - 100 rubles; 4. Lamps MAYAK H1 12V 55W ULTRA Super Light90%; 5. Bolts M6×45 - 4 pcs; 6. Lambs M6 - 4 pcs.
Installation of PTF
The headlights were covered with armor with yellowish film ORACAL 8300 No. 21;
Installed lamps Autolamp MAYAK H1 12V 55W ULTRA Super Light90%; 3. Covered with silicone sealant all possible places where water could penetrate inside the headlight;
I removed the plugs for the foglights on the bumper; to get to them, I had to work hard, because their fastening is located on the inside of the bumper; the plug is secured with two screws. I crawled up to them through the hood, the right one caused the most trouble, it was very difficult to get to it;
I took the PTF, placed the frames on them and screwed the bolts into the mounting holes (the bolts go tight, cutting threads in the plastic). I used a head to screw them in, because it’s impossible to turn them by hand (be careful, the bolts get very hot!).
After installing the fog lights using the wings for fastening, in the future you can install (dismantle) them very comfortably and quickly!
In the future, I will change the PTF connection pads to the VAZ-2108-2110 crankshaft sensor pads, because they have an elastic band and a sealed connection to protect against water getting into the contacts!
The headlights are in place. And it was necessary to paint the bolt heads dark
PTF connection:
To install the PTF wiring, I used the PTF connection kit, the only negative in this kit is the lack of a PTF on indicator, and searching for it later became a problem for me, so take the full set;
First, I laid the wires in the corrugation, the wires turned out to be a bit long (I shortened them);
I laid them through the hole where the hydraulic corrector tubes were laid (but this method is not easy, because you have to remove the frill and the wiper drive motor), I saw that many people lay them through the hole in the clutch cable. (I think this is not safe, the wire may wear out over time, and it’s not far from the short circuit) or they drill a new one (drilling is also not my option).
I removed the frill and wiper motor
Afterwards we work with the mounting block (I used the annotation included in the PTF connection kit; everything is carefully and clearly described in it.
The only difficult thing was that I had to remove the terminals from the blocks, and because the wires were thick and there was no crimping, I soldered the wires together and to the terminals, then crimped them with pliers, covered them with heat shrink and installed them back into the block (but now everything is firmly held).
We check the headlights, everything works!
We adjust the position of the headlights using the adjusting screw.
Lamps used in the headlights of the VAZ 2110
The vast majority of motorists are faced with the need to replace lamps on a VAZ 2110. Factory components sooner or later wear out or do not initially meet the driver’s requirements. This applies in particular to low beam bulbs, which may not suit the needs of motorists for several reasons. Such as:
- too dim road lighting;
- rapid wear, breakdown;
- inappropriate shade of color (for example, headlights with a white and bluish glow are well suited for driving during adverse weather conditions).
Since the driver needs to drive with low beam both at night and during the day, the bulbs in the system become unusable relatively quickly.
If the low beam lamps on a car break down, according to the law, it is required to urgently replace it - for driving in the dark without the lamps on, you will face a fine. In addition, it is unsafe for you and other road users.
In order to choose which types of low beam lamps are suitable for installation on a VAZ 2110, you need to understand how the electrical circuit of your “ten” functions. The following components are connected to it:
- light switch, located in your car on the panel at the front of the car;
- headlight mode switch, which you can find on the steering column;
- relay for switching the modes of lamps located between the high and low beam bulbs;
- fuses (4 pieces), which are located on the installation block and ensure the operation of the light electrical circuit;
- signal lighting that notifies the motorist that the high beam is operating.
For the VAZ 2110, as well as models 2111 or 21124, it is important to choose lamps that will illuminate the road and prevent eye fatigue when driving in the dark.
How to Change the Dimensions Light Bulb on a VAZ 2110
Installation, repair and replacement of front and rear dimensions of the VAZ 2110
The SDA clearly states that it is not possible to drive in the dark or in poor visibility conditions without the dimensions included on both the front and rear of the vehicle. Today we will look at how the dimensions are placed on the VAZ 2110, what could be the cause of the breakdown, and how to fix them.
Vas 2110 with markers and DRLs
Business date, meeting
The front dimensions are called headlights and are found in the headlights in front of the car on either side of it. They are extreme on the sides of the lighting system and their name comes from the fact that they show the size of the car and the width of oncoming cars.
Various options for side and daytime lights
The rear dimensions are designed for the same mission. for you to move on. This is especially true when overtaking if you don't want someone who didn't make the real size hit your Swallow.
Adjustable position of rear lights
READ Where is the Fuel Pump Relay Cherie Amulet
This is an important tip: if you suddenly have to go at any cost and you get burned, the flask cannot be replaced with a new one in the left dimension, due to its absence, do not be lazy and move it to the right. And we will tell you how to do this.
device
Headlights (front dimensions) are part of the headlight. The rear dimensions are part of the rear light of the VAZ 2110, this is one of its sections. Nearby are the rear fog lights, tail lights, turn signal, reflector, brake light and size.
Causes of breakdowns
There can be many reasons for malfunctions. The most common is that the lamps are on, which naturally prevents the side lights from turning on. Particularly unreliable in this regard are the lamps brought to us from the Middle Kingdom.
Detailed description of the submersible lamp High beam, rotation and dimensions
Do it yourself.
REPLACING HEADLIGHT BLANKS BASED ON VAZ 2110, 2111, 2112
REPLACING TUBERS
Front side lights VAZ 2110
, 2111, 2112. REPLACEMENT OF LAMP
OVERALL DIMENSIONS
OF LADA.
Although they attract more than the “democratic” price, and at any wholesale outlet, you cannot encounter them. Therefore, it may be worth mentioning the saying that we are not such rich people that we buy cheap things twice.
READ Spark Lost VAZ 2110 16 Valves
Good branded light bulbs will last several times longer, and you won't have to change them forever.
Bulb Dimensions
Sometimes the dimensions “blink” or the instrument panel lights flash when they turn on the parking lights. Many blame this size on the relay but can't find it. The VAZ 2110 carburetor does not have a side relay, there is only a relay for high and low beams.
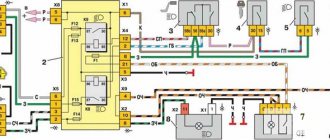
For a vehicle with an injection relay, locate all fuses in the mounting block. Moreover, if the relays light up one after the other, you should immediately contact an electrician as this indicates a short circuit somewhere in the circuit and therefore a burnt out vehicle.
Mounting block and relays and fuses
Never, under any circumstances, replace a blown fuse with a larger one, or one that is not a “fault” at all.
Repair
As already mentioned, it is prohibited to move the car in the evening or at night unless it is on fire. parking lights so we will look for the cause and then fix it.
If you are sure the electrical paths are working, first make sure the bulbs haven't burned out. And if they need replacement, do it.
READ What Oil to Use in Honda Civic
For the headlight, the replacement procedure is as follows:
- Open the lid;
- Disconnect the battery, or better yet, remove it. We're talking about electricity, which is dangerous;
- From the engine compartment, take the lamp with your hand, disconnect the wires going directly to the lamp from the unit;
- Remove the rubber cover;
- Move the lock to the side by unhooking the spring using the hook;
- Take this flask;
- We replace it with a new one and put everything back together.
When replacing, make sure the main lights are on.
Rear marker lamps on the VAZ 2110 are installed as follows:
- Turn off the car;
- Remove the contact part from the body side (open) the epiphany with the lamps. To do this, press the latches;
- Take this flask, replace it with a new one.
Remember that bare hands cannot touch the halogen lamp. Replace gloves. The fact is that when you touch the light bulb there will be dark spots. Moreover, this has been proven. This bulb burns out much faster.
Types of lighting
To ensure reliable and long-lasting headlight performance, car enthusiasts can choose from LED, xenon, halogen or conventional incandescent low beam bulbs
The following types of lamps are popular among owners of the VAZ 2110, as well as 2111 models:
- Philips Vision. Capable of providing a third more light than halogen models. They are also significantly superior in quality and durability to the factory lighting of many car models. Often these are the lamps that are installed in machine production, which is an indicator of the high quality of the model. In terms of price-quality ratio, they are considered one of the best options for VAZ;
- Philips VisionPlus. The model is a modernized Philips Vision type. It illuminates the road surface 60% better than the standard halogen model, which provides greater light output;
Philips Vision Plus light bulb
- Philips X-treme Vision. It is the most powerful lighting component because it increases luminous flux by 100%. It is not installed during the production of the VAZ, so it must be purchased separately;
- Osram Night Breaker Plus. With them the light is 90% brighter. In addition, the glow of the product is 10% whiter than conventional models. This allows you to significantly (up to 35 meters) increase the length of the illuminated road surface. Also, the products last 50% longer than ordinary halogen varieties;
Osram Night Breaker Plus Bulbs
- Philips Diamond Vision 5000 K. Capable of increasing the brightness of light by 20% relative to the standard lighting in the VAZ 2110. The low beam in the headlights when using such products becomes as close as possible to natural light in the daytime. They are more expensive than most of the presented models;
- Osram CoolBlue 5000 K. High color temperature provides bright white (but close to daylight) illumination, which does not tire the driver and is familiar to the eyes.
Osram Cool Blue Bulbs
Xenon light
This product is 20% brighter than the standard lamp in the optics system of VAZ-2110 cars.
Along with xenon and halogen ones, there are also LED lamps on sale for the VAZ-2110 (including low beam H1). The main advantage is that they are bright. They shine better than xenon. Motorists also note their high service life - it ranges from 5 to 10 thousand hours. For example, a good halogen lamp will burn no more than 500 hours, and a xenon lamp can work up to 2500 hours.
But experts say that an LED lamp is of little use. Do not be fooled by advertising that talks about super-brightness. Laboratory tests show that a VAZ-2110 low-beam lamp (H1 or H4 base), installed in a headlight that is not equipped with an adaptive system, illuminates even worse than a halogen one.
Expert opinion
It-Technology, Electrical power and electronics specialist
Ask questions to the “Specialist for modernization of energy generation systems”
Low beam lamp VAZ 2110 (price, photo) Such parts cost quite a lot and are often equipped with additional control units, a cooling system and controllers. Ask, I'm in touch!
Lighting replacement technique
If you have already decided which lamps you plan to install on the headlights of your VAZ, you need to replace them. If you are going to do it yourself, the easiest way to install new lighting in the headlights will be relevant for you.
To do this, follow several steps:
- Dismantle the rear casing (box), which is located on the headlight unit of the car.
- Disconnect the wires from the terminal block under the housing cover.
- Remove the spring that secures the bulb to the headlight unit.
- Rotate the holder of the lighting product and pull it out of the headlamp.
After this, you can make a replacement in the lighting system, following the reverse algorithm.
In some situations, it is not necessary to replace the lamp on a car - the contacts in the lighting system may oxidize. Some car enthusiasts do not know that in certain cases, when the light is not on, the wiring connections in the blocks come loose. And sometimes the reason for the deterioration of surface illumination can be a banal fogging of the light diffuser due to a violation of the tightness. Replacement of equipment is not necessary - it is enough to repair or wipe the components of the light system.
The VAZ-2110 car was designed back in the 80s of the last century, so there are no particularly technological solutions in its design. The same applies to optics. The car comes from the factory with four-lamp headlight units, which imply the use of only one type of lamp.
Other malfunctions affecting the illumination of the rear lights
The reversing lights may not light due to a faulty switch. To troubleshoot, you need to do the following:
- disconnect the connector;
- unscrew the switch with a 21 key;
- remove the switch and replace it with a new one.
Note. The operation should be carried out quickly so that there is no large leakage of engine oil from the gearbox.
A malfunction of the car's lights may be caused by problems with the hydraulic corrector. With its help, you can change the angle at which the headlights are tilted (this is due to the different load levels of the car). The hydraulic corrector consists of a master cylinder, which is mounted on the dashboard, actuator cylinders of the headlights and connection tubes. It cannot be disassembled and cannot be repaired. The assembly part should be replaced. Removal and installation of the main cylinder of the headlight hydraulic corrector occurs in stages:
- remove the handle and cylinder lining by prying it off with a screwdriver;
- unscrew the nut with a 22" head;
- remove the hydraulic corrector.
The trunk light may also need replacing. In this case you need:
- Disconnect the cable and terminal of the negative battery;
- disconnect the rear light from the block with wires by opening the trunk lid;
- press the fastener parts and remove the holder with lamps from the flashlight body;
- unfasten the lamp by unscrewing two nuts;
- loosen the three nuts that secure the decorative trim of the luggage lid and unscrew the nut closest to the lamp;
- lift the cover and remove the lamp;
- The new lamp is installed in the opposite order to that described above.
Note. When installing the flashlight, first place the flange of its body under the decorative trim, and then tighten the nuts securing the trim.
Many cars of the VAZ family, including the VAZ 2110, have a problem that affects safety and also causes a lot of trouble for drivers. The rear light board is a thin strip with conductive tracks. You have to change this tape quite often, and with it the burnt out light bulbs. You can use the option of inserting iron cartridges from the VAZ 2101. So, to do this, you need to:
- remove and disassemble the rear lights, removing the board and the tape from them;
- buy single cartridges for stops and dimensions;
- purchase copper wire with a cross-section of 2.5 mm, connectors, M3 bolts;
- mark the places for the cartridges and drill them, finishing the holes with a file;
- to modify the cartridges for clearance and brake lights, turn the tip terminals 180 degrees;
- completely cut out the cartridges from the turn signals;
- secure the cartridges to the plastic with bolts and nuts;
- connect all the cartridges, laying the pluses on the turn signal, stops and dimensions;
- extend the connector block and install everything on the car.
Note. Before installation, you should check everything to ensure there is no short circuit.
What headlights are installed on the VAZ-2110
At different times, a dozen were equipped with headlights from different manufacturers, or rather, two - domestic headlights from the city of Kirzhach and German Bosch headlights. They are slightly different in design:
- In Kirzhach headlights, a lens is provided for the low beam lamp, and a reflector is provided for the high beam.
- Bosch offers only reflectors for low and high beam lamps, but, according to owner reviews, the quality of the luminous flux is better with German headlights, regardless of the installed lamp. In addition, the reflector surface for the low beam lamp on Bosch headlights is larger, which improves illumination in difficult weather conditions.
Nevertheless, many find advantages in domestic headlights, one of which is a lensed shade for the low beam lamp. Whatever headlights are installed, the quality of light is greatly influenced by the lamps.
Types of headlight bulbs
Marking of lamps according to GOST and EEC.
Since the front optics of the car are designed for a four-headlight lighting scheme, halogen single-filament lamps with an H1 type socket are used for low and high beam. This is an outdated scheme, but if you choose the right lamps, you can achieve good results. The following lamps are installed in the front optics from the factory:
- High beam - lamp AKG12-55-2 with a power of 55 W with H1 socket.
- The same lamp is installed on the low beam
- The direction indicator has a 21 W lamp, type PY21W. The A12-21-4 lamp with a power of 21 W is installed from the factory.
- W5W - 5 W lamp installed in side lights . The domestic lamp A12-5-2 comes from the factory.
Types of lamps installed in the VAZ-2110 headlight.
Which lamps are better?
The editorial car has conventional headlights with lamps from a domestic manufacturer.
Naturally, the factory light combined with the block headlight from Kirzhach shines so-so. Therefore, many immediately consider alternative lamp options, among which there are sure favorites:
- for those who like to save money, the Chinese Nord YADA “Clear” is suitable for a price of one hundred rubles per piece, nothing more good can be said about it;
- Bosch P1+90 , costs exactly ten times more, is durable and has a classic shade, can be installed for both low and high beam.
- Osram H1 Cool Blue Hyper 5000K is the best option for tens of not the most advanced optics, the price is in the range of 800-900 rubles per piece;
- Osram H1 Night Breaker + 90% is an excellent option, they shine a little dimmer than the previous ones, but in rainy weather they have no equal;
- Sho-me H1 B4 Xenon White +120% , a lamp for everyone, with a slight yellowish tint, price around 1300 rubles;
- Philips X-treme Vision , many people like the effect of these lamps, they are quite durable and bright, the price is about 700 rubles;
- Koito “Whitebeam” H1 , with a power of 55 W, produces a luminous flux corresponding to a 100-watt lamp, the price is about 1,300 rubles per piece.
The VAZ 2110 car has long been known to Russian drivers. And this is not surprising, since its manufacturer is the Volzhsky Automobile Plant. It first appeared on the market in 1995, and production ended more than ten years ago. Despite this, the car is still often found on Russian roads today.
The VAZ 2110 is a reliable, comfortable, inexpensive to maintain and quite beautiful looking front-wheel drive sedan. If you compare the cost of consumables with foreign cars, you will notice a significant difference. The price of spare parts, fluids and other things for the VAZ 2110 is several times lower. It is also worth noting the efficiency in fuel consumption. A car with a 1.6 liter unit spends 8-10 liters of gasoline per 100 km. Quite playful and fast, acceleration takes 11 seconds.
Having become the owner of such a car, you need to know the type and power of light bulbs that the manufacturer has provided for it. Since periodically they burn out and require replacement.
Dial indicators on the VAZ 2110 panel
The number 6 indicates the fuel level indicator in the gas tank. The device’s readings are not particularly accurate, but it is logically clear that at mark 0 the tank is actually empty, with a few spare liters remaining. Fuel, at the ½ mark the tank is half full or empty, as you like, and at the 1 mark the gas tank is full. Light indication of the fuel level is entrusted to control lamp 7, which begins to flash when the vehicle's range on the remaining fuel is about 100 km, which is approximately 9-9.6 liters. To ensure that the fuel pump does not fail, it is not allowed to completely empty the tank.
Lamps used in the VAZ 2110 recommended by the manufacturer
The VAZ 2110 car has long been known to Russian drivers. And this is not surprising, since its manufacturer is the Volzhsky Automobile Plant. It first appeared on the market in 1995, and production ended more than ten years ago. Despite this, the car is still often found on Russian roads today.
The VAZ 2110 is a reliable, comfortable, inexpensive to maintain and quite beautiful looking front-wheel drive sedan. If you compare the cost of consumables with foreign cars, you will notice a significant difference. The price of spare parts, fluids and other things for the VAZ 2110 is several times lower. It is also worth noting the efficiency in fuel consumption. A car with a 1.6 liter unit spends 8-10 liters of gasoline per 100 km. Quite playful and fast, acceleration takes 11 seconds.
Having become the owner of such a car, you need to know the type and power of light bulbs that the manufacturer has provided for it. Since periodically they burn out and require replacement.
Instrument panel VAZ 2110 - description of lamps and indicators
Designations of indicator lamps on the device panel of the VAZ 2110 - 15.
Many car owners are faced with this seemingly common question. What do the indicator lights on the device panel mean?
Well, how do we know, all of them together light up only when the ignition is turned on, and when one of them lights up while driving, it becomes a little restless.
I didn’t know this myself when I switched to the “two” after the “seven”; on the 2107, in general, half of them didn’t light up, so I didn’t know what it was and why. And a friend of mine, after buying a car in Novorossiysk, even bought a whole book on VAZ, due to ignorance of these light bulbs.
The designations on the device panels on all VAZs are virtually identical, just placed differently.
Let's start in order.
1 — Cooling water temperature, in degrees Celsius.
2 - Tachometer, engine speed.
5 — Speedometer, vehicle speed in km/h.
6 — Fuel level in the tank. With a remainder of 5-7 liters. A yellow light comes on - a warning or an icon with a picture of a gas station.
7 - In fact, this is an image of a gas station, signaling the need to refuel.
8 - Indicator lamp for turning on the dimensions.
9 — The brake water level is low, it may be leaking here and there.
10 - Turn on the high beams.
11 - Clock adjustment knob (hours/minutes - switches when pressed), from time to time this knob does the function of switching the total mileage/day mileage (on panels with a narrow screen).
12 — The screen displaying the total mileage/daily mileage can be narrow on some models.
13 - Hazard warning lamp - “hazard light”.
14 - Check Engine, often indicated by this icon - this means there is a malfunction in the engine, it is recommended to stop the engine.
15 — Screen with a clock (can show the outside air temperature if there is a temperature sensor).
16 — Malfunction in the battery charging system: loose or broken generator belt, generator malfunction, open circuit and other problems.
17 - Parking brake indicator.
18 - Insufficient oil pressure in the engine, it is recommended to turn off the engine and find the cause.
19 — Air damper light (on carburetor engines)
I’ll also add about the lamps on the additional panel in the dashboard of the VAZ 2110 - 12.
— The light marked with an arrow indicates a malfunction of the dimensions or brake lights. — Below is a brake pad wear indicator, if it lights up, check the brake pads, maybe it’s time to change them. — Seat belt warning light — this is clear from the picture.
On the other side from above:
— Low engine oil level — Low washer water level — High cooling water temperature
This is what the review came out with. If some kind of lamp lights up and the signal beeps, do not panic. As a rule, these are little things.
Save this note for yourself on your own social network by clicking on one of the buttons below.
Table of light bulbs used in LADA VAZ 2110
| Installation location | Designation according to GOST | EEC designation | Power, W | Appearance |
| Headlight block: | ||||
| high beam lamp | AKG12-55-2 | H1 | 55 | |
| low beam lamp | AKG12-55-2 | H1 | 55 | |
| front turn signal lamp | A12-21-4 | PY21W | 21 | |
| side light lamp | A12-5-2 | W5W | 5 | |
| Fog lamp | AKG-12-55-1 | H3 | 55 | |
| Side turn signal lamp | A12-5-2 | W5W | 5 | |
| Rear Exterior Light: | ||||
| turn signal lamp | A12-21-3 | Р21W | 21 | |
| side light lamp | A12-4-1 | T4W | 4 | |
| side light lamp | A12-10 | T10W | 10 | |
| fog lamp | A12-21-3 | Р21W | 21 | |
| Rear interior light: | ||||
| brake light | A12-21-3 | Р21W | 21 | |
| reverse lamp | A12-21-3 | Р21W | 21 | |
| License plate lamp | AS12-5-1 | C5W | 5 | |
| Luggage compartment lamp | AS12-5-1 | C5W | 5 | |
| Interior lamp | AS12-5-1 | C5W | 5 | |
| Glove box light bulb | AS12-5-1 | C5W | 5 | |
| Instrument cluster illumination lamp | A12-1.2 | W1,2W | 1,2 | |
| Instrument cluster indicator lamp | A12-1.2 | W1,2W | 1,2 | |
| Individual lighting lamp | A12-4-1 | T4W | 4 | |
| Cigarette lighter lamp | AMN12-3-1 | T3W | 3 | |
| Heater control unit illumination lamp | A12-1.2 | W1,2W | 1,2 | |
| Illumination lamp for the damper control lever of the ventilation and heating system | A12-1.2 | W1,2W | 1,2 | |
| Clock light | A12-1.2 | W1,2W | 1,2 | |
| Switch symbol illumination lamp | A12-1.2 | W1,2W | 1,2 | |
Video of replacing lamps in headlights of a VAZ 2110
The video below details the process and tools needed to replace the low beam bulb.
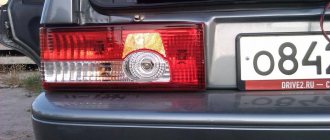
Replacing the rear light and its elements
Tail lamps for VAZ 2110
Replacement of the rear light occurs according to the following scheme:
- disconnect the wire from the negative terminal of the battery;
- Having opened the trunk lid, unscrew the screws that secure the rear trunk trim (2 pcs);
- having pressed the rear upholstery, bend the side upholstery, which will allow access to the rear light connection parts;
- disconnect the flashlight and the block with wires;
- loosen the nuts that hold the rear light and remove the washers;
- remove the lamp from the car;
- release the flashlight body from the holder and lamps by squeezing the claws of the clamp;
- install a new lamp, performing the steps in reverse order;
- tuck the side trim under the seal.
Replacing parking lamps and tail lights
Rear fog lamps in VAZ 2110
When changing a vehicle's headlight bulb, you must perform the following steps:
- remove the lamp together with the socket from the optical element;
- remove the lamp from the socket.
Replacement of light bulbs in the rear lights is carried out according to the following algorithm:
- lamps need to be changed from the luggage compartment side;
- remove the contact part along with the lamps (it is held in the lamp body using latches).
Side turn signals
If the side turn signal lighting malfunctions, do the following:
- move the side turn signal forward, pulling its rear part;
- remove the above part;
- disconnect the lamp socket;
- replace the lamp by sliding the cover;
- If you need to replace the cartridge, you must disconnect the wires.
Car license plate light
License plate light bulb VAZ 2110
If the lights that illuminate the car number do not light, the actions should be as follows:
- Unscrew the two self-tapping screws with a Phillips screwdriver and remove the lampshade;
- replace the lamp, first removing the transparent cover from above.
Stop light and reverse
You can remove and install the brake light and reverse light according to the following scheme:
- remove the flashlight board by squeezing the protrusions;
- remove the lamp by pressing down and turning counterclockwise;
- disconnect the wiring connector;
- unscrew the nuts (two outermost and two middle) of the decorative trim using a tool of the appropriate size;
- remove the cover;
- Unscrew the two nuts that secure the lamp and remove it.
Fog lamp
To properly replace the light source in the fog lamp, you do not need to remove it.
So:
- disconnect the negative wire (its terminal) from the battery terminal;
- remove the rubber protective cap from the rim on the back side of the reflector;
- remove the tip of the “negative” wire from the reflector output;
- remove the lamp mounting bracket in the form of a spring, squeezing it with your fingers;
- remove the lamp from the hole located in the reflector;
- disconnect the tip of the “positive” wire from the lamp wire.
You can assemble the lamp by following the reverse procedure.
Replacing the entire fog light
If you need to replace the entire fog light, the steps are as follows:
- disconnect the block of its wires from the harness;
- unscrew the two self-tapping screws securing the cladding using a Phillips screwdriver;
- remove the lining;
- remove the headlight;
- Install the new headlight in reverse order.
What lamps do drivers use in the VAZ 2110
As standard, the VAZ 2110 is equipped with halogen lamps with an H1 socket - standard for low beam optics on Russian passenger cars. Its power does not exceed 55 W. Moreover, according to GOST, it is marked as AKG12-55-2. The same type of lamp is installed on headlights for long-distance lighting.
The H1 standard is somewhat outdated today; manufacturers produce H7 type bulbs for low beam. They can be installed on the VAZ 2110 model. Among modern analogues there are different modifications - xenon, halogen and LED. Let's look at them in more detail.
Xenon
The development of automotive light optics technologies has led to the fact that in the last decade, xenon lamps have taken a strong leading position in equipping low-beam optics. Their main advantage is a denser luminous flux compared to halogen lamps. However, there is also a drawback - the need to install an ignition unit. This slightly increases the cost of the equipment.
In addition, xenon means less energy consumption and a longer service life. The light of such lamps is more natural - it completely lacks the characteristic yellowness. Thanks to this, the illumination of the road improves, and for oncoming traffic participants, the dimensions of the car can be guessed from a much greater distance than usual.
Important! The optical system housing must contain information about the type of lamps used. For incorrect or illegal installation of xenon on Lada series cars, the driver is deprived of the right to drive for up to one year.
Halogen
Halogen lamps are the most common and available to almost every VAZ 2110 car owner. The lamp bulb is made of special quartz glass, which is durable and resistant to cracks. Despite their low cost and good lighting performance for low beam optics, they have a number of disadvantages:
- If installation rules are violated, they quickly burn out.
- Exceeding the power by even 5% leads to constant overheating and reduces the service life by half.
However, halogens, if the nominal parameters are observed, are quite stable and very common, are represented by a wide range of different lines and are often used as replacements.
Review of popular halogen lamps among VAZ 2110 owners
Most often, VAZ 2110 car owners choose the following types of halogen lamps for low beam optics:
- Osram Night Breaker. The luminosity is not higher than 1000 lm, which makes it visually comfortable to perceive.
- Osram Night Breaker Plus. Illuminates the road surface 90% brighter than the standard one installed in the VAZ 2110. The light beam does not scatter at a distance of up to 35 meters. Service life is twice as long.
- Philips VisionPlus. The modernized light bulb has a 60% higher luminous flux compared to the previous version.
LED
LED elements in automotive optics are unrivaled. Among their main advantages are a huge service life (up to 50 thousand hours), high luminous flux power and energy saving. So, for comparison, with the same luminosity, a standard VAZ 2110 lamp consumes 55 W, a xenon lamp consumes 35 W, and an LED lamp consumes only 3.5 W! This has a positive effect on the longevity of the battery and all electrical components.
However, this light bulb also has some disadvantages:
- High price.
- A special adaptive system is required. In conventional headlights it will not produce the declared luminous power.
Important! LEDs, especially cheap Chinese ones, can produce unstandardized blue-violet shades, which is unacceptable from the point of view of traffic regulations.
The best LED lamps for low beam
Among the manufacturers producing LED low beam lamps, the following lines inspire confidence among the majority of VAZ 2110 car owners:
- Osram.
- Phillips.
- Lighthouse.
- Narva.
Before purchasing LED lamps, you need to take into account that standard VAZ optics are designed for halogens. Therefore, without special adaptation, LEDs simply will not display the glow parameters declared by the manufacturer.
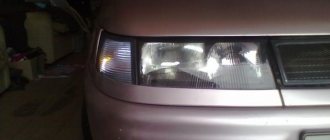
Standard head optics of the VAZ 2110 car
Headlights Kirzhach
As a rule, it does not shine with variety. Of all the well-known manufacturers, the VAZ line is limited to two main positions:
- Kirzhach headlights, produced by the Avtosvet plant. Such headlights can be easily purchased for a price range of 2500-2700 rubles;
- Bosch headlights, the price of which is much lower.
It is worth noting that most drivers, first of all, care about the low beam, which should be bright. Kirzhach headlights are equipped with a low beam lens, and a reflector is used for high beam. As for Bosch, they use reflectors in both cases.
Difference between reflector and lens
Halogen lamp for VAZ 2110
It lies in the fact that the lens has a much clearer light line. Reflectors, on the contrary, are dependent elements, although they have weak illumination from the side under the low beam. This has a better effect on the quality of light in cloudy weather. As for the use of headlights at night, in order for the lighting to be as productive as possible, most experts recommend, first of all, adjusting the headlights correctly, and secondly, using halogen lamps instead of traditional ones.
Advantages of halogen lamps compared to conventional ones
Halogen lamps VAZ 2110
Long gone are the summers when people preferred traditional bulbs used in headlights. Today, new generation halogen and xenon light bulbs have almost completely replaced the old ones and are successfully used in the automotive industry. So:
- Halogen lamps, in particular, give drivers excellent visibility of the road at night. And this is a huge plus, which gives the driver not only comfort and the opportunity to travel on highways at night, but also a high degree of safety.
- Halogen lamps for cars are a special bulb consisting of heat-resistant quartz glass. The flask is filled with a mixture of gases of a special type, which are also called iodide or bromide. Thanks to such gases, filaments are capable of self-healing.
Halogen lamps for VAZ 2110
- Halogen lamps for cars have improved color rendering and make it possible to obtain different shades of light purely chemically.
- Thanks to the mixture of substances in halogen lamps, they significantly increase the service life of the lamps by reducing the degree of tungsten evaporation.
- Halogen lamps use quartz glass, which is coated with a special filter substance that does not transmit ultraviolet rays. It is because of this parameter that objects illuminated by “halogens” do not fade.
- Halogen lamps are also designed to combat heat radiation. This is due to the dichroic reflectors used in these lamps.
- In halogen lamps, you can manually adjust the brightness of the light. This is done by replacing the reflector, which can be of different shapes or diameters.
Types of halogen lamps
The best h1 halogen bulbs in the VAZ 2110
The most common types of halogen lamps for cars today are:
- Linear halogen lamps, which use a spiral filament and a transparent quartz tube;
- Halogen capsule lamps, which are small in size and do not use protective glass;
- Halogen lamps that use glass reflectors;
- Halogen lamps using parabolic glass reflectors.
Self-replacement of light elements of VAZ 2110
When replacing low beam lamps on a VAZ 2110 model, first you need to comply with safety conditions. Then you need to prepare a set of the necessary tools and consumables, and then proceed with the reinstallation, following the instructions.
Preparation and necessary tools
Don't think that replacing a lamp is a trivial task. During a seemingly simple procedure, the car is left without control. Therefore, first of all, it must be stopped by placing it on a level surface. To ensure the electrical safety of both the repairman himself and the electrical equipment, the ignition must be turned off and the battery terminals disconnected.
Next, you need to prepare a new lamp, a pair of gloves (it is strictly prohibited to handle the bulb with bare hands!) and a set of improvised tools necessary for installation and dismantling work.
Step-by-step instruction
The algorithm for replacing a low beam lamp on a VAZ 2110 boils down to the following steps:
- Remove the rear housing from the headlight.
- Disconnect the wiring from the block located under its cover.
- Remove the spring holder that secures the light bulb.
- Rotate the cartridge and pull it out of the optical system unit.
- Install a new lamp.
- Follow the steps in reverse order to reassemble the equipment.
- Check serviceability.
Recommendation! The reason that the lamp in the low beam headlights on the VAZ 2110 does not light may be oxidized contacts in the pads. To restore their function, the system must be disassembled and the connections cleaned of oxides.
Workflow Description
Replacing the low beam lamp on a Lada Kalina with your own hands
Let's consider two options - when you only need to replace the low beam lamp on a VAZ 2110 and when you need to remove the entire structure for repair and maintenance.
Replacing the lamp
To carry out this process, you do not need any additional tools; it is enough to purchase new lamps, their type H1 60/55 Watt for combined options and H7 55 Watt for individual designs.
Important! It is better to change the elements in two headlights at once, since the light may differ, and car enthusiasts have noticed that if one new lamp is installed, the second one fails much faster
The LED low beam bulb for the VAZ 2110 is an excellent solution, characterized by high quality work and durability, the only significant drawback is the high price
The workflow is as follows:
- First of all, you need to open the hood and secure it. since access to the element body is not hampered by anything, you do not have to further disassemble any systems in order to increase the convenience of the process. The only thing is that you need to remove the battery on the right side.
- We recommend wearing gloves. because there are a lot of protruding elements under the hood that can scratch your hands.
- Before starting work, it is imperative to remove the terminal from the battery. this is necessary when carrying out any work on the electrical equipment of the car to prevent damage to the system and avoid electric shock.
- Replacing the low beam bulb on a VAZ 2110 begins with removing the plastic plug. located behind the installation site of the lamp we need. Everything here is very simple and quick: carefully turn the element counterclockwise about half a turn and remove it.
The plug must be intact and fit tightly to the body, otherwise moisture and dust will get inside, which will cause malfunctions in the system and corrosion on metal elements
- Next you need to remove the connecting block. this is also done very simply: press the latches on the sides of the housing and pull the assembly away from the headlight. You cannot pull the VAZ wires. since you can break the contacts, and the latches will not release the chip from the seat. After removal, move the assembly to the side so that it does not interfere with you in the future.
- After this, you need to carefully unscrew the latch. To do this, simply press it on both sides and remove it from engagement with the hooks on the body. Everything is very simple, and you can easily figure out how to do this when you see the design with your own eyes.
The spring clamp holds the lamp as tightly as possible and securely fixes it in its place
- When all the above work has been completed, all that remains is to remove the lamp from the housing and replace it with a new one. At the same time, always hold it by the base; touching the glass part is strictly prohibited, since oil from the skin causes overheating of certain areas and rapid failure of the element.
- Assembly is carried out in reverse order. after this, the same process is repeated with the second headlight, usually all work takes no more than half an hour.
Removing the headlight
Sometimes it is necessary to repair individual elements or replace the entire headlight; there are also cases when the connector cannot be removed and to dismantle it it is better to remove the entire structure.
The process is performed in the following sequence:
- First you need to remove the radiator grill so that you can get to all the fasteners.
- Next, you need to unscrew three bolts to free the housing; their location is shown in the photo below.
All fasteners are easily accessible
- From the side of the wing, use a screwdriver to carefully pry up the decorative trim located below; when you release it from the latch, carefully snap it off until it comes out completely.
- Below you will see another bolt with a 10mm head that secures the headlight unit to the bracket; it also needs to be unscrewed.
- Next, pull the housing forward, after which you need to grab the hydraulic corrector housing and carefully turn it clockwise 90 degrees, after which this unit can be removed from the housing.
This is how the hydraulic corrector is removed
Advice! If you need to disconnect the turn signals, then everything is simple - unscrew two screws in the rear.
Finally, if you need to replace the glass, then unsnap three latches at the top and bottom, after which the sealant is carefully cut off with a sharp knife and the damaged element is removed. After this, the ends are cleaned, a new compound is applied, onto which the glass is placed and fixed with clamps.
As for replacing light bulbs, this process is very simple; even novice motorists can do more complex work. The video in this article will help you understand the process in great detail.
How to adjust headlights
Adjusting the headlights after changing lamps, if necessary, is best done by a professional service center. However, if someone does not have such an immediate opportunity, then an approximate adjustment of the optics can be done with your own hands, following the instructions:
- Place the machine perpendicular to a flat, light wall on a level place five meters away.
- Turn off all additional light sources, except for the low-beam headlights - side and running lights.
- Place an assistant in the driver's seat or place ballast weighing 70-80 kg there.
- If the beam of light from a headlight with a replacement bulb does not coincide with the other, you need to use the adjustment screws on the optics housing and adjust the lighting.
What do we want from fog lights?
First, a few words about what we need from fog lights and why a different light installed in a different place on the car will only harm both the driver himself and interfere with oncoming traffic. Even with the brightest lamps installed in the headlights, and with the best optics, their task does not change - to illuminate a very likely area of the space ahead and to capture as much of the roadside as possible.
In general terms, this applies to both near and far light, it’s all about the settings. In conditions of limited visibility associated with high humidity (fog, snow or rain), headlights are not enough.
In most cases, they only interfere, especially distant light lamps - reflecting from water particles, the most powerful light literally creates a wall impenetrable to the eye.
An affordable PTF can produce such light: it will be scary to blind, and glowing under fog is out of the question.
Now everyone can choose the right fog light for their own 10, naturally, after consulting their wallet and common sense. Smooth and well-lit roads for everyone!
Main conclusions
On a VAZ 2110 car, a halogen lamp with an H1 base of 12 V and 55 W is installed as standard in the low beam headlights. To improve illumination and service life, it is also permissible to install more modern analogs of the H7 type. The most popular halogen models are:
- Osram Night Breaker.
- Osram Night Breaker Plus.
- Philips VisionPlus.
Brighter, but requiring an ignition module, xenon and economical, and durable, although requiring a special adaptation system, LEDs can also be installed. When reinstalling, it is important to secure the vehicle by immobilizing it and turning off the power supply, preparing tools and consumables, and completing all steps in accordance with the instructions. Upon completion of the work, it may be necessary to adjust the light flux, but it is better to do this in a specialized workshop.
Other faults
It is not so rare that the culprit of a problem is the two relays responsible for the headlights. The most common reason leading to relay malfunctions is contact oxidation. In this case, most often the lamp does not burn steadily, but blinks.
It is enough to clean the contacts, and the relay will work properly again. If the reason is burnout and failure, such a relay is replaced with a new one.
Another possible problem is in the network. You need to check all the contacts of the wires going to the headlights, PTF, as well as instrument lighting.
If this does not help, then remove the switch - the headlight dimmer, then the exterior lighting control and check their contacts.
Expert opinion
It-Technology, Electrical power and electronics specialist
Ask questions to the “Specialist for modernization of energy generation systems”
What kind of light bulbs are in the headlights of the VAZ 2110? A xenon or LED part will not be able to form the correct light shelf due to the inappropriate size of the bulb in the standard tens headlight. Ask, I'm in touch!