How to remove the washer reservoir on a Lada Largus?
When replacing the washer reservoir on a Lada Largus, many car owners wonder how to remove it. Everything is done relatively simply, but it will require a small amount of time, a standard set of tools and a place to carry out the work.
Note! If it’s frosty outside, it’s better to remove the washer reservoir in a warm place. Otherwise, you can ruin the plastic, as it becomes very fragile in the cold.
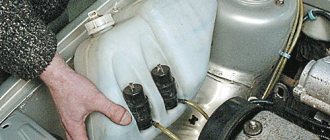
1. Remove the rubber hood seal approximately halfway. 2. Remove the clip securing the plastic frill on the right side. 3. Remove the hose from the holder and remove the right side of the lining.
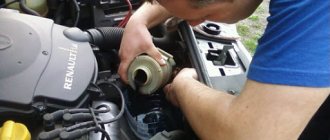
4. Disconnect the wiring block from the washer pump by first squeezing the plastic lock.
5. Using a 10mm wrench, unscrew the only bolt securing the washer reservoir to the car body.
6. Turn the tank over and remove it from the installation site, having first removed the hose seal from the groove in the body.
We install the tank in the reverse order.
Checking washer fuses
The following two tabs change content below.
About the expert:
Renault car expert
I own a Renault Megane 2, before that there were Citroens and Peugeots. I work in the service area of a dealership, so I know the car inside and out. You can always contact me for advice.
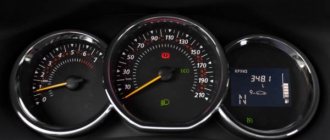
Of all the fuses, two are responsible for the operation of the washer - F03 and F27. The first of them is usually checked like this: they press the brake, and if the “stops” are on, they conclude that it is working properly. In addition, you need to put the vehicle in reverse and check if the light turns on. If not, then fuse F27 has blown.
Location of fuses in the main unit
We were talking about the main fuse box mounted on the dashboard on the left.
Checking the operation of the windshield washer pump
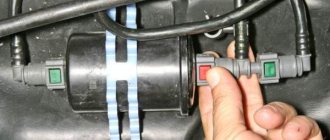
Try disconnecting the pump connector, which is located on the washer reservoir, and measure the supply voltage. Sometimes the Renault Logan glass washer may not work because the motor has burned out. But this is from the realm of fantasy. More often, the cause needs to be looked for in the wiring.
The only connector on the tank
So, we will disconnect the connector:
- Disconnect the hose going to the washer reservoir from the tee;
- We remove the rubber seal on the “grid”, and then the plastic “grid” itself.
Access to the connector is now open. Disconnect the plug by pressing the locking tab.
Check six lines
Three power lines are connected to fuse F03 - they power the brake light lamps, the reverse lamp, and the washer motor. The fuse will blow if even one wire comes into contact with ground. The same applies to fuse F27 - it supplies power to several lines at once. Let's list them:
- Reverse switch mounted on the “box” housing;
- Headlight washer pump;
- Steering column switch module (where the washer is turned on);
- Rear windshield wiper motor (sedan cars do not have one).
We need to look for what exactly causes the current to exceed in the circuit.
Fuse ratings: F03 – 20 A, F27 – 20 A.
One little trick
Let's look at how to deal with a typical fault in a switch module:
- On the casing under the steering wheel, unscrew the three screws;
- Separate the upper and lower halves (it is better to remove the upper one first);
- The steering wheel must be turned to the right from “zero” by 90 degrees. Then a window will open on the module. Thin spring wires will be visible there. They touch the contact blades.
The petal that switches the washer circuit must be cleaned with cologne or alcohol. Then everything starts to work.
An interesting case from practice
The owner discovered an interesting effect after scheduled maintenance with clutch replacement. On his Logan sedan, the windshield washer did not work immediately upon returning from the service. Of course, the problem was in the wiring of the sensor installed on the “box”. It turned out that both wires were crushed when installing the “box” in place. The result was that the fuse kept blowing.
Traffic regulations prohibit driving with washers not working, so, for example, the loss in price when selling such a car will be significant.
When should you add anti-freeze?
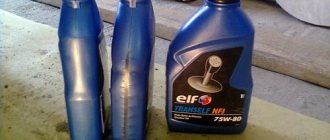
In modern cars, the glass washing system is designed not only to clean the windshield, but also to wash the headlight optics of the car. Therefore, only clean water is poured into the washer reservoir in summer, and non-freezing liquid with high cleaning capabilities in winter - in winter highway conditions you should have a good view of the road and clean headlights.
When should such a liquid, which is called “anti-freeze”, replace water in the washer reservoir? First of all, at the end of the warm summer-autumn season, when cold weather sets in and frosts approach. Do not wait until the water in the windshield washer system freezes one morning - this can lead to ruptured lines, broken pump impellers and damage to the washer reservoir. If you don’t want to repair the entire system, drain the water and fill it with anti-freeze before negative air temperatures appear outside.
In addition, it is necessary to fill in anti-freeze in several other situations:
- as the liquid in the tank is consumed (topping up);
- if necessary, replace the liquid with a more frost-resistant anti-freeze (concentrated liquid with a high alcohol content is more resistant to severe frosts);
- when the windshield washing system freezes (completely drain and replace or add hot water);
- when filling with low-quality anti-freeze (also complete drainage).
Another option: adding a more concentrated liquid to a diluted anti-freeze solution (withstands frosts down to -5C) when it gets colder.
Replacement
If the old motor has failed, there is no point in trying to repair it somehow. To buy a new part, you will have to spend very little money. And the replacement procedure on most cars is extremely simple.
I will describe the main stages of work associated with replacing this element of the windshield cleaning system of any car.
Turning off the vehicle's power. A safety measure without which further work makes no sense. Be sure to remove the negative terminal from the car
It's simple but important. Otherwise, you not only risk burning the wiring, but also getting an unpleasant electric shock yourself. Search for a motor
It all starts with identifying where your windshield wiper motor is located. It depends on your car. On some cars, just lift the hood and you will immediately see the washer reservoir. The motor itself is located on the reservoir (partially inside) of the windshield wiper, into which the liquid is poured. Do you see the tank? If yes, then you are in luck. If not, then you will have to look for it by removing elements of the engine compartment. On some car models, the tank is hidden so that the fender protection has to be removed.
- Disconnect the connectors with wires from the motor. Then remove the tank itself.
- The hose and fitting are separated from each other. Don't forget to drain the liquid. Filling a new one will not be difficult. Yes, and for prevention it won’t hurt to do it.
- Using a screwdriver, push the intake seal out of the bushing. This will allow you to completely remove the windshield washer motor.
- Don't forget to install a new bushing when reassembling. This often leads to the washer pump itself breaking down. So the old bushing goes to the landfill.
- Reassemble the assembly in reverse order. Here many craftsmen relax, because they consider the work done. In fact, reassembly causes more problems than disassembly. Advice from someone who made similar mistakes. That is, from me. Do not try to remember the location of parts unless you are confident in your memory capabilities. We got distracted by something, forgot, got confused. This happens to everyone, and there is nothing wrong with it. To ensure proper reassembly sequence, you can record, mark, or label the parts in the order in which they are removed. This will make it easier to put everything back together the way it was before.
The instructions are for informational purposes only, as the procedure may differ depending on the car model. Consult your machine's owner's manual for assistance. This is the best visual aid for self-repair.
There is nothing complicated in this work. Even the car owner who prefers to solve most problems with the help of a car service can easily cope with it. Repairs cost several hundred rubles and take a maximum of a few hours.
Thank you for your attention! Subscribe, leave a comment, share your own experience in repairs and don’t forget to tell your friends about us! They might also find it interesting and useful.
Where to start diagnostics?
If your car's windshield washer does not work, pay attention to the characteristic symptoms. The electric motor hums when turned on, but liquid does not splash from the nozzles onto the windows.
To check, just turn off the engine, turn on the ignition and switch the steering column switch to the windshield washer position. Most likely, the reason is clogged nozzles, a filter element, a flown off, kinked or burst hose.
The windshield washer motor is silent when turned on. There is a problem with the pump, wires or steering column switch. If the fuse is good, proceed to diagnosing the power supply circuit.
The windshield or headlight washer pump requires + and – to operate. Depending on the connection diagram, when you move the steering column lever, one of the wires is shorted to ground or acts as a power wire (a + appears on it). Accordingly, the second wire is either constant + after turning on the ignition, or shorted to ground. The search for an open circuit or short circuit should begin with studying the electrical circuit.
How to change windshield washer fluid in a car
So, you have purchased anti-freeze windshield washer fluid, and you need to pour it into the reservoir. This procedure is not complicated, and you do not need to go to a service station - you can do the draining and filling yourself.
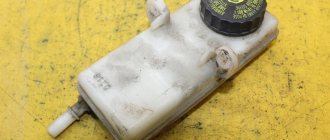
If you have never done this before, remember: the washer reservoir is located under the hood of the car (look for it on the left hand side in the headlight area). It is a small translucent/white container with a capacity of up to 3.5 liters with a blue, cyan, black or yellow lid, which can depict a windshield with a spraying washer.
You have to pour anti-freeze into it, but first you should check whether there is liquid in it, and if there is, then drain it.
How to drain liquid from the tank
Replacing water or fluid in the washer reservoir in the warm season is simple: water or weak anti-freeze can be completely used up by operating the steering column lever. The pump will blow all the liquid out of the system and reservoir. But this method is good if the tank is minimally filled: there is no need to put heavy loads on the washer pump electric motor!
If the tank is full (up to 3.5 liters in the tank + 1.5 liters in the line system), the liquid should be drained forcibly. There are several options for forced draining:
- You can blow it out of the system and empty the tank with an air compressor (the pump tube is connected to the windshield washer system, and the compressed air is turned on).
- You can drain the liquid through the windshield washer hose, which is disconnected from the nozzle and lowered into a drain container. After this, the windshield washer motor is turned on, and liquid under pressure is pumped out of the tank.
- You can unscrew the washer motor and drain the liquid through the resulting hole (but only if access to the motor is convenient).
If access to the hoses and washer motor is difficult (on some brands of cars this is really difficult), you can pump out the liquid from the reservoir using the simplest method - a rubber bulb with an elongated spout or a large syringe with a tube. Then all that remains is to expel the remaining fluid from the lines and injectors, using the steering column lever.
How to fill liquid
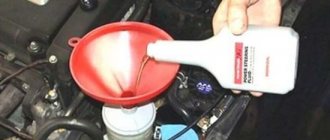
After the water or old windshield washer fluid has been drained, you can begin to fill in the new anti-freeze agent. It's simple: you need to remove the cap from the bottle and slowly pour the required amount of liquid into the neck of the tank. For convenience, you can use a large watering can.
When pouring, try not to splash the liquid past - there are electrical wiring and headlights nearby, which can short out if liquids get in. It is also important that the antifreeze does not spill onto the drive belt - this will worsen its technical characteristics.
In the same way, you can add windshield washer fluid when it is used up, or pour hot water into the anti-freeze tank if it freezes in the tank.
Important! After the liquid has been added, pump the windshield washer motor lever a little so that the anti-freeze agent flows into the system. It is also recommended to bleed the pipelines and nozzles before pouring any liquid into an empty tank - it is necessary to prevent the formation of air pockets or old water.
Lada Largus washer reservoir volume
The Lada Largus windshield washer reservoir has a volume of 4.7 liters.
For refueling in the warm season, it is permissible to use ordinary running water, but it is recommended to use either distilled water or a special summer windshield washer fluid.
When the temperature drops to +2 C, it is necessary to replace the summer windshield washer fluid with a special winter “anti-freeze” fluid. Or use a concentrate diluted with water. Otherwise, the summer fluid will freeze and may damage the reservoir, pipes or injectors.
However, the most common breakdown of this unit is the loss of its cover. This happens due to the breaking of the retaining plastic strip. But the cap continues to fulfill its role, but may be lost when the windshield washer fluid is added again.
For those who are faced with such a problem, the only way out of it is to replace the cover with a new one. Fortunately, there are no problems with its purchase and it costs little money.
To order online, you can use the article number:
Windshield washer reservoir cover for Lada Largus article number - 6001548742 It looks like this:
Washer reservoir design
Windshield washer reservoirs are unified and consist of the following main structural elements:
- A housing used to store coolant and mount other parts. The case has a rear neck with a screw cap.
- A pump that supplies fluid to the injectors.
- Many tanks have a washer fluid level sensor.
- Fastening the tank (brackets and clamps).
The tank body on all modern cars is rigid; it can also be solid (one plastic part) or composite (two molded plastic parts that can be disassembled).
The tanks also contain various structural parts, listed below:
- Filler neck into which the screw cap is installed. The lid must be screwed tightly to avoid loss of liquid. However, the lids are often provided with plastic bridles for safety.
- The screw cap itself.
- Holes for mounting a liquid supply pump.
- Hole for mounting a liquid level sensor.
- Washer fluid level marks and vertical grooves.
When repairing a tank, pumps are installed through holes with inserted rubber bushings. The pump installed on top can be fixed with a plastic cap nut. The pumps at the bottom of the tank are held in place by the elasticity of rubber bushings. The tanks are attached to the body either using brackets molded on them, or using separate baskets or clamps.