Every cyclist sooner or later experiences such an unpleasant situation as a bicycle tube puncture. If you find that you have a flat tire at home, that’s one thing (although some knowledge in tire repair is also required), but what if you get a flat tire during a multi-kilometer ride, for example, somewhere in a field? In such a situation, how to determine the location of the puncture, how to properly change and seal the bicycle inner tube, what glue and patches are best suited for this purpose. Additionally, in this article we will look at some of the nuances of repair and proper operation of bicycle inner tubes, for example, we will talk about what pressure should be in them and much more.
Replacing a bicycle tube
During long trips, it is advisable to carry with you not only bicycle tools, but also a spare tube, with which you can quickly replace a broken one and move on. After all, this is much faster than waiting for the glue to dry on something that has just been sealed. Therefore, in this section we will consider the question of how to remove a bicycle tire and replace the tube if it is punctured.
- Remove the wheel from the bicycle. To do this, loosen the eccentric (or unscrew the fixing nut on the axle).
- Wipe the side surfaces of the tire and rim from dirt with a rag.
- We lay the wheel on its side and make a mark with chalk (or other available materials) on the tire opposite the tube nipple.
If there is nothing at hand, then we remember this position, relying on the side inscriptions. After this, the wheel should remain only on this side. This is necessary so that after we take out the tube and find a puncture on it, we can, by applying it to the tire, find the place where the foreign object pierced the latter. In most cases, a nail or plant needle remains in the bicycle tire and if not removed, it will puncture the new tube immediately after replacing it. - We unscrew the cap of the tube nipple, and, pressing on the nipple, we release the air until the edges of the tire “lag behind” the sides of the rim. You don't have to lower the camera completely.
- Then, using a special bead paddle (mounter), we pry up the edge of the tire, and, resting the paddle against the rim wall, we pull the bead outward.
Make sure that the camera does not get caught between the mounting and the rim. This may lead to its rupture. If you don’t have a spatula, you can use any non-sharp, preferably plastic object of a similar shape.
You should not use wooden products for these purposes (they may have burrs) or metal ones, which damage the paintwork of the bicycle rim. Sharp objects (screwdrivers, knives, etc.) are strictly not recommended. They can damage both the tube and the tire. - After you have pulled out part of the bead, hold it with your second hand and use a spatula to draw along the contour of the rim. At this stage we have removed one side of the tire.
- We pull out the camera, for which we push the nipple inside the rim, and slowly take it out.
It is important not to turn it over to the other side until we find the puncture site and find it on the tire (by placing the camera on it).
- After this, we remove the bicycle tire completely (you don’t have to do this right away, but try to find the puncture site by touch, but with the tire removed, of course, it’s easier). We move its side, which remains between the walls of the rim, towards the edge and, holding the latter, pull it towards us.
After we remove it, we leave the tire in the same position as it was on the rim (to search for a foreign object stuck in it). - We check the inside of the rim and tire for debris and foreign objects that should be removed before installing a new tube.
- We inflate the bicycle inner tube and find the puncture site, remembering its position or marking it, for example, with chalk. After that, we lower it completely through the nipple.
- We apply the camera to the tire, placing its nipple opposite the mark, and make a second mark at the location of the detected hole.
- We run our hand along the inside of the tire at the puncture site and find a sharp object that can be easily removed with tweezers or pliers.
- After this, we put one side of the tire on the rim. Please note that the correct tread direction must be observed during installation. This can be done by looking at the side of the tire. There will be arrows on one or both sides indicating the correct direction of rotation (there may be the inscription Drive, Direction, or just an arrow). Next, we insert the new tube inside, pulling the nipple out through the corresponding hole on the rim (for ease of installation, the bicycle tube can be slightly pumped up), and put on the second bead. Inflate the wheel with a pump and screw on the cap.
Then you should repair the punctured inner tube, for example, after you arrive home from a bike ride, or during a rest stop.
Tire retreading
The tire can be repaired on the road on your own or at a service station. It all depends on the extent of the damage, the availability of consumables, tools, skills and time for repairs. If you are not confident in your abilities, then it would be best to put on a spare tire or call a tow truck.
On the road
On the road, you can seal the tire yourself. How to do this (with a tourniquet, sealant or patch) is up to you. However, if the damage is significant, then it is better not to take risks and not expose yourself and other road users to danger.
In the tire shop
A tire repair shop can also repair fairly large punctures and cuts (up to 5 cm in length) on car tires. This is done as follows: the area is cleaned, then the rubber around the damage is vulcanized, after which a special patch is installed on the glue, the structure is similar to the tire material. However, even with proper repair (which is not the case everywhere), such a tire will not last long. Therefore, a driver facing such a problem should consider purchasing a new wheel in the near future.
How to determine the puncture site
The seemingly simple procedure of identifying the location of a flat tire can become significantly more complicated depending on where you find the flat tire (at home or while traveling). To simplify the search procedure, it should be taken into account that in 90% of cases it is located on the so-called “contact patch” of the wheel with the road, usually no higher than 2/3 of the height of the camera. An exception may be damage from the rim (if the rim tape on the latter has failed) or the iron strands of the tire cord that have come out. Therefore, we will look at several options for how to find the hole in the bicycle chamber through which air is released.
- The easiest way is to lower the camera into water. It is enough to have a small tank, the depth of which allows you to immerse it at least 2/3 of the height. We rotate the camera until we detect air bubbles that will escape from the water. Then we take it out, find the puncture site and begin the repair.
- If there is no water nearby, then fine dust (which can be found on dirt roads) will come to the rescue. We increase the pressure in the chamber to intensify the air stream from the hole and bring it a short distance to the dust (without touching it). We rotate the camera and look at the place where the dust begins to fly away.
- If there is no wind outside, the puncture can be detected by holding the camera to the wet wrist (its inner side). The skin should be wet to simplify the search procedure as much as possible. For this method it is also desirable to increase the pressure.
- If there is a strong puncture in a quiet place, it can be detected by ear.
Sealant
This is more of a “quick” repair in order to get to the workshop, because the sealant will have to be removed. The manufacturer produces different versions of cans, which differ in some components. It is recommended to choose medium-priced ones; cheap ones usually have bad reviews.
No practical experience is required to seal a truck tire:
- jack up the wheel, it should be at least half deflated;
- place the nipple in the upper position;
- connect the can;
- We spend it completely;
- spin the wheel several times;
- inflate the tire with a compressor to the required pressure;
- we drive several kilometers so that the composition finally spreads over the entire surface;
- we check and, if necessary, perform pumping.
How can I seal the camera?
Not every glue and not every patch is suitable for fixing a punctured bicycle wheel. Therefore, it’s worth dwelling in more detail on the topic of what you can and shouldn’t seal your bike’s inner tube with. There are several options, which we will consider below.
- Specialized repair kits. Many manufacturers of bicycle parts produce so-called repair kits for a bicycle inner tube, which usually consist of a box-case, chalk for marking the puncture site, a sander (usually a perforated metal plate or a piece of sandpaper), several patches of different shapes and sizes, and glue.
The composition of the glue is specially developed for use with the surface of these particular patches (with which it enters into a chemical reaction), so using it together with patches from another manufacturer may not produce results. Fortunately, in most of these repair kits the amount of glue is clearly calculated for the number of patches. - Chinese repair kits for bicycle inner tubes. Some riders underestimate the power of the Chinese industry and look at their straps with disdain. I can’t talk about everything (I’m sure that some of them are really terrible), but for the last 4 years I have been using exclusively Chinese patches from the Red Sun company (although this may not be a company, but the name of a repair kit). They are quite common.
Over several years of use, none of the patches have come off or become leaky. And the cost of this product is lower than that of famous brands. The disadvantages include that the kit contains only glue and patches, and what’s most offensive is that the patch is disproportionately larger than the glue. Well, these are trifles. In general, I recommend it to everyone. - The third option is the most unreliable and therefore should be used only as a last resort. Here we have highlighted homemade patches that can be made from an old bicycle inner tube. Almost any plastic glue for rubber can be used as glue. But in this case, the reliability of the patch turns out to be very low. Here they say, “at your own peril and risk.” When using homemade patches, you should not use glue, which, when hardened, can burst at the bending points.
- Curing. It sounds good, it turns out very reliable (better than using any glue and patches, given that you vulcanize in a specialized workshop), but in reality it is not worth the money and hassle. It’s quite difficult to do at home (and impossible in the field) and you can easily screw up the camera.
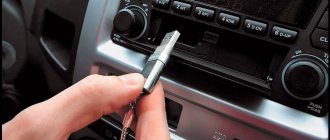
Repair kits-harnesses
In the store we found three versions of the repair kit from the domestic company Airline, which at first glance offered, plus or minus, the same thing, but for different money. Just for fun, we bought all three, so that we could also understand how they differ from each other.
ATRK‑2 (131 rubles) and ATRK‑3 (165 rubles) look almost identical, except that in the more expensive one, in addition to an awl with a needle tip, a file for cleaning damage and harnesses, there was a tube of activator glue. The most expensive ATRK‑4 set for 705 rubles also included a convenient organizer case, a spare needle tip, a double supply of tourniquets and a folding blade.
According to the instructions, before installing the harness, the puncture site must be cleaned with a special file, which is included in all kits. The trouble is that its thickness is a good half a centimeter, so squeezing it into a standard nail hole turned out to be a serious problem: punching through several layers of tires so that the file moves more or less freely in the hole is very difficult. In this regard, the best tool turned out to be from the cheapest set for 131 rubles, where the file was screw-shaped and screwed into the tire like a self-tapping screw. But we suffered a lot with the file-graters from the ATRK‑3 and ATRK‑4 sets.
Next was the procedure of attaching the tourniquet to the needle tip and squeezing it into the cleaned hole. To our great surprise, the all-metal tool from the most expensive set did not pass the test - the tip sponge broke off. The most interesting thing is that this did not become a problem: there was a spare tip in the kit. It turns out that the manufacturer knows about the weakness of the tool’s metal?!
There were no difficulties with the tips from the ATRK‑2 and ATRK‑3 sets. Moreover, the plastic grip handles turned out to be more convenient than the straight iron “corkscrew” from the ATRK‑4 set.
It must be said that pressing the tip with the tourniquet, even into a cleaned and widened hole, requires considerable physical strength. Moreover, this must be done on a tire that is not yet completely flat, otherwise it will be pressed under pressure.
As for the activator glue from the ATRK‑3 kit, it is used as a solvent for the tourniquet to completely seal the puncture from the outside. It should not be applied to the entire tourniquet, but only to the ends, otherwise the entire tourniquet will melt and it will no longer be possible to stick it into the puncture.
We consider the result of repairs using Airline repair kits to be positive. The repaired tire, inflated to two atmospheres, did not go flat within 24 hours. However, there is a lot of fuss and physical exertion with this method of repair. In addition, out of three different sets, it is best to assemble one - with a tool from ATRK-2, glue from ATRK-3, a box, a knife and a supply of harnesses from ATRK-4.
How to properly apply a patch
After we have found and marked the puncture site of the bicycle tube, we should begin to repair it, namely, seal this hole. To do this, you must perform the following operations.
- If the camera is wet (after searching for a defect), then you should wait for it to dry completely. Plus, it must be completely deflated.
- Using sandpaper or a special perforated iron plate (which is usually found in bicycle repair kits for inner tubes), we clean the puncture site until a matte color appears. The sanding area should be 1 centimeter larger than the diameter of the bicycle patch.
After this procedure, we try not to touch this area with our hands or other objects. - Remove the protective film from the surface of the patch that we will glue to the camera.
- Apply glue. It can be applied only to the patch, only to the camera, or to both places. This information can be found on the glue tube. We also pay attention to the air exposure time and complete hardening time indicated there (the last two points may not be indicated).
- We firmly press the patch to the place we need, squeeze out the air from under it (to do this, press on its center and gradually move towards the edges) and keep it in this state for several minutes. The procedure is simplified if you place the camera on a flat surface, place a strong plate on top (for example, a piece of laminate) and press it with all your weight by stepping on it. We compress the gluing area for about 5 minutes.
- Many people say that after this you can immediately put the camera in the bicycle wheel and ride, but I would advise you to wait at least another 30 minutes.
Mushroom patch
Let us immediately warn you that this and the subsequent method of independently repairing a broken wheel will require disassembling it, so they cannot be called simple. To be even more precise, this will most likely come in handy in a desperate situation with a lot of time, since manually disassembling a wheel using improvised means will require considerable pain and effort - not an activity for everyone. Our main task is to check the “fungus” patch itself, so with the reader’s permission and to speed up the test, we will still use the help of a tire shop.
The price of the patch is cheap - from 20 to 50 rubles per piece. True, they are rarely sold individually: the main buyers of such things are tire shops and car repair shops, so usually “fungus” patches are sold in small and medium-sized wholesale in sets of 15 pieces or more.
The principle of operation of the “fungi” is approximately the same as that of any rubber patch. A metal “leg” in a rubber wrapper is pulled out from the inside through the puncture, sealing the hole and sealing the entire circumference around the puncture with a “cap”.
The problem is that the “fungus” patch, like the tourniquet, is intended for a large hole in the wheel. The thickness of the “leg” is such that it squeezes into a hole with a diameter of at least 3–4 mm, otherwise the rubber shell of the “leg” simply slides off. There is no point in picking out a puncture from a nail to such a size, and therefore the “leg” can be cut off and just a patch glued on.
What to do if the camera goes down
If, after you have sealed the puncture on your bicycle tube, it still deflates over time, then you should check:
- Is there air leaking out from under the patch? To do this, place the patch with the patch in water and make sure there are no air bubbles. If they are, then you will have to tear off the old one and glue a new patch.
- Check for other, smaller punctures by lowering the camera into water. If they are found, seal them.
- Are there any air leaks in the nipple? To do this, you should spit on it (or, if you do everything correctly, apply a soap solution) and observe for several tens of seconds. If it leaks, bubbles will form on it. If a leak is detected, tighten the nipple with a special wrench.
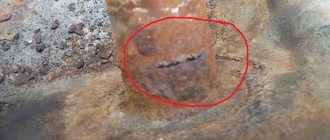
- Has the metallized cord come out? It happens that over time, the cord on cheap bicycle tires breaks down, which is a thin wire (more expensive tires use nylon threads and other materials), which can come out from the inside of the tire and constantly pierce the tube. If such a problem is detected, the tire should be replaced as soon as possible. A temporary solution is to pull out the protruding cord wire and seal the area with a patch for the camera. But I repeat that in this case the tire needs to be replaced, because... this will be repeated regularly.
If the camera is damaged at the base of the nipple (for example, it was rubbed by the rim), then it is better to replace it immediately. As a rule, such defects cannot be repaired.
The last method “for the lazy” is to repair a tubeless tube using a special spray
Tire sealant, which is popularly called a “spare in a can,” as a rule, comes in a repair kit in “premium class” cars, where do-it-yourself car repairs, in principle, are not provided for. However, over time, such cans became available for free sale, and now any lazy person can quickly and inexpensively seal a wheel with automotive sealant for tubeless tires.
- The first step is to unscrew the nipple, although it all depends on the type of sealant and how it is used, some manufacturers claim that there is no need to unscrew the nipple.
- Next, the contents of the bottle are squeezed into the nipple hole, according to the instructions and recommendations of the manufacturer. After this, the nipple is screwed into place.
- The wheel is inflated to the required pressure and 10 minutes after completion of the procedure you can continue driving.
Despite the apparent simplicity and “frivolity” of such repair of tubeless tires, the sealant is quite popular among motorists, who confirm the uniqueness and high efficiency of this method of repairing wheels.
Tips to avoid punctures
To reduce the likelihood of unexpected tire and tube damage while driving, you should follow a few simple rules.
- Maintain operating pressure in the wheel at the required level. There is no specific figure here, because... The rated operating pressure may vary for certain tubes/tires. For example, on mountain bikes the pressure in the chamber should be about 2.5-5 bar, and on road bikes - 6-9 bar. On the bicycle tire there are corresponding inscriptions for the minimum and maximum pressure. It looks something like this.
If the pressure is too low, it greatly increases the risk of puncture. It is worth remembering that when driving in winter or in the autumn-spring period, the temperature outside is lower than in the apartment. Therefore, on cold days the chamber should be inflated a little more (since when the air temperature in a closed volume decreases, its pressure decreases). Therefore, if you pump up to 3 bar in summer, then in winter you can increase the pressure by about 1 bar (but not higher than the maximum permissible). - Change tires after they wear out. As the tire reaches the end of its service life (wearing off the tread), the likelihood of a puncture also increases. And if you have a worn tire, and you begin to notice that the wheel is starting to break more and more often, you should think about replacing the tire.
On the bicycle parts market you can find two more devices that are designed to make life easier (at least that’s how they position themselves) when riding a bicycle. This is an anti-puncture tape and sealant that is poured in a small amount into the inner tube and is designed to “tighten” punctures while driving.
Anti-puncture tape is a strip of soft, rubberized plastic or, in more expensive products, Kevlar, which can be glued or simply inserted between the tire and the bicycle tube and protect against punctures. But there are pitfalls here. Cheap anti-puncture protection, firstly, does not always protect against punctures, and secondly, it can fall apart inside the tire and grind the inner tube into dust with its fragments, thereby dooming the latter to be thrown out. Plus, it's overweight. In general, after sitting on the forums, I agreed that they are criticized more than they are praised.
As for the sealant, everything is not so good here either. Of course, you can use it as a temporary solution when you don’t want to bother with replacing the camera. But the sealant does not completely seal the puncture, but only reduces air leakage. Plus, there were complaints after use, when they wanted to stick a patch on the puncture site.
In general, according to the editors, it is better to use higher-quality bicycle tires with built-in puncture protection, carry a spare tube with you, and not bother with the above-mentioned accessories.
What's the result?
Surprisingly, absolutely all methods of tire repair proved to be effective and reliable - not a single tire went flat. And since none of the repair methods are financially expensive, ease of use and labor costs became the decisive parameters.
1) So, the magazine “Engine” recognizes a can of sealant as the fastest and easiest way to repair a broken wheel in the field. The repair takes literally a few minutes. In certain situations there is no need to even use a pump. The price of 400 rubles is not ruinous. Moreover, even a child can fix a wheel this way. A shelf life of 5 years turns a can of sealant into an extremely useful component of a motorist’s kit. The only caveat is that the future life of the wheel with sealant inside is not entirely clear.
2) In second place are repair kits with harnesses. Moreover, as practice has shown, the most expensive set is not necessarily the most convenient. The two main advantages are the low price and the ability to repair the wheel without removing it from the car. Moreover, the method is capital, that is, further professional repairs will most likely no longer be required. However, there will be a lot of fuss and physical effort.
The remaining two methods of tire repair, we repeat, are exclusively for extreme cases when there is no other option, since they require disassembling the wheel.
3) The old-fashioned option of installing a camera in a tubeless tire is, firstly, simpler, and secondly, more reliable than a patch. The main task is to find at least some complete tube in the area, which in fact may turn out to be much easier than searching for a working village tire shop or a car shop with tire repair kits. In addition, installing a camera can bring back to life not just a punctured tire, but even a cut or torn one.
4) The last place is occupied by the installation of a “fungus” patch, which, let’s be honest, is common as a professional puncture repair. Mandatory wheel disassembly and the need to use additional tools and chemicals do not fit in with field working conditions in the event of a tire puncture. The repair process is too complex to be considered convenient.
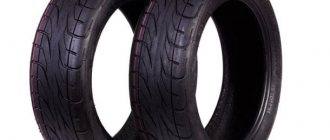
Nowadays, tubeless tires are most often installed on passenger cars. They differ from chamber ones due to their low cost, lightness and ease of repair. However, they are pierced in the same way as chamber ones. Inside tubeless tires there is a special enveloping layer that significantly slows down the descent of the wheel if damaged. If the puncture is small, the tire can be sealed without removing it from the axle. This article will look at how to seal a tubeless tire in several ways.
Large tire cut
Cuts or punctures are eliminated using vulcanization and thermal plaster in a service station. This patch can be applied in two ways:
- “Cold” method - everything is simple, the patch is placed on the glue from the inside. In principle, such a manipulation is not difficult to do if you have disassembly skills. This is not much more difficult than sealing a tire in case of a cut.
- The “hot” method is a little more complicated. A patch of raw rubber is applied to the damaged area. After gluing, the hole site is heated using a vulcanizer and during the heating process the patch seals the hole more tightly. A kind of “soldering” of the tire occurs. This technology is used mainly on large and side cuts to ensure a more secure bond.
What kits should you buy to repair damaged tubeless car tires?
Below are 15 sets that are most often found in car dealerships. A brief summary of each of them will help you more or less decide when purchasing. The first three options showed decent results and can take their rightful place in any motorist’s first aid kit.
Top three
- Titan T-609 - the kit for 130 rubles includes five reinforced strands, glue, an awl with an eye and a device for forming holes and stripping. The budget kit fully coped with the task, showing an excellent ratio of quality and price.
- DoneDeal DD0320 - consists of an awl with a twisted tip, a needle with an eye, glue, a cutter and eight strips of raw rubber. The handles are comfortable, and the presence of a cutter allows you to carefully complete repair procedures. Unfortunately, the cost of 540 rubles did not allow this repair kit to become the leader of the test.
- Michelin Tire Repair Tools Kit – to buy this kit for repairing punctured tubeless tires, you only need to have 180 rubles in your pocket. The equipment leaves much to be desired, however, there is a rasp, a needle and strips of rubber for repairs. The glue is a bit runny, but we managed to repair the wheel.
The only repair kit Titan T-609, which is equipped with a decent set of tools at an affordable price. The DD0320 is equipped with a cutter for cutting harnesses, and if not for the price of 540 rubles, the package is not so bad.
Briefly about other available repair kits
- AVS RK-110 A 78220S - a set from China for 180 rubles includes a spiral awl, an installation needle, five strips of raw rubber and glue. During repair work, the awl breaks the cord threads, but after restoration the wheel continues to move.
- CityUp CA-793 - a repair kit costing 200 rubles consists of an awl with an eye, stripping, glue and five pieces of reinforced strands. The rasp handle immediately turned, so I had to take another one. There is no way to recommend this option.
- Tire Repair Kit - the kit for 160 rubles includes an awl with a twisted tip, a needle, glue and five strands. The wide groove of the eye of the needle makes the work somewhat difficult, but the set still passed the tests.
IMG Tire Repair Toolbox V125 is one of the most expensive packages from China at 720 rubles. The box contains: a rasp, a pressure gauge, glue, a tool with an eye, a key for cleaning the valve threads, 10 patches for the chamber, 4 spool valves and 4 caps. The most complete set presented here, but the tool is inconvenient, and not all components may be useful.
Repairing a punctured tire - test of 16 repair kits and advice from ZR
Is it possible to use a travel first aid kit to heal a punctured tire? Za Rulem experts tested 16 kits for repairing tubeless tires, and at the same time demonstrated an operation algorithm for saving a damaged tire. The instructions are supplemented by life hacks that will be useful to all drivers.
In ancient times, there was GOST 5170–73 “First aid kits for repairing pneumatic tires.” There were so many components that were not in these first aid kits! And a fungus, and a grater with a plaster, and a roller... And now each manufacturer decides for himself what to put in his kit.
Let's check what the descendants of those travel first aid kits are capable of. Grant's editorial office, one of whose wheels gave up the ghost, pushed for decisive action. Instead of a tire shop, we visited several stores where we purchased 16 different kits for repairing tubeless tires. The price range is sevenfold, although the principle of operation is the same. After finding a puncture, you need to remove the culprit of the problem (screw, nail), then widen the hole and tightly insert a folded rubber band into it. The nuances of technology and tools may vary, but in general the repair algorithm is exactly the same.
What is included in the tire fitting kit for tubeless wheels?
The repair kit includes the following items:
- Rasp. It is this that simplifies repairs, as it creates a perfectly even hole for further repairs.
- Awl. Its task is to help seal the puncture in the car tire evenly with a tourniquet.
- Tourniquet. Serves to fill the hole space.
- The glue helps to secure everything securely.
The repair kit is inexpensive (much cheaper than repairs that would be done at a car dealership), everyone can buy it for easy repairs. You can quickly fix the problem by working with this kit.