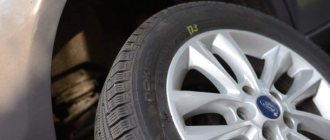
If knocking occurs in the front suspension of a Priora, you should pay attention to the following parts and components:
- racks
- strut supports and bearings
- ball joints
- steering rack
- steering tips
And in this article we will look at repairs related to tie rod ends. If the knocking noise appears specifically from the tips, and the play when turning already exceeds the permissible limit, it is necessary to replace the tips. for new ones. To perform this repair, you will need the following tools and accessories:
- Ball Joint or Steering End Puller
- Crowbar and hammer (if puller is not available)
- Pliers
- 19 mm wrench
- 13 mm wrench
- Torque wrench
- Penetrating lubricant
Replacing tie rod ends on a Priora with your own hands
1. First of all, remove the wheel bolts and lift the front of the car with a jack.
2. Apply penetrating lubricant to all threaded connections:
3. Now, using pliers, we align and pull out the cotter pin from the tip pin, as is clearly shown in the photo below.
4. Now loosen the coupling bolt that presses the tip to the rod:
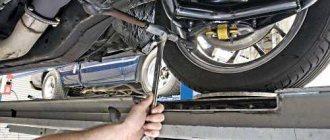
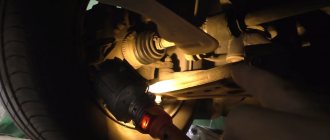
5. Then, using a puller or a pry bar with a hammer, you need to press the tip out of the hole in the rack.
The result of this action is shown clearly below.
6. Next, you need to unscrew the steering tip, twisting it from the rod. To do this, you may need an additional lever, for example, a small piece of pipe or a deep socket. It is worth noting that the left tip unscrews clockwise, and the right one counterclockwise. The photo below shows everything using the left side as an example:
The result can be seen below.
7. If you want to maintain the alignment of the front wheels, at least at approximately the desired angle, you need to count the number of revolutions made when unscrewing the tip. The new one should be wound at the same number of revolutions.
8. After replacing the tip, screw on all the nuts and bolts, and also install the cotter pin in place.
9. We do the same with the second side. Of course, the ideal option is to definitely go to a service station after replacement and have the front wheels wheel aligned. There is no need to save money on this procedure; it may cost more if the wheel angles are disturbed after the repair.
Method for dismantling the steering tip without a puller
When driving on poor-quality roads, rapid wear of the vehicle's chassis and steering occurs. Some drivers repair their cars themselves, without turning to auto mechanics for help. To replace the steering tip, a special puller is used to remove it from the lever. Not every car owner knows how to remove the steering wheel end without a puller with a minimum set of tools.
Required Tools
To replace the steering tip, you must prepare the following tools and accessories:
- jack;
- a wheel wrench for unscrewing the wheel mounting bolts;
- hammer;
- crowbar or pry bar;
- metal brush for cleaning parts;
- WD-40 lubricant;
- calipers;
- set of heads and open-end wrenches;
- graphite lubricant.
Experienced motorists carry this set of tools in the trunk; it can come in handy on the road.
Removal instructions without a puller
After preparing the necessary tools, you need to do the following work:
- Place the car on a level surface and place a shoe under the rear wheel to prevent it from rolling while jacking it up.
- Loosen the wheel bolts and use a jack to raise the front wheel of the car. To be safe, place a reliable stand under the threshold and release the jack a little so that the threshold rests on the stand.
- Unscrew the wheel mounting bolts and remove it. Using a metal brush, clean the steering tip from dirt, rust and dust. Treat the threaded connections with WD-40 and wait 10 minutes for the stuck nuts to loosen.
- Using an open-end wrench, loosen the locknut of the steering tip. Turn the steering wheel in the opposite direction and use a wrench or socket to unscrew the steering ball pin.
- Using a special tool, remove the steering tip. If a puller is not available, use a crowbar or pry bar by inserting the tool between the rod and the stand. Focusing on the lever, strike the end of the steering tip with sharp movements with a hammer.
- When removing the tip, use a caliper to measure the distance from the middle of the part to the steering rack mark in order to correctly install the new part and maintain wheel alignment. If a caliper is not available, you can count the revolutions when unscrewing the tip or thread turns.
- Unscrew the spare part and replace it with a new one.
Assembly is carried out in reverse order. In this case, you need to lubricate all threaded connections with graphite lubricant.
What to do if the thread on the nut is broken
If the thread on the old nut is stripped, you need to insert a pry bar so as to firmly press the steering nut against the eye, and use an open-end wrench to unscrew it. If the attempt is unsuccessful, you need to lubricate the nut with WD-40, tap it and try again.
If the edges on the nut are licked, you must use an adjustable or gas wrench.
If it is still impossible to unscrew the nut, an incision should be made on the edges with a grinder or a hacksaw.
Actions when parts are deformed
During operation, steering parts quickly wear out and become deformed. For traffic safety, they can only be replaced. If the deformed part cannot be dismantled, it can be cut off with a grinder and replaced with a new one.
There are times when there is no access to cut a part. In this case, it can be heated with a torch and, with light blows of a hammer, leveled to its original position, after which it must be removed and replaced.
Video review of replacing steering tips on a Priora
Since the procedure for replacing tips is practically no different from the tenth family, it is with the example of 2110 that everything will be shown.
If you have any questions, please discuss them below in the comments.
The steering ends on the Priora, as well as the ball joints, can last more than 80,000 km without replacement, but given the current state of the road surface that exists in the cities of our country, not every owner is able to reach such a milestone, even with careful operation. Fortunately, if you notice knocking on the tips and excessive play of the ball pin, you can replace them yourself, having only the necessary tools:
- pry bar and hammer (or a special puller)
- wheel wrench
- jack
- keys for 17 and 19
- pliers
- torque wrench during installation
First, we lift the front part of the car with a jack, after which we remove the wheel where the first step will be to replace the steering tip:
Now we apply penetrating lubricant to all threaded connections, and then loosen the pinch bolt, as shown in the photo below:
Then you need to use pliers to remove the cotter pin from the ball pin of the steering tip:
And now you can unscrew the nut completely:
Now, using a puller or a hammer with a pry bar, you need to knock out the pin from the seat of the strut knuckle:
Next, you can unscrew the tip from the tie rod, since nothing else holds it. It is worth noting that on the left side you need to turn it clockwise, and on the right side, vice versa. Also, be sure to count the number of revolutions made when turning, so that in the future you can install a new tip with the same number of revolutions, thereby maintaining the toe-in of the front wheels:
When installing new steering tips on a Priora, you must use a torque wrench, since the ball pin must be secured with a nut with a torque of 27-33 Nm.
The price of these parts can vary quite a lot depending on the manufacturer, and can range from 400 to 800 rubles per pair. If after the replacement you notice that the wheel alignment has become disturbed, tire wear has increased, it has become uneven, etc., then you should definitely contact a service station to have the wheel alignment procedure performed.
Signs of wear on tie rod ends
Deterioration in driving performance is not the only symptom of this malfunction. Worn steering rod elements are indicated by knocking noises from the front wheels that occur during sudden movements of the steering wheel.
You can also feel play in the end joints by yanking the wheel sideways.
- The parts themselves are not expensive, as are replacements in a workshop, so it’s worth purchasing a few in reserve.
- If, except for the ends of the rod, everything in the machine is in good order, then you should carry out the replacement yourself.
- For an inexperienced person this may take about an hour.
The operating time may be extended, for example, if difficulties arise, such as the need to unscrew stuck mounting screws. In this case, it is better not to risk it and contact a mechanic.
Signs of a bad tip
The steering tips on the Priora fail quite rarely, but you need to keep an eye on them. The main thing in operation is to keep the anthers in good condition. The service life of the entire tip directly depends on them. If dust and water do not get inside, the ball joint will last its entire service life - and this is at least 100 thousand kilometers. But this is provided that the driving style is not aggressive, most of the operation takes place on relatively smooth roads, without a large number of holes.
If there is a malfunction in the steering tips, the following symptoms appear:
- Crunching sound when turning the steering wheel.
- Steering wheel sticking.
- When driving on uneven roads, knocking noises appear.
Similar symptoms appear when a ball joint or strut bearing breaks, so you need to carefully diagnose the entire suspension and steering.
Signs of breakdown
Tie rods have two main enemies.
- Dirt. PH are hinged parts, therefore, when the boot is damaged, various solid particles of debris, dust, and dirt begin to enter the mechanism. Friction occurs, parts begin to wear out faster, and moving components are destroyed.
- Bad roads. How many bumps, holes, curbs do you have to overcome every day? All these impacts negatively affect the condition of the tips - the hinge begins to actively wear out, and play occurs in the vertical direction.
If a tip is found to be faulty, it must be replaced. It is better not to do with restoration and restoration of functionality.
Many people are interested in the question of how you can check the steering tips and make sure they are worn out or, on the contrary, intact. It is not necessary to go to a service station and pay money for this.
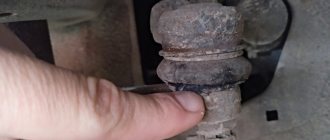
To check the condition of the LV, you need to turn the wheel all the way in one direction and remove all dirt from the boot. If there are breaks or cracks in the rubber, then the part has worn out and no longer performs its functions properly. Do subject to replacement. The second wheel is checked in a similar way.
There is one more important measure that is recommended to be carried out even if there are no signs of wear on the launch vehicle. To do this, a pry bar is inserted between the steering knuckle and the rod, after which the parts are moved relative to each other. If no vertical play occurs during these manipulations, everything is fine. If it is, you will definitely have to change the component.
Tools for repairs
In order to independently repair Priora steering ends, you will need the following set of tools:
- A set of keys, specifically for “19”, “13” and a cylinder head. Others may be required.
- Pliers, duckbills.
- Jack and support for the car. As the latter, you can use several wooden blocks.
- Wheel chocks or suitable elements for securing the vehicle.
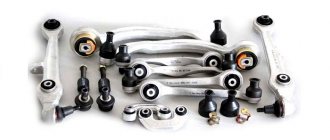
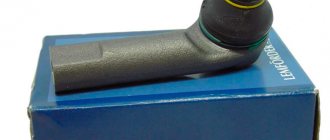
- A set of new tips or boots (depending on what exactly needs to be changed).
- Puller for ball ends.
Be sure to choose only high-quality products; if you doubt the authenticity of the manufacturer or notice a visible defect, it is better to refuse to purchase such spare parts. Be sure to replace the tips on both sides, after which you need to do a wheel alignment, and this procedure is not cheap.
Preparatory work
Before you begin work on replacing the steering tips on the Priora, you need to perform several manipulations to prepare the car. Namely:
- Place blocks under both rear wheels. The machine must be on a level surface so that it does not roll away during repairs.
- Place a jack under the side of the car that is being repaired.
- Loosen the bolts that secure the wheels to the hub.
- Raise the car on a jack and remove the entire wheel.
- Place a support under the car - wooden blocks.
- Lower the car onto the support.
How to correctly change tie rod ends so as not to spend money on wheel alignment?
From careless driving on a bad road, as well as simply from time to time, the tie rod ends on a car fail. Then, when driving over uneven surfaces and even during active steering, knocking noises appear from the front suspension. This malfunction cannot be ignored, as it is not only dangerous, but also leads to accelerated wear of the remaining suspension elements. Moreover, a loose steering end disrupts the wheel alignment, which leads to wear on the tire tread.
DIY repair
Of course, you can go to a car service center, where the technicians will quickly replace everything for you. But this procedure will cost a decent amount, since you will have to buy new tips, pay for the work to replace them, and at the end do a wheel alignment. At the same time, the experience of motorists says that this work can be done independently, so much so that you don’t even have to go to install the wheel angles.
Fault diagnosis
To make sure that the source of the knock is a faulty steering tip, you need to lift the car on a jack and rock the wheel in all planes. In this case, you need to place one hand on the steering tip. If there is play or even knocking, then the tip malfunction is obvious. It is also necessary to make sure that the play appears only in the steering tip, and not in the steering rod.
Replacing a faulty tip is quite simple. For experienced drivers, the entire job takes about half an hour. If you simply replace an old part with a new one, this will lead to a violation of the wheel alignment angles. Therefore, the new tip must be installed in exactly the same way as the old one was previously installed.
The work is performed in the following order. First, unscrew the fastening nut from the faulty tip; to do this, remove the cotter pin from it and knock it out. Next, you need to measure the distance from the tie rod to the edge of the tip. Then we finally unscrew the old tip and screw in a new one in its place. We plant it at exactly the same depth, periodically measuring the distance. Then we assemble everything in reverse order.
Of course, such a repair cannot be called ideal; it is rather a temporary solution or a way to save a lot on repairs. After carrying out such work, it is still necessary to go to the wheel alignment and check the wheel alignment angles.
When using any materials, an active link to DRIVENN.RU is required
Removing old tips
To remove the Priora tie rod end, you can use one of the following methods:
- Remove using a puller.
- Remove the hinge using a pry bar.
- Beat it out with a hammer.
The last two methods are very dangerous - you can damage not only the tip, but also the stand itself. And if you plan to replace only the anthers, then the risk of knocking off the thread on the finger is very high.
Therefore, it is best to use a puller for work. Follow these steps to remove the tip:
- Loosen the bolt that secures the clamp.
- Loosen the nut on the adjusting bolt.
- Remove the cotter pin from the hole in the hinge pin.
- Using a 19mm wrench, unscrew the nut from the pin.
- Install the puller and, by rotating its bolt, completely remove the tip pin from the hole in the rack.
- Unscrew the tip from the rod, while being sure to count the number of turns.
After repairs, be sure to do a wheel alignment. Even if you measure the total length of the rod before dismantling, you are unlikely to achieve the same value afterwards.
If you cannot unscrew the nuts on the rod, it is best to remove it completely. To do this, unscrew the bolts securing it to the rail. If necessary, you can warm up the threaded connection with a gas spray. But this is an extreme measure; usually pre-treatment with a penetrating lubricant such as WD-40 is sufficient.
Replacement procedure
Since there are many brands of cars, we will analyze the procedure for replacing the tie rod end on the most popular popular cars VAZ 2108, 09, 099.
Preparation.
- To stop the car, use the handbrake. For reliability, install chocks under the rear wheels;
- Using a jack, lift the front wheel and support it for safety;
- Remove the wheel;
- If necessary, clean everything from dirt;
- If it is impossible to unscrew the tie rod nut, use WD-40 or similar auto chemicals.
Replacing the tie rod end.
Loosen the nut that secures the ball joint to the tie rod from the retaining cotter pin.
Unscrew the nut shown above.
Using a special puller, press the ball pin out of the steering knuckle.
The steering rods are attached to the steering mechanism using bolts. The bolts are not immediately noticeable, since they are secured with special locking plates. To get to them, bend these plates with any tool that allows you to do this.
In other car models, bolts may be locked differently.
The bolt that secures the steering rod is turned out completely, but the second bolt is only loosened.
By loosening the second bolt, you can now turn the locking plate to the side and completely disconnect the tie rod.
You can see a hexagon on the tie rod. Clamp it in a vice and loosen the locknut.
The tie rod end can be unscrewed, but before that, take a piece of paper and a pen to write down the number of revolutions or remember them, and also put a mark where it was located, this is important.
Install the new tip by tightening it the same number of turns that you remembered. For precise installation, use the mark.
Installing new items
Installation is performed in reverse order:
- Screw the tip onto the rod, counting the turns. The main thing is to achieve an approximate match in the length of the rod with the new and old tips.
- Place the pin in the hole in the stand and secure it with a new nut.
- Tighten the nut on the rod.
- Tighten the bolt on the tip clamp.
- Install a cotter pin to secure the nut to the pin.
At this point the repair can be considered complete. If you only need to replace the Priora steering tip boot, then you do not need to remove the entire element, just remove the pin from the hole in the steering knuckle of the strut. Be sure to wash the hinge and apply new grease.
Why do steering arms fail?
The most common causes of failure include: accumulation of dust and dirt,
- Driving on bad roads
- Hitting potholes on the road,
- Hitting various obstacles,
- Driving style
- Wear of any other steering components, tie rods, etc.
The service life of tie rod ends is about 30 - 40 thousand kilometers, after which they should be replaced. But, they usually require replacement much earlier than recommended.