What brand of oil is in the manual transmission on Lada from the factory?
- For Lada Priora - Lukoil TM 4-12 (80W-85, 75W-90).
- On the Lada Kalina - Mineral TNK TRANS KP, TU 38.301-41-191-01, which is produced by the Ryazan Oil Refinery (the old name is ROLS T).
- On Lada Granta - Lukoil TM 4 with a viscosity class depending on the region of operation of the car - 75W-80, 75W-85, 75W-90, 80W-85 or 80W-90.
- On Lada Largus – ELF Tranself NFJ 75W-80 GL-4+.
- Gearbox 2180x (Lada Vesta and XRAY): semi-synthetic gear oil “Rosneft Kinetic Service” SAE 75W-85 API GL-4.
- JH3 gearbox (Lada Largus, Vesta and XRAY): transmission oil “TRANSELF TRJ (NFJ) 75W-80” SAE 75W-80 API GL-4+.
- Gearbox JH5 (Lada Largus, Vesta and XRAY): oil TRANSELF TRT 75W-80 TPM4501/B06138A.
Selecting the viscosity of the transmission oil:
| Minimum temperature to ensure lubrication of components, o C | SAE viscosity grade | Maximum ambient temperature, o C |
| -40 | 75W-80 | 35 |
| -40 | 75W-85 | 35 |
| -40 | 75W-90 | 45 |
| -26 | 80W-85 | 35 |
| -26 | 80W-90 | 45 |
| -12 | 85W-90 | 45 and above |
What kind of oil is in the automatic transmission of Lada Granta and Kalina 2? Genuine EJ-1 ATF gear oil (supplied by JX Nippon Oil and Energy Corporation).
Which gear oil composition should I choose ? To answer this question, we conducted surveys among owners of Lada Grant, Lada Kalina and Lada Priora, asking them to answer the question “What composition of transmission oil do you use in your car” and as a result we received approximately the same results:
Which brand of gearbox oil should I choose?
The next polls and very similar results:
The survey below will also help you decide on the choice of gear oil. Take part in our survey and discussions. Let us remind you that you will find answers to other questions about transmission oil in the article about changing gearbox oil.
Gearboxes in modern vehicles are complex units. Over time, parts may wear out, which can negatively affect both the functioning of the unit and the appearance of new sounds during its operation. Today you will find out what additives exist in gearboxes to reduce noise and what properties they have.
Why does first gear howl in an automatic transmission?
Sometimes the gearbox hum only appears when driving in first gear. When switching to the second, the unpleasant sound disappears. This means that the problem is in the planetary gear, or rather, in one of its satellites - a group of gears. Over time, the howl of the automatic transmission in first gear only becomes stronger. This leads to transmission scattering and complete engine stop.
The planetary gear needs to be repaired. You can, of course, not rush into a trip to the service station and wait for the mechanism to completely collapse, but such a delay can hurt your wallet. A complete replacement of a planetary gear is more expensive than repairing one of its planetary gears.
By the way, if an unpleasant sound appears only during forced (fixed) transmission, then there is no need to rush into repairs. Try changing the working fluid. But if the noise also appears while driving, this is a serious matter.
The transmission is noisy in neutral and howls at speed.
Main causes of malfunction:
If extraneous noise from the gearbox occurs when the clutch is depressed, the release bearing is faulty.
Some VAZ models are worthy of a special note, in which the manual transmission begins to make noise, howl and vibrate at relatively short distances. Many people attribute the malfunction to a design defect and the quality of manufacturing of transmission parts, which makes the idea of any repair very doubtful.
Gears engage poorly and with a crunch
Difficulty shifting gears and a metallic grinding noise at the moment of shifting are clear signs of a malfunction of the manual transmission synchronizers. But before removing the gearbox for repairs, check the gear selector and clutch. Play in the gearshift lever, cable jamming, and incorrect adjustment of the gear selection mechanism lead to unclear and often poor gear shifting. And incomplete disengagement of the clutch after pressing the pedal (the clutch is moving) will cause crunching and grinding sounds. Driving with such a malfunction will quickly damage the synchronizers.
Will disassembling the manual transmission help eliminate the howling?
Most Lada car owners, having tried the methods listed above, calm down, manage to get used to the noise and continue driving their car. But some are ready to go all the way, so they decide to disassemble the box themselves or contact a service center for this service. Is it possible to achieve the desired result using this complex procedure?
Sometimes when opening the box, significant defects in individual gears are revealed. In this case, the transmission usually makes a loud noise when engaging a particular gear. There may also be problems with the clutch and release bearing. Sometimes replacing these parts solves the problem.
New Lada: Everything about the Lada Granta fuse box: where it is, location, diagram and decoding
In most cases, installing new parts does not make the gearbox quiet, because all gears are made on the same equipment, which, as already mentioned, does not allow for an ideal configuration.
The procedure for removing and disassembling the gearbox is lengthy and expensive, but may not yield results, so it is hardly worth going through the gearbox if howling is the only problem.
A cable that has turned into a “ruff” cannot work normally.
But it's almost a detective story. The owner of the Mitsubishi Pajero asked to diagnose the box. Previously, the clutch was changed at a service center, after which miracles began: release the pedal - a light knock, press a little - the knock is clearer, and squeeze it all the way - silence. The service rejected these complaints, reproaching the owner for buying the clutch on the side: it was his own fault. But is it?
We had to figure out the mystery. At first, the mistake was due to incorrect installation of the box. It is known that to replace the clutch it is moved away or completely removed. The new clutch is centered along the hole in the flywheel using a mandrel: the crankshaft and driven disk must be coaxial, otherwise the splined end of the input shaft may not fit into the splines of the disk hub or, worse, “bite” in them. Then you can only put the box in place with incredible effort, and even by twisting it!
Where the disk is centered with the first mandrel that comes to hand, or even with a rod with electrical tape wound around it, they often manage to bend the input shaft and destroy the bearings. It’s not noticeable on the outside, but it will have an impact later. What kind of accuracy in “hundredths” can we talk about when dealing with electrical tape?! If the repairman has simplified his work, “unexplained” noises in the gearbox are natural. It was with these interesting thoughts that we removed the box from the Pajero. But it turned out to be completely serviceable: the input shaft rotated easily, no play in the bearing, no runout of the shank was found. And the clutch looked like new! Have we witnessed a miracle? And then I accidentally grabbed the driven disk hub.
Bearings Lada Granta
This inexpensive but relatively comfortable car produced by AvtoVAZ OJSC, according to the developers, will soon become a favorite of Russian car enthusiasts, since it combines such qualities as comfort, reliability, safety and, most importantly, a low price for its class.
As in other VAZ models, domestically produced bearings are installed here. This material covers the nomenclature of these products used in cars, as well as their imported analogues (do not forget that Chinese bearing manufacturers, and, for example, the Vologda Bearing Plant (VBF), which is among For some reason, motorists are considered the standard of quality, although VAZ mainly uses bearings from the European Bearing Corporation (Volzhsky and Saratov Bearing Plants)).
List of bearings used in the Lada Granta car that can be easily replaced
To view information on a specific bearing, simply click on the number.
| Knot | Bearing number | Quantity | Imported analogue |
| Differential box (right and left supports) | 7207 | 2 | 30207 |
| Front wheel bearing | 256707 | 2 | — |
| Gearbox shaft bearing (rear support) | 180305 | 2 | 6305 2RS |
| Gearbox secondary shaft bearing | 464706 | 5 | K32x37x27 |
| Clutch release | 520806 | 1 | — |
| Rear wheel bearing | 256706 (ball - higher rotation speed) 537906 (roller - higher load capacity) | 2 | — |
| Transmission input shaft (front support) | 42205 | NJ205 | |
| Transmission output shaft (front support) | 42305 | NJ305 |
It should be noted that in the vehicle documentation, bearing numbers are often indicated with a lot of additional (and often long-outdated) letter designations, which you can ignore. The same applies to accuracy class 6. Nowadays, quality standards are implemented in such a way that bearings with a declared class 6 from one manufacturer can be an order of magnitude worse than the zero class of another.
AVTOVAZ’s developments do not stand still, and in 2013 the company’s management, together with the design department, decided to switch to a new type of cable-driven gearbox. These gearboxes are installed on Lada Granta and Kalina 2 cars.
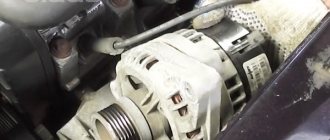
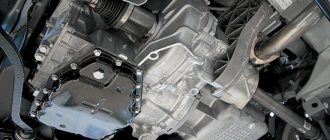
Appearance of the gearbox
Chapter 14 - Accounting for Donations and Grants
skip to content
- Study in Cambridge
- About the university
- Research at Cambridge
Search the site Home
- Study in Cambridge
- student courses
- application
- Events and open days
- Tariffs and finances
- Student blogs and videos
- Graduation Why Cambridge
- Qualification catalog
- How to apply
- Fees and funding
- Frequently asked questions questions
- International students
- Continuing Education
- Executive and vocational education
- Education courses
- About the university
- How the University and Colleges Work
- story
- University visit
- Term dates and calendars
- map
- For the media
- Video and audio
- Find an expert
- Publications
- Cambridge International
- News
- Events
- Public participation
- work
- Cottage in Cambridge
- Research at Cambridge
- For staff
- For current students
- For graduates
- For business
- Colleges and departments
- Libraries and amenities
- Museums and collections
- Email and phone search
- Home
- Policies and Procedures
- Financial procedures
Financial department
- House
- Personnel and Service Department Personnel and Service Department Overview
- Financial User Group (FUG)
- Pensions
- Client/Vendor Setup Client/Vendor Setup Overview
- Supplier configured
- Client setup
- Expense Claims Review
- Bureau of Financial Personnel Review
Staff Desk Reservation Form
- Tax overview
- Policies and Procedures Review
- Brexit Guidelines Review
- Review of financial provisions
- Review of financial procedures
- Budget planning
- Budget monitoring and management overview
- Monitoring and control of expenses by income overview
- Chapter 3 - Chart of Accounts Overview
- Section 2: Source of Funds Codes Overview
- Section 3: Transaction Code Overview
- Section 4: The Role of the Chart of Accounts in Report Review
- Chapter 4 - Overview of procurement procedures
Code of Ethics
- Code of Ethics Review Financial Compliance
- Procurement Cycle Overview
- EU Directives on public procurement
- Overview of import procedures
- Environmental Considerations Overview
- Disposal of excess equipment overview
- Chapter 5a - Employment Status Review
- Chapter 5b - Review of Costs and Benefits
- General expense accounting procedures
- University staff trips review
- Living expenses overview
- Expenses for non-employees
- Entertaining review
- Benefits Overview
- Chapter 6 - Overview of Non-Payment Expenses
- Processing supplier invoices
- Payment overview
- Overview of foreign currency transactions
- Overview of credit card procedures
- Chapter 7 - Cash and Banking Procedures
- Chapter 8a - Foreign Trade and Credit Control
- Overview of pre-sale procedures
- Sales Overview
- Debt Management Overview
- Chapter 8b - Internal Trade overview
- Chapter 9 - VAT and other taxes: overview
- Sales to EU members overview
- Sales to the rest of the world Overview
- Common mistakes in accounting for VAT on income
- Typical UK Shopping Review
- Duty Relief review
- A Quick Guide to Corporation Tax
- Chapter 10 - End of Manual Overview
.
Automatic transmission
“Automatic” was installed on the car of the Tolyatti Automobile Plant from July 2012 to March 2022 - this is 4 speed. Automatic transmission from Japanese manufacturer Jatco.
Grant's four-speed automatic transmission - model JF414E, classic type, with a torque converter; similar units are equipped in Nissan, Mitsubishi, and Suzuki passenger cars.
This type of transmission on Granta is paired only with the 98-horsepower VAZ-21126 power unit.
The gearbox is highly reliable; with careful operation and timely maintenance, it can run up to 200 thousand km.
It is necessary to replace the transmission fluid every 60 thousand km; the manufacturer recommends filling with Nissan branded ATF EJ-1 or Matic-S oil.
The quality of the Lada Granta automatic transmission does not cause any major complaints; if the transmission requires repair, it is mainly due to the fault of the driver:
- as a result of slipping, the clutches burn out;
- after overheating, gaskets and seals begin to leak;
- When you hit an obstacle, the automatic transmission pan breaks through, and then a thorough repair is definitely required.
Removing and installing the gearbox
Clutch housing fasteners to gearbox housing
If it is necessary to replace a component of a manual transmission on a Lada Kalina, you will need to remove the mechanism in question. The car is placed on a lift. Apply the parking brake and turn off the ignition. Then open the hood and disconnect the negative terminal from the battery. The oil filler cap is removed. Remove the screen and install the previous element. The fixation clamp is loosened. The inlet pipe hose is disconnected from the corresponding sensor. The air intake nut is unscrewed. The checkpoint is removed.
Upon completion of the repair work, the manual transmission is installed in its original place. CV joint grease-4 is applied in a thin layer to the outer surface of the corresponding clutch bushing. The finger fixing bolts are turned towards the steering knuckles. If the bolt nut that secures the left control arm is back toward the body bracket, then the last fastener is removed and the control arm is removed.
The oil from the manual transmission is drained into a container. The wheel drive is turned out of the gears of the differential axle shafts. In their place, the plugs are dismantled. The brackets for the rear and left suspension mounts are installed on the gearbox.
During the operation of a car, various malfunctions can occur; there are breakdowns that are most typical for each car model. On the Lada Kalina, car owners quite often encounter a problem - the reverse gear of the manual transmission does not engage, and when such a defect appears, many car owners are prepared for serious repairs. But breakdowns occur for various reasons; the fault can be caused by either a mechanical or an electrical part. In order not to do unnecessary work, you need to start looking for the defect that has arisen from the most basic one, maybe the wire is simply frayed, or there is a bad contact in the plug.
AVTOVAZ told how to get rid of the frequent knocking of the gearbox on LADA cars
The “fractional knock” defect appears in the area of the gearbox at idle in neutral gear; when the clutch is depressed, the knock disappears. To eliminate this gearbox problem at AVTOVAZ, a special technique was compiled, which was sent to the Lada.Online website by one of the site’s readers.
To eliminate the “fractional knock” defect, it is necessary
:
1. Place the car on a two-post lift, apply the parking brake, turn off the ignition, open the hood and disconnect the ground wire terminal (electro-hydraulic lift type P-3.2G with a lifting capacity of 3.2 tons, wrench 10).
2. Remove the gearbox in accordance with the requirements of the technological instructions for a specific car model (download for XRAY, Vesta, Largus, Granta, Kalina, Priora, Niva 4x4).
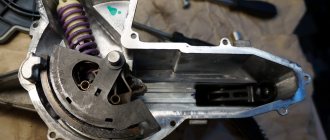
3. Make sure that there are two installation sleeves 2 on the cylinder block 1, Figure 1.
4. Make sure that the bushings are not damaged or deformed.
5. If one of the installation bushings is missing, it is necessary to install a new bushing on the cylinder block (a hammer with a plastic striker).
6. In case of deformation or destruction of the installation sleeve, it is necessary to carefully, without damaging the installation hole in the cylinder block, remove the damaged sleeve and install a new one (pliers, hammer).
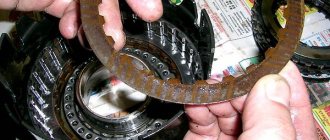
7. Remove the pressure 3 and driven 4 clutch discs in accordance with the requirements of the technological instructions for a specific car model.
8. Replace the clutch driven disc with a new one:
9. Install the clutch pressure and driven discs in accordance with the requirements of the technological instructions for a specific car model.
10. Install the gearbox on the transmission stand and bring it under the car (hydraulic transmission stand type ST-1 “GARO”).
11. Raise the supporting part of the transmission rack with the gearbox, insert the splined part of the input shaft into the splines of the driven clutch disk, carefully move the gearbox to the cylinder block and make sure that the installation bushings located on the cylinder block fit into the corresponding holes on the gearbox without deformation and destruction.
12. If the result is positive, install the gearbox in accordance with the requirements of the technological instructions for the specific car model. The AGO for the work performed should be filled out using defect code 1601130 096 000 “Transmission resonant noise, damper defect.”
13. If installing the gearbox on the engine without destroying and deforming the bushings is impossible, then it is necessary to agree on the repair method with the UOSOA by completing a “pre-approval” in the Lada-Garantiya information system.
14. Start the engine and make sure that the “fractional knock” defect is eliminated when the engine is idling and the gearbox is in neutral (exhaust coil with fan type SERF/SP from SovPlym).
Source
How to eliminate the howling of a VAZ box
The first thing you can do is contact the service center and request that the noise be eliminated as part of the warranty repair. This process is long, painstaking, requires patience and does not always end in victory. In most cases, the manufacturer claims that the sound during transmission operation is normal and the vehicle is not subject to warranty repair. But if the sound is very loud or the buyer is very persistent, the manufacturer suggests replacing the box. But, judging by the reviews of drivers who managed to replace the manual transmission under warranty, this does not always solve the problem. The fact is that a howling box is a manufacturing feature, not a defect, so whether it’s worth replacing it with exactly the same one is up to you to decide.
Modification of the clutch cable
Sometimes the noise is due to vibration transfer between the fork and the clutch cable. This problem can be solved with a simple modification that does not require financial investment. You need to remove the clutch cable from the fork, replace the standard rubber insert with a washer made of softer rubber, which dampens vibration well. The element is glued to a plastic part, which serves as a stop for the cable.
This method does not help everyone and will not allow you to achieve ideal silence, but it makes the unpleasant sound much quieter. In any case, it won't hurt to try to implement this simple modification.
Interior noise insulation
Another option is good sound insulation of the cabin. Of course, the howl of the box in this case will not go away, but it will be less audible. This event is expensive, but it will make the car more comfortable. If the performance of the transmission is not in doubt, and only noise is annoying, you can use this option.
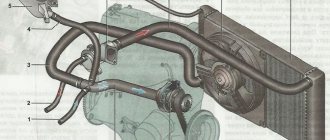
Do I need to add oil?
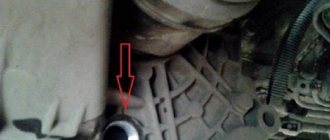
It is difficult to check the oil level in a cable-driven box; this model does not have a dipstick. The only way to do this is to unscrew the oil filler plug. If at the same time the oil begins to flow out slowly, then the level is normal; if not, it is better to top it up. In this case, it is imperative to use exactly the same technical fluid as already poured in the box.
To add oil to the maximum level, you need to jack up the car from the side where the oil filler neck is located and add oil until it begins to flow out. For convenience, it is better to use a syringe. As soon as the liquid flows out, the plug must be quickly tightened. If you do not raise the correct side of the car, the transmission fluid level will be low.
In some cases, this procedure helps get rid of the howling or makes the box a little quieter. Some motorists noted that they had to add about 0.5 liters of oil to the manual transmission. But in most cases, the procedure does not eliminate the howling problem.
Does oil quality affect transmission noise?
At the factory, manual transmission 2181 is filled with budget oil of dubious quality. Many people prefer to replace it immediately. This not only makes the transmission quieter, but also extends its life. Does changing the oil eliminate the noise? In some cases, this procedure can improve the situation somewhat, but it is not a panacea. In most cases the box continues to howl.
What to do?
Unfortunately, there is no clear solution to the problem today. We can only wait for AvtoVAZ to find an opportunity to update equipment and improve technology. If you are planning to purchase a domestic car and silence in the cabin is important to you, abandon the mechanics in favor of, for example, a robotic transmission, which some models are equipped with.
In fact, the howl of a manual transmission is not so critical as to cause serious discomfort for the driver and passengers. It’s just that many, having heard a third-party sound, begin to doubt the serviceability of the unit, and when they learn that this is just a feature of a particular model, they calm down.
If you are planning to buy a Granta, Kalina or Vesta with a manual transmission, you should know that a howling gearbox is not a myth, but a reality that many owners of these cars face. It's up to you to make a purchase or look at a car of another brand.
Manual transmission 2181 with cable drive
Clutch cable location on manual transmission 2181
Checking the oil level in the gearbox
edit this post
Automatic transmission hums when accelerating
Sometimes the car makes unpleasant sounds when starting to move. Perhaps it's the automatic transmission whining. It starts making noise when shifting into third gear or at a speed of 60 km/h. With further acceleration, the unpleasant noise intensifies. After reaching a certain speed (80-90 km/h), the sound from under the hood subsides. If you stop pressing on the gas, the sound will no longer appear, but further acceleration will provoke its appearance again.
Replacing the rear gearbox can solve this problem. It is also worth inspecting the rear brake discs. You need to check the back side (where the brake cylinder is located). Rusty deposits may accumulate on the discs. If their width is more than 1 centimeter and they are over the entire surface, this may cause extraneous noise. The problem is solved by cleaning the inside of the disks.
Replacing Grant cable gearbox bearings without removal — search on DRIVE2
Replacement of rear bearings of gearbox 2181 - Lada Granta.
Review from the owner of Lada Grant
- with your own hands.
I decided to carry out the repair by removing the box
, because I wanted...
I decided to carry out the repair by removing the box
, since I also wanted to solve the issue of a dry splined primary shaft, and at the same time look at the condition.
Replacing the Grant clutch. — Lada Granta, 1.6 l., 2013.
Granta
normal, engine 186, gearbox
2181, mileage 31t. with kopecks, 3 years like from the assembly line.
10, unscrew the lower flywheel screen (three bolts with a key *10*) last, before removing the box
, so this bolt (see photo below) is not convenient to unscrew and the screen itself.
How to change the oil in an X-ray with flushing the engine:
- 1. Warm up the engine, drain the old oil and wait about half an hour until the remainder is added.
- 2. Start the engine without oil and let it run for one and a half minutes at idle speed.
- 3. Fill in the flushing oil, install a new filter and run the engine in the flushing oil at idle speed for 20 minutes.
- 4. Drain the flush as in the first point, fill in one and a half liters of new oil. Let the engine run for one and a half minutes at idle speed.
- 5. Drain everything again and wait half an hour until the remainder is added. Remove and discard the used filter.
- 6. Install a new filter and fill in the required amount of new oil.
You can use a car.
Description of transmission
Below we will consider the most important indicators that affect the operation of the car:
- the gear ratio for the VAZ 21807 shows figures of 3.94, for the French analogue this figure is slightly lower - 3.87;
- with this transmission, the Lada Vesta accelerates to one hundred in 10.2 seconds, which is a second faster than the JH3 - 11.2;
- the maximum speed for the VAZ 21807 is 188 km/h, for the JH3 the figure is 178;
- The fuel consumption of Lada Vesta with a domestic gearbox is 7.5 liters, the French gearbox consumes 7 liters.
Manual transmission
The most important thing the engineers worked on was modifying the transmission tooth profile. They took an example from European models, where the noise of the gearbox should merge during downshifts with the roar of the engine
Lada Vesta designers applied new developments, improving the entire system and adjusting its balance.
Do I need to add oil?
It is difficult to check the oil level in a cable-driven box; this model does not have a dipstick. The only way to do this is to unscrew the oil filler plug. If at the same time the oil begins to flow out slowly, then the level is normal; if not, it is better to top it up. In this case, it is imperative to use exactly the same technical fluid as already poured in the box.
To add oil to the maximum level, you need to jack up the car from the side where the oil filler neck is located and add oil until it begins to flow out. For convenience, it is better to use a syringe. As soon as the liquid flows out, the plug must be quickly tightened. If you do not raise the correct side of the car, the transmission fluid level will be low.
In some cases, this procedure helps get rid of the howling or makes the box a little quieter. Some motorists noted that they had to add about 0.5 liters of oil to the manual transmission. But in most cases, the procedure does not eliminate the howling problem.
Replacing fluid in automatic transmission robot Lada Vesta
We drive 5-10 km; We fix Vesta on an overpass, inspection hole or lift; We remove the technological hole or protection of the vehicle’s internal combustion engine; We disconnect the battery terminals, the clamps of the air pipes, and remove the air filter to the side; We unscrew the transmission fluid control plug of the car’s automatic transmission; We take a container for old oil with a volume of more than 2.5 liters; Using a size 8 square wrench, unscrew the drain plug with the rubber seal; We drain the liquid completely, to do this you should wait a little; Screw the plug into the drain hole; Using a clean 20 mm long hose and a funnel, pour transmission oil to the lower mark of the Vesta control window
Please note that the lubricant that is poured into the Lada robot is different from the mechanics; We install the level control plug in place; We assemble the attachments and put the car engine protection in place.
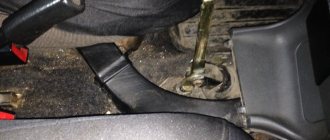
Couplers and spring
In this case, there is no need to go into the engine compartment. This troubleshooting option was proposed by another member of the DRIVE2 community named Roman, who is known there under the nickname Roy04.
First, he dismantled the lining of the central tunnel to gain access to the mechanisms. After examination, it was determined that the sounds were coming from 3 points.
Further, after a test drive with the tunnel removed, it turned out that this was not the cause, but only its consequence. It's all about the design of the Lada Vesta transmission. Due to the design features, when driving at speed III, vibration occurs in the gearshift mechanism, which is directly on the transmission (under the hood). And from behind the scenes the cable vibrates and moves longitudinally.
There are no devices for damping these vibrations, but you can make your own “counterweight”, from scrap materials. To do this, you can use plastic clamps and a spring, for example, from a figure eight carburetor.
With the help of clamps, the rigidity of the components that make sounds is increased, and the spring guarantees tension on the manual transmission handle itself.
As a rule, after such modifications, crackling and clicking noises in the manual transmission of the Lada Vesta disappear.
In mid-2016, AvtoVAZ officially abandoned the use of manual transmissions from the French manufacturer Renault. The reason is the high cost of the “product” and the lack of a base for maintenance.
If domestic gearboxes cost 20–25 thousand rubles, then imported ones reached 45–50 thousand. Obviously, such a rise in price automatically increased the cost of the car as a whole. Perhaps because of this factor, many car enthusiasts preferred a model with a classic automatic or robotic option.
However, there are those who claim that the quality of production of domestic new mechanics (21087) is inadequate. They are ready to pay an additional 30,000 rubles for the French version. Let's compare the Renault JH3 (JR5) manual transmission and the VAZ 21087 manual transmission.
Driven clutch disc.
The play between it and the disk itself was unacceptably large. The hub was gradually gnawing on the seat and indistinctly announced this with knocks. A little more - and the Pajero would have stood in the middle of the road.
In conclusion, let me remind you the following. On modern cars, manual clutch adjustment is not provided. If during acceleration the tachometer goes off scale and the car accelerates sluggishly, the clutch must be changed immediately. It’s different with a domestic product. It is not very convenient that here you have to more often monitor the free play of the pedal and manually adjust it. But if the first signs of slipping appear, but there is still something to regulate, then you can drive for a while.
This was easier on older cars with a hydraulic clutch: as its discs wore out, the free play of the pedal decreased, and the force on it increased. The basket disk pressed the driven disk against the flywheel weaker. But as long as it was possible to maintain the required clearance in the drive, the car drove. And on modern front-wheel drive VAZ cars, for example, the drive is cable-driven, without any backlash. The gradual rise of the pedal warns of clutch wear - it becomes higher than the brake pedal. To prevent slipping, you need to adjust the cable by lowering the clutch pedal to the level of the brake pedal.
It is worth remembering that the clutch of these cars “dies” very quickly in case of slipping! People often ask: why does a car, especially a hot one, shake when starting? A common cause is a misalignment of the pressure plate diaphragm spring. For this reason, it does not grab with the entire working surface, breaks down, grabs again - until the clutch is fully engaged, it shakes the entire car. Because of this, the spring petals may break. And with strong heating, the diaphragm spring often warps, changing shape. The result will be the same. Such defects cannot be treated; the clutch will have to be replaced.
Oil additives: is it possible to do without repairs?
If changing the oil does not help, the gearbox howls, then it is necessary to repair the unit. Many people can talk about adding additives, but this does not help in 80 percent of cases. According to reviews from many motorists, adding additives can only temporarily or not completely muffle the sound, but will not completely solve the problem.
Chemically active substances contained in revitalizant additives form a cermet layer on the surface of worn gears and bearings, which, according to the manufacturer, restores the geometry of the parts and compensates for wear. Of course, if the howl of the gearbox is barely noticeable, it has just begun, then adding, for example, Hado, may well delay the problem with repairing the gearbox. But it may not help if the problem is already old and the wear on the unit components is significant. Then repairs are definitely needed.
What noise additives are best to use?
There are many additives to eliminate noise. Manufacturers promise that their use will increase the service life of the mechanism and ensure smoother operation of the automatic transmission. Let's highlight the following additives:
- ATF Additive. Slows down oil oxidation and restores the performance of rubber seals. At the same time, it cleans the valve body channels and forms a protective film on the parts. This leads to a reduction or complete elimination of extraneous noise. According to the manufacturer, the additive increases the service life of the automatic transmission. The product consists of the same components as the oil, only their concentration is increased several times.
- EX120. This additive prevents early wear of the automatic transmission and protects rubbing parts. Its use helps eliminate extraneous noise. In addition, the geometric parameters of worn parts are partially restored due to the formation of a special metal-ceramic film on the metal surface. The product can be used in all types of transmissions and mixed with any oil. This revitalizant does not enter into a chemical reaction, which means it does not cause changes in the viscosity and other parameters of the working mixture.
The appearance of extraneous noise in the automatic transmission area is a reason to diagnose and repair the mechanism. A normally operating automatic transmission never hums or makes a grinding noise; it emits only a uniform, monotonous sound. The presence of noise is a sign of a malfunction that can occur both in the selector and in the working part of the mechanism.
Any gear transmission makes noise during operation. Under normal conditions, its level is low and is almost completely absorbed by the walls of the gearbox housing. If the VAZ 2109 gearbox howls, then this indicates problems in its functioning.
Why does the box howl and make noise?
If you have a mechanic
Gears shift poorly in a car with a manual transmission for three reasons. The first of these is a malfunction of the clutch when it does not completely disengage (drive). The first sign of this malfunction is that the reverse gear is engaged with a characteristic crash. The rear one reacts to this anomaly more noticeably than other gears, because it is the only one not equipped with a synchronizer.
The second reason is a defect in the gear selection mechanism of the gearbox. And finally, the third is excessive wear of the gearbox synchronizers.
There are also several clutch malfunctions in which manual transmission gears shift poorly:
- Air in the clutch release hydraulic drive or fluid leakage from it. The malfunction is eliminated by replacing failed components of the hydraulic system and pumping it.
- Worn or broken clutch release fork. The part requires replacement or repair.
- Warping (runout greater than 0.5 mm) or too thick new driven disk.
- Failure of the basket (temperature deformation of the pressure plate or its distortion).
- Loss of mobility of the support bearing of the gearbox input shaft (at the end of the crankshaft to which the flywheel is attached).
- Jamming of the clutch driven disc hub on the splines of the gearbox input shaft. To eliminate the defect, clean the splines of the gearbox hub and input shaft. It wouldn’t hurt to lubricate them a little with lithol.
- There is too much free play in the clutch release fork. Its value needs to be clarified with the manufacturer, since it is slightly different for different cars. Until you find out the value of this parameter for your car, set it from 5 to 8 mm. Too little free play of the fork is also undesirable, as it leads to clutch slipping and increased wear of the release bearing.
Excessive wear of synchronizers mainly occurs in those gears that are engaged more often: these are usually first, second and third. The rear one is not included in this list because it does not have a synchronizer. When your gear shifts poorly, and you assume that the reason for this is wear of the synchronizers, firstly, you should only have difficulties with this while driving. Secondly, in this case it switches better if you use double squeeze.
For those who don’t know what double squeeze is. To shift to a higher gear: depress the clutch, engage neutral, release and depress the clutch again, engage the gear.
Backlash in the so-called “helicopter” is one of the reasons for unclear gear shifting
To switch to a lower gear: double squeezing must be combined with re-engaging, that is, when the clutch pedal is released and the gearbox is in neutral, you need to press and release the accelerator pedal. This is how gears are changed in cars that do not have synchronizers. If the gearbox shifts easier using double squeezing, then the culprit for poor gear shifting is most likely worn synchronizers.
Look for damage or check that it is adjusted correctly. Don't even think about the clutch and synchronizers.
Manual transmission 2181
Unlike its predecessor, the new gearbox has received a lot of innovations. This box was the first for AvtoVAZ to undergo computer modeling; a similar approach to production and engineering made it possible to optimize the design and make it more reliable. The oil sump of the new gearbox has changed from 3.3 liters to 2.2 liters and the oil used is not outdated “mineral water”, but good “semi-synthetic” whose service life is designed for the entire life of the car, namely 5 years or 200 thousand kilometers .
But, undoubtedly, the most important and significant change was the introduction of gear shift cables instead of metal rods. This solution made it possible to completely remove vibration from the gearshift lever, qualitatively increase the clarity of gear engagement and their selectivity, and reduce the lever strokes.
The filling of the new box has also changed. The gear part, namely the primary and secondary shafts, remained unchanged; new multi-cone synchronizers were introduced in first and second gears. Unlike classic synchronizers, the new type of synchronizers are much more reliable, and since, according to statistics, the first and second gears are the most loaded, this solution made it possible to increase the reliability parameter of the new unit. Also, synchronizers of this design simplify gear shifting, making it even smoother. In addition, the car plant’s plans include installing this gearbox on more powerful engines, which means a clutch with a larger diameter is required. Unlike its predecessor, the new clutch has a size of 215mm (approx. It was 200mm), this entailed changing the clutch housing and relocating the starter.
The next change will be especially noticeable at subzero temperatures. In old-type boxes, the gear selection mechanism was located at the bottom and was in oil. When the temperature dropped below zero, the oil thickened and engaging gears until the oil warmed up was difficult. In the new model gearbox, the gear selection mechanism is a separate module located outside the gearbox - this solution made it possible to get rid of the problem of difficult shifts in cold weather during the first kilometers of the journey, and also in the future greatly simplifies the process of repairing and servicing the gearbox. There is protection against erroneous engagement of reverse gear, which can only be engaged in neutral.
Through an integrated approach to the development of a new gearbox, engineers managed to achieve a level of gearbox operation no worse than that of competitors in the price segment. AvtoVAZ plans to introduce multi-cone synchronizers in third gear, as well as switch to a hydraulic clutch drive.
Finalization
Purpose: install a gasket between the clutch cable and the gearbox fork
Procedure:
- Remove the clutch cable end from the fork.
- Unscrew the cable end, having previously measured the length of the free threads.
- Remove the clutch cable boot.
- Remove the rubber insert from the cable stop (photo No. 1).
- Instead, install a round washer made of porous rubber (diameter 32-35 mm, hole 12-13 mm) (photo 2).
- Cut a piece of rubber measuring 20x70 mm, 2.5-3 mm thick.
- Glue it (for example, with “Moment” glue) to the plastic cable stop (one turn), secure with electrical tape 1.5 turns.
- Insert the cable into the bracket on the gearbox and put on the boot.
- Screw on the tip, leaving a couple of millimeters less free threads on the stud (since the new gasket is thicker than the factory part).
- Place a 2 mm foam rubber spacer between the cable tip and the fork lever.
- Adjust the clutch pedal.
As a result: the effect was noticeable immediately. Now the rattling can only be heard with the windows open. After modifying the clutch cable fastening, the car drove more than 15 thousand km, the gearbox noise was within normal limits. Increased vibrations and noise are noticed only at a temperature of -20 o C, when the rubber gaskets become hard. The author has posted sound files (engine acceleration-braking mode at 1500-2000 rpm in 3rd gear), which shows what the noise was from the gearbox before and after modification. Site users can download the file:
To download files you need to log in to the site To download files you need to log in to the site
On foreign cars, increased clutch cable vibrations are dealt with using a special weight (Renault Logan cable). You can repeat the foreign experience in a garage, for example, wrap a bitumen ball around the cable sheath (taken from a vibration damper).
Let us remind you that owners of Lada Granta, Kalina and Priora cars also encounter clicks in the clutch pedal.
Replacement
Despite the simplicity of this operation, replacing the cables of the Kalina 2 gearbox must proceed strictly according to plan. Any violation not only complicates the process, but also often leads to unpleasant consequences. If you don't put the car on the handbrake or don't support the wheels, it can run over your leg and injure your foot.
If you do not disconnect the battery, careless movement of any metal object may cause a short circuit and damage the wiring or some electrical components. Let's look at how to remove the Kalina transmission cables and then install new parts in their place
Preparation
On the Lada Kalina, replacing gearbox cables begins with choosing a location for this operation. You need a flat, well-lit area without drafts (yard or garage). You will need cables (AvtoVAZ article number (OEM) 219011703113, price 2.5–5.5 thousand rubles per set) and the following tools:
- key to 10;
- Phillips and flat screwdrivers;
- puller (open-end wrench size 13, the arms of which are ground with a cone to a thickness of 0.5–1 mm).
Having chosen a site, put the car on the handbrake. If for some reason it does not work, support the rear wheels with wheel chocks or bricks. Otherwise, on Kalina 2, replacing the gearbox cables can lead to serious troubles.
Removal
Replacing Kalina gearbox cables begins with removing these parts. You will have to perform a number of works under the hood and inside the car in very inconvenient places. Therefore, you will need an assistant with dexterous hands who is not afraid of dirty work.
Replacing cables for the Lada Kalina gearbox
Actions under the hood
After placing the machine on the site and opening the hood, proceed as follows:
- Disconnect both terminals of the battery using a 10 mm wrench, then remove it and place it next to the car.
- Disconnect the air filter pipe from the engine by loosening the clamp using a Phillips screwdriver.
- Remove the air filter housing (there is no need to disassemble it as when replacing the filter element). To do this, use your fingers to release its fastenings from their seats on the body.
- Use a puller to pry up the cable tips so that they come off their pins. If you don’t have a puller, you can do this with a flat-head screwdriver or even your fingers.
- Pull the cable clamps out of their seats.
After disconnecting the drive elements from the pedals, pull them out through the engine compartment.
Activities in the salon
To ensure that the Lada Kalina 2 gearbox cables are removed normally, do the following in the cabin:
- Remove the handbrake pad, the cover covering the gear selector (plastic tunnel or console with cup holders) and the side ventilation panels next to the tunnel. All you need is a Phillips screwdriver.
- If you cannot remove the console, unscrew the bolts securing the handbrake lever, then move it to the side.
- Unclip the ends of both cables, then remove the clips holding them from their seats.
All that remains is to remove the plastic clip that secures both parts to the car body.
Installation
Replacing Lada Kalina gearbox cables is not only the removal of old ones, but also the installation of new parts, but in the reverse order. Consider a few important points:
- To ensure proper orientation of each cable, insert them with the arrow on the rubber seal facing up.
- If you can’t get them into the cabin, disconnect the oxygen sensor wire (lambda probe), and reconnect after installing new elements.
- If even the removed wire does not help, then hang up the left front side of the car, then support it with a safety stop and push the parts into the interior from under the car.
Having inserted the cables into the interior, perform the same steps as during dismantling, but in reverse order.
How to eliminate the howling of a VAZ box
The first thing you can do is contact the service center and request that the noise be eliminated as part of the warranty repair. This process is long, painstaking, requires patience and does not always end in victory. In most cases, the manufacturer claims that the sound during transmission operation is normal and the vehicle is not subject to warranty repair. But if the sound is very loud or the buyer is very persistent, the manufacturer suggests replacing the box. But, judging by the reviews of drivers who managed to replace the manual transmission under warranty, this does not always solve the problem. The fact is that a howling box is a manufacturing feature, not a defect, so whether it’s worth replacing it with exactly the same one is up to you to decide.
Modification of the clutch cable
Sometimes the noise is due to vibration transfer between the fork and the clutch cable. This problem can be solved with a simple modification that does not require financial investment. You need to remove the clutch cable from the fork, replace the standard rubber insert with a washer made of softer rubber, which dampens vibration well. The element is glued to a plastic part, which serves as a stop for the cable.
This method does not help everyone and will not allow you to achieve ideal silence, but it makes the unpleasant sound much quieter. In any case, it won't hurt to try to implement this simple modification.
Interior noise insulation
Another option is good sound insulation of the cabin. Of course, the howl of the box in this case will not go away, but it will be less audible. This event is expensive, but it will make the car more comfortable. If the performance of the transmission is not in doubt, and only noise is annoying, you can use this option.
Do I need to add oil?
It is difficult to check the oil level in a cable-driven box; this model does not have a dipstick. The only way to do this is to unscrew the oil filler plug. If at the same time the oil begins to flow out slowly, then the level is normal; if not, it is better to top it up. In this case, it is imperative to use exactly the same technical fluid as already poured in the box.
To add oil to the maximum level, you need to jack up the car from the side where the oil filler neck is located and add oil until it begins to flow out. For convenience, it is better to use a syringe. As soon as the liquid flows out, the plug must be quickly tightened. If you do not raise the correct side of the car, the transmission fluid level will be low.
In some cases, this procedure helps get rid of the howling or makes the box a little quieter. Some motorists noted that they had to add about 0.5 liters of oil to the manual transmission. But in most cases, the procedure does not eliminate the howling problem.
Does oil quality affect transmission noise?
At the factory, manual transmission 2181 is filled with budget oil of dubious quality. Many people prefer to replace it immediately. This not only makes the transmission quieter, but also extends its life. Does changing the oil eliminate the noise? In some cases, this procedure can improve the situation somewhat, but it is not a panacea. In most cases the box continues to howl.