Installation in Lada Priora 2
Priora 2 cars are equipped with a standard 1 DIN size radio with a trapezoidal front part. The display is located on the top of the instrument panel, which makes it easier to read information.
Basic configurations were not equipped with a head unit; plastic plugs were installed on the central part of the instrument panel.
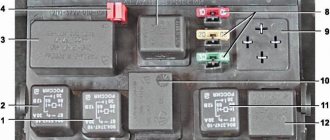
The instrument panel has a standard harness for connecting the radio, equipped with an ISO connector consisting of two plugs.
Self-installation of the radio on Priora 2 includes several stages:
- Unscrew a couple of screws located under the removable rubber mat in the niche for small items.
- Remove the decorative leather cover of the gear selector knob, under which there are 3 additional screws for a Phillips screwdriver.
- Remove the lower part of the center console; the gear shift knob remains in its original place.
- Unscrew a pair of screws located under the climate control unit.
- Use a spatula to pry and remove the 2 covers located above the button block and under the standard place for the radio.
- Unscrew the remaining 4 screws and pull the front panel towards you.
- After this, it is necessary to modify the panel or mount the equipment in a standard window and make adjustments.
The radio installed on the Priora must be connected through the ignition switch, which allows you to save settings and guarantees that the equipment is turned off after removing the key. It is necessary to modify the standard plugs by supplying additional power from the buttons in the instrument panel.
Why the radio doesn’t pick up well in the car - what’s the matter?
Possible mechanical or technical damage may result from a breakdown of the antenna, contacts or the radio itself. Diagnostics of these elements will help identify the cause of the signal malfunction.
If the car has an external antenna, it is likely that it is damaged. Another reason related to the antenna is its poor connection to the radio. If the accessory has visually visible signs of damage, the receiver must be replaced with a new one.
Sometimes drivers install an additional radio signal amplifier on their vehicle.
Among the most common reasons for poor radio performance is a faulty, or more often outdated, radio tape recorder. Therefore, when buying a car, we recommend replacing this equipment first.
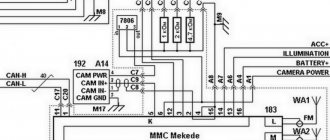
Alternative radio menu (MMC) Lada Granta
What is the difference:
- The previously used NK has been fixed - unnecessary lines from the registry have been removed, due to which bluetooth and radio did not work correctly in the standard shell.
- Added a convenient on-screen keyboard and call it from some programs.
- Added the ability to configure a 3G modem and create a connection directly from the menu, bypassing the desktop and Explorer.
- Added Opera browser with automatic connection to the Internet.
- Added the ability to configure the GPS receiver.
(archive password: club-lada.rf).
Next, how to replace the stock firmware with a modified one..
Features of installing a radio on a Lada Priora
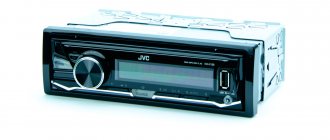
As a rule, installing a radio on a Priora involves several types of audio players:
2 DIN media player for LADA Priora
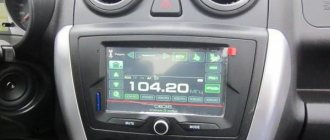
These designations indicate the dimensions of the hole for installing the radio, which correspond to the dimensions 180x50x160 mm for 1 DIN and 180x100x160 mm for 2 DIN. If you want to install a more modern version of a 2 DIN radio, the car owner will have to carry out the procedure of sawing the partitions of the front console of the car in order to widen the hole for the player. In some cases, to adjust the dimensions, it becomes necessary to cut out or purchase an appropriate transition frame for the console, which is much more difficult than installing 1 DIN.
If you nevertheless decide to install a 2 DIN system, then it is best to entrust the installation work to an experienced specialist, otherwise there is a risk of damaging both the console itself and the car interior trim.
It should also be noted that 2 DIN standard radios have an extensive range of functions:
- long service life thanks to shock-resistant housing;
- paired amplifiers increase signal reception several times;
- the ability to switch the frequency of the radio signal by all passengers in the car thanks to the Music Zone system;
- function of built-in radio navigator;
- built-in USB connector allows you to connect external devices to view and play files;
- the presence of a bass amplifier for music for higher quality sound.
Built-in USB port and amplifier outputs
Manual for the Priora head unit
For those who are still trying to approach the discussion of the standard head units of cars produced by AVTOVAZ without bias, we are posting the manual on the radio of the Priora car. And along the way, we would like to note the fairly high quality of the device and great functionality. Of all the complaints against it on all kinds of forums (often completely unfounded, according to the principle - they can’t do anything good here, because everyone can’t.), only one can really be presented - the weak power of the built-in amplifier, but all manufacturers are guilty of this, except perhaps Pioneer and JVS. But you can't please everyone! For those who need louder volume, please install an amplifier, since there are linear outputs on the device. Otherwise, it's an excellent device. There are not enough settings, namely sound settings, so excuse me, it is not tailored for music lovers, but for ordinary users. For now, we are posting the instructions in the form of scans.
To enlarge the photo, click on the picture.
I would like to start by telling you why everything happened and for what purpose.
My father took the car, a Priora Universal, such a white one, absolutely beautiful) They called it the White Wagon. They have always been not indifferent to music, especially high-quality music, and they also like to watch TV, on the road, for example, or when going out into nature. Therefore, the question arose: Will a full-time GI be suitable for all these needs?
, from which several specific questions arise: -is there a linear output, outputs? -Are there linear inputs? (for example, put the sound from the TV there)
I want to dedicate this entry to these questions, as well as a more or less detailed disassembly of the State University. Let's begin...
What we have:
Standard GU, included in the luxury configuration.
A wide list of functions, design to match the interior of the cabin and much more... but these are the normal
(i.e. tulips) linear outputs front-rear, linear input (popularly AUX) are absent in this radio. Instead, the standardized miniISO connector:
After searching for a long time, I found this picture:
Much of it is true, but not all
! I thought, looked, walked around the State University. I was sure that there were 4 linear outputs, but AUX, its presence wasn’t very good. For some reason, they made a separate Navi item in the menu of this radio, as I understand it, it turns on the sound from the navigator, namely voice instructions. And as luck would have it, contact 11 did not respond in any way to the change in capacitance - no background or noise was heard.
It was decided to disassemble the GU piece by piece, from the inside, so to speak) Let's go!
Remove the top cover - one screw, on the left
Remove the mask - panel. 4 screws - 2 on top, 2 on bottom. Carefully bend the latches on the sides, there are also 4 of them. Carefully pull out the mask - it is on pins PLS
Remove the disk drive - 2 screws on top, 2 on the front under the front mask, just below the disk receiving window:
The guts of the State University opened before us:
Well, the long-awaited miniISO connector, view from the inside)
As you can see, part of the connector - the changer control - is not soldered at all, the linear input is not in its place - it is a group of 7-8-9 contacts. Well, the linear outputs are as expected according to the pinout, all the same 1-2-3-4-5. Well, we figured it out) all that’s left is to try it! Unfortunately, I never managed to launch the linear input ((And I abandoned this idea...
But there is also something interesting: 1) This wedge protects you from shorting the contacts of the miniISO connector to the housing!
2) Sound amplifier - TB2929HQ - hence the quality (((
3) And finally! Who said that this is the Urals? The label says Delta, and on the board there is a mysterious XG9822. Well, as a culmination, the search engine pleases us with the result:
and there are a lot of Chinese squiggles...
So here it is... As always, AvtoVAZ screwed up! As they say, rather than treating something like this, it’s better to make something new! Although for those who don’t give a damn about the sound in the car, this Mayfun will do just fine))
I hope the article will help someone, or just satisfy someone’s interest))
Why is the car radio always hissing?
Many car owners are faced with a very unpleasant problem when, while listening to music on a radio station, various sound distortions occur - noise, wheezing, interference, etc. This makes you wonder why the radio hisses in the car, the signal is poorly received, and how to correct the situation.
A simple radio malfunction - incorrect settings. Some people use automatic frequency search in the car, others use manual search; it is enough to save them in the device’s memory.
The signal may deteriorate if the radio station is far away or the vehicle passes a source of electromagnetic interference. Here we can only advise you to change the location to a more accessible one.
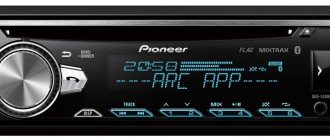
LADA Priora/Lada Priora: Standard audio device (radio tape recorder)
Due to numerous requests, I hasten to tell you about the standard Priora tape recorder Yes, yes, you heard right, such a thing exists
I’ll say right away that this 1Din device with a false panel has the following characteristics: reads CD/MP3, is equipped with USB, two-channel output, has built-in BlueTooth and is equipped with an LCD display
By the way, one of the advantages of this device is that it fits well into the overall interior of the car.
First, let's go over the quick buttons: ST - stereo/mono switching. BAND - switching bands. AF—turn on/off the mode for receiving alternative frequencies when receiving RDS stations. TA—turn on the traffic information standby mode. PTY—select the program type when receiving RDS stations. SCN - scanning during playback. RPT - repeat song/disc (folder) SHF - shuffle =) MODE - switch modes. AS/PS - auto scanning and memorization of memorized stations, selection of tracks. SCAN - scanning stations. DISP - options for displaying information on the display. EQ—switch equalizer presets.
Well, the radio is like a radio. Ranges FM1-FM3, ORT and MW1-MW2. There is auto and manual tuning, auto scanning with memorization, review of memorized stations, as well as a choice of stereo/mono modes. There is also a mode for receiving RDS stations, searching and waiting for traffic information to be received, searching for stations based on the type of programs being transmitted, as well as searching for alternative frequencies.
What we have: Reads Audio, MP3 and WMA CD(R, RW)... Everything is as usual: switching between tracks, rewinding, repeating a track/disc, shuffling, moving 10 tracks forward/backward and scanning the disc. It is also possible to select a track by number or by file name (only for MP3, it seems) + select a folder on an MP3 disk.
Do-it-yourself installation of a radio in a Lada Priora
In the first case, we consider the installation of a 1 DIN type audio player, which does not involve changing the shape and parameters of the plastic base of the console. Before installation, turn off the power to the vehicle by disconnecting the negative terminal of the battery.
It is recommended to divide the installation process of a standard audio player into several stages in the following sequence:
- 1. Preparing the hole for installation. To do this, remove the plastic cover covering the niche provided by the manufacturer for installing the audio player;
- 2. Determination of connectors for connection. In the hole for installing the audio player there are several sockets: for power connections in gray and for speakers in brown;
- 3. Connecting the player to car connectors. If the connectors of the audio player and the machine comply with the ISO standard, it is necessary to make the connection according to the diagram or through an adapter;
- 4. Installing the radio in the standard hole. Remove the magnetic frame and install the housing into the standard hole in the car console. When locked correctly, there will be a slight click;
- 5. Activate the player by pressing the “Reset” button.
Installing an audio player of type 2 DIN is more labor-intensive due to the formation of the appropriate hole size in the Priora console. The installation process is similar to the 1 DIN installation system, the connection is made according to the same principle.