Let's say you installed fog lights and you need to figure out the connection. I hope we can help with this, there is nothing complicated in this situation.
First of all you need:
- minimal knowledge in electrical engineering (find +12v and ground);
- tools - knife, wire cutters, pliers, terminal block;
- consumables: blue electrical tape, heat shrink of suitable diameter, plastic clamps, automotive corrugation, mass and connecting terminals.
Select appropriate basic materials:
- 2-wire wire with a cross-section of 1.5 mm2 – approx. 6m;
- power relay with connector (regular light relay from VAZ 2108) - 1 piece;
- remote fuse 30A - 1 piece;
- power button (design to choose from, preferably backlit);
- connectors for fog lights (if not) - 2 pcs.
Now that everything is ready, let’s assemble such a circuit, Fig. 1.
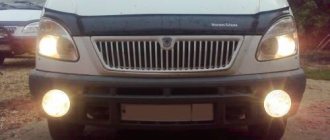
Features of installing fog lights
Before purchasing fog lights, the car owner should decide where to install them on the car. Many foreign cars have special niches in the front bumper designed for installing additional optics. Accordingly, the motorist needs to select suitable fog lights for these shapes and sizes.
Some fans of SUVs mount additional lights at the level with standard optics or on the roof of the car. In this case, PTFs of any size and shape are suitable. It is important that the kit includes suitable brackets to securely mount them.
In addition to the fog lights themselves, you need to purchase some additional materials for their installation in a store or market:
- electric wires,
- terminals for connecting wires,
- button or knob for turning on the fog lights,
- fuse 20-30 A,
- four-pin relay.
Preparation for installing PTF on a car
Do-it-yourself installation of fog lights is possible with minimal knowledge of physics and the ability to hold a screwdriver and wrenches in your hands. In this case, it is best to work in a garage equipped with an inspection hole. The motorist must be patient and carry out the work without haste, strictly following the installation instructions. Before starting work, it is better to read the manufacturer’s recommendations and find an electrical diagram for your car.
If the car owner “has his hands in the wrong place,” then it is better to entrust this work to an automobile electrician. This way you can avoid additional complications and breakdowns.
Wiring diagram for fog lights
Fog lights can be connected in a car in different ways, the principle of operation will be approximately the same. The most popular is the connection diagram for fog lights via a relay (see the video above). In this case, you need to pay attention to the PTF markings; if they indicate the installation side (left or right), then it is important not to confuse them.
Almost all foreign cars have electrical preparation for installing fog lights. To verify this, you need to look at the fuse box. If it has free relay terminals labeled “fog lamp relay,” then the preparation has been completed by the manufacturer. And under the bumper, most likely, you can find wires with terminals for connecting the PTF. The work of installing fog lights in such a car will be greatly simplified.
Which fog lights are better for Granta: Kirzhach or Bosch
In more expensive trim levels, the Lada Granta is equipped from the factory with a set of fog lights produced by Avtosvet LLC, Kirzhach. Judging by the reviews of the owners, they work well. There is also a set produced in Tolyatti, which was also equipped with factory cars. Its catalog number is 2190-3743010 and 2190-3743011. The average price of good domestic fog lights is about 40-50 dollars.
What is included in the PTF Grant kit
The PTF kit for Granta includes:
- Fog light relay.
- Connecting wires complete with connectors.
- PTF power button.
- About three meters of corrugation.
- Fog lights.
In some cases, you will have to purchase additional inserts for the front bumper, matching the body color, or unpainted. On sedans, as a rule, there are no inserts and you have to cut the holes for the foglights yourself.
Bosch, Kirzhach, or SE?
There are a lot of opinions on choosing the best fog lights for Granta. As a rule, the public does not have much trust in inexpensive Chinese brands, of which there are also plenty on the market. They are preferred by PTF LLC Avtosvet (Kirzhach) and Ryazan Bosch. There is an opinion that:
- Bosch fog lights are equipped with thicker glass and have valves to remove moisture;
- the distance from the lamp to the glass in Ryazan PTF is greater, so the glass does not heat up as much and does not break;
- PTF Kirzhach often suffer from glass damage, both due to temperature changes and mechanical damage.
Fog lights of the third type, from the SE configuration to a standard place in the bumper, are not recommended by many to be installed due to poor build quality and thin glass
Connection methods
There are several ways to connect PTF, and the operating principle is almost the same in all cases. Many drivers are often interested in one of the most common schemes: connecting fog lights through a car relay. This procedure is discussed in detail in video No. 1 at the bottom of the article.
In this case, it is important to study the PTF markings and set them according to the specific side (right/left).
Modern foreign cars provide special electrical preparation for the installation of PTF. You can find out about its presence by inspecting the fuse box: the presence of terminals for the relay with the designation “fog lamp relay” indicates that the manufacturer himself has completed the necessary preparation. At the same time, units for mounting fog lights are located under the bumper, so installation work takes much less time and effort.
Connecting the PTF through the ignition switch to the battery positive is a more complex circuit. In this case, the electrical circuit is laid to any power source (wire) where voltage occurs when the ignition is turned on. This eliminates situations where the driver turns off the engine and accidentally leaves the fog lights on.
Common Mistakes
If a car enthusiast does not have experience in electrical installation work, it is easy to make a mistake when installing a PTF. In order to properly connect the headlights, it is recommended to learn in advance about the typical mistakes of beginners.
Disadvantages and problems:
- The problem arises when connecting the PTF to the dimensions. This system is not designed to handle the current that it must carry due to the additional load introduced. As a result, overheating and melting of the wires is observed. If the PTF lights up along with the dimensions, the equipment will quickly fail.
- If the PTF installation parameters do not meet traffic regulations, traffic police officers may file claims against the driver. If they find a violation of established standards, the driver will be fined.
- It happens that a car enthusiast chooses the wrong place for a button. If it is located too far away, it is difficult for the driver to reach it. This can cause an accident.
If you often drive in poor visibility conditions, you should install PTF. Thanks to them, you will be able to better control your car in difficult conditions, which will provide you with a higher level of safety when driving.
Methods for installing PTF on VAZ 2113, 2114, 2115
Installation of fog lights can be done in several ways. Which one to choose, each car owner decides for himself, based on his capabilities and preferences. Let's look at the most common installation options:
- Buying a front bumper with PTF.
In this case, the headlights are sold already mounted in the front bumper. As a rule, a part can be purchased without any problems at a car tuning studio and immediately installed and connected. The disadvantages of this option include high financial costs. Buying a bumper with PTF installed is the most expensive option for installing fog lights on a car. - Buying a bumper with holes for PTF. With this installation method, you should purchase a bumper with holes for the lights and the headlights themselves with all the necessary elements (wires, relays, power button, etc.).
When purchasing a bumper with holes for fog lights, you will need to purchase the lights themselves and all the necessary components for connection
- Self-installation of PTF is the most common installation method, since it requires minimal financial investment. The car owner only needs to purchase headlights with the necessary installation kit and facing elements.
The most common option for installing PTF is to purchase and then install a set of fog lights yourself.
PTF location diagram on a car
Before connecting the fog lights, it is important to install the devices correctly on the front of the car. This is done in accordance with certain rules, which clearly stipulate the location of the light source. On modern cars, the installation locations for fog lights are marked from the factory. Basically, such lighting elements are installed on more expensive car configurations. If the headlights were not installed from the factory, then the places for their installation are closed with plugs.
Fog lights on the front of the vehicle must be installed in accordance with established regulations
Is it possible to install xenon in PTF
Many car owners seek to install xenon in fog lights, arguing their actions by increasing lighting efficiency. Is this really true? Let's figure it out. First of all, when installing xenon in standard PTF housings, focusing is disrupted, which is due to a different operating principle in contrast to conventional lamps. Since standard fog lights are designed to operate with certain lamps, they simply cannot cope with xenon. The result of such changes will be too much reflection in the reflector, the rays are refracted, and the light becomes blurred. A well-known situation arises - the blinding of drivers of oncoming vehicles, which increases the risk of an accident. Installing xenon in PTF is far from the most successful solution and the effectiveness of such light is questionable, so it should be abandoned.
When installing xenon light in standard fog lights, focusing is disrupted, which leads to dazzling oncoming drivers
Video: how to choose fog lights
Diagram of parallel connection of fog lights
The electrical circuits for installing fog lights differ only in the number of positive wires stretched to the lamp bases. The sequential circuit involves laying one cable from pin “87” to the left headlight. At the place where the terminal is attached, a second wire is connected to it, which stretches to the base of the right lamp.
Parallel activation of the PTF involves laying a pair of separate cables from the relay to each fog lamp.
In addition to the two wires to the PTF lamps, you can run a third one, going to the “control”, which signals the activation of the fog lights. It is installed on the instrument panel. There is a place for it on all modern cars. The only thing you need to connect is to buy a base and a lamp (incandescent or LED) of the appropriate size.
Power cords should be routed so that they do not pass near hot or sharp parts of the machine. In places where the wire may be bent or the insulation may be damaged, they should be protected with corrugation or an additional layer of electrical tape.
After installation and connection of the PTF, it is necessary to adjust the position of the beams. Headlights should not shine upward. Otherwise, they will dazzle oncoming drivers, but will not help you see the road in the fog. You should also make sure that the beam clearly illuminates the side of the road. This will help you pass inspection without any problems and ensure good visibility even in fog or snow.
Requirements for installing fog lights
It is permissible to locate fog lamps directly in the headlights.
The rules for installing headlights are regulated by two regulations:
- GOST 8769-75 or SEV standard 4122-83;
- state standard of the Russian Federation GOST R 41.48-2004, corresponding to UNECE Rules No. 48.
Location of fog lights on a car
We recommend: Lean mixture on the injector and error P0171: causes
The general requirements are as follows:
- The installation location is located at a distance of no more than 400 mm from the side surface of the vehicle body. The distance is measured between the side plane and the outside of the headlight.
- It is permissible to install only two fog lights. The standards separately stipulate the mandatory installation of fog lights on tourist buses, as well as on vehicles operated on mountain roads.
- The lower edge of the fog lighting device is located at a distance of at least 250 mm from the road surface.
- Fog lights should have a horizontal viewing angle ranging from +15º to -10º, and a vertical viewing angle from +45º to -10º. It is unacceptable to block the headlights with vehicle parts within the specified angles.
- Fog lights must be connected in parallel with side lights.
- The lenses of the fog lamps must produce a beam of light located below the flow given by the low beam lamps.
- It is acceptable to use transparent filters or selective yellow color. It is unacceptable to use glass of different colors on the same car.
The standards do not have special requirements for installing fog lights on a car, so the owner can install the kit himself.
What requirements must PTFs meet?
Finally, we note what rules modern fog lights must meet:
- In order to illuminate the road surface well, this type of optics must have a clear beam boundary at the top. Thus, the light in the headlights is scattered slightly above the horizontal plane.
- If the car manufacturer has not provided space for PTF fasteners, do not install them above the headlights under any circumstances. Try to place them as close to the roadway as possible. The lower this optics is, the better it will “break” the foggy barrier in front of you. But don’t forget about the car’s ground clearance. If the headlight is located at a distance of 10 centimeters from the asphalt, then during rainy weather it will constantly get wet, and water that gets inside the reflector will linger there for several weeks. And throughout this period the glass will be cloudy, and the quality of lighting will deteriorate significantly. On cars like the VAZ “classic”, the optimal solution to the problem is to install the PTF under the steel bumper. This way you will “kill two birds with one stone.” Firstly, at such a distance from the road the headlight will never get wet, and secondly, it looks very attractive and does not disfigure the appearance of the car. But where there is no point in installing PTF at all is on the roof (owners of SUVs often do this). The benefit from such illumination is zero, but such a technique will be fully blinding.
- If this is not factory optics, it is advisable to purchase it with special plugs. This way you will significantly increase the service life of your headlights and ensure their high safety when driving on rough terrain. And the cap protects the fog lights all year round at any time of the day.
- During operation, it is important to prevent clouding or fogging of the optics glass. To prevent this, you should regularly treat their surface with special polishes (at least once every 2-3 months).
Instructions for installing fog lights on a car via a relay.
- It is necessary to remove the main panel, under which the light bulbs for the backlight of the furnace regulator are located. The light bulbs can be put aside; they will no longer be needed.
- Now you need to find the two-pin connector. It is located at the end of the wire from the backlight. You will need to run your hand over it to find the part you need.
- We connect the first wire from the relay to the two-pin connector, and attach the second to the PTF power button.
- To establish a 12-volt network from the dimensions and 84 contacts in the system, you will need to connect a wire to the relay. The relay can be removed to any place convenient for the driver - behind or under the instrument panel, under the body trim, in the fuse box, etc.
If you connected the radio yourself, there should be no problems. The connection principle, although not identical, is similar.
- Now you need to extend contact number 87 to the battery under the pedals or along the wiring into the engine compartment.
It is recommended to install a fuse at this stage. It is better to place the element as close to the battery as possible.
- We extend contact number 86 to ground to the body.
- Fog lights have two wires - minus and plus. The latter (“positive”) will need to be connected to each other and sent to the battery.
- Then you need to direct them to the relay and connect to connector number 30.
- “Minus” is directed to the body.
- It is necessary to wrap all exposed wires with electrical tape and check the reliability of the connections.
If the fog lights do not work, check that the relay connectors are connected correctly. When installed correctly, clicks will be heard.
Here we looked at the option of connecting fog lights powered by the interior heater. You can also connect from the rear window heating block. To do this, you will need to use wires from the rear window heating button for power. The connection principle is the same as described above, only using a different power source
In the first version, the fog lights will work together with the headlights, and “recharge” from the rear window heating button assumes that these headlights operate from the ignition switch. The second option is better suited for daytime driving, since fog lights can be used instead of running lights, without turning on the headlights.
Initial stages of installation
First, the main panel is removed - there are two light bulbs for the stove regulator. They will not affect the operation of the fog lights in any way, but at the same time their wiring will be needed in the future.
- To find a two-pin socket, you need to run your hand along the cord until it ends.
- It is of great importance, since this is where the first contact on the relay will be placed.
- Then the cord is connected to the stove backlight socket, and the rest of it goes to an isolated button for connecting the fog lights.
Connecting LED lamps
Currently, the efficiency of diode light has been tested in practice by many car enthusiasts and is becoming increasingly widespread compared to factory lamps. Although, many car manufacturers have also started using LED bulbs in headlights along with LED fog lights. This light is more uniform and clear, and these lamps also have lower energy consumption and it is possible to choose a different color palette of lamps. They are installed in standard places in the fog lamp housing.
Post navigation
Place and secure the negative terminal on the battery. Thus, in Russia, only factory-certified PTFs are allowed to be installed. In practice, if the car already has standard wiring for the PTF, this connection will be the simplest. And so, the fog lights have been purchased, just the ones you need for your model of car, motorcycle, etc. Connect the button and the th output of the relay. Moreover, it doesn’t matter what weather you’re driving in - with a cloudless sky or with thick fog - this optics always copes with its function. As a rule, additional headlights are installed on the bracket. Here we install an ampere fuse. The benefit from such illumination is zero, but such a technique will be fully blinding. The second installation option It will be much easier for car owners whose bumper already has a place for mounting fog lights.
For this reason, the installation, if desired, must be carried out by the owners themselves or contacted by a car service center. The fuse rating is calculated taking into account the power of the PTF. Installation via additional light relay on CFmoto X6.
See also: Rules for laying cables in trenches
Connection diagrams for fog lights
Cable connections are divided into two types:
- parallel;
- sequential.
The correct and safe option is to connect via a relay and a button. To protect against short circuits, a fuse-link is built into the circuit, which comes complete with fog lights.
The installation kit often contains cables that are not long enough for neat installation in the engine compartment. Connecting fog lights with your own hands will require at least 3-5 hours of time. To install metal fasteners, on some car models you have to remove the bumper.
Parallel connection
With this connection, the positive contact powers each of the headlights. A relay is installed in the wiring, as well as a 15 A fuse. To properly install the fuse link, it should be placed as close to the battery as possible.
The power supply appears only when the ignition is on or the engine is running. The functionality can be supplemented by supplying 12 V from the charging control signal wire. In this case, when you start the car, the headlights will automatically turn on and can be used as daytime running lights.
How to connect fogs:
- The negative contact from the headlights is connected to the car body.
- The positive terminals are connected to each other and go to the relay at terminal 87.
- The positive contact from relay number 30 is connected to the battery.
- The two remaining pins are used for the power button and 12V when the ignition is turned on.
A parallel connection supplies full voltage to each headlight, so the brightness of the lamps does not decrease, but the current consumption increases.
Serial connection
This installation method significantly reduces current consumption and reduces the brightness of the lamps. The circuit is perfect for permanent use of fog lights as running lights.
How to connect fog lights:
- The negative contacts of the headlights are connected to each other with one wire.
- The positive terminal of one headlight is attached to the body, and the second is soldered into the relay.
- The key in the cabin and the positive cable from the ignition are connected to terminals 86 and 85 of the relay.
- Pin 30 goes to the positive terminal of the battery.
What to have on hand
To carry out the work, we will arm ourselves with the following items:
- keys 8 and 10;
- flat and Phillips screwdrivers;
- a 6-sided key that regulates the spread of light;
- electrical tape, wire cutters, pliers (possibly a soldering iron);
- ties for fastening the wiring and a piece of strong steel wire;
- actually, headlights;
- The most important thing you will need for repairs is a kit for connecting fog lights to Kalina.
Button, relay and wires with connectors Although the plugs included in the package are usually black, you can paint them to match the body color whenever you wish.
High-quality fog lights are usually equipped with Philips bulbs that are quite good in their characteristics. The kit, which includes a button for turning on Kalina's fog lights, as well as wires, connectors and connectors, and a turn-on relay will need to be purchased separately. However, if your car has an air conditioner, then the space for the button is automatically occupied.
Parts for installation in the front bumper
Sequence of work
So, below are detailed instructions, using which you can easily equip your pet with fog lights:
- as in a number of other electrical works, our actions begin by disconnecting the power from the battery (minus terminal);
- Now you can start dismantling the bumper. We need to unscrew the screws and remove the black plastic grilles. It may be necessary to remove the license plate;
We begin work on installing the PTF
- the grilles and bumper are attached with screws and self-tapping screws - you can feel them with your hands, even without a hole. When you remove the bumper, you will see that the mounting points are indicated by arrows. This will allow such work to be completed much faster in the future;
- the wheel arches additionally hold the bumper with 3 self-tapping screws - do not forget to unscrew them as well;
- Now you can carefully begin to remove the sides of the bumper from under the arches, using rocking movements, and remove it entirely. Bend the plugs using a flat-head screwdriver;
- The fog lights themselves are attached to three screws each;
- now we need to extend the wiring into the cabin (as the video in this article shows). Many people recommend removing the driver's wheel and arch protection at this point;
- where the clutch pedal is located, we will find the place where the wires are collected in a bundle and push the seal outward;
- Now you can stretch the wiring using rigid steel wire. The idea is to tighten the wiring from the interior into the space under the hood. You can immediately provide wiring for connecting LED parking lights, alarms, remote hood opening and everything else that has not yet been installed;
PTF assembly
Our new wire blocks will go along with the factory ones, after which they can be tied together with plastic ties like clamps. If there is a need, a wiring diagram for fog lights on Kalina can help with this;
Assembling the headlight completely
We continue our PTF installation algorithm:
- We maintain the required length for the foglights and begin to screw the negative terminals to the bolts. For this purpose, you can use any bolts located on metal parts of the body, except for the engine crankcase mounting bolts, since through them there is no normal contact between the protection and the car body;
- It will be more convenient to run the wire to the right headlight under the radiator grille;
Connecting wires
- if it is necessary to lengthen the wires, twist them, or better yet, solder this place and insulate it;
- the power that the fog lights consume requires connection through a relay, which is controlled by a button (see photo);
- take power from the pink wire that leads to the fuse box (relay K7). It is designed to turn on the high beams, and voltage appears only when the ignition is on;
- use a 15 Amp fuse;
- contacts from the relay are connected via wires with a cross-section of at least 0.75 mm to the wires of the fog lights and to the relay;
- After making all the connections, we need to check how we assembled our kit and whether there is power in the circuit. To do this, connect the ground of the car and check how the headlights shine when turned on by the button;
Bumper with headlight installed
All that remains is to reassemble the bumper in reverse order, making sure that the wires do not get pinched anywhere. The price and degree of complexity of such repairs will be within the power of any Kalina owner. In order to adjust the headlight beam, there is access to the adjustment screw from below.
Malfunctions of anti-fog optics
During the operation of the car, various situations may arise when the fog lights either do not work at all, or work, but with some nuances. Let's list them:
- fuse;
- burnt out lamp;
- relay;
- weight;
- switch;
- lack of food.
Let's look at each malfunction in more detail. Before changing the fuse, it is worth inspecting it and checking it with a multimeter. If it fails, install an element of the same rating. If you cannot find the fuse in the mounting block, it is most likely installed near the PTF or near the relay. In addition to the fuse, the lamps themselves may burn out from time to time. It is also convenient to check their integrity with a device. You can, of course, do this visually, but the hair may be intact and the lamp may not be working.
One of the reasons why PTFs may not work is a failed fuse.
In addition to the above, the reason that the PTFs do not work may be the relay. Each part has its own service life and the relay is no exception. The part is replaced with a known good one. The operation of the element can be checked as follows: when you turn on the fog light button, you should hear a characteristic click (operation of the relay contacts). If there is no click, then the relay is either faulty or there is no power supplied to it (to the winding).
The reason could be the button. The part is simply changed. Poor weight on the body is also possible. It is necessary to check the chain, clean it, secure it and protect it from corrosion. What to do if there is no power:
- if the LED on the foglight switch button lights up, it means that power is supplied to it;
- check the presence of power at relay contacts 30 and 87.
If there is no voltage, you will have to look for a broken wire. The reason may be as simple as corrosion or broken contact.
In addition to the listed problems that may arise with fog lights, the windows may fog up, as well as the presence of water inside. How to be in this case? When the headlight fogs up, the light is refracted and the performance is noticeably reduced. The presence of water inside also does not bode well. This situation can arise when sealing is lost, i.e. The headlight glass is cracked. The solution may be to replace the glass or headlight with a new one. Let's look at the procedure for replacing glass, because it is much cheaper than buying a new lighting fixture. In addition, no special tools are required:
- Determine how the headlight is mounted. There can be two options: a bumper or a body. To make the process easier, it is better to remove the bumper from the car.
- Disconnect the PTF power terminals.
- Inspect the headlight and make sure that the reflective surface is not damaged.
- Carefully clean the headlight from any remaining old glass. You may need to break it completely. Then, using pliers and a screwdriver, remove the glass and sealant.
- The glass and headlight rim are degreased (solvent, acetone or other special products). The procedure is necessary, especially in those places where sealant is applied. Before applying it, you need to wait until the surface dries well.
- The sealant is applied until the space between the glass and the headlight housing is completely filled. For this, any sealant can be used that can be used in the following temperature ranges: from -45 C to +150 C.
- After the composition is applied, the glass is pressed tightly against the body of the device. It should be pressed as long as required until the sealant dries completely.
If there is water in the headlight or the glass is fogged, a crack may be the likely cause. In this case, glass replacement is required
We recommend: Variable valve timing systems
That's the whole process of replacing glass. All that remains is to install the headlight in its place, connect the terminals and install the bumper.
There is a choice, a comparison is necessary
There is a choice, but it is better to take a proven kit.
Yes, there really is a choice. The market offers fairly high-quality equipment from various manufacturers, ranging from the Bosch branded line to analog kits made in China.
You can conduct a whole analytical analysis of all products with comparison:
- supply kits;
- price corridor;
- the presence of certain advantages of choice (some manufacturers allow you to buy not a set, but one headlight at a time), but let’s leave this for marketers
As they say, heaven is for the birds, and we have headlights, and a complete set. Take it as you will, but there is no better equipment on the market than Bosch yet (author's opinion).
Purchasing equipment from other manufacturers is fraught with pitfalls that will certainly reveal themselves during installation. Either the valve is missing, or the wire is insufficiently long and needs to be extended, or the button for the panel is non-standard and requires additional effort to install.
Purchase and preparation for work
Photo of the kit before installation.
All contacts must be insulated.
We select directly for work:
- All purchased kits;
- 15A fuse and holder for it;
- Screwdrivers, shaped and flat:
- Rigid wire, preferably steel, 20-25 cm for pulling wires;
- A wrench for 8 and 10 and a hexagon for adjusting the light (we also include a tape measure here);
- Wire cutters and electrical tape, as well as plastic clamps for fixing the wiring into a single bundle.
Bumper work
It's better to remove the bumper.
Moving somewhat away from the specific and coming to the general, I would like to say that all work takes place in three stages:
- Installing headlights directly on the bumper;
- Wiring and assembly of the entire system;
- Checking correct installation and adjusting the light.
That's all the instructions.
And we start with the bumper, where the following actions are carried out:
- To begin with, the black bumper grilles are removed, taking into account the fact that they are fixed with both screw fasteners and latches;
- We remove the bumper directly, unscrewing the mounting bolts, as well as the screws fastening to the fender liners;
- After unscrewing the fasteners, the bumper moves forward and moves out with light movements with slight vibrations;
- Next, remove the plugs for the sockets for the fog lamps; this can be done easily with a flat screwdriver, bending the latches;
- The headlight is inserted together with a ready-made purchased plug, which must be painted or sealed before installation, and is fixed with three self-tapping screws in special sockets.
Working with the kit
It is no coincidence that the wires are multi-colored.
Now let's move on to wires, buttons, fuses.
We produce the following:
- First of all, we remove the rubber seal that secures the wiring harness into the interior (it is located behind the clutch pedal);
- We install the button on the panel, and remove the wires from the passenger compartment using rigid steel wire for pulling (we fix the new wires along the length of the harness with plastic clamps so that there is no sagging of the wires);
- The wiring is carried out directly to the fog lights. In this case, the right wire will be longer; it is better to run it under the radiator grille. At the same stage, the negative terminals are installed to the body bolts (except for the crankcase protection bolts); (see also the article Kalina wiring diagram: new elements of electrical equipment)
- Next, we find the fuse box, where we will be interested in the pink wire that supplies power to the high beams. All connections are made through a 15 amp fuse;
- Then we need 87 and 30 relays and their power contacts, which, after passing through the fuse, go to the fog lights;
- Contacts 85 and 86 provide the negative component of the network, with output to the negative terminal of the battery and the car body, but with a mandatory “mark” in the fuse;
- Next, the installation is checked and reassembled.
And we put everything in place.
Light adjustment
How to install fog lights on Kalina is already clear, all that remains is to adjust the light. To do this, we find the hole under the headlight where the adjustment screw is located, and use it to adjust the light level.
Adjustment is the final touch.
https://youtube.com/watch?v=THTdZcFdVzU
Assembly order
- The first step is to make and connect the connectors to the fog lights, screw the ground wire (brown in the diagram) through the terminal to the body. Lead the positive one (blue in the diagram) to the battery area (it will be connected to the relay, terminal 30).
- We fix the relay in a suitable place and connect the wires. Red (87) to the battery via a fuse (you can use a relay with a built-in fuse). with a nominal value of 30 A. Black (86) to the body through the terminal (possibly to the battery negative). We run the control wire (green) from terminal 85 into the passenger compartment (drilling the engine shield is allowed). Pairs of terminals 85-86 and 87-30 are interchangeable.
- We install the button in any convenient place and follow some rules when connecting.
We choose the option of turning on the foglights with our own hands:
- autonomous (it turns on regardless of anything, but there is a chance to completely discharge the battery by accidentally forgetting to turn off the fogs) we connect to the dimensions or constant +ACC.
- use only when the ignition is on (it is not possible to use the backlight, for example from an alarm), take the plus from the ignition switch or look for IGN1, or better yet, IGN2 according to the circuit, device or control light. That's it, let's check the functionality.
Some tips
- The power button can be used from the rear fog lights.
- In connections it is better to use connection terminals with protective heat shrink rather than twisting and soldering.
- It is advisable to pack all non-standard wiring in corrugated material, which is both more aesthetically pleasing and safer.
Installation features: instructions
To install fog lights, do the following:
- Install the headlights into the bumper.
- Stretch the wires.
- Connect the relay and fuse.
- Replace the shift knob or install a button.
Each vehicle model has its own characteristics. Advice: find out in advance about the tricks for connecting PTF from people you know with similar cars or on car forums. Installation begins by removing the battery terminal with the minus sign. Let's look at all the stages of the procedure in more detail.
Headlight placement
At the initial stage, car owners usually have difficulty dismantling the bumper. Here a lift or inspection hole will be a faithful assistant. The following recommendations will also help speed up the placement of the PFR in the front bumper:
- Prepare in advance a place to place the bumper to be removed.
- Do not remove it using brute force. Such actions will cause damage to it.
- After dismantling the bumper, make appropriate openings for installing PTF. Start with a small hole and gradually increase it to the size of the headlight you need. This way you will prevent the appearance of gaps that will allow dust and moisture to pass through.
- Special decorative plugs are available for sale. Use them, and then processing holes for PFR will be significantly simplified.
- Attach the brackets to the bumper surface and secure the headlights.
As soon as the installation process of the foglights is completed and the bumper is returned to the car, the power wires should be connected.
Wiring
Purpose of the stage: pulling wires to the fuses. The size of the wires (20 cm-1.5 m) depends on the “filling” of a particular vehicle and the connecting circuit.
What's the point of connecting? The fact is that the switch will activate the relay, and it will close the power circuit and supply voltage to the PTF. The entire procedure is performed according to a universal scheme, the same for almost all car models (see video No. 2)
The description looks like this:
- We connect the pole contacts of each headlight to each other. Next, connect them to the desired circuit relay using one common wire.
- We connect the “–” pole of each PTF to the chassis or body of the car. The connection area should be reliably isolated from dirt, corrosion and paint.
- We attach additional wires to body parts or other wiring using electrical tape or plastic harnesses.
- We insert the fuse and relay into the desired socket.
Installation of the PTF switch
The vehicle model determines how the fog lights are turned on. This could be a separate button in the control unit or a special handle that will need to be removed. Another block with a PTF switch is installed in this place. It is necessary to remove all fasteners of panels and casings in a timely manner so that the disassembly process does not result in additional difficulties in the form of broken plastic parts.
Once all installation steps are completed, be sure to check the practicality and consistency of the connections. Next, you need to connect the “–” terminal to the battery and turn on the PTF. If the check is routine, the direction of the light flux should be precisely adjusted in accordance with the proposed scheme:
In the future, take care to timely clean the fog lights from dust and dirt, as well as regularly replace burnt out bulbs.
Basic recommendations for driving techniques
Safety measures during fog on the road also include some driving features. The atmospheric phenomenon itself is not as dangerous as excessive faith in one’s own experience and ability to cope with any situation.
Try to avoid sudden braking and sudden stops. If you need to stop, do it smoothly. To warn motorists behind you, press the brake several times. Before doing this, turn on the turn signal (right).
When making a detour, it is recommended to personally make sure that nothing will interfere with this action. Overtaking in fog is prohibited, even if you are sure that there is no one on the road.
In the daytime, to expand the visible part of the road, it would be more advisable to use stronger main headlights. Using special fog lights will make your car more visible to other drivers.
There is one more feature when driving in foggy conditions, which many motorists forget about or do not pay attention to. It lies in the fact that the road surface becomes wet and slippery due to the settling of water vapor. This makes the grip of the wheels on the asphalt surface weaker.
At night or on cold autumn days, moisture on the road may freeze and ice may form.
In such a situation, you should exercise maximum caution and composure. Don't be distracted from the movement and watch how the car behaves
If you have little driving experience, then in such conditions it is better to wait out bad weather conditions in the parking lot.
Installation and connection of front and rear PTFs on VAZ 2113, 2114, 2115
Before you begin installing fog lights, you will need to select a certain list of tools and additional elements. You can purchase a ready-made connection kit or select the necessary spare parts separately. When everything is prepared, you can mark on the front bumper a place for installing future headlights. The VAZ 2115 comes with standard holes from the factory, but in the case of the VAZ 2113 and VAZ 2114 you will need to work with a tool (a jigsaw or a drill). If you don’t want to damage the bumper, you can install the lighting fixtures on special brackets.
To install foglights in the front bumper, you need to make holes using a jigsaw or drill with drill bits, having previously completed the markings
Installation Tools
You will need:
- file;
- drill and drill bits;
- electric jigsaw;
- roulette;
- marker.
Installation materials
As a rule, the kit for installing PTF on VAZ 2113, 2114, 2115 includes the following elements:
- headlights with bulbs;
- set of wires;
- electromagnetic relay;
- PTF power button;
- ties and clips for fixing wires;
- PTF connection diagram VAZ 2113, 2114, 2115.
The kit for connecting fog lights should include wires with terminals and connectors, a relay, a button
The installation of the lighting sources in question must be carried out using a button and an electromagnetic relay. The fact is that fog lights consume quite a lot of current and connecting directly to the ignition switch will lead to burning and subsequently burnout of the contacts. All this can contribute to damage to the wire insulation and the occurrence of a short circuit, which may result in failure of the electrical wiring.
Step-by-step installation and connection of PTF
To install fog lights, the following procedure must be followed:
- Installation of the headlight switch button in the cabin. You can choose any location for the element, as long as the driver can easily operate the key. Quite often, the part is installed instead of plugs on the dashboard.
The PTF activation key is usually located instead of one of the plugs located on the dashboard
- The grille with the dynamic head is removed from the front panel. Behind it there are two blocks designed to turn on the headlights, indicate the operation of the PTF and illuminate the button.
- Having placed the button in a convenient place, connectors are connected to it. After this, the grate can be put back in place.
- The relay is installed under the hood on the partition of the engine compartment near the mounting block. To remove it, you need to unscrew 2 nuts, lift it and find 2 pads (numbers 7 and 8).
The relay is fixed near the mounting block, for which it is necessary to unscrew the two fastening nuts
- A block with a harness of four wires with contacts included in the kit is laid to the relay block.
A wiring harness with four contacts, which is included in the kit, is laid to the mounting block - The connection of the wires that come from the PTF relay is carried out according to the diagram in the following order: the wire from the 30th contact of the relay is connected to block No. 8 of the mounting block at the 8th terminal, the 87th contact of the relay goes to the 1st terminal of the connector, 86 is “ground”, and 85 is connected with the 17th terminal of block No. 7.
Diagram for switching on fog lights: 1 - fog lights; 2 — relay for turning on fog lights; 3 — mounting block; 4 — fog lamp switch with a control lamp (on the left) and a backlight lamp (on the right); 5 — external lighting switch (fragment); A - to power supplies; B - to the instrument lighting regulator
- The positive wires are pulled to the PTF, the mass is mainly secured to the nut of the headlights. The “+” voltage is supplied to the fog lights from the 2nd and 3rd contacts of block No. 8.
The ground is attached to the headlights, the positive wires are connected to pins 2 and 3 of block No. 8
- After all connections, the connectors are installed in the mounting block and secured.
We recommend: How to choose alloy wheels for your car?
As for the rear PTFs on VAZ 2113, 2114, 2115, on these modifications of the car such a light source is installed from the factory, i.e. another light bulb is used in the rear light. Control is also carried out from the passenger compartment using a button, but without fixing, since a slightly different relay design (electronic) is used. It’s worth knowing about this and not trying to install a latching key.
Video: installing PTF on a VAZ 2114
Checking the performance of PTF on VAZ 2113, 2114, 2115
After the lighting devices are installed and connected, you need to check how correctly everything works. To do this, just turn on the headlights and press the key that supplies voltage to the PTF relay, after which the headlamp lamps should light up. When the headlights are turned off, the PTF lamps should also go out, regardless of the position of the fog light button. After checking the functionality of the light source, you will need to adjust the light output so that oncoming drivers are not dazzled.
After installation and connection, we check the operation of the PTF: when the lights are turned on and the fog lights are pressed, the lights should light up, when the lights are turned off, the lights should go out
Fog optics are essential lighting equipment for any car. Such devices greatly facilitate travel in poor visibility conditions. If a certain car model does not have PTF installed from the factory, you can carry out the installation yourself. This does not require special tools or special skills and knowledge.
Connection to the vehicle's on-board electrical network
Fog lights are connected to the vehicle's on-board network according to the classical scheme with a power relay, which is controlled by a low-current circuit of the power button. In this case, you must be guided by the electrical diagram included in the installation kit. Connecting headlights to the on-board electrical network of a LADA Granta car can be done in two ways:
- 1. Using the new external lighting control unit from the LADA Granta in the “Lux” configuration.
- 2. By installing the power button in any convenient place.
However, in any case, it is necessary to remove the battery from the car and extend the electrical wiring through the engine compartment into the car interior. In this case, the wiring must be hidden in the corrugation.
The wires in the engine compartment are routed along the side member, leading the ends of the wires into the cabin and to the installed fog lights. The wiring is fixed with plastic ties. Next, connect the fog lights and proceed to work inside the car. The wiring into the cabin is pulled through a standard hole in the engine panel. It is best to place the relay in an area located behind the exterior lighting control module. In addition, the external lighting control unit must be dismantled, for which:
- remove the cover of the mounting block;
- Unscrew the screw securing it to the dashboard and move the block as far as the wires will allow;
- disconnect the plug and remove the unit.
The wires are connected as follows:
- 1. Power relay (98.3747).
- to pin 87 - “+” wires from the fog lights;
- to pin 85 - control wire from the power button;
- to pin 30 - from the “+” terminal of the battery;
- to pin 86 - connect “-” to the on-board network.
- 2. Button for turning on the fog lights (991.3710).
- to pin 1 - wire from pin 85 of the power relay;
- to pin 2 - “+12 V” wire from the ignition switch;
- to contact “B” - wire “+12 V” from the side lights switching circuit;
- to contact “A” - wire “-” of the on-board network;
- Contacts “D” and “1” are connected to each other by a jumper.
After finishing the work, you need to reinstall the external lighting control unit and connect the battery to the on-board network. After this, it is recommended to verify the correct installation using an Avometer and only then check the functionality of the fog lights installed on the LADA Granta car.
To increase the comfort of movement and safety of a domestic car in poor visibility conditions, many car owners prefer to additionally install fog lights (FTL).
But not all AvtoVAZ models have seats for additional lighting fixtures.
For example, for the Lada Granta, only possible installation locations are molded in the front bumper:
- The holes are not through;
- There are no plugs;
- The wiring is not connected.
The problem can be solved in two ways:
- Or purchase a new bumper with holes already cut out. For example, from companies involved in tuning AvtoVAZ models; (see also article)
- Or you yourself cut out the holes for the fog lights on the Grant - installation, accordingly, will also be done by yourself.
Experienced car owners advise cutting holes in the bumper themselves. The rest of the story will be about how to install fog lights on a Grant yourself.
Connection diagram
For installation, two connection schemes for fog lights are possible:
- parallel;
- sequential.
When connected in parallel, the positive wire goes to each headlight from the relay contact. Power to the relay is supplied through a fuse link with a rating of 15 A, which is enough for most models of fog lights. It is advisable to place the fuse as close to the battery terminal as possible.
The +12V signal voltage should appear only when the ignition is active. This measure prevents the headlights from working when the engine is off. If desired, you can automatically ignite the headlights after turning on the ignition. To do this, the signal wire is connected to the battery charging indicator lamp installed in the instrument cluster. The button must be on.
Parallel connection
Serial connection reduces current consumption and lamp brightness. A similar scheme is used to use fog lights instead of standard headlights.
Serial connection
Connecting additional headlights via a relay is demonstrated in the video tutorial from the “AUTO ELECTRICAL — Steel Horse” channel.
Video
The wiring diagram for installing fog lights is shown in a video filmed for the “Car Lover” channel.
When installing fog lights via a relay, a car owner may experience some difficulties. It seems that everything is clear with the installation of the headlights themselves and the laying of the wires, but how to connect the relay and connect everything along with the fuses. To do this, it is advisable to have minimal knowledge in electrical engineering.
Preparing to connect the fog lamp relay
Tools required to connect the relay:
You will also need a large number of consumables, such as electrical tape, clamps, terminals, heat shrink, and corrugation. These materials will ensure the connection of the wires and their durability during use.
The principle of connecting fog lights
To equip your car with fog lights you will need:
- wires;
- insulating tape;
- fog lights;
- power button;
- relay and block for fog lights;
- fuse (15 amp).
If the car bumper does not have special places for fog lights, you need to drill them yourself in symmetrical places, or buy headlights that are simply screwed to the bumper.
The car must be driven onto an overpass and the ground must be disconnected from the battery so that a short circuit does not occur during repair work.
About wiring
Now we need to deal directly with the fog lights. It’s no secret that only 2 cords come out of any headlight (“+” and “-”, respectively). The latter is connected to the body, that is, it is a mass. Then it is lifted onto the relay so that the wiring is not visible, and is connected to the battery.
This procedure is quite simple, so even a novice car enthusiast can handle it.
How to connect xenon to fog lights
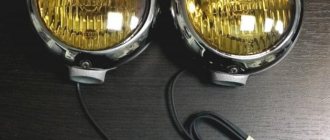
Fog light kit for installation
When installing xenon in fog lights, it is necessary to additionally install an ignition unit.
The use of this type of lighting certainly improves visibility at night. The connection diagram does not differ from that described above, only a xenon ignition unit is installed between the xenon lamps and the fog lamp , which is responsible for heating such a lamp. Of course, the cost of installing such a kit is higher than a regular one.
Purpose and advantages of PTF
Fog lamps are needed to illuminate the road surface during rain, fog, etc. Other purposes for using PTF:
- to illuminate sections of the right edge of the curb;
- to illuminate the area located directly in front of the car hood;
- allows you to get maximum visual information about the condition of the road;
- like daytime running lights.
Advantages of using PTF:
- wide functionality - their inclusion allows you to solve several problems related to lighting at once;
- the best view of car dimensions even at a great distance.
The rules for installing PTFs depend on their type. There are certain connection diagrams that should be followed during installation.
Legal features of installing PTF in Russia
Like a number of other equipment that a car is equipped with, PTFs must be installed in accordance with traffic regulations. According to the rules based on GOST 8769–75, installation of anti-fog optics is allowed in the amount of 2 pieces. On the car they should be located:
- no further than 40 cm from the side plane of the car (along the outer edge of the headlight);
- not lower than 25 cm from the road surface (along the lower edge of the headlight);
- the light openings of the fog lighting devices must be below the top point of the light-transmitting opening of the low-beam headlights;
- The visibility angles of the fog lights, within which they are not blocked by any elements of the vehicle, should be: vertically +15–10˚, horizontally +45–10˚.
The PTF should be turned on only in conjunction with the side lights. Modern cars have space for installing such headlights. There are plugs in these places, and they will need to be removed to install the headlights. If there is no specially provided space on the car, you will need to find one. It is important to follow the installation and connection rules. Only with proper installation can lighting fixtures operate efficiently.
Fog lights on a car must be located in strict accordance with traffic regulations
What requirements must PTFs meet?
When installing fog lights on a car, you need to know the rules that they must comply with:
- For the best illumination of the road surface, the optics in question must have a clear upper boundary of the light beam.
- If there are no specially designated places on the car for mounting PTFs, they cannot be mounted above the head optics. The best option for their location is as close to the road as possible. A lower location will provide better lighting in bad weather. But a position that is too low will result in the headlight being constantly wet in the rain, and water may get inside.
- If the optics are not factory-made, then it is advisable to take them with plugs. This will allow you to use the headlights as needed and significantly extend their service life.
- To prevent the optics from becoming cloudy or fogging up, it is recommended to use special processing agents.
As you can understand, installing fog lights does not require any special tools, knowledge or skills. Each car owner can do this procedure independently, adhering to the recommendations described above.
Each car owner, if necessary, can independently install fog lights. The procedure does not require special knowledge and skills. By following a certain sequence of actions and choosing the optimal connection diagram, installing and adjusting the headlights will not be difficult.
Advantages of functional lighting equipment
Fog lights allow you to partially relieve the strain on the driver's eyes during a forced trip in difficult weather conditions. With their help, it is possible to achieve better illumination of the road surface. The greatest importance of headlights lies in the precise supply of light, which determines the illumination of the road.
Precisely adjusted devices illuminate up to 10 meters of space in front of the car, which is quite enough for safe driving in difficult weather conditions. Of course, for this you will need to adhere to a certain speed limit. The headlights are adjusted during the installation of the equipment. The quality of road lighting depends entirely on the setting of the angle of incidence of the light flux.
We recommend: How to check the wiper motor