1200 rub. for the photo report
We pay for photo reports on car repairs. Earnings from 10,000 rubles/month.
Write:
Replacing the outer CV joint boot of a VAZ 2110 without any particular difficulties can be done with your own hands in literally half an hour. You will need a new CV boot, a tube of lubricant, a couple of new clamps, a screwdriver, several wrenches to pull the CV joint out of the steering knuckle and a hammer to knock it off the drive. To see the procedure for replacing the CV joint boot on VAZ 2110, 2111, 2112 or other front-wheel drive vehicles, watch the video.
And so, in order to free the drive shaft, and then remove the outer CV joint and pull off its boot, you will have to disconnect the steering tip, unscrew the hub nut, and unscrew the 2 bolts securing the ball joint. After dismantling the grenade, be sure to wash out the old lubricant and thoroughly fill it with new one!
Grenade boot and its replacement
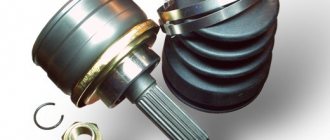
The grenade of the VAZ 2110 car is a constant velocity joint that forces the front drive wheels to rotate and allows them to turn. The peculiarity of this device is that it is capable of transmitting rotational movements to axle shafts located in relation to each other at a constantly changing angle. Replacing the boot of a VAZ 2110 grenade is necessary when noise and knocking are heard, especially when driving on sand. You can easily replace the boot of a VAZ 2110 grenade with your own hands, fortunately there are step-by-step instructions.
Constant velocity joint or CV joint
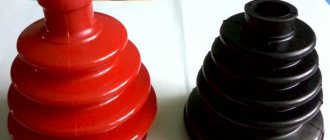
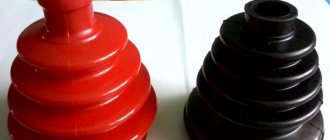
VAZ 2110 grenade boot
The design of the car provides that the hinge is subject to a significant load and is made of very strong alloys. A well-maintained and good CV joint (grenade) can last longer than the car itself. To achieve this result and save money, because the procedure for replacing a hinge is expensive, you must follow some rules. One of these rules is to systematically check the condition and timely replacement of the grenade boot. The most important enemies of a car grenade are dirt, dust, water and sand that enter the working part while driving. To protect against such destructive factors, anthers are installed, which are protective rubber cones that very tightly cover the CV joint mechanism of the vase. If you find that the grenade boot is torn, it must be replaced immediately. During periodic technical inspections, you need to carefully inspect the boots and replace them if necessary.
Note. If folds, cracks, deterioration in the elasticity of the rubber and other deformations and damage are found on the anthers, replacement should not be shelved.
Replacement procedure
Let's say right away that it is impossible to repair the CV joint. So don't even try. The most correct and reasonable decision is to purchase a new grenade and install it in place of the failed one.
The first thing we recommend starting with is watching a video about replacing the CV joint on a VAZ 2110. This way you will clearly understand how the procedure is performed and in what sequence. Then, according to the instructions we have presented, you can get to work.
- Since the CV joint is located at the bottom of the car, you will need a lift or a pit in the garage from where you can begin replacing the element.
- Be sure to secure the car. To do this, you can engage fourth gear and tighten the handbrake all the way.
- If you have driven the car into a pit, place wedges or wooden blocks under the wheels to block the wheels.
- Remove the protective cap and unscrew the nut on the hub.
- After removing the hub nut, unscrew the wheel fasteners.
- Raise the wheel that requires CV joint replacement using a jack.
- Now unscrew each of the six bolts of the part, after which only the flange will hold it.
- Remove two bolts from the lower knuckle support.
- Turn the steering wheel all the way, which will allow the element to fall out on its own.
- Remove the boot, which is located in the grenade structure.
- Remove the retaining ring.
- Unscrew the hinge from the shaft spline to avoid damaging other components.
- Check the operation of the entire system to determine the causes of the breakdown.
- Install a new CV joint using the steps in reverse order.
Replacing the CV boot
VAZ 2110 grenade and its boot
The process of replacing the boot is not as complicated as it seems at first glance. Most car owners change the boots one at a time, that is, when the inner boot wears out, the grenades change it without touching the outer one. And after a while, after damage or wear of the outer boot, they change it. This is a pointless waste of money, effort and time.
Note. It is strongly recommended that if it is necessary to service and repair CV joints, remove the entire shaft and replace both the inner and outer boots at the same time.
VAZ 21102 grenade
Diagnose part problems
The grenades are protected by a rubber boot. It is mounted on an external and internal hinge. The boot prevents dirt from getting into the CV joint. Another of its functions is to retain lubricant; without it, the hinge will not work.
If the boot wears out over time or is torn, sand, small stones and dirt will begin to get into the joint. After some time, the CV joint will become unusable and the grenade will have to be replaced. Such repairs will cost much more. Therefore, it is important to monitor the integrity of the anther. If a defect is detected, replace the CV joint boot.
You can visually check the condition of the anthers yourself, without resorting to the services of service station workers. It is best to drive your car into the inspection hole. First of all, you should pay attention to the boot of the outer CV joint. The VAZ 2110 has two boots on each outer side of the wheels. These anthers most often fail. The inner boot needs to be replaced much less frequently than the outer boot.
You can check the integrity of the outer CV joint boot without a hole. We stop the VAZ 2110 on the road, preferably in a place where the car will not interfere with the movement of either cars or pedestrians. We turn the steering wheel to the right to the extreme position, this will be enough to diagnose the outer boot on the left side.
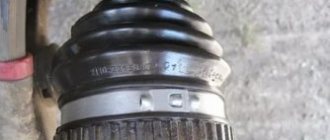
We similarly inspect the boot from the opposite side. If traces of grease are visible on the boot or there are cracks and cuts, then the boot should be replaced. The design of the VAZ 2110 allows you to cope with the replacement yourself.
Following the recommendations of experienced craftsmen, you should replace the boots of both the outer and inner CV joints at the same time. Even if the inner CV boot still looks intact and without cracks.
Purpose and principle of operation, possible malfunctions
The constant velocity joint of the VAZ 2110 car model (abbreviated CV joint) is subject to loads throughout the entire period of operation, which leads to its failure. The design is distinguished by the highest level of properties; high-quality carbon steel is used for its production, capable of withstanding loads for a long period of time.
CV joint VAZ 2110
The reasons for the failure of the CV joint VAZ 2110 vehicle include the ingress of various parts of dirt and sand inside, which is associated with loss of lubrication and at some point leads to damage if the equipment is operated with a torn rubber boot. In this case, it will be necessary to urgently replace the internal grenade, which fails and needs to be monitored for technical condition, guaranteeing long-term operation of the VAZ 2110 model car. You can find the need to replace the internal CV joint of the VAZ 2110 if you hear a corresponding crunch caused by the presence of gaps in the mechanism, foreign bodies leading to malfunction.
How to replace the inner CV joint boot of a VAZ 2110 with your own hands
To replace the inner CV joint boot of the VAZ 2110 we will need:
- set of wrenches: ring and open-end wrenches for 13, 17, 19;
- WD-40, if you don’t have it, you can use brake fluid;
- brush with metal bristles;
- mount;
- screwdriver;
- hammer with lead or brass head;
- container for oil from the gearbox;
- a new outer joint boot and an inner CV joint boot - 2 sets in case of replacement on both sides.
And so we move on to the step-by-step replacement instructions:
The most convenient way to change CV joint boots on a VAZ 2110 is in the inspection hole. The car is first set to the parking brake. We install the wheel stop. It ensures the vehicle remains stationary during repairs.
- After making sure that the car is stationary, we tear off the wheel studs. We jack up the side from which we are replacing. Remove the cap that protects the CV joint nut. Unscrew the wheel bolts and remove the wheel.
- If the crankcase protection is installed below, then remove it. Before dismantling, all threaded connections should be treated with WD-40 or brake fluid. We unscrew the plug in the gearbox and drain the oil into a prepared container.
- We unscrew the two bolts that hold the ball joint on the steering knuckle of the front suspension. To facilitate dismantling, spray the joint generously with WD-40.
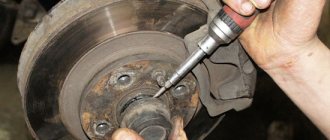
- We ask your partner to press the brake pedal, then unscrew the nut securing the outer CV joint to the hub. If you replace the CV joint boot on a VAZ 2110 yourself, you can block the brake disc using a screwdriver.
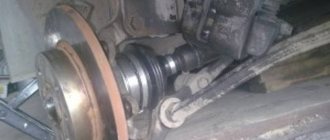
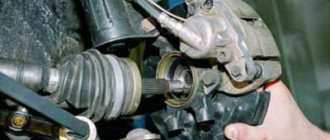
- We turn the steering wheel to the right all the way if we are replacing it on the left side. Remove the outer CV joint from the wheel hub. To prevent the drive shaft from falling, we tie it up using a regular wire or rope.
- Holding the axle shaft with your hand, use a pry bar to remove the inner CV joint from the box. DO NOT REMOVE TWO DRIVE SHAFT AT THE SAME TIME. The gears in the box may shift, and installing the drive shafts back will be very difficult.
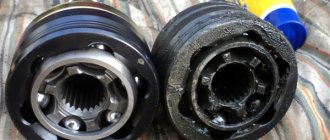
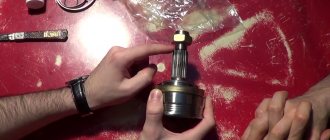
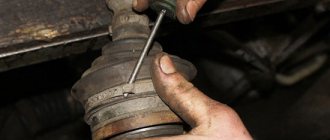
- We remove the clamps that secure the anthers. We clamp the axle shaft in a vice. Using a soft-head hammer, knock the grenades off the drive shaft. After washing the CV joints in gasoline to remove the old lubricant, we make sure that the joint is intact. We fill the hinge with new special lubricant. We install new boots and secure them with clamps. We press the CV joints onto the shaft.
- Having replaced the retaining ring on the inner CV joint, we insert the axle shaft into the box. To fix it in the box, carefully hit the axle shaft with a hammer through a wooden block several times.
- Install the drive shaft into the front wheel hub and secure it with a washer. Don't forget to put a washer under the nut. We attach the ball joint back to the steering knuckle.
- To replace the CV joint boot on the VAZ 2110 on the other side, repeat paragraphs. 1-9.
What will you need at work?
When replacing the internal CV joint of a VAZ 2110 car, you need to select the right equipment and tools, without which the next job is impossible. Repairing the unit does not seem likely; it will only need to be replaced .
To perform the following operations, you will need a set of equipment and tools:
- A new internal grenade, which includes a clamp and lubricant, will ensure subsequent trouble-free operation of the system over a long period of time;
- A lift, or a special inspection hole with a jack, will be required to lift and secure vehicle , guaranteeing safety during the work;
- A set of standard tools used to replace the internal CV joint. Includes wrenches, screwdrivers, pliers and much more needed for repairs.
Functionality check
of the inner and outer CV joints should be examined separately , since the procedures and signs are somewhat different.
External grenade
The most obvious and main sign of wear of this element is the appearance of a sound similar to a crunch. It appears because the grooves have worn out and the balls do not move along them as well as before. The crunching becomes noticeable when entering turns, sharply pressing the gas pedal or passing difficult road sections.
Grenade
If you want to verify that the outer CV joint is faulty, do the following:
- When starting from a standstill, deliberately create jerks, but not strong ones;
- Try to accelerate sharply and slow down;
- Move the shaft transversely between the CV joints. If you feel any play, then the grenade is definitely worn out.
Internal grenade
It is noteworthy that the internal hinge is more durable and less subject to wear. Most often, the inner CV joint declares its malfunction when simply driving in a straight line or when passing through difficult sections. A check for play, similar to an external grenade, will allow you to verify problems.
Replacement of failed equipment
Replacing the CV joint of a VAZ 2110 vehicle, located on the inside rather than the outside, is a simple process; several operations will be required. The design transmits rotation from the gearbox to the shaft. The operation of the device affects traffic safety; for this reason, detection of a CV joint failure is carried out at a high level from the ground.
The replacement operation is performed on a special lift, an inspection hole, which is due to its location in the lower part of the vehicle; access is needed only in this position.
Design
Drive diagram
If you disassemble the CV joint, it will consist of three main elements:
- Inner ring;
- A ring with holes that hold six balls - a separator;
- The hinge body together with the drive shaft.
In a VAZ 2110 car, the CV joint may need to be replaced. But which one exactly? After all, in the “ten” there are two of them - internal and external. They are necessary in order to effectively overcome all obstacles. Here one CV joint will clearly not be enough.
Internal and external
- The first grenade is internal, and it transmits torque to the shaft from the transmission.
- The second grenade is external and engages with the car's wheel hub.
Despite the fact that their operating principle is the same, they differ in design and price.
Tool for work
Replacing the hinge or its boot is relatively easy, and no specialized tools are required. All you need is:
- A set of keys of the most common sizes;
- A set of heads (a 30 head is required);
- Puller of ball joints and steering tips;
- A rubber or wooden hammer (mallet), or a regular one, but with a wooden handle;
- Jack;
- Knife;
- WD-40 product;
- Rags;
You will also need a new CV joint (if you plan to replace it), a new boot and mounting clamps, CV joint-4 lubricant or similar. Having stocked up with everything you need, you can start disassembling.
Tools for replacing the external CV joint of Lada 2110
There are several specific tools here that you can’t do without. To begin with, you need a 32mm socket, as well as a huge lever to unscrew this very grenade.
Next you will need something like a reverse hammer. The weight of the cargo is about a kilogram. If it is not there, then we will go along the second path, we will describe it below. You will also need a device for removing and installing clamps, either pliers, or just a screwdriver, we’ll talk about this a little later.

