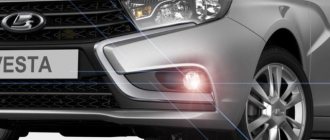
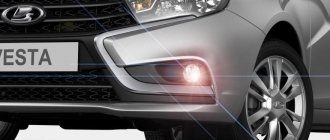
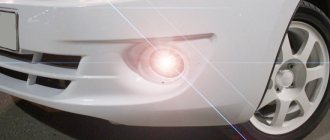
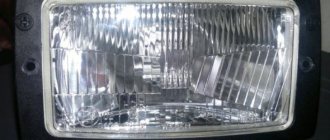
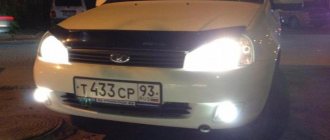
Cloudy headlight glasses
When operating a car, the headlights may not shine well due to clouding of the glass. The disruption of luminous elements in older cars is especially noticeable. Glass, even if it is not damaged mechanically and is regularly wiped, can become cloudy from dust, dirt, sand and small scratches that are not visible to the eye. However, the beam of light passing through such headlights is too scattered and loses its clarity, and this poses a certain problem when driving on the roads. Before you begin to eliminate this problem, you need to know what the headlights are made of. It can be either glass or carbonate. If it is glass, then it is easier to change it than to polish it and try to return it to its original condition. If it is polycarbonate, then such headlights have many advantages. Firstly, they are safer than glass ones and pose fewer threats during an accident. Secondly, their weight is significantly less than that of glass headlights. And thirdly, they are easier to replace. At the same time, these elements also have their downside - they are easily damaged or scratched. Such elements can only be wiped with a soft flannel cloth, and it is better to stick a special film on the surface of the polycarbonate, which will increase the service life.
Instructions - installing PTF on Lada Vesta
Installing fog lights on the Lada Vesta is difficult. This is due to the design of the electronic equipment of the Lada model. The fog lights on the Lada Vesta are controlled from the steering column switches, and they do not have a fixed position with the fog lights on. In addition to this, problems are created by the absence of a special electronic fuse box of the EMM type in all but the top-end trim levels of the Lada 2180. The signal about the start of PTF operation in the original design comes here. Owners of cheap modifications of the Lada Vesta have to look for other connection schemes. Despite the difficulties, installing PTF yourself is possible. To do this, you will need to purchase the headlights themselves, brackets for mounting them, a power button, a contact snout, a set of wires with corrugation, connectors and adapters, and a 16 Am fuse.
First remove the bumper
Connecting the PTF Vesta begins with disconnecting the battery and removing the bumper, which is simultaneously attached to the body, fender liners and lockers with a large number of bolts and screws. Unscrew one by one:
— 4 bolts in the lower part of the body;
— 4 self-tapping screws from the fender liner;
— 2 screws from each locker;
— 6 bolts on top of the body and 2 more under the license plates.
At this time, it is necessary to hold the bumper by the beam to avoid damage if it falls. The Lada Vesta has a massive bumper, so the help of a second person will not hurt. The detached part needs to be pulled slightly towards you and removed from the side brackets.
Preparing the seats and mounting the headlights
We have already said earlier that instead of fog lights, the fret manufacturer installs plastic plugs in which holes must be cut. This can be done with a bimetallic crown, or an ordinary stationery knife. The second method will take a little longer and require additional care. If it seems that it won’t be possible to cut smoothly, you can buy a new lining for the PTF.
Next, you should install and secure the pre-purchased brackets with self-tapping screws, and then place the fog lights themselves inside them.
At the same stage, the power button is installed. It can be placed wherever it is convenient for the driver, but usually a place is selected on the center console, next to the button used to open the luggage compartment. The hole for the button can be drilled or cut.
The most important point is connecting the fog lights
We lay the output to the button through the corrugated box between the side members, starting from the right headlight. It is more convenient to run the wires inside the cabin itself next to the passage into the pedal assembly.
The light bulb is connected in the same way as in the Lada Priora, Viburnum or Grant. Electricity is taken from the battery and connected to the contact relay through a fuse. The relay can be installed in the engine compartment or inside the cabin of the 2180. We extend the plus contact from the size fuse or from the cigarette lighter.
Wiring diagram
Carefully cut out the space for the power button.
We use the same principle as when installing Priora and Granta equipment.
The 12V load power for the relay must be taken from the battery using an M6 bolt, directly through the fuse.
Plus it will be possible to take it where the size fuse is located in the mounting block, from the cigarette lighter.
We mount the relay where it is most convenient: in the engine compartment or inside the cabin. So we got off with a “slight fright” - we interfered minimally with the electrical part, maintaining the warranty on Vesta.
Installation diagram for LUX version
Scheme for the LUX package
Lada Vesta Furia Roja › Logbook › Replacing the factory PTF with PTF Osvar.
Let's start with the fact that there were few factory PTFs, and I wanted a little more light from the PTF. Readings on various forums suggested three options: installing bi-lenses with xenon instead of PTF, installing PTF with N11 lamps, and installing Russian-made PTF with N1 lamps. Of course, I wanted the first option since it was a very bright + long-range mode, but the price tag here was 6 thousand+ in total and perhaps a little communication with traffic police officers, which I didn’t really want. The second option was more affordable, but the dubious quality of the PTFs themselves and the high cost of N11 lamps, compared to N1 lamps, gave rise to some doubts. The third option is the Russian PTF Osvar for the H1 lamp base. High-quality housing, iron reflector and glass diffuser. Of course, the third option won, so to speak, cheaply and angrily! And so let's start, ordered: Lada 8450006276 right fog light bracket Lada 8450006277 left fog light bracket Hella 4RA 933 332-101 relay, operating current Osvar 36023743 -2 pcs. fog lamp renault logan/sandero/duster Osram 64150NBU-HCB incandescent lamp, high beam headlight; incandescent lamp
I ordered everything on emex
relay from hella
I ordered the relay from Hella, I don’t know why), apparently Bosch were expensive. I used the relay to unload the standard wiring, since the standard PTFs had H16 lamps with a power of 19 watts, I didn’t take any risks and took the power from the battery, the standard PTF wiring is only controlled.
PTF themselves from OSVAR
On the left is Osvar, on the right is Valeo (factory)
The PTFs look very high quality and well assembled; the PTFs already have lamps. But he still advised me to coat the glass with sealant; after 10 thousand runs, a little sand appeared in the right PTF when I washed it generously. There were already lamps in the PTF.
simple lamps and standard brightness
Brackets for PTF
I ordered the brackets specially, because I knew that they needed to be modified, and I didn’t want to disfigure the factory ones.
Bracket already with PTF
As it turned out, you need to modify it a little, filing the plastic a little and the PTF fits like a family!
There is nothing special to explain about connecting the wiring; relay contacts 85.86 are taken from the wiring going to the PTF power supply; contact 87 is taken from + to the battery through the fuse. Contact 30 goes to the PTF power supply
I also threw a mat under the battery, purchased earlier for 50 rubles
We also purchased brighter lamps in PTF, high and low.
In the PTF I installed the previously installed PHILIPS H1 X-TREME VISION +130 in the far range, and in the far range I installed the OSRAM H1 NIGHT BREAKER +110. I haven’t installed the neighbor one yet, but they are waiting their turn PHILIPS H7 X-TREME VISION +130
And so, we begin removing the bumper to install the PTF
photo from the Internet Installing fog lights PTF Lada Vesta
We unscrew all the bolts that are shown in the picture, unclip the bumper from the wings, carefully and slightly pull the bumper towards you and turn off the temperature sensor in the bumper. Next, we place the bumper on a flat surface and dismantle the standard PTFs, which are held on by 2 screws, and also installed the new PTFs on 2 screws
In many places, IZH Full size is stamped on the plastic; in the back, there were different lamps from the factory. on the left was GE, on the right was Philips (the lights were the same)
For the experiment, only one PTF was installed and the new PTF was adjusted using the factory PTF
Full size, passenger side OSVAR, driver's side VALEO
We configure the PTF and see the difference
Full size difference in light on face
I made the adjustment the next day and installed the second PTF and also adjusted it.
And now night photos of the headlights:
Only PTF
Full size light more white
PTF + Middle
Full size headlight low beam lamps are still factory
PTF+Near+Far
Full size satisfied with the lighting
I am pleased with the result of the work done! The lighting just got better! I recommend! Thank you all for watching, like and repost!) Criticism is welcome!)
Fog lights are an invariable attribute of a modern car. Unfortunately, AvtoVAZ equips models with pre-installed PTF only in luxury versions. Owners of basic modifications are forced to upgrade the car themselves and order paid services from a service station.
What is the reason for installing fog lights?
- road safety in fog, snowfall, and reduced visibility;
- aesthetic appearance: the car looks completely different, a certain element of tuning, modernization.
Reviews are positive and negative
| № | Positive |
| 1. | Gennady, 32 years old, St. Petersburg: I bought the basic version of Vesta, I installed the PTF myself with a friend. There is nothing difficult about it, we did it in half an hour in total. |
| 2. | Kirill, 29 years old, Moscow: I traveled for two years without fog lights, it was very difficult in bad weather. I installed it at a service station, it was expensive, but the cost is worth it. |
| 3. | Vasily, 41 years old, Volgograd: bought the car second-hand, the previous owner installed a PTF. They illuminate well, cover the roadside, and visibility is good. |
| 4. | Dmitry, 45 years old, Samara: after a year of using Vesta, I realized that it wouldn’t work without additional lighting. I installed it myself and finished it in 20 minutes. |
| 5. | Alexander, 42 years old, Saratov: I bought Vesta in its basic configuration a year and a half ago. The car is good, but installing additional accessories is expensive. In particular, the fog lights cost me more than 45,000 rubles. |
| 6. | Ivan, 39 years old, Uralsk: my positive review of the PTF Autostol63261500097R, which I bought at a local store. Good price-quality ratio, warranty from the manufacturer. |
| 7. | Vyacheslav, 50 years old, Krasnodar: I don’t use the car very often, but I realized that I can’t do without additional headlights. Autumn time, often foggy, visibility is limited. I bought FranceCarFCR220029, my recommendations. |
| 8. | Alexey, 32 years old, Sevastopol: I bought a Lada Vesta in the basic version and decided to install fog lights. As it turned out, there was nothing complicated, there was more uncertainty. |
| Negative | |
| 9. | Vladimir, 32 years old, Moscow: I bought a car in a luxury configuration with PTF. I am dissatisfied with the quality of lighting, I plan to install Valeo 47401. In thick fog, visibility is still limited, despite the low landing. |
| 10. | Sergey, 33 years old, Samara: I drove for six months on factory fog lights, the quality is not very good. If possible, I will replace it with foreign analogues. |
| 11. | Kirill, 38 years old, St. Petersburg: garage mates recommended installing Autostol63261500097R instead of factory headlights. The cost of Autostol is one and a half thousand more expensive than the factory analogue, but the quality is obvious. |
| 12. | Valentin, 42 years old, Rostov-on-Don: I drove Vesta for six months, the car is good. There are not enough fog lights, weather conditions have worsened, visibility has decreased. I have selected several options: Valeo 47401, Autostol63 261500097R, I will choose and consult with specialists. |
| Video - Installing fog lights | Video - Installation without intervention in the ECU |
Replacing fog lamps on a Lada Vesta
To remove an old part on a Lada Vesta model, you must first provide free access to it. You can do this in two ways:
- The first method is simpler and takes much less time. To provide access to the PTF mounts, it is necessary to turn the wheel to the inside. Of course, this option may not always be effective, since if you try to unscrew the fastening screw with a long screwdriver, you will not succeed. Then you should use the second method;
- The second method is to remove the front wheel. Of course, this will take you much more time and you will have to put in more effort, but in the end you will get full access to the PTF mounts of the Lada Vesta car.
The inner wall of the body of the part we are interested in is located on the fender liner. At this stage, you can continue dismantling the fog lamp, or simply replace the lamp in it, if necessary.
In order to gain direct access to the light bulb, just turn the hatch on the cover counterclockwise until it stops. The lamp, like the hatch, has a thread. Only in order to unscrew the lamp itself, you need to rotate it counterclockwise. Now, you will release the wiring harness and the light bulb, and in order to separate them, you will need to press the latches.
Installation is done in the same way in reverse order.
It is worth paying attention to the sequence of tightening the screws. After tightening the first screw, you need to tighten the second one diagonally
Removing the front bumper
Official representatives of AvtoVAZ consider the installation of lighting equipment as an upgrade of the equipment of the Lada Vesta car to the level of the maximum configuration. The cost of the procedure reaches 60 thousand rubles.
The exorbitant price is explained by the complexity of performing the process using the dealer method, which also involves the use of original production parts. The cables alone will cost the owner about 20 thousand rubles. Therefore, many car owners are interested in how to install headlights themselves.
Do-it-yourself installation allows you to achieve significant cost savings. The only unpleasant moment here may be the possible cancellation of the warranty.
Considering the massiveness and aesthetic component of this element in the exterior, dismantling the front bumper should be done carefully and strictly according to the instructions.
First of all, you need to disconnect and remove the battery from under the hood. Then, using a “10” head, unscrew the 2 bolts securing the air filter unit, which also hold the upper part of the bumper.
The registration numbers are removed, under which there are 2 screws securing the bumper to the central beam. Using an L-shaped TORX “20” key, unscrew these 2 screws and 2 of the same self-tapping screws that attach the bumper to the wings in the wheel arches.
Then, using an L-shaped TORX “30”, unscrew 4 screws securing the lower part of the bumper, and TORX-20 – 2 more screws securing them to the side panels on each side.
After this, the bumper is pulled forward, alternately on each side of the wheel arches, until its latches come out of the mounting sockets.
The bumper remains hanging on the top four TORX-30 key bolts, of which the central one (opposite the hood lock bracket) is unscrewed last, while keeping the bumper from falling, after which the accessory is completely disconnected from the car.
It is advisable to use this situation to simultaneously clean the radiator from insects and debris.
Replacing the lamps inside the headlights
The original halogen high and low beam devices on the Lada Vesta stand out for their high-quality assembly and good light. The headlights illuminate the entire road in front of the car and at some angle on the sides. When replacing them, remember that halogen lamps must not be touched with hands. All manipulations are carried out with gloves on your hands, or even better, holding the base. Otherwise, there are no difficulties when replacing light bulbs or headlights. To do this, you don’t even have to remove the headlight itself, the bumper, or perform complex manipulations.
Open the hood and approach the headlight from behind. You can see 2 lamp covers (low and high beam). They are very easy to unscrew by turning clockwise. Then you need to disconnect the wiring and release the socket from the spring retainer, remove the socket and replace the burnt out lamp. The DRL, turn signal and side light bulbs are much easier to replace. To gain access to the bulb, turn the socket clockwise and then remove it. The burnt out lamp is ready to be replaced. Assembly is carried out in reverse order. Now in more detail about all types of lamps.
Recommendations for selection
Purchase accessories by prior agreement with service station specialists and auto store managers. An exception is cases of purchasing original products, when the article numbers for the Lada Vesta fog lights are identical to the original ones.
Check the integrity of the packaging, the presence of holographic elements, barcodes, dates, and batch numbers. Keep your receipt until the warranty expires.
Install lighting fixtures only if you have experience in servicing the equipment. Otherwise, you risk causing damage and connecting the limit switches incorrectly.
Which fog lights are better for the Lada Vesta is an individual choice. It largely depends on the size of the allocated budget. It is advisable to give preference to foreign analogues.
Conclusion
If you are the owner of a non-luxury Lada Vesta model and decide to install fog lights, then choose from more expensive analogues. If you are the owner of a luxury version of Lada Vesta, which is equipped with fog lights by default, consider replacing the lenses and diode elements. In any case, it will be cheaper than buying and installing accessories as a kit.
We install PTF ourselves
Let's look at the installation process. From the list of factory items you should purchase: fog lights, a power button, inserts for attaching the lights to the bumper, a 4-pin relay, a 16-amp fuse, a wire, a plastic corrugation (at least 5 m long). First you need to dismantle the bumper and cut through the plugs where the headlights are installed. The cuts are made either with a 76-diameter crown or with a knife. We attach the fog lamp bracket with self-tapping screws. In the lower left part under the steering wheel of the Lada Vesta (near the button that opens the trunk) we install a button for turning on the fog lights. It can also be placed directly on the instrument panel. You must first cut out a receiving hole for the button.
The wires leading to the right headlight should be hidden in a metal box. From the engine compartment to the passenger compartment we lay the wire through a special hole in the pedal assembly. In this case, a simplified scheme similar to the Lada Kalina, Priora, Grant is used.
Power to the relay is supplied from the battery (necessarily through a fuse). The positive contact for controlling the button is supplied from the mounting block. Take the plus coming from the dimensions or the cigarette lighter. The device for closing the circuit can be located both inside the cabin and under the hood. We connect all the elements of the circuit according to this diagram and check the operation of the PTF using the button.
Fog lights, like the main optics of a car, play an important role in creating high-quality lighting. Fog lights are especially important in poor visibility conditions. For example, during rain, heavy fog or snowfall. As for the Lada Vesta, the situation here is such that fog lights are provided only in the “luxury” configuration. Therefore, installing PTF is relevant for this family of cars. If you are determined to install fog lights yourself, then this review is for you.
It must be said that installing PTF on Vesta yourself is somewhat more difficult than on other Lada cars. On the other hand, you will thus save quite a decent amount. So, for example, an official dealer can charge you up to 10 thousand rubles for installation, depending on the region. If you do not have such an amount, then it is better, of course, to carry out the installation yourself. Therefore, be patient and have enough time.
Preparation for equipment installation
The main difficulty is that the electrical system design of this machine is significantly different from previous versions.
You will have to cut a hole for the button to turn on the fog lights.
The lighting will be controlled using a switch mounted under the steering wheel, but does not have suitable positions for fixing the light output. The electrical signal comes from the lever through an additional unit, available only in the luxury version. So the most acceptable solution is to install a kit with a separate connection and a special button output.
List of tools needed for installation:
- pliers;
- screwdriver with Phillips bits;
- self-tapping screws;
- 76 mm bit for drilling holes;
- stationery knife;
- a set of keys for removing the bumper and installing optics.
Headlamp device
A block headlight is a design development that allows you to combine lamps in a single housing, each of which would do its own job. The light bulbs on the Vesta in the headlight unit have their own fastening elements, as well as places for installation.
Headlamp unit. Photo source: https://deilo.ru/chelabinsk/transport/lada-vesta-fara-perednyaya-levaya-402370297079657.html
The headlight contains the following lamps:
- halogen low beam;
- halogen high beam lamps;
- turn signal lamps;
- daytime running lights and dimensions.
The convenience is that, if necessary, the owner can replace each light bulb with his own hands without removing the entire headlight, and there is also the opportunity to buy a complete headlight unit without purchasing individual elements.
What kind of high and low beam lamps are on the Vesta?
Lada Vesta bulbs for high and low beam meet international standards and are not inferior in quality to foreign analogues. AvtoVAZ uses the following lamps on Vesta:
- near – H7;
- distant – H1.
The consumption of both is 55 W. Despite the general power rating, they differ in base.
Lamp socket for headlight
Lada Vesta light bulbs have their own markings. Their designations are certified according to EEC:
- near – H7;
- distant – H1;
- turn signal – PY21W;
- daytime running lights (DRL) and dimensions – W21/5W, brand – Vanssi;
- PTF – H16.
These names are easy to find in automotive stores or service centers.
How do fog lights work?
Fog lights on Lada Vesta Unlike conventional high or low beams, which create a translucent veil in the rain, complicating visibility, PTFs, with their specificity of a wide range of action, sufficiently illuminate the road surface. In addition, Lada Vesta fog lights play a positive role for oncoming drivers in difficult weather conditions. To ensure excellent visibility in snowstorms, heavy rain, etc. PTF is being developed in the following specifics:
- It has a fairly clear upper edge of the light beam. It follows that illumination and reflection do not rise above the minimum required horizontal threshold.
- Lada Vesta fog lights should be installed closer to the road itself, since there is always a clear gap of atmosphere between the road and the layer of foggy veil, into which a wide beam should penetrate.
Why don't you have fog lights?
On modern domestic cars, such additional equipment is installed exclusively in luxury configurations or as an additional option. If our Vesta did not have foglights when we purchased it, then we will need to do the installation ourselves.
It is important to remember one immutable truth - even installing such a small thing as a pair of headlights automatically leads to loss of warranty. There can only be one way out, try to perform the so-called re-equipment to a configuration an order of magnitude higher than the existing one
You will need a standard kit from AvtoVAZ, which includes:
There can only be one way out, try to perform the so-called re-equipment to a configuration an order of magnitude higher than the existing one. You will need a standard kit from AvtoVAZ, which includes:
- Two headlights (261500097R);
- Front wiring kit in harness (8450006983);
- Left fastening element (8450006277);
- Right fastening element (8450006276);
- Switch kit (8450006924);
- Body electronics unit (231A08052R);
- Instrument panel wiring harness kit (8450030715).
PTF installation cost
It would be good to first think about how much such a procedure would cost, because on Vesta an installation of this kind is a rather complicated and time-consuming task.
The cost of pleasure, at the time of writing, is approximately 50,000 rubles. If you have somewhere to add 15-20 thousand, then you can safely go to the dealer and install it on site. If something happens, you can always fix any damage under warranty. Has the desire to save money taken over? We do everything with our own hands.
How much does installation work cost?
If you don’t have enough time to install fog lights yourself, you can turn to specialists for help. An official Lada dealer carries out such work for an amount approximately equal to 60-70 thousand rubles. Of this, at least 10 thousand rubles will have to be paid to an electrician for installation. The price consists of the cost of original spare parts required for installing the PTF and complex work that will completely copy the luxury version.
Installing foglights yourself will reduce the required budget. In addition to the headlights themselves, you will need to purchase other equipment, with a total cost of at least 5,000 rubles. To summarize, we can say that installing PTF on fret 2180 without outside help is about 5 times cheaper than from an official dealer.
The installation of fog lights on a Lada Vesta by an official representative of AvtoVAZ is considered as a partial upgrade of the car’s equipment to a top-end one. Typically, such a procedure costs no less than 60 thousand rubles.
This exorbitant amount is due to the complexity of installation using the “dealer” method and the need to use original parts from AvtoVAZ. The dashboard wires alone will cost about 20 thousand rubles.
Therefore, installing it yourself will allow you to save a lot of money. The only trouble is that in this case, the car’s warranty support may be voided.
We install PTF ourselves
Let's look at the installation process. From the list of factory items you should purchase: fog lights, a power button, inserts for attaching the lights to the bumper, a 4-pin relay, a 16-amp fuse, a wire, a plastic corrugation (at least 5 m long). First you need to dismantle the bumper and cut through the plugs where the headlights are installed. The cuts are made either with a 76-diameter crown or with a knife. We attach the fog lamp bracket with self-tapping screws. In the lower left part under the steering wheel of the Lada Vesta (near the button that opens the trunk) we install a button for turning on the fog lights. It can also be placed directly on the instrument panel. You must first cut out a receiving hole for the button.
The wires leading to the right headlight should be hidden in a metal box. From the engine compartment to the passenger compartment we lay the wire through a special hole in the pedal assembly. In this case, a simplified scheme similar to the Lada Kalina, Priora, Grant is used.
Power to the relay is supplied from the battery (necessarily through a fuse). The positive contact for controlling the button is supplied from the mounting block. Take the plus coming from the dimensions or the cigarette lighter. The device for closing the circuit can be located both inside the cabin and under the hood. We connect all the elements of the circuit according to this diagram and check the operation of the PTF using the button.
Fog on the road is a frequent occurrence, so it is difficult to imagine a modern car without fog lights (FFL), which increase driving safety in poor visibility.
Lada Vesta is a modern sedan, and the need to equip it with this optics is also obvious, but fog lights are installed by the manufacturer only on top versions of the model, while in the basic configuration, the front bumper only has removable plugs with design places for independent equipment of the PTF car.
In addition, the standard daytime running lights (DRL) of the Lada Vesta, the use of which is mandatory in Russia, are not of the best design, and you can tune them by replacing the standard yellow lamps with white LED ones. The result of such low-cost optimization will please any car owner.
Let's look at the nuances of installing fog lights and tuning DRLs in more detail.
conclusions
It is necessary to select the lamp correctly.
This article discussed the simplest, but most expensive method of installing anti-fog equipment.
In practice, especially if your Lada Vesta is no longer under warranty, everything can be done at much lower cost using plastic corrugation, simpler wiring, a 16-amp fuse, and a 4-pin relay. In general, the installation sequence will not differ.
By choosing the most suitable method, you can equip your car with enough light for comfortable driving in the dark, when visibility is very limited.
Lada Vesta is equipped with fog lights only in the luxury version. Other versions of the car have special plugs for their installation. This can be done at the dealer, but many car owners refuse this option due to high prices. Therefore, you have to purchase and install a kit for connecting PTF to Vesta yourself.
Lada Vesta
Lada Vesta. Replacing lamps - part 1
For normal operation of the lighting and light signaling system, use the lamps specified in Appendix 2,
Note. You can replace the lamps yourself using the methods described below. If replacement seems difficult, it is recommended to contact your dealer.
ATTENTION!
Before replacing a lamp, make sure the associated signal light is turned off.
Block lights
To remove the low beam lamp, do the following:
— remove cover 2 (Fig. 11) by turning it counterclockwise;
— disconnect the wire block 7 from the lamp;
— remove the antenna 8 of the spring clamp from the groove;
- remove the lamp;
— Install the new lamp in the reverse order.
To remove the high beam lamp, do the following:
— remove cover 1 by turning it counterclockwise;
— disconnect wire block 6 from the lamp;
— remove the antenna 5 of the spring clamp from the groove;
- remove the lamp;
— Install the new lamp in the reverse order.
To remove the turn signal lamp, do the following:
— turn socket 4 counterclockwise and remove it from the seat assembled with the lamp;
— remove the lamp from the socket by turning it counterclockwise;
— Install the new lamp in the reverse order.
To remove the daytime running light and side light bulbs, do the following:
— turn socket 3 counterclockwise and remove it from the seat assembled with the lamp;
— remove the lamp from the socket;
— Install the new lamp in the reverse order.
Rice. 11. Headlamp
Tail lights
Replacing the turn signal and brake/side light bulbs on the exterior fender light.
To replace the turn signal lamp 4 you must:
— open the trunk trim hatch located in the rear light installation area, providing access to the socket connector 4 of the turn signal lamp;
— turn patron-connector 4 counterclockwise and remove it from the seat assembled with the lamp;
— remove the lamp from the socket by pulling it towards you.
Reinstall the cartridge connector in the reverse order.
To replace the brake/side light bulb 3 you must:
— open the trunk trim flap located in the rear light installation area, providing access to the socket-socket 3 of the brake signal/side light lamp;
— turn the socket-socket 3 counterclockwise and remove it from the seat assembled with the lamp;
— remove the lamp from the socket by turning it counterclockwise.
Reinstall the connector cartridge in reverse order.
Replacing the reverse and side light bulbs on the interior light located on the trunk lid of the car
To replace the reverse light bulb 1 (Fig. 12), you must:
— unlock the two outer holders 1 (Fig. 13) of the trunk trim 2. The trim holder is a structure of a fixed base and a movable fixing “fungus” 3 (Fig. 13). When the “fungus” is raised, the holder is unlocked;
— to unlock the trim holder 3 (Fig. 13), it is necessary, for example, to slightly lift the moving part of both holders using the blade of the ignition switch key 4 (Fig. 13);
Rice. 12. Tail lights
Rice. 13. Replacing the reversing and side light bulbs on the outside lamp
— overcoming the resistance of the holders, bend the trunk lid trim to gain access to the connector cartridge 1 (Fig. 12). To avoid damage to the upholstery, bend back no more than 7-8 cm;
— turn the socket connector 1 (Fig. 12) counterclockwise and remove it from the seat assembled with the lamp;
— remove the lamp from the socket by pulling it towards you.
Reinstall the connector cartridge in reverse order.
To replace the side light bulb 2 (Fig. 12), you must:
— using the same sequence as for replacing the reverse light lamp 1, provide access to the connector socket 2 of the side light lamp;
— turn the socket-socket 2 counterclockwise and remove it from the seat assembled with the lamp;
— remove the lamp from the socket by pulling it towards you.
Reinstall the connector cartridge in reverse order.
To replace the reverse and side light bulbs in the right headlight, a similar sequence is used.
