If during operation of the car you experience body vibration at idle, then, first of all, you need to check the engine mounts. It is quite possible that they served their time.
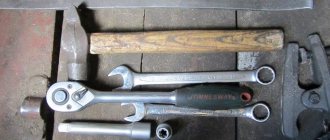
In this article we will look at how to change the left and right mounts (mounts) of a VAZ 2110-2112 engine. To complete the work we will need the following:
- Inspection pit or overpass;
- Jack;
- Socket wrench 15;
- Socket wrench 13;
- A little strength and patience)).
Prices
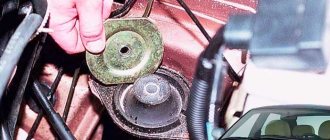
Before you go to the store, you should determine whether it is worth changing only the cushions or the entire support assembly. Depending on the condition of the metal supports and the absence of damage on it, you can replace only its rubberized component.
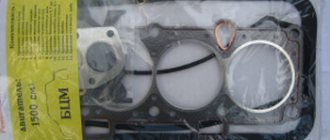
- The price of a set of pillows for a 16-valve VAZ-2112 is about 1,500 rubles, and the assembled supports are 3,000 rubles.
- Work on replacing pillows in car services varies within 500 rubles per piece, however, we believe that this is a waste of money, and we suggest that you carry out this work yourself, since no special skills are required for this.
Left support - removal and replacement
- We drive the car into a pit or onto an overpass;
- Remove the engine splash guard (protection);
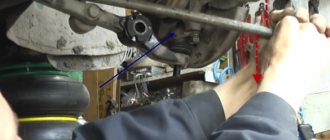
- We install a jack under the gearbox (it is better to place a small wooden block between the jack and the gearbox) and lift the box slightly, thereby freeing the left support;
- Take a 15mm socket wrench with an extension and unscrew the support stud nut;
- Remove the upper support stop;
- We release the jack a little so that the box drops slightly and remove the support pin;
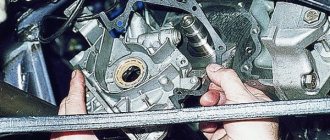
- After this, using a 13mm socket wrench, you need to unscrew the 2 bolts that secure the support cushion to the body bracket;
- Slightly move the cushion towards the engine and remove it;
- Remove the lower support stop.
Installation of the new left support (cushion) must be done in the reverse order. To prevent the pin from turning, you need to make sure that its protrusions fit into the oval hole in the gearbox housing bracket.
Design and purpose of tens engine mounts
Over the years, vast practical experience has been accumulated on the topic of how to change engine mounts on a VAZ 2110, and videos of repair processes can also be found in abundance. However, few people pay attention to the features of the part. And, it must be said, it is in vain, because such knowledge will help to accurately determine the source of vibration and purchase the necessary spare part for repair.
The main purpose of the engine support is to reduce the level of vibration transmitted from the power unit to the car body. The rubber-metal structure consists of a steel base with a thick rubber cushion. The device has proven itself well, since it is quite reliable and is worth the money.
The eight-valve Lada 2110 engines are attached to the body at three points: right, left and rear. The side supports connect the body to the engine block through through holes. The rear support is attached with two bolts to the gearbox, and two nuts to the body. The importance of this damper part is very significant - it prevents longitudinal vibrations of the internal combustion engine during braking and acceleration.
How to check engine mounts yourself? Simple tips
- First, you should drive the car into a garage or other area with a flat floor;
- Secondly, we lift the car using a jack at the same time from the front wheels and in the middle of the car, more precisely under the engine, we install a wooden log or other support and remove the jack;
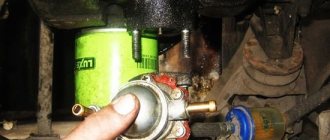
- Third, lie under the car and inspect the engine mounts. A visual inspection can reveal: hardening of the rubber, the presence of cracks and tears, as well as delamination of the support, or more precisely, separation of its metal part from the rubber.
- 1. Disconnect the wire from the battery that goes to ground, lift the car and install supports if necessary;
- 2. Using a jack, lift the engine to provide access to the faulty part;
- 3. Unscrew the bolts from the mounting points to the engine and body and remove the faulty part;
- 4. Install the new one in place of the old one and tighten it, while in order to avoid vibration and extraneous noise, tighten the nuts with the engine running. And assemble all the components that were previously dismantled.
AutoFlit.ru
Priora engine for VAZ 2110
- Comparison of technical characteristics of VAZ-21124 and VAZ-21126 engines
- Comparison of power indicators of engines 21124 and 21126
- Table of changes in units, parts and components of the VAZ 21126 engine compared to the 21124 engine
- The difference is in the connecting rod and piston group, piston pins and lock rings, cylinder block gasket, timing drive, timing belt, support rollers and timing belt tensioning mechanisms, crankshaft pulleys, water pump, catalytic converter and its gasket.
Replacing a VAZ 21124 engine with a VAZ 21126
- All engine mount mounts are identical.
- The differences are in the plugs of the coolant temperature sensor and the oil pressure sensor, so we replace them with standard ones (if you have Priora wiring, then you do not need to change them).
- It is necessary to reflash the January 7.2 ECU specifically for the Priorovsky engine. You can order the firmware on the Ikin website.
- It is not necessary to install the Priora catalytic collector; the main thing is to programmatically disable the second oxygen sensor, since the ICE 21126 has Euro-3 standards.
- Consumption of 21126 in the city with heavy traffic jams and warm-ups in the morning (10 minutes) ranges from 6 to 9 l/100 km.
- Consumption on the highway (average speed according to BC 76 km/h, speed from 20 km/h to 180 km/h) consumption 6.2/100 l.
xn—2111-43da1a8c.xn—p1ai
see also
- In this position, using the “15” key, you can unscrew the main nut, after which the box lowers slightly;
- The pillow limiter at the top is removed;
- Using a spanner “13”, unscrew the 2 nuts securing the support to the body and remove it;
- Next, the limiter from below is removed along with the pin.
- First, remove the belt from the generator, it will interfere. Next, the attachment of the “genes” to the motor is slightly loosened;
- We place a jack at the bottom of the engine crankcase and lift it;
- Unscrew the nut securing the pillow, use the “15” key;
- Remove the 2 screws securing the pillow to the bracket;
- All that remains is to unscrew the 3 bolts from the spar and remove the bracket;
- Remove the old cushion and install the new one.
AutoFlit.ru
avtoexperts.ru
In today's article we will talk about such important elements of the transmission as gearbox mounts. Many car enthusiasts do not even know what they look like or where they are until these products make themselves felt with various types of malfunctions.
In order to understand and promptly respond to emerging problems with gearbox mounts and resolve the issue with minimal means, we will try to talk about their purpose and malfunctions in more detail.
Gearbox support for VAZ 2114: new on the left, old on the right
Purpose
The gearbox supports are designed to secure it to body elements, as well as to suppress vibration and noise when driving.
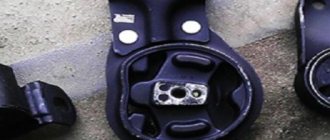
Manual transmission cushion VAZ 2112
Device and types
Depending on the design of the vehicle, gearbox supports can be made in different designs. Depending on the type of cushion, the boxes can be rubber-metal or hydraulic.
Rubber-metal
This type of product is a simple design consisting of two metal plates between which there is wear-resistant rubber.
Rubber-metal box cushion for VAZ 2110
This is the cheapest and most popular type of pillow. Recently, some manufacturers have begun to replace rubber with polyurethane due to its increased wear resistance. This type of support is available in both collapsible and non-dismountable versions.
Hydraulic
These cushions are a more modern design and are able to effectively smooth out any vibrations, adjusting to the operation of the power plant.
The support itself is a housing with two chambers located in it, with a membrane between them. Both chambers contain a hydraulic filler. The purpose of the membrane is to eliminate slight vibration when the car is not moving quickly on a flat highway and the engine is idling.
Hydraulic support
The liquid in the chambers is responsible for the vibrations that appear at speed. The changing pressure forces it to move between the chambers of the support, increasing the stiffness of the cushion, while dampening almost any strong vibrations.
Basic faults
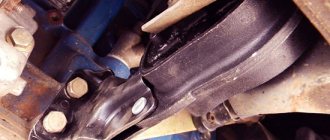
On average, the service life of gearbox supports is about 100 thousand kilometers or more. However, during long-term operation of the vehicle, the power unit supports experience various loads, plus temperature changes, which negatively affects their condition. The rubber of the cushions loses its elasticity, delaminates, or cracks, and eventually completely collapses.
Collapsed automatic transmission support of Volkswagen Tiguan
Large loads on the gearbox supports occur when starting and braking the vehicle. At the same time, if the driver prefers an aggressive driving style, that is, he starts abruptly and brakes sharply, then the airbags simply will not be able to last their service life and will fail ahead of time.
Tired Fiat Albea gearbox cushion
Malfunctions also include collisions with various obstacles, when the support bracket itself may be damaged. In addition to this, oil or antifreeze leakage that gets onto the rubber base of the cushion can also reduce the service life of the support. Plus, there is a high thermal load in the engine compartment with simultaneous splashes of cold water.
Signs of a faulty support
A failed gearbox cushion will make itself felt with characteristic signs. So, when driving or braking the car, unpleasant clicks, jolts, knocks, squeaks and noise will appear in the area of the front of the car.
When driving over various uneven surfaces, shocks will again appear in the front of the car, as well as vibration and feedback to the gear shift lever. Plus, when the support wears out, a characteristic squeaking and clanging sound often appears and can interfere with speed.
On rear-wheel drive car models, if the gearbox mounts are worn out, shifting gears will be difficult, plus the car will vibrate while in motion.
A support malfunction can also be determined by structure-borne noise, for example, when starting and stopping the engine, as well as when the load changes.
Checking status
The condition of the supports can be checked visually. Upon inspection, the product should not show cracks (most often appear along the edges), tears, delaminations, or hardening of the rubber. Sometimes, when hardening, the rubber part peels off from the body of the pillow, which will be visible upon inspection.
Transmission cushion requiring replacement
When the silent blocks of the gearbox supports wear out, the gearbox linkage fastenings may break, the cushions may become deformed with the appearance of cracks, and eventually the support may burst.
For the presence of backlashes
The malfunction of the gearbox cushion can be determined in the inspection hole or overpass during its inspection. You need to apply force to the box, moving it sideways or up and down, while looking at the condition of the support. You can also apply force to the support using a pry bar. A worn part will “move” with its internal part. The working support in this case will look like a single whole, elastically resisting the applied load.
In addition to the supports themselves, their mounting bolts may fail, which will be visible from the sagging box.
General replacement scheme
Dismantling and installing a new gearbox cushion on most car models can be done with your own hands, without turning to car service professionals. It is enough to have an inspection hole in the garage, not be afraid of dirty work and purchase a minimum list of tools.
To work you must have:
• Jack;
• the necessary set of tools (the list is indicated in the repair manual for this vehicle);
• Safety stands for the engine;
• New product.
Operating procedure
• The car is placed on the inspection hole, the handbrake is raised and supports are installed under the wheels;
• The battery and battery stand are removed (depending on the design of the car model);
• The body is lifted with a jack, and a reliable piece of board is placed under the power unit across the inspection hole. If the garage has a manual hoist, then only the engine itself is raised;
• Stops are placed on the board and the body is lowered onto them from a jack, thereby unloading the supports;
The photo shows the replacement of gearbox cushions using the example of an Audi 80
• The gearbox support fasteners are released and removed;
Unscrew the bolts and dismantle the support
• Before installing a new cushion, you need to place it on the future location and check the alignment of the holes in the support and the holes in the body. If necessary, you can lower or raise the body a little with a jack;
• A new product is installed, the fasteners are made using the torque prescribed by the manufacturer, and everything is assembled in the reverse order.
Installed a new gearbox cushion. Photo — Drive2.ru
Finally
To extend the service life of the supports, we recommend choosing a gentle driving mode, avoiding sudden acceleration and braking. Also, periodically pay attention to the condition of the power unit cushions in order to replace them in a timely manner. It is recommended to check them at every scheduled maintenance or when signs of malfunction appear.
If oil or coolant gets on the supports, clean and wipe them dry, keeping the rubber from corroding.
Installing an additional gearbox cushion
- Rear cushion of the VAZ 2110 gearbox (8 cells), catalog number 2110-1001286/50;
- 2x Bolt M12*80 or M12*75;
- 2x Nut M12 with plastic;
- 4x Washer baud bolt M12;
- 2x Bolt M10*35 or M10*25;
- 2x Grover for M10;
- 4x Silent block washer;
- 2 keys “19”;
- key "17".
- We fasten the additional support to the gearbox with two M12 bolts, using two “19” keys;
- We fasten the pillow to the body with M10 bolts using a “17” wrench;
- Make sure that the support is not stressed and there is a gap in the indicated place (if necessary, place washers under the bolts).
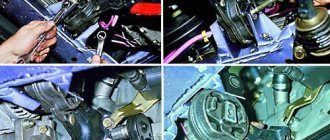
Replacing the right support
- Remove the engine splash guard;
- We also remove the generator belt (read about how to remove the generator belt here);
- We install a jack under the engine and lift it slightly, thereby unloading the right support;
- As in the case of the left support, take a 17 socket wrench and unscrew the upper nut of the pillow bolt;
- Next, using a 15mm socket wrench, unscrew and remove the pillow bolt along with the limiter;
- Next, raise the jack a little, remove the shaped nut from under the engine bracket and remove the upper limiter;
- Take a 13mm wrench and unscrew the 2 bolts securing the airbag to the body bracket and remove the airbag.
Install the new right support in the reverse order.
Please note that the shaped nut of the support bolt must be installed on the upper stop with the protrusions facing up. You can now buy engine mounts in any auto store, or on the auto parts market; there are also now a huge number of online stores with delivery, but I do not recommend that you order spare parts from such stores, because It’s better to look at everything before buying and check what can be done in a car store or on the market.
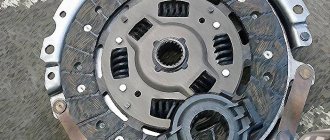
Replacing engine mounts on a 16-valve VAZ-2112 with your own hands: remove from the support
An engine mount is a special support that is designed to secure the engine to the car body. It is a structure made of a steel body and a rubber (rubber - approx.) cushion placed in it. Its main purpose is to minimize vibration on the car body coming from the engine.
The video shows the detailed process of replacing engine mounts on a VAZ 2110-2112.
When should you change the power unit mounts on a VAZ 2110: signs and reasons
Before you change the engine mounts of a VAZ 2110 car and watch a video of this process, you need to study the signs that indicate a breakdown of the rubber-metal mounts. The main symptoms characterizing problems with damper units:
- Vibrations transmitted to the steering wheel and pedal unit when idling.
- Extraneous noise in the cabin when moving on an uneven surface.
- A characteristic knocking sound in the engine compartment during acceleration and braking.
When drawing conclusions after your observations, you should not confuse vibrations on the steering wheel during braking, which are associated with defects in the brake discs or pads. To be more convincing, you need to open the hood and inspect the power unit supports. If you place your palm on a running internal combustion engine, you can feel changes in its operation.
Many years of experience in operating the Lada 2110 allows us to assert that the reasons for the failure of damper cushions are the following factors:
- Deformation phenomena on the rubber support due to mechanical and temperature influences, as well as due to exhausted service life.
- Cracking and delamination of rubber from exposure to chemically active components.
- Loss of elasticity caused by temperature changes.