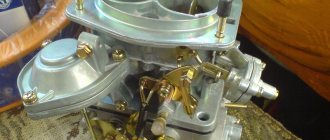
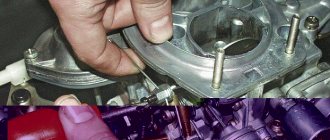
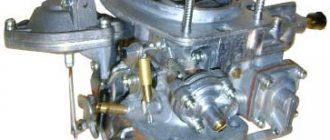
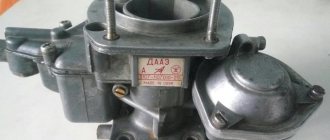
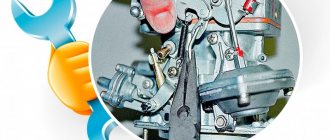
The process of adjusting the VAZ-2105 carburetor is a simple task that can be completed by any car owner who knows the device and the sequence of necessary operations. The principle of operation of a carburetor is to create a fuel-air mixture by mixing gasoline with oxygen and then feeding it into the combustion chamber. In this article we will get acquainted with the design, features and advantages, and also take a detailed look at how to adjust this unit with your own hands.
Today in the car market, carburetor engines are in less demand than injection units. This is due to the trend created by world leaders in the field of mechanical engineering. They offer a new filling with a wider range of capabilities and improved characteristics. However, carburetors have a number of advantages that make them most effective in certain situations. Only they can ensure successful engine starting the first time in the most severe frosts. A small volume of vapor is retained in the inlet manifold, which allows you to start the engine on the first try at low temperatures. Also, on domestic VAZ-2105 cars there is a choke. With its help, the fuel system is enriched, the concentration of the combustible mixture is increased, thanks to which the engine warms up much faster.
How does a carburetor work on a VAZ 2105
There is nothing complicated about the operation of a carburetor. The intake manifold connects the fuel system to the power unit. When the engine is running, the pressure in this manifold decreases. This causes a vacuum to form in the carburetor. It is the reason why both gasoline and air are sucked in at the same time. As a result, these two components are mixed to form a working mixture. And thanks to this mixture, the pistons begin to move.
In order for a vehicle engine to work efficiently, it is necessary to achieve ideal operation of all carburetor systems. This includes engine starting and warming up systems, idle speed, gasoline level control system, accelerator pump, elements of the main metering chamber, and econostat.
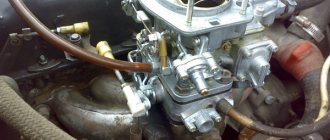
According to experts, you can adjust the carburetor even without removing it from the car.
Before you start adjusting the carburetor, you need to be sure that you know the structure of the unit. The VAZ 2105 carburetor has several most important components. It is they who will need to be regulated. This is a system that doses, starts and warms up the engine; system responsible for the level of gasoline; idle system; econostat; acceleration pump.
Purpose and design of the carburetor
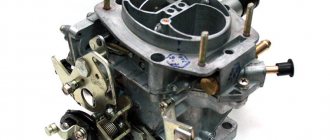
The main function of the unit is to ensure the preparation and dosage of the air-fuel mixture in all engine operating modes without the participation of electronic systems, as is implemented in more modern cars with an injector. The DAAZ 2105 carburetor, installed on the mounting flange of the intake manifold, solves the following problems:
- provides a cold start of the engine;
- supplies a limited amount of fuel for idling;
- mixes fuel with air and directs the resulting emulsion to the manifold at operating modes of the power unit;
- doses the amount of mixture depending on the opening angle of the throttle valves;
- organizes the injection of additional portions of gasoline during acceleration of the car and when the accelerator pedal is pressed “all the way” (both dampers are maximally open).
The unit is equipped with two chambers, the secondary one is opened by a vacuum drive
The carburetor consists of 3 parts - the cover, the main block and the throttle body. The lid contains a semi-automatic starting system, a strainer, a float with a needle valve and an econostat tube. The upper part is attached to the middle block with five M5 screws.
A fitting is pressed into the end of the cover for connecting a gasoline pipe.
The structure of the main part of the carburetor is more complex and includes the following elements:
- float chamber;
- main metering system - fuel and air nozzles, large and small diffusers (shown in detail in the diagram);
- pump - accelerator, consisting of a membrane block, a shut-off ball valve and a sprayer for fuel injection;
- transition system and idle channels with jets;
- secondary chamber damper vacuum drive unit;
- channel for supplying gasoline to the econostat tube.
The middle block of the carburetor contains the main metering elements - jets and diffusers
At the bottom of the unit there are axles with throttle valves and main adjusting screws for the quality and quantity of the air-fuel mixture. This block also contains the outputs of many channels: idle speed, transition and starting systems, crankcase ventilation and vacuum selection for the ignition distributor membrane. The lower part is attached to the main body with two M6 screws.
The design provides for different sizes of chambers and chokes
Video: device of DAAZ 2105 units
Step-by-step adjustment of the carburetor on the VAZ 2105
If you are not familiar with the design of the car, you have no experience in repairing it, disassembling it or the layout of the fuel system, then it is better not to start adjusting it. Any/wrong actions can only aggravate the problems or cause a breakdown. If you have an idea about the structure of the carburetor of your car, then performing all the manipulations will be quite simple. As a result, you will increase the efficiency of your vehicle, reduce fuel consumption and increase the performance of the power unit. There is nothing wrong with such manipulations. Quite the contrary.
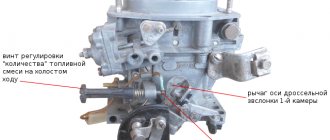
- Crankshaft speed calibration. First you need to make sure that there are 750-800 revolutions per minute. The production adjustment screw will help with this. It must be screwed all the way, and then returned three turns.
- Change oxygen content. To adjust the amount of carbon dioxide in the exhaust, you must use a quality screw. You need to screw this screw all the way in, and then unscrew it 5 turns. This will increase the fuel concentration and make the mixture richer.
- Speed regulation. To adjust the idle speed, you must use the quantity screw. Your task: to make the engine work stably at 750-800 rpm. The effect can be achieved by gradually tightening the quality screw. With such manipulations, the speed will increase and then decrease, which will lead to unstable engine operation. As soon as the power unit begins to operate unstably, start unscrewing the screw. Do this until the motor starts running stably.
- Idling. Upon completion of all actions, idle speed calibration is required. Again you need to use the appropriate screw. The rpm should be 800-900. If necessary, all actions can be repeated.
Once all the necessary setup steps have been completed and the desired parameters have been achieved, you need to test the carburetor.
Start the engine and sharply press the accelerator pedal, and then release. If everything is configured correctly, the crankshaft speed will increase temporarily. If your actions lead to the engine stalling, then you need to increase the number of revolutions. The adjusting screw will help you with this task. Check how the motor will behave under full load conditions: a working stove, light, and so on.
Expert advice
After completing the procedure for adjusting the VAZ-2105 carburetor device, experienced auto mechanics recommend paying attention to the following critical points:
- Valve location - is in the retracted position, with the idle speed jet touching the seat in the carburetor body.
- Lubricating the rubber seal with special motor oil.
- The location of the air damper intended for cold passage is in a vertical plane, while the suction handle is lowered.
- The condition of the solenoid valve - the presence of damage and malfunctions is checked as follows: turn on the ignition;
If clicks are heard during the inspection process, the part is in full working order.
Technical part of VAZ 21054 injector: characteristics
“Five” is familiar to many. There are many VAZ models; an interesting fact is that even the old models are very well known and are not inferior to new technologies. With their stability and reliability, they have held the championship for many years in a row. Although many will agree that things sooner or later deteriorate and need repair. The same goes for carburetors; their strength weakens over the years, and they simply need to be checked and cleaned. 2105 injector and carburetor in this case are no exception.
This is most often a difficulty for car owners; they must have at least some initial information in order to cope with a problem of this nature. This process takes a lot of time if this information is poorly oriented, so everyone who owns a car should be ready to resolve such issues on their own.
Replacement instructions
For the procedure, you should use an overpass or inspection hole. To raise the car, you can use a jack, lifting the front end and placing it on supports. Replacement is carried out only on a cold machine.
Required Tools
Replacing a timing belt and chain is a complex and lengthy procedure. To complete it as quickly as possible, you need to properly prepare for it and prepare in advance:
- a set of keys;
- set of heads;
- knob;
- screwdriver
To make consumables last longer, you should buy originals.
Stages
- First, turn off the power to the car by removing the negative terminal from the battery.
- If protection is installed, it must be removed.
- Then you need to drain the coolant from the system.
- At the next stage, you need to dismantle the radiator, cooling system fan, and pump pulley.
- Then you need to remove the drive belts for the power steering, air conditioning compressor, and generator.
- Next, unscrew the spark plugs.
- Then we remove the distributor protection screen and disconnect the tube connecting it to the timing belt from the air collector sleeve.
- By turning the crankshaft by the bolt securing its pulley, you should set the marks. The mark on the timing belt pulley must coincide with the casting on the camshaft; accordingly, the installation mark on the crankshaft gear must align with the mark on the oil pump housing. In the video you can see how to set the tags correctly.
- Using a special tool, you need to unscrew the mounting bolt and remove the crankshaft pulley.
- Then you need to remove the lower and middle timing protection covers.
- By unscrewing the tensioner mounting bolt and turning it counterclockwise, we loosen the tension on the timing belt and remove the latter.
- Now you should change the roller and start tightening the VAZ 2105 timing belt.
Changing the tension roller
Before doing this, all parts should be cleaned of dirt.
- The belt should first be pulled onto the crankshaft pulley, then onto the oil pump drive pulley, and lastly onto the camshaft pulley.
Pulling the belt onto the camshaft pulley
- Having put the belt on the tensioner, you need to tighten the bracket and install the spring.
When installing the timing belt, do not rotate the camshaft and crankshaft so as not to knock off the marks.
- After turning the crankshaft two turns, you need to check that all installation marks match, tension the belt and tighten the tensioner bracket mounting bolts.
- Next, assembly is carried out in reverse order.
After the procedure for changing the timing belt or chain of the VAZ 2105, you should start the car and check the performance of the engine.
Idling
The DAAZ-2105 1107010 carburetor is adjusted as follows. The mixture toxicity screw must be unscrewed approximately 3.5 turns. The quantity screw is unscrewed 7 turns. Using a starting device, the power unit is started. If the speed is high, you can reduce it by tightening the quantity screw. The engine needs to be warmed up.
Next, remove the choke completely and adjust it using a screw to approximately 900 revolutions. After this, turn the quality screw. They twist it and achieve the highest speeds. You need to find the position at which the speed will be maximum. This is the correct position. With this position of the screw, the fuel burns as efficiently as possible and the idle speed is smooth. And if you rotate it further, the engine will become unstable.
Many people recommend adjusting the idle speed of the DAAZ-2105-20 carburetor using spark plugs. When the engine is idling, regardless of the quality of the mixture, the spark plugs will be black, so you should not trust this method.
Setting the needle valve opening
Turn the carburetor cap over so that it is positioned vertically. In this case, the tail of the float should lightly touch the needle ball. Please note that even partial overlap is not allowed. Measure the distance using a paper template. Determine the distance from the plane of the float to the gasket on the carburetor cover. It should be no more than 6.5 mm. If it is larger or smaller, then adjust in the desired direction by bending the small tail on the float. The distance to the maximum degree of valve opening is measured in the same way.
TNND device
TNND consists of:
- Drive shaft;
- A rotor with a certain number of blades;
- Stator;
- Distribution disk;
- Adjustable drive gear;
- Connection couplings.
Low pressure fuel pump design
When the rotor begins to move, its blades begin to move closer to the stator and, under the influence of centrifugal force, certain chambers appear. Since there is a certain voltage inside, the fuel from these chambers is sent directly to the fuel injection pump. For this purpose, special channels in the distribution disk are used. In this case, a small amount of fuel is directed to the pressure reduction valve if the pressure is created greater than that set by the system.
Since both devices are inextricably linked, to maintain the necessary conditions, a fuel drain choke (in the form of a nozzle) screwed into the high-pressure pump is used. Thus, the design of this part makes it possible to create the necessary conditions in the chambers depending on the speed of the drive shaft. This design is suitable for diesel engines, but there are other types, which will be discussed further.
Now about the setup itself
Maintaining the required fuel level in this device is ensured by a float mechanism.
Setting the float mechanism
- Start the car engine and let it idle for 2-3 minutes;
- Remove the carburetor cover;
- Check the fuel level in the float chamber. It should be 28 mm.
In case of deviation, we perform the following actions:
- Measure and adjust the distance between the cover gasket and the float when the float tongue touches the needle valve ball. It should be 6.5±0.25 mm. Adjust by bending the tongue;
- Check the maximum valve needle travel. It should be 8 mm. To check, it is necessary to measure the distance between the cover gasket and the maximum retracted float. It should be 14±0.5 mm. The deviation is eliminated by acting on the bracket;
- Visually check that the tongue of the needle valve axis is perpendicular and that the float is parallel to the bottom plane of the cover. If there are any violations, correct them.
If all of the above steps fail to achieve a stable fuel level (28 mm) in the float chamber, then the needle valve must be replaced.
Adjusting the starting device of the VAZ 2105 carburetor
- Using the thrust handle located in the cabin, close the air damper;
- Check that the rod shank is at the end of the carburetor trigger rod groove. If there is a violation, correct it by bending the rod;
- Remove the cover and measure the gap between the edge of the air damper and the chamber wall with the starter rod recessed (we recess the rod using a screwdriver with the rod disconnected). It should be 5.0-5.5 mm. We adjust by rotating the adjusting screw of the starting device.
Idle adjustment
This type of work should be carried out on a warm engine.
- Use the mixture quantity screw to bring the engine to 850 rpm;
- Use the quality screw to bring the speed to the maximum level;
- Use the quantity screw to reduce the speed to 850;
- Use the quality screw to bring it to maximum again;
- Having thus achieved 850 rpm, tighten the quality screw until the engine “shakes”;
- By unscrewing the quality screw, achieve stable engine operation.
With proper adjustment of the VAZ 2105 carburetor, fuel consumption in the summer should not exceed:
- outside the city on the highway at a speed of 90 km/h – 7 – 7.5 liters per 100 km;
- during the urban driving cycle - 8.5 - 9 liters.
If you cannot do this work on your own, it is better not to torture yourself and the car, but contact the AvtoVAZ service center.
The VAZ 2105 “Ozone” carburetor is used to operate the engine of the “five” known to many Russians, which was produced in 1980–2010.
Malfunctions and solutions
Adjusting the carburetor with screws does not help to get rid of problems and is done only once - during the setup process. Therefore, if a malfunction occurs, you cannot mindlessly turn the screws; the situation will only worsen. Find out the true cause of the breakdown, eliminate it, and then proceed to adjustment (if necessary).
Before you begin repairing the carburetor, make sure that the culprit of the problem is not the ignition system, the fuel pump, or weak compression in the engine cylinders. A common misconception: shots from a muffler or carburetor are often mistaken for a problem with the unit, although there is an ignition problem - the spark on the spark plug forms too late or early.
What malfunctions are directly related to the carburetor:
- the engine does not start - it seizes and immediately stalls;
- the engine does not idle;
- “dips” when sharply pressing the accelerator pedal;
- the power unit “does not pull” or functions unstable;
- increased gasoline consumption, accompanied by black smoke from the exhaust pipe and the formation of soot on the electrodes of the spark plugs.
The listed problems have several causes, so it is proposed to consider them separately.
Difficulty starting the engine
If the cylinder-piston group of the VAZ 2105 engine is in working condition, then sufficient vacuum is created in the manifold to suck in the combustible mixture. The following carburetor malfunctions can make starting difficult:
- When the engine starts and immediately stalls when cold, check the condition of the starter membrane. It does not open the air damper slightly and the power unit “chokes” from excess fuel.
Checking the fuel in the float chamber is done without disassembling: remove the air filter cover and pull the primary throttle rod, simulating the gas pedal. If there is gasoline, the accelerator pump nozzle, located above the primary diffuser, should spray out in a dense stream.
When the level of gasoline in the carburetor chamber exceeds the permissible level, fuel may flow into the manifold spontaneously. A hot engine will not start - it first needs to throw excess fuel from the cylinders into the exhaust tract. To adjust the level, follow these steps:
- Remove the air filter housing and unscrew the 5 carburetor cover screws.
- Disconnect the fuel line from the fitting and remove the cover by disconnecting the telescopic rod.
- Shake out any remaining fuel from the element, turn it upside down and check the functionality of the needle valve. The simplest way is to suck air from the fitting with your mouth; a working “needle” will not allow this.
- By bending the brass tongue, adjust the height of the float above the plane of the lid.
With the needle valve closed, the distance between the float and the cardboard spacer should be 6.5 mm, and the stroke on the axis should be about 8 mm.
Video: adjusting the fuel level in the float chamber
No idle speed
If the engine stalls at idle, look for the problem in this order:
- The first step is to unscrew and bleed the idle fuel jet located on the right side of the middle part of the carburetor.
If the previous recommendations do not resolve the problem, try blowing aerosol fluid into the hole in the throttle body. To do this, dismantle the mixture quantity adjustment block together with the flange by unscrewing 2 M4 screws. Pour detergent into the opened hole, do not turn the quantity screw itself! If the result is negative, which happens quite rarely, contact a carburetor technician or completely disassemble the unit, which will be discussed below.
The culprit of unstable engine operation at idle speed is rarely the carburetor. In particularly advanced cases, air leaks into the manifold from under the “sole” of the unit, between sections of the housing, or through a crack that has formed. To detect and fix the problem, the carburetor must be disassembled.
How to get rid of "failures"
In the vast majority of cases, the culprit of “failures” when sharply pressing the accelerator pedal is the carburetor accelerator pump. To fix this annoying problem, follow these steps:
- Place a rag under the lever pressing the pump membrane, unscrew the 4 M4 screws and remove the flange. Remove the membrane and check its integrity, replace it with a new one if necessary.
In old, heavily worn carburetors, problems can be caused by a lever whose working surface has been significantly worn out and does not press the “penny” of the diaphragm. Such a lever should be changed or the worn end should be carefully unfastened.
Small jerks when pressing the accelerator “all the way” indicate contamination of the channels and jets of the transition system. Since its device is identical to CXX, fix the problem according to the instructions presented above.
Video: cleaning the accelerator pump ball valve
Drop in engine power and sluggish acceleration
There are 2 reasons why the engine loses power - lack of fuel and failure of the large membrane that opens the throttle of the secondary chamber. The last breakdown is easy to detect: unscrew the 3 M4 screws securing the vacuum drive cover and get to the rubber diaphragm. If it is cracked, install a new part and reassemble the drive.
In the vacuum drive flange there is an air channel outlet, sealed with a small rubber ring. When disassembling, pay attention to the condition of the seal and change it if necessary.
If the secondary throttle drive is working properly, look for the problem elsewhere:
- Using a 19 mm wrench, unscrew the plug on the cover (located near the fitting). Remove and clean the filter mesh.
- Remove the unit cover and unscrew all the main jets - fuel and air (do not mix them up). Using tweezers, remove the emulsion tubes from the wells and blow in the washing liquid.
The reason for the lack of fuel may be a low level of gasoline in the float chamber. How to adjust it correctly is described above in the corresponding section.
Problems with increased gas consumption
Supplying too rich a mixture to the cylinders is one of the most common problems. There is a way to make sure that it is the carburetor that is to blame: at idle engine speed, fully tighten the quality screw, counting the revolutions. If the engine does not stall, get ready for repairs - the power unit pulls fuel from the float chamber, bypassing the idle system.
To begin with, try to get by with a little blood: remove the cover, unscrew all the jets and generously treat the accessible holes with an aerosol. After a few minutes (precisely indicated on the can), blow out all channels with a compressor developing a pressure of 6-8 bar. Reassemble the carburetor and do a test run.
An over-enriched mixture makes itself felt by black soot on the spark plug electrodes. Before the test run, clean the spark plugs, and upon return, check the condition of the electrodes again.
If local flushing does not produce results, disassemble the carburetor in this order:
- Disconnect the fuel pipe, the gas pedal linkage, the starter cable and 2 tubes - crankcase ventilation and distributor vacuum.
The next task is to thoroughly wash all channels, chamber walls and diffusers. When directing the canister tube into the channel openings, make sure that the foam comes out from the other end. Perform the same operation with compressed air.
After blowing, hold the bottom part up to the light and make sure there are no gaps between the throttle valves and the chamber walls. If any are found, the dampers or lower block assembly will have to be replaced, since the engine draws fuel uncontrollably through the cracks. Entrust the operation of replacing chokes to a specialist.
When performing a complete disassembly of the DAAZ 2105 carburetor, it is recommended to perform the entire range of operations listed in the previous section: clean the jets, check and change the membranes, adjust the fuel level in the float chamber, and so on. Otherwise, you risk finding yourself in a situation where one breakdown endlessly replaces another.
As a rule, the lower plane of the middle block is arched due to heating. The flange must be ground in on a large grinding wheel, having previously pulled out the bronze bushings. The remaining surfaces should not be sanded. When assembling, use only new cardboard spacers. Reinstall the carburetor and proceed to setup.
Video: complete disassembly and repair of the Ozone carburetor
How is the starter adjusted?
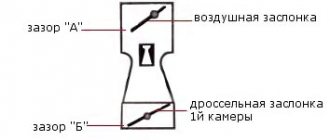
Trigger: 1 - diaphragm, 2 - adjusting screw, 3 - diaphragm rod, 4 - air damper control lever, 4.1 - lower profile of the groove of lever 4 for limiting the maximum opening of the air damper, 4.2 - upper profile of the groove, responsible for the mechanical opening of the air damper , 4.3 - edge of the lever to ensure the starting clearance of the throttle valve of the first chamber, 5 - air damper, 6 - air damper lever, 7 - air damper return spring, 8 - air damper drive rod, 9 - adjusting screw stopper, 10 - throttle adjusting screw dampers of the first chamber, 11 — throttle valve drive lever, 12 — throttle valve of the first chamber
If you turn the lever 4 that controls the air damper 5 counterclockwise until it stops, the air damper will close completely due to the action of the spring 7. If the damper does not close, the cause of the jamming must be eliminated.
As soon as the air damper is completely closed, you need to press rod 3 of the starting device all the way. As a result, the air damper 5 will open by 3.0 mm. If necessary, you need to adjust the gap with screw 2 .
If the air damper is completely closed, then the throttle valve 12 of the 1st chamber will be slightly open by 1.1 mm.
Removal and installation of TPS
The first step is to disconnect the minus terminal from the battery, and then disconnect the chip with the power wires from the sensor, as shown in the photo below:
Now, using a Phillips screwdriver, unscrew the two screws securing the sensor to the throttle assembly.
After both screws are unscrewed, carefully move it to the side.
The seat has a special foam pad that needs to be kept intact. The new sensor is installed in the reverse order, so that the holes in it coincide with the holes in the throttle.
The price of a new TPS for injection VAZ 2104, 2105 and 2107 is about 200-500 rubles. The cost depends on the manufacturer and place of purchase.
Installing two carburetors
Experienced VAZ 2105 drivers sometimes resort to such a drastic measure as installing two carburetors at once on the standard car engine. Why is this necessary? Two carburetors can solve the main problems with engine operation:
- uniform fuel supply;
- uniform supply of air to the mixture;
- At high speeds, the fuel-air mixture will form faster, which will significantly facilitate engine operation.
Accordingly, the operation of two carburetor units will minimize engine wear, which will extend the life of the car for many years.
In pairs, the devices give the engine greater dynamics and power
The easiest way to install a pair of carburetors is in a car repair shop, but if you wish, you can do this work in a garage. For this you will need:
- set of wrenches;
- pliers;
- drill;
- vice;
- two carburetors of the same model;
- two collectors of the same type;
- coolant;
- rags;
- hoses according to the diameter of the carburetor inlets.
Work process
Before installing the second carburetor, it is necessary to drain the antifreeze from the system and remove the standard manifold. After this, you can proceed directly to the installation:
- Place carburetors on each manifold.
- When installing, it is important to ensure that the edges of the collectors do not protrude, as otherwise they may cause the chambers to jam.
- If there are any objects (such as studs) in the manifold passages, they must be removed so that there is no resistance to fuel flow. The studs can be cut with a drill.
- After this, each carburetor on the manifold is “fitted” to the cylinder head. To properly install each of the two devices, you will need to remove the cylinder head.
- Fasteners need to be cut from a 3–4 mm steel plate. These products will hold the collectors using nuts.
- Connect the manifold heating using gasoline tees, as well as a vacuum brake booster. If the amplifier is not provided in this configuration, then the places for it must be plugged in any convenient way.
- Next, install the carburetors on the cylinder head, adjust their operation with the quality and quantity screws.
- Connect the gas drive and gasoline hoses to the device connectors.
Video: performing work on installing two carburetors on a VAZ 2105
There is an opinion that when installing two carburetors on a VAZ 2105, fuel consumption immediately increases by 2 or 3 times. However, it is not. Consumption can be reduced by up to 1.5 times, since the operation of two devices at once significantly facilitates the functionality of the motor.

