Hello, dear friends! Many motorists are naturally interested in the question of how to remove saffron milk caps from the car body. And under such a cheerful name as saffron milk caps or bugs hides an extremely serious problem in the form of rust. In fact, these are small pockets of corrosion that appear on the surface of the body.
Each car comes from the factory with a certain amount of anti-corrosion protection. For some it is better, for others it is worse. It is the task of the car owner himself to protect the car from corrosive processes. If saffron milk caps are left unattended, they will grow and actively spread further.
Therefore, true car enthusiasts are concerned with the question of how to get rid of them, whether this can be done with their own hands and at home. Actually it is possible. The main thing here is to take a responsible approach to completing the task.
Why do saffron milk caps appear?
These small, and sometimes not so small, rust spots are the result of destructive processes caused by the oxidation of metal surfaces.
A similar effect occurs due to the contact of 3 components. These include moisture, oxygen and static electricity. Corrosion usually forms in places where the protective layer of paint and varnish has been damaged. Having overcome these obstacles, the three horsemen of corrosion are left face to face with the bare and unprotected metal, reacting with it. Yes, rust does not appear in 5 minutes. This is a rather lengthy process. But if the damage is small or located in hard-to-reach places, the motorist simply will not notice its beginning and development, having already seen the result in the form of a red spot.
The rate at which the metal will degrade depends on several additional factors. These include the level of protection of the body metal, environmental conditions and contact of the damaged area with chemicals.
These factors have a direct bearing on the depth, shape and color of the rust.
One of the first signs that rust is attacking a car is the appearance of bubbling marks in the paintwork.
Rust spots
Regardless of the model, make and year of manufacture of the car, we can identify several main points and areas that are most often subject to the formation of saffron milk caps, bugs or simply traces of rust.
These include the following areas and zones.
- Hood. Quite often it is necessary to remove saffron milk caps from the hood, since small stones, crushed stones and highly abrasive debris fly into it from the road;
- Wheel arches and fenders. At least as often, bugs are removed from the wing and arches. It is also affected by stones and dirt, often flying from under your own wheels. If you install wider tires or wheels, the process will only speed up;
- Thresholds. They are located as close as possible to the road, and therefore take the brunt of the impact of the environment.
It doesn’t matter what kind of car you have, Lada Kalina, VAZ 2114 or a brand new Mercedes. Every car is susceptible to corrosion to one degree or another.
Now you need to figure out how you can deal with saffron milk caps yourself correctly, and what you will need for this. Many people are scared by the price of such a service in a car service, which is quite normal.
Putty
So, we figured out the cleaning, choosing the method of removing the “fungus” from the body on our own. The photo below shows which surface should be prepared for the next step.
The resulting area must be washed to remove crumbs of old paint. The surface must be degreased with alcohol; it will quickly dry from the remaining drops of water. Bare metal can be coated with a binder, but this is not usually done. Immediately begin applying the mixture to the metal.
Putty can be prepared, but it is better to buy ready-made. It dries quickly after adding a sealer, so you need to apply the mixture quickly. Avoid creating excess material so you don't have to spend a lot of time cleaning. A smooth surface is achieved with a rubber spatula.
The putty will not be thick. Over time, it will crack due to body vibrations, and the finish paint will need to be redone. Heavily damaged areas are cut out with a grinder and fresh metal is welded.
Fighting methods
If you are thinking about fighting saffron milk caps on your own vehicle, you need to know about the existing options.
Essentially, all available methods are divided into 2 main categories.
- Mechanical method. This is a set of special measures, the task of which is to clean damaged surfaces, perform priming, puttying and painting of the vehicle body;
- Chemical method. Here we are talking about a slightly different approach. The method is based on special converters and kits aimed at treating damaged areas with anti-corrosion agents.
There is a lot of debate and talk regarding these two methods.
Some adhere exclusively to the mechanical method of processing. Others are sure that there is nothing better than chemical control of saffron milk caps.
In fact, both methods are really good. Moreover, each of them is relevant for certain situations. It is only important to understand which category your situation falls into.
- Mechanical restoration methods are relevant in situations where corrosion has managed to penetrate quite deeply into the metal elements of the machine. That is, you will have to completely remove all traces, clean the surface and get to clean, intact metal. Here you will need the appropriate tools and devices;
- Chemical options are best used when it is not possible to use the mechanical method. When the area is treated, the rust turns into foam. To remove it, just apply water pressure. Some products help the corrosion harden, after which the area can simply be covered with a layer of paint.
Before choosing one option or another, be sure to study the nature of the damage and its depth. Simple chemistry is not always enough to cope with the problem.
Practice clearly shows that in case of serious metal defects, the use of chemicals gives only a temporary effect, after which rust appears again. Therefore, the optimal solution would be to use a mechanical processing method.
How to remove rust at home: basic methods
Motorists sooner or later face the problem of corrosion. The question often comes up on the Internet is how to remove saffron milk caps from a car.
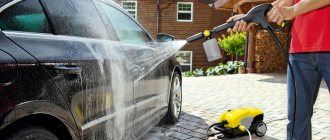
In fact, there are not so many such options: only two. They allow the car owner to deal with corrosion on his own. One of the conditions for efficient work is a clean car. To do this, you need to send the car to a car wash or wash it thoroughly in your garage.
It is the simplest and fastest method of removing rust stains. The principle of operation is to carefully clean the damaged area with sandpaper and then treat it with a rust preventative. What tools and materials need to be prepared.
To perform cleaning you will need:
- an ordinary sharp chisel;
- fine-grained emery cloth;
- rust converter.
The work is performed in the following sequence:
- use a chisel to remove the damaged paintwork at the site where the “bug” appears;
- thoroughly clean the body area using sandpaper;
- then the area is treated with a converter (a layer is applied evenly);
- Allow some time for the treated area to dry.
Some craftsmen select paint in advance so that after cleaning they can apply a layer of dye to the damaged area. The advantage of this method is its simplicity and speed; it does not require the purchase of special equipment, and most importantly, a minimum investment. But there are also disadvantages - the method is only suitable for straight and flat areas, in addition, there is no guarantee that corrosion will not make itself known again.
A mechanical method of protection includes lamination - applying a thin and very durable film to the metal body of a vehicle. It is highly resistant to moisture, aggressive environments and has a long service life.
Interesting articles:
How to remove varnish streaks on a car body
Is it possible to pump up with your own weight?
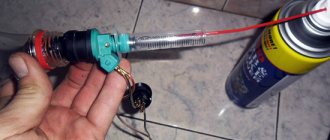
Using chemical reagents.
The method is based on treating “saffron milk caps” with special reagents that effectively neutralize them. Such preparations are galvanizing agent and orthophosphoric acid. Since work is carried out with chemicals that can be harmful to humans, the presence and use of protective glasses and gloves is a prerequisite. Tools you will need:
- nippers and pliers;
- sandpaper and rag;
- nut, bolt;
- 2 meter wire, light bulb, AA battery;
- plastic container.
Step-by-step instruction:
- It is necessary to remove the graphite rod from the battery. To do this, use pliers to remove the upper part of the element.
- Next, the rod and metal scraps of the battery case are crushed (only the bitten part) and dipped in phosphoric acid.
- Clean the red spots with sandpaper.
- Take the wire and connect it to the positive of the battery, and the other end is secured to the bolt and nut and to the rest of the battery body.
- A light bulb is connected to the resulting circuit.
- The end of the wire with a 2-turn AA battery is wrapped in a rag and moistened in phosphoric acid.
- Take galvanizing agent and apply it to the rusty spot, soaking a rag in the acid. When the mixture dries, the light will go out.
After cleaning the car body from red spots, it is recommended to immediately cover these places with paint and varnish to avoid re-rust.
The advantages of this method: simple, cheap, availability of materials.
Disadvantages: during the stripping process, it is necessary to monitor the chemical reaction. After the applied layer has dried, the next one should be applied immediately. There is a possibility of repeated red spots in these places.
To avoid this, a number of measures are performed between stripping and painting: putty and primer.
Stages of filling:
After the “saffron milk caps” are removed from the metal surface, they begin to degrease and dry the body areas.
- Take the putty and mix it with the hardener.
- The resulting mixture is carefully and evenly applied to the damaged area.
- Use a regular spatula. The main thing is to achieve a perfectly flat surface in order to hide traces of deformation of the surface of the car body.
- Allow time for the new coating to dry.
If the dents are relatively small, then it is worth trying fiberglass putty to smooth them out. If there is significant damage, take fiberglass, but apply a finishing layer of automotive putty on top. Upon completion of work, priming begins.
- After the putty has completely dried, the surface where the “bugs” were is treated with a solvent.
- The next step is to cover the putty areas with a primer.
- The car is left in a dry garage for approximately 24 hours to allow the new coating to dry.
The final stage will be painting the body.
- The primer layer is thoroughly cleaned.
- Take paint of the appropriate color and pour it into a spray bottle, after mixing it with a solvent. If painting is done from a spray can, then there is no need to add solvent to the paint.
- The dye is applied in several layers.
- Next comes drying.
- The final step is to treat the surface with polish to add shine to the body. If you don’t have a special product at hand, you can use wax and rub it with a soft cloth.
It is not recommended to carry out work in a room where the ambient temperature is less than 15 degrees.
Parking sensors: which one is better to choose?
Here it is important not to confuse the effective method and advice of a skilled master with a banal advertisement for another supposedly miraculous remedy. No one denies the fact that excellent rust converters exist, but sometimes outright bullshit is advertised, which is of no use at all. You should not rely on the magical properties of expensive auto chemicals with an unclear composition and promises to give the perfect result. It is better to give preference to the old proven method of the mechanical type. He is the one who shows himself at his best.
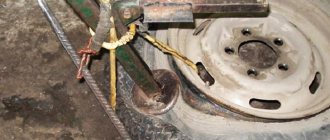
The method of removing saffron milk caps using the most common AA battery is also gaining popularity. I also heard about this method, but I don’t really trust it. You can experiment, but be careful.
If you have real experience of a non-standard approach to rust removal, be sure to write about it in the comments and tell us about your results. It is very interesting to find out first-hand how effective a battery really is in the fight against bugs and saffron milk caps.
We return to the mechanical method. He does not promise to do everything quickly, but focuses on quality.
You will need to take a set consisting of:
Inspection of defects and cleaning
Sometimes it can be difficult to notice minor corrosion. In order not to miss insidious stains, it is better to wash the car at a car wash with detergents.
Inspect the surface in daylight, preferably outside in sunny weather. Minor damage to the varnish can be immediately repaired with varnish, nail polish will do.
When deep rust forms, two methods are used:
- Mechanical: wipe with a cloth, remove deep layers with sandpaper. A drill will do and will save your time.
- Chemical - a special substance, a rust converter, is applied to the rusted area, the reaction residues are washed off with water.
Before removing the “mushrooms” from the body yourself, you should carefully evaluate whether all the necessary substances and conditions are present. After cleaning, the surface should be mirror-like, without brown spots.
Rear view camera for cars: what they are, which one to choose
- Bulgarians;
- grinding machine;
- sandpaper;
- solvent;
- rust converter;
- primers with anti-corrosion effect;
- paints to match the body color;
- colorless varnish in a can;
- two-component putty (with hardener).
You can roughly estimate how much such a set costs. And feel free to multiply it several times to get the cost of work at a car service center.
Step-by-step removal
In such a matter, it is important not to rush and not skip any of the required steps. Approach the task as responsibly as possible.
Step-by-step removal of rust traces and restoration of paintwork looks something like this:
- First, the damaged areas are cleaned. A sandblaster, sander, grinder or regular sandpaper will do. But sandpaper is used in extreme cases, when there are no other options;
- Carefully, consistently and gradually remove pockets of rust, avoiding strong temperature changes when working with power tools;
- The treated surfaces are then coated with a converter to seal the result. Refer to the manufacturer's instructions;
- Remove any remaining corrosion using a solvent. This will completely degrease and clean the surfaces;
- A layer of putty is applied to level out any existing irregularities and depressions. A total of 2-3 layers are required;
- When the putty has completely hardened, the surface is sanded and leveled;
- The procedure ends with priming, applying paint and treating with colorless varnish.
If you do everything according to the instructions, be careful and take your time, the result will pleasantly surprise you. Otherwise, it’s easier to immediately contact a car service center.
Do-it-yourself chemical way to get rid of corrosion
The chemical method differs only in the initial stage - cleaning the part from rust. According to reviews from manufacturers, these substances are able to eradicate rust, stop its further spread and do not damage the iron itself (unlike “sandpaper”). Application is very simple - apply the product to the rusty surface for 30-40 minutes, then wipe with a cloth or rinse with water. But to get a nice, smooth surface you will still have to clean, putty and polish (except for the initial stages of corrosion).
Some funds are available to motorists even with the most modest budget
There are kits on sale that allow you to independently apply a protective layer of zinc to the car body. The kit already contains a solution for removing rust and applying a protective layer, as well as an electrode with a zinc tip. This process is electrochemical, so a connection to a battery is required.
The kit includes liquids and all necessary working tools
Anti-rain for car glass: buy ready-made or make it yourself - which is better?
The best way to combat car body corrosion involves preventing its occurrence.
In practice there is nothing complicated about this. Yes, even the most active measures will not protect against rust. But prevention will significantly delay the formation of the first saffron milk caps, and will also reduce the volume of damaged areas to a minimum.
Preparation for final painting
Next, we remove the “mushrooms” from the body. The body paint instructions state that residual rust is not acceptable. The cover is sure to explode next spring. After the putty has dried, the area to be treated is cleaned first with coarse and then fine sandpaper until a smooth surface is obtained.
When stroking there should be no scratches, dimples, or drops. When the paint falls off, even the smallest mistake will become noticeable. This creates a perfectly even base for the next stage - priming.
The primer is applied with a spray gun like paint. It penetrates deep into the layers of putty, creating a rough and durable base. This is necessary to prevent drops of paint from rolling off.
Modern anti-corrosion agents
The correct choice of high-quality automotive chemicals is a necessary condition for successful anti-corrosion treatment of the car body and thresholds. But choosing is not so easy - there are many anticorrosive agents on the market with different levels of effectiveness. How to make the right choice?
As already noted, it is better to remove rust with orthophosphoric acid, VSN-1 neutralizer, or a zinc kit. But for subsequent anti-corrosion protection of different body surfaces (external and internal), different chemicals are used.
External processing
Liquid plastic, PVC film based on rubber resins and combined bitumen mastic are optimal for treating external body surfaces. These are dense synthetic compounds that can withstand severe temperature changes, high levels of humidity and exposure to aggressive chemicals.
Among the best options, we recommend mastics from the brands Dinitrol, Liqui Moly, Body 930, Tectyl Bodysafe. They are applied in a layer of up to 4 mm, create an internal elastic layer and are capable of providing reliable protection of surfaces against rust for up to 18 months.
Fiberglass Repair of Rust Through Rust
The cheapest way to repair rotted arches, sills or other parts of the body kit, which allows you not to remove rust from the metal, but simply to disguise the through hole so that the part does not fall apart for some time. This is done using a factory repair kit for plastic bumpers, or separately - sheets of glass mat (glass mats) and epoxy putty (polyester resin).
Fiberglass body treatment
Fiberglass body treatment
Stages of work:
- Use masking tape to delimit the area around the damage.
- Wipe the work area with a degreasing compound.
- Apply putty (resin) evenly to the secure edges.
- Cover with a sheet of glass mat adjusted to the shape.
- Lubricate it with a layer of putty (resin), and stick another sheet on top.
- Repeat until desired strength is achieved.
After polymerization, the surface is sanded, coated with primer, and, if necessary, tinted using conventional technology.
How to react to enamel peeling
Damage to the factory body coating (paint, enamel, anti-corrosive layer) requires immediate intervention. You cannot delay time if you notice an area of exposed metal. In such a place, a corrosion center will form in the shortest possible time, the localization and elimination of which will require a lot of costs, time and materials.
Sequence for removing rust from the bottom of a car:
- elimination of peeling areas of paintwork;
- removing rust from the bottom of the car;
- degreasing damaged areas;
- rust converter treatment;
- puttying;
- applying anticorrosive.
Adviсe
To avoid costly repairs, it is important to promptly clean the car arches from any rust stains that have appeared. To do this, it is necessary to use the most effective means and follow preventive measures.
Car owners are recommended to:
keep the vehicle clean;- park the car in a dry, ventilated garage;
- cover the body with polishing compounds;
- do not delay cleaning work from corrosion;
- combine mechanical and chemical methods;
- clean not only the front, but also the inside of the wing;
- thoroughly dry each protective layer;
- Rub the putty thoroughly to eliminate roughness.
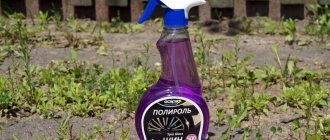
To prevent the appearance of rust, it is useful to treat the undamaged surface of the arches (and the body as a whole) with special polishing agents. They create a thin film that prevents moisture and dirt from penetrating microcracks and paint chips.
Mastics based on:
- bitumen,
- rubber,
- liquid plastic.
There is a lot of useful and important information about methods of fighting rust on a car in this section.
Places where bugs and rust spots are more common (photo)
Thresholds
Arches
Wings at the arches
Trunk
Rust progresses well in places where there is increased exposure to foreign objects: sand, dirt, stones. The hood suffers from small stones from the tires of other cars, the wheel arches from their own “emissions” (by the way, wide non-standard tires or rims contribute to greater damage). The thresholds of the car are also one of the first to rot due to the close proximity to the “aggressive environment”, plus unsuccessful exits from curbs aggravate the situation.
Removing rust with potent agents
There are chemicals for removing rust (rust remover or rust dissolver - rust remover or solvent). Rust remover removes rust using a strong, concentrated acid. This can be hydrochloric, oxalic, phosphoric (higher concentration than in the rust converter) or other acid.
Of course, rust removal is a better option than converting or sealing it, and is a concrete answer to the question “how to remove rust from a car?”, but this remedy has its own characteristics and disadvantages.
Features of rust remover:
Rust remover is most often used as a product that requires soaking a rusty part, so it is mainly used to remove corrosion on small parts. However, this product can also be used on large surfaces. For stationary parts with a large area, it is necessary to apply the product, then cover it with plastic film to prevent its evaporation
Hydrochloric acid and oxalic acid, as the main active ingredients of rust remover, are very toxic, so rust remover must be used with extreme caution. Strong acids have an adverse effect on metal, especially if the action is too long
After this action, the corrosion resistance of the metal is weakened.
Considering all the above features of rust removers, they are still used when removing rust on the body. An important point after using such a product is to wash off the acid and neutralize its residues.