Light bulbs used in headlights The standard equipment of the Lada Vesta car uses light bulbs with the following markings:
| Installation location | Base size | Power, W |
| Block - headlight | ||
| Further | H1 | 55 |
| Near | H7 | 55 |
| Turn signal bulbs for Lada Vesta | PY21W | 21 |
| DRL lamps (running lights), turn signals | W21/5W | 21 / 5 |
| External rear light | ||
| Bulbs in dimensions, brake light | W21/5W | 21 / 5 |
| Turn signals | WY16W | 16 |
| Rear light internal | ||
| Reverse | W16W | 16 |
| parking lights | W5W | 5 |
| Lamps in PTF Lada Vesta | H16 | 19 |
| Turn signal indicator | W5W | 5 |
| License plate light | W5W | 5 |
| Glove compartment lighting | W5W | 5 |
| Luggage compartment lighting | W5W | 5 |
| Front door sill illumination | W5W | 5 |
Problems
There is one big problem - the risk of burning out the electronics unit, which, by the way, happened to many Vesta owners. For example, if you put LEDs in the DRL of a sedan, then after a short time they will simply stop shining. As a rule, in such cases, the fuses are replaced, which are marked in the instructions with the symbols F16 and F17.
Replacement must be done carefully
However, there are none under the cover that covers the fuse box. In the end, it all ends with a burnt-out electronics unit, which has to be replaced. It's all about the higher resistance of the diodes, which is why Vesta's electronics unit cannot withstand it.
The most unpleasant thing is that this is not a warranty case, so contacting the dealership for a warranty replacement will not help. You have to buy the unit yourself, and it is quite expensive - it is not always possible to find a part even for 8,000 rubles, and sometimes the price tag for an element reaches 19,000 rubles!
Moreover, such a problem can arise not only because of LEDs. If you thoughtlessly select and install components, it is more than possible to end up with a burnt-out unit.
Connection
It is recommended to use a DRL control controller (you can find it in the same catalog for 170 rubles). This block will extend the life of LEDs. The connection is made according to the following diagram:
A simpler option using KREN 8B:
Let us remind you that we previously considered other methods of installing LED DRLs in the headlights of LADA cars (report No. 1, report No. 2). An easier way to tune headlights is to install LEDs instead of lamps. What do you think about this?
Share on social networks:
Found an error? Select it and press Ctrl+Enter..
Source
What to buy?
One of the Drayvovites, who is known in the community under the nickname 22KAZAK, carefully studied this issue before replacing the lamps in all the above components on his Lada Vesta Altai sedan. As a result, he came to the conclusion that it is possible to replace factory lamps with an analogue one, but only if you purchase tested, certified products and proper installation, so this point must be monitored especially carefully.
So, to replace you will need:
- Low beam – LED lamps OPTIMA CL-6 LED HEADLIGHT. Installing such lamps will also require the purchase of universal rubber covers for the headlamp.
- Dimensions and DRLs are MTF W21/5W LEDs. They fully comply with the requirements and match the polarity.
- License plate light – PHILIPS.
During the installation process, questions usually do not arise and you can do everything yourself. The main thing is to correctly calculate the polarity when installing lamps in side lights/DRLs. If you are not confident in your abilities and knowledge, it is strongly recommended to consult an auto electrician or entrust the work to him.
Installation of flexible LED DRLs in the headlights of LADA cars
Have you heard about flexible LED daytime running lights (DRLs or DRLs), which are designed for self-installation in car headlights?
Such tuning of head optics does not require large expenses and can significantly transform the car. Let's look at this process in detail. Required
: flexible DRLs (can be found among popular Aliexpress products, price about 400 rubles), the set includes four U-shaped fasteners per strip.
The following shows the process of installing flexible DRLs in Lada XRAY headlights. On other LADA models (Vesta, Largus, Granta, Priora, Kalina, etc.) the process is performed similarly. There are examples in the comments below.
A little background
One sunny day you got bored and decided to do some easy tuning of your Lada Vesta, which, as you know, starts with the light bulbs.
It's no secret that standard DRL lamps look somewhat depressing, with a yellowish tint. It’s especially sad that they decided to make LED running lights on the X-ray’s sibling.
So, you bought Chinese white LED bulbs with huge declared lumens to embellish the appearance of your pet. You start dismantling the old ones, install new lamps and, in anticipation of white rays of light, start the car and get... no light.
After slight bewilderment, you try to return everything to its original state - install the incandescent lamps back in place and again check the operation of the running lights. But a miracle does not happen, the light is still missing and you begin to sort through ideas, look for the reason for what happened. Usually the first thought that comes to a car owner’s mind is “The fuse has blown!” You open the fuse table, find the required F39 and are perplexed - it is intact.
Via PC
- Adapter ELM327, you can buy on AliExpress (see product catalog).
- Ddt4all software (download).
How to activate the function
:
- Run ddt4all. Select a port. Select an adapter. Check the box and click Connect.
- In the window that opens, click the button marked with a circle (with a magnifying glass).
- Select search by CAN.
- In the left window, find and select the [EMM] block.
- Below we open “EMM_Lighting -> EMM_Lighting - configuration”
- In the right window we find the parameter “Nbx_rear_tail_with_DRL_CF”
- Enable Expert mode (in the menu at the top, second icon from the left).
- Change the values from 0 to 1.
- Save with the “Send” button or the button located to the right of the set value.
The process is also shown in the video:
What's happened?
And everything turns out to be extremely simple. On modern Lada cars, engineers have come up with electronic protection against short circuits (short circuit), which has a non-volatile memory! It is hidden in an additional body electronics module (EMM), to which the daytime running lights circuit is connected.
This block is located on the front passenger side:
Two other significant blocks are located nearby: the central body electronics unit (CBKE, also known as VSM) and the Era-Glonass unit.
The comfort unit (EMM) is responsible for the operation of the running lights (DRL), side lights, and also for the operation of the windshield wipers. If abnormal situations, such as short circuits, occur in these circuits, the built-in protection, which is assembled on the VNQ6004SA driver chip, turns off the output voltage to the circuit and then stores the state thanks to the built-in non-volatile memory. The protection will be removed only after receiving the appropriate command from the controller.
Installation
2. Remove the glass from the headlight (using the example of XRAY, Priora or Granta/Kalina 2).
3. Removed the headlight mask (attached with latches).
4. Make holes (with a thin drill or a heated paper clip) for self-tapping screws in the places where the U-shaped fasteners will be installed.
If there are not enough fasteners, you can make two holes in the headlight mask and secure the flexible DRLs with fishing line. Or use super glue.
We make a hole in the back of the headlight for the wires.
Preparing seats for the installation of PTF
By placing the bumper on the soft canvas with its front side, you gain access to the fastenings of the niche plugs in which the fog lights are installed.
The front bumper of the Lada Vesta Optima configuration is equipped with plugs that are not designed to attach PTF to them, and does not have any additional fasteners on the rear side.
In this case, it is necessary to purchase brackets for installing fog lights (2 pieces included - right and left).
If fasteners are present, they must be removed to get to the plugs.
After dismantling the PTF mounting brackets, remove the plugs held in the grooves by latches and self-tapping screws.
In the removed plastic plugs, using a drill with a core drill, holes are cut out with a diameter corresponding to the existing contour or selected headlights, after which the cut edge is processed with fine sandpaper and the parts are installed in their standard places.
Selection of fog lights
The standard PTFs of the luxury Lada Vesta configuration are equipped with H16 lamps with a power of 19 watts, which cannot be called the optimal option. The fog lights listed in the table below have higher performance and, especially Valeo, have proven themselves when installed instead of standard ones.
In addition to headlights, you must purchase the following materials:
- 4-pin relay – 1;
- headlight on/off button - 1;
- protective corrugated cover (tubing) for wire - 5 m;
- wire - 5 m;
- 16 A fuse - 1.
Light inside turn signals
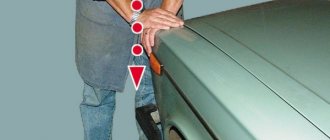
The turn signal light of the Lada Vesta is built into the socket, so before you begin replacing it, you need to turn it to the left and then carefully pull it out. To do this, use a flag attached directly to the cartridge. To unscrew the light bulb itself, you need to press it a little and at the same time turn it counterclockwise. It will come out of the socket, and you can install new lighting. After replacing in the reverse order, the cartridge must be secured with a sealing gasket. After replacing any light bulb in the headlight unit, it is recommended to check compliance with the technical instructions. If necessary, lighting should be adjusted.
Choice of performance
First of all, you need to decide how the fog lights will be installed on the Lada Vesta - by an official dealer or independently.
Installation of PTF by a dealer - a condition for maintaining the right to warranty service - is carried out in the scope of work provided for when producing top versions of Lada Vesta, and, accordingly, including the entire list of components approved by the manufacturer. Even without taking into account the cost of performing the work, the amount turns out to be impressive.
The high cost in this case is due to the complexity of installing the Lada Vesta PTF, since the electronic support circuit of this car differs significantly from the electronics of previous models of the Lada line (Granta, Priora, Kalina) - the fog lights on Vesta are controlled from the steering column lever-switch by turning the sleeve-tip, which functions regardless of the position of the lever.
The reason for the high cost of installing a PTF by a dealer is the additional electronics unit, installed only on luxury versions of the Lada Vesta. This block is an intermediate link on the signal path from the switch to the headlights, which displays information about their inclusion on the dashboard. And the installation of this device also entails expensive changes in electrical wiring.
If the car’s warranty period has expired, then equipping the sedan with fog lights is possible using a much simpler scheme, which includes, in addition to fasteners, the ability to easily turn on/off the PTF with a button on the front panel.
Via phone
- Bluetooth adapter ELM327.
- Pyren script (download).
- DDT database (download).
- SL4A (Python) on Android.
- Launch _pyren_launcher.ry
- Select the connection type, then Start
- Enter the cmd command to access the extended menu
Next, find the corresponding item in the menu (the exact name is still unknown).
Let's remember that we previously told you how you can do the same:
Share on social networks:
Found an error? Select it and press Ctrl+Enter..
Source
What lamps are recommended?
The most important question is which lamps are inexpensive and last a long time? In this case, it is recommended to pay attention to the following products:
- OSRAM;
- KOITO;
- PHILIPS;
These are good producers. These lamps have the best illumination, durability and a low price tag. There are also more advanced versions of these light sources, for example, Osram night breaker, which produce more lumens when operating than the original light bulb.
Installation should not be difficult, since it has the same base as the factory one, so there is no need to look for the article number. All you have to do is take off the old one and bring it to the store.
It is not recommended to install lamps from unknown manufacturers and those of inappropriate power. Firstly, there may be little light, and secondly, there is a high probability of damaging the wiring, especially when using 100W lamps. It is also prohibited to install xenon and LED light sources.
Connecting fog lights
The PTF power button is conveniently located on the central part of the console or to the left of the steering column in an existing recess. The hole for the button, depending on its configuration, is drilled or cut out, followed by careful processing of the edges without damaging the finish.
The wiring from both headlights should be brought into the cabin in the area of the pedal assembly; for this, it is convenient to route the wire of the right headlight along the transverse box between the side members.
To connect the headlights, it is advisable to use the classic circuit used in previous models of the Lada line (Priora, Kalina, Granta), simplified - take the power from the clamp bolt of the positive terminal of the battery.
This method will minimize interference with the vehicle’s electrical circuits and the cost of purchasing components.