A bumper is a part that protects a car when hitting obstacles and minor accidents. After the incident, she needs repairs. Or the motorist decides to upgrade it. For the convenience of performing these actions, dismantling is performed. Therefore, it is important to know how to remove the front and rear bumpers of a VAZ 2109 with your own hands.
- Keys for 17, 13 and 10.
- Heads for 10, 13 and 17.
- Ratchet.
- Phillips screwdriver.
Tools
The peculiarities of fastening the VAZ 2109 buffer are that it is supported by self-tapping screws and bolts. This allows you to use a minimal set of tools for removal. When performing work you will need to stock up on:
- Keys for 17, 13 and 10.
- Heads for 10, 13 and 17.
- Ratchet.
- Phillips screwdriver.
Installation
Installation is carried out in the reverse order of work. To place an object you will need:
- Place the body kit tightly.
- Tighten two nuts under the hood.
- Secure the bolts to the side members and front wings.
In the version released before 1985:
- The body element is installed, and studs are inserted into the holes.
- Nuts are tightened on the side.
- Bolts are screwed into the wheel arch liners.
How to remove the front body kit
When doing the work yourself, you need to clearly know how to remove the front body kit:
- Using head 17, unscrew the two fasteners from below. They are connected to the front fender liners.
- Using head 10, unscrew the nuts on the side fastening of the bumper, two on each side.
- The studs are removed from the holes in the brackets.
- The object is being dismantled from the front.
In some cases, it may be necessary to remove the body part along with the fasteners. The process looks like this:
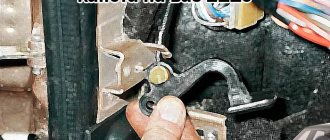
- Using wrench 13, unscrew the two nuts securing the front bracket and remove it.
- Using a screwdriver, twist three self-tapping screws and remove the side bracket.
On a VAZ 21099 car produced before 1985 and models released later, the removal process is somewhat different.
With later versions of the car, the part is removed as follows:
- The fasteners are twisted from the side members and front wings.
- Under the hood, you will need to unscrew the two nuts that secure the part.
- When removing the body kit, it is carefully pulled away from the body.
Dismantling and tuning of the bumper for a VAZ 2109 car
The bumpers of the VAZ 2109 car are famous for their incredible strength. Another feature of the protective elements of the Lada “nine” is its characteristic appearance. Chopped rectangular shapes and black color cannot be confused with another model.
But the time comes when replacing the bumper on a VAZ 2109 is simply necessary. When driving on Russian roads over many years, the protection still becomes unusable. Or the driver gets bored with the outline of the base part and wants to replace it for aesthetic reasons. As an option, use a VAZ 2114 part or resort to tuning. In any case, you will need to remove the front and rear bumpers. This is easy to do even in your own garage. Let's consider the sequence of actions, reasons for dismantling and tuning methods.
How to replace a rear body kit
The sequence of actions for removal is as follows:
- Remove the fasteners using wrench 17.
- From the side, using wrench 10, unscrew the fastening bolts.
- Remove the mounting studs. Due to this, the sides of the object sag slightly.
- Lightly grasping the back of the buffer, pull it away from the body, and remove the object.
- Dismantling the rear brackets attached to the body. This is done with key 13. To remove them, you need to unscrew two screws with a screwdriver.
- It is necessary to remove the beam from the buffer, which increases the rigidity of the structure.
- Removing beam strips.
The installation process is performed in the reverse order of removing the rear bumper.
Reasons for removing a part
Drivers of the “nine” dismantle the front and rear protective elements in such cases.
- Replacement of a VAZ 2109 bumper with the same (basic) one due to severe wear or breakage.
- Installation of a new, more beautiful, protective element.
- Lifting.
- Painting or straightening the body (followed by installing the protective element back).
- Removing the radiator, repairing lighting devices.
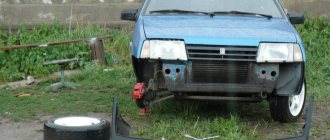
In the first case, the protection is removed because it has become unusable. Driving without a VAZ front bumper not only disfigures your car externally, but also leaves body elements and the engine cooling system unprotected. The situation is the same with the rear bumper: without it, the Lada does not look complete, and the body, muffler and rear suspension are at risk. Therefore, it is necessary to remove the damaged part and replace it with a new one. The factory element for BA3 2109 can be purchased everywhere in auto stores.
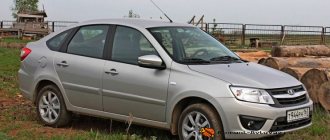
When replacement is made for the purpose of decoration or bumper tuning is performed, the driver removes the protection and looks for a new one to suit his taste. There are many options for lowered and chunky racing pieces on the market. Some people prefer to equip the “nine” with bumpers from its “successor” - Lada 2114. This is not the best step, because you will have to tinker with installation. The mounting holes are slightly different from those on the 2109. In addition, the rounded shapes of the 2114 exterior do not quite match the chopped style of the “nine”.
You will have to remove the factory part if you decide to completely repaint the body. After all, part of the body is located under the bumper. Dismantling is also necessary to get to the radiator and headlight wiring. If there are failures in the engine cooling system, there are times when you need to remove the radiator. In addition, there is a gap between the protection and the body (sagging), and many believe that such a solution spoils the appearance.
Car enthusiasts do the bumper lifting themselves. This procedure involves cutting off the top edge. Not everyone can do this kind of work with their own hands, and if you are not sure that you can cut the layer evenly, contact a specialist.
Nuances
Before you begin withdrawal, you will need to complete a number of preparatory steps:
- The object is thoroughly washed from dirt and dust.
- The fasteners are tapped with a hammer. Next, traces of corrosion are removed with an iron brush.
- The fasteners are treated with a WD-40 solution. After applying the substance, you need to wait 15-20 minutes. During this time, the product will destroy dirt and corrosion.
- Drive the car to a viewing hole, overpass, or use a jack. The work process will be more convenient.
When replacing the buffer, do not apply much force. This will damage the nut threads. Subsequently, in order to remove the bolt, it will need to be cut off (using a grinder), and this will significantly slow down and complicate the work process.
Almost any motorist can replace the VAZ 2109 buffer. It is important to know the sequence of the operation and be especially careful.
Checkpoints
Measuring the distances between body control points is the most common way to check the condition of a car. After taking measurements, you need to check them with the passport data.
The check is performed as follows:
- Dimensions are checked diagonally;
- The current condition of the machine racks is checked;
- The roof is examined visually, the dimensions of the diagonals of the roof itself and the door frame are checked;
- Increased attention is paid to measurements of the rear and front window frames;
- A visual inspection of the entire body is carried out from various angles in order to determine the presence of gaps and bulges that differ from the required parameters.
| Check Point | Passport sizes | Tolerance (+/-) |
| Diagonal of the front doorway from the edge of the lower threshold to the middle of the roof | 1345 millimeters | 5 millimeters |
| Diagonal of the front door opening from the lowest point of the windshield to the middle of the lower threshold | 1000 millimeters | 5 millimeters |
| Distance between front door hinges and pillar in a straight line | 963 millimeters | 5 millimeters |
| Diagonal of the rear door opening from the point where the lower sill joins the central door pillar to the roof | 1112 millimeters | 5 millimeters |
| Diagonal of the rear door opening from the top of the B-pillar to the lower threshold | 860 millimeters | 5 millimeters |
| Long diagonal rear side window frame | 706 millimeters | 3 millimeters |
| Short diagonal rear side window frame | 383 millimeters | 3 millimeters |
| Hood diagonal | 1610 millimeters | 5 millimeters |
| Distance from the middle of the windshield to the middle of the hood | 712 millimeters | 5 millimeters |
Article on the topic: Hand (parking) brake system on the VAZ 2110
Advice from professionals
Before you start removing the front bumper, you need to perform several preparatory operations:
- wash the part well. Remove accumulated dirt;
- Tap all fasteners with a hammer. Use a wire brush to remove rust;
- treat fasteners with a special solution, such as WD-40;
- After application, wait 10-15 minutes. During this time, the solution will destroy all corrosion and dissolve dirt;
- To make the work easier, use the inspection hole.
Step-by-step instruction
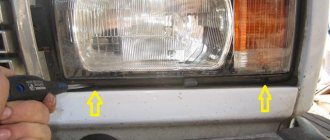
- Use the head (17) to remove the bolts securing the bumper to the wings on each side.
- On each side, use the head (10) to unscrew two bolts. They connect the element to a bracket on the machine body. The fasteners are located inside.
- The mounting pins are removed from both sides.
- The completely freed part is removed from the brackets.
Sometimes the fastening bolts stick so tightly that they cannot be unscrewed. You have to remove the bumper, along with the fasteners. To do this you will need to perform several operations:
- Use a wrench (13) to unscrew the nuts on the front bracket. It is then disconnected from the body. If the nuts do not give in, they are cut off with a grinder;
- To dismantle the side bracket, unscrew the screws with a screwdriver.
On VAZ 21099 models manufactured later than 1985, the removal process is somewhat different from the technology described above. On later models, removal will require the following steps:
- The fasteners securing the element to the front wings and side members are unscrewed
- The nuts located under the hood are unscrewed. They hold the part tightly. Sticky nuts are cut off with a grinder.
- To remove the bumper, you need to pull it slightly away from the car body.
Chassis tuning
During this procedure, changes are made to a variety of components and assemblies. Let's list them.
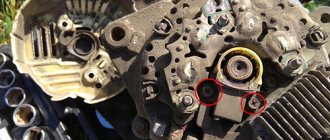
Replacing shock absorbers
The standard shock absorbers on the VAZ 21099 have never been highly efficient. Therefore, modernization of the chassis always begins with their replacement.
Gas-filled tube shock absorbers with spacer rod for improved handling and ride height control
Instead of “native” hydraulic ones, drivers install gas-filled shock absorbers (based on one or two pipes). This action allows you to increase the stability of the car and halve its braking distance. In addition, almost all gas-filled shock absorbers now have the ability to be adjusted, which allows the driver to either increase ground clearance or, conversely, “lower” the car.
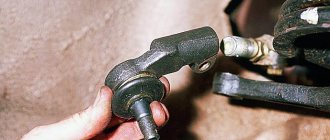
Replacing shock absorber struts
Shock absorber struts are another design element of the VAZ 21099, the reliability of which raises many questions. They can travel 100 thousand km, but after that problems inevitably arise. Therefore, car owners replace them with products from Plaza, Protec, Koni, etc. Fans of extreme driving, in addition to the racks, install spacer bars, which make the suspension stiffer, but at the same time increase the car’s handling.
Installing disc brakes
Today, almost all leading automakers install disc brakes on all wheels of their cars. They are considered the most effective.
Rear wheel of a VAZ 21099, equipped with disc brakes from a VAZ 2110
However, the VAZ 21099 is an old car, so its rear wheels are equipped with drum brakes. Domestic car owners solve this problem by installing disc brakes on the rear wheels from the front wheels of the VAZ 2109 or VAZ 2110. They are fully compatible with the VAZ 21099 and do not require any additional modification.
Installation
Replacement of a repaired or new bumper is carried out in the reverse order. You need to follow a certain sequence:
- The part is tightly installed on the brackets.
- The nuts are tightened under the hood.
- The bolts securing the part to the side members are screwed.
- The bumper is attached to the front fenders.
If the VAZ 21099 was manufactured earlier than 1985, the installation of the part occurs in a different order:
- First, the body part is installed.
- Threaded rods are inserted into the holes.
- Tighten the nuts located on the sides tightly.
- The fender liners are fixed with bolts.
Good to know! To remove a part on a low VAZ 21099 car, it is better to lift it on jacks on both sides. The best option would be an inspection hole.
Tuning the lighting system
First of all, drivers change the standard incandescent lamps in their headlights to LED ones, since they last at least 5 years and consume less energy. In addition, LED lamps turn on faster and are very ergonomic. Some go even further and install not LED, but xenon lamps.
Xenon lamps are high power, so they are often dimmed
But you need to be careful with them: the light flux is very powerful. You can easily blind oncoming drivers. Therefore, fans of xenon lamps often darken the optics in the headlights with a special tinting varnish sprayed from a can. The main requirement for this composition is that it must be resistant to high temperatures.