03/03/2022 1,362 Alarms
Author: Victor
When installing an anti-theft system, the car owner must know the connection points for the alarm system with auto start. If the security system is connected incorrectly, using the engine remote start function will be impossible.
[Hide]
What are connection points?
The connection points for an installed car alarm are regulators and controllers built into the security complex and forming an anti-theft system.
The purpose of the sensors can be different:
- identification of physical impacts on the vehicle body;
- detection of activity inside the car;
- detection of vehicle body tilt during jacking or evacuation, etc.
The number of sensors determines the complexity of installing a security system. If the controllers are connected incorrectly, the alarm will not work properly. Connection points for a security system with auto start can be located in different places, taking into account the model of the security system and the car.
Regardless of the type of vehicle, there are elements that must be installed:
- ignition switch;
- push-button switches installed on the doors, luggage compartment and hood;
- starter mechanism;
- gas pedal;
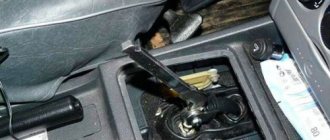
- gearbox control selector;
- parking brake lever and pedal;
- controllers installed on the wheels of the car.
The described points have simple car alarms that have minimal functionality and work without additional options and commands.
The “VybratAuto” channel talked about what alarm connection points are and how they are connected.
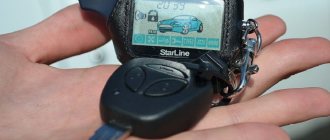
StarLine B29 Dialog
This is a Russian manufacturer. The system is capable of starting the engine according to three different programs. So, you can press the corresponding button on the key fob, start it from a temperature sensor or using a preset alarm clock. There is a function for adjusting the warm-up time of the car. This device implements intelligent engine starting control. The process is recorded by the voltage level in the car network, by signals from the tachometer or from the generator.
Those who are looking for which alarm with auto start to install on the Lada Granta may well choose this option.
Where are the main alarm connection points?
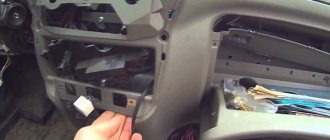
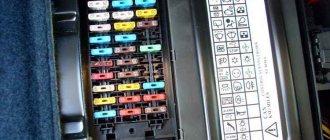
If the system connects independently, the car owner must know the location of the points. They are usually located in the central interconnect module of the internal wiring.
This block is most often located below the dashboard, next to the control combination:
- In the latest versions of Russian vehicles, the module can be installed on the right side of the gas pedal, in earlier versions - on the left of the steering column.
- In imported cars, this device is usually located next to the clutch pedal, near the front door.
Regardless of the type of vehicle, connection points are installed in the lock. The ignition switch is equipped with dozens of conductors that connect to the main devices and assemblies. The lock has positive terminals and contact elements for the starter mechanism. They must be connected if a security system with automatic engine start is used.
central locking
When a vehicle is equipped with a central locking system, this device is the connection point that must be connected to the security system. The central locking control unit is usually installed next to the switching module or under the driver's door trim. If the central locking system was not installed normally, then its location may be under the hood or behind the glove box; sometimes the module is installed under the driver’s seat. It is recommended that you first read the service manual for the system.
Depending on the type of central lock, the device can have three types of polarity:
- straight;
- reverse;
- variable.
The VMazute channel spoke in detail about connection points.
Through the threshold
Some conductors are routed through the threshold under the driver's door; accordingly, the connection points for an alarm system with auto start may be located under the decorative trim. In these places, the components necessary to control the operation of the fuel pump are usually installed.
Connection points can be installed under the door thresholds:
- limit switches;
- power conductors of the central locking;
- side lighting;
- sirens of the anti-theft complex.
In some car models, up to 90% of all connection points are installed under the thresholds, as a result of which the process of servicing and connecting the system is greatly simplified.
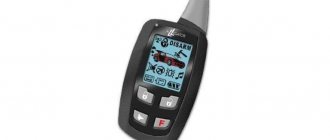
Pandora DXL 3170
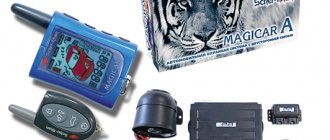
This device is also assembled in Russia. The device is distinguished by a huge list of different settings for everything related to automatic startup. Selecting the desired function and setting the necessary parameters can be quite simple - the menu is organized in such a way that, even if you are using the alarm for the first time, everything will be clear. One of the features of this alarm is that it automatically stops the engine based on certain temperature indicators.
If you choose which alarm with auto start to install on your car, then this is also a completely suitable option.
Step-by-step instructions for installing connection points yourself
Installation features:
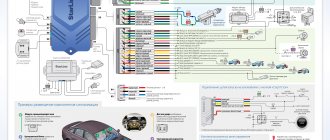
- “+” represents a positive contact, it must be connected to the ignition switch;
- the starter mechanism is characterized by negative polarity, its connection is made with a lock;
- ACC is a point with positive polarity, it must also be connected to the ignition switch;
- the ignition system in the car has positive polarity, so its connection is made through a switch;
- if the car is equipped with a central lock with negative polarity, then it must be connected to the security system according to the electrical circuit;
- a push-button switch is mounted on each car door (these parts have positive polarity and must be connected in accordance with the diagram);
- Parking headlights are equipped with a positive pole, so they must be connected to the steering column switch;
- the brake is a plus, it must be installed in the so-called frog.
Auto electrician Sergei Zaitsev, using the example of a Mitsubishi Lancer, spoke about connection points for car alarms.
Volkswagen Passat 1989, 90 l. With. - electrical and electronics
Hmmm... What if hands grow from the wrong place?))) I thought it would be easier, I’ll save money. I thought there for two minutes, and how to disassemble it, sing, twist... I already imagined sitting and crying with a disassembled torpedo. I’m going to go again to my friend Pavel dop-studio.ru/ It’s convenient for those who live in NEAD! Thanks for the detailed story, but it’s definitely not mine.
I want to change the alarm system, but I don’t know which one is better to choose. If it’s not difficult, tell me which of these is better? vyborok.ru/avto-moto/luch…avtozapuskom-rejting.html
A good whitefish, I also installed it myself on a KIA Sportage KM 2007, it served faithfully for 5 years until the time of sale, now it serves the new owner
What is the best way to connect whitefish wires to car wiring? Twisting, soldering iron or something else?
The main thing is not to overdo it with soldering. wires may break off at the soldering point after half a year
What is the best way to connect whitefish wires to car wiring? Twisting, soldering iron or something else?
The most ideal thing is to put it on the connector (mom and dad). when they were not available for twisting and soldering it)
What is the best way to connect whitefish wires to car wiring? Twisting, soldering iron or something else?
good twisting and insulation is enough
and why does the startup not fully start the car, it will start and stall, what should I do?
So maybe the problem is not in the autostart, the ignition system needs to be looked at, or the autostart was installed crookedly
tell me where to hook up the blue ac+
Hello, does anyone know why the hood switch may not work?
For those who connect to a tachometer, there is a green wire No. 28 on the chip, if you remove the black clip from it, but you need to program the alarm (control by tachometer), according to the standard it is set to voltage.
hooray. the light was put in the wrong place. Thanks to the Kulibins. The central control didn’t work, it burned out because there was no tightness of the system. I bought a used one and that's it
hello gentlemen. I bought Sher Khan Logitek 4. It’s a good thing, but I can’t connect the light alarm, tell me where or program it too. car B3 station wagon, 1990 and how to check the central locking compressor, otherwise someone is not functioning and I don’t understand where the problem is. Before me, the Kulibins were tinkering with a hundred problems, solved 3 more left (hundreds). Thanks in advance!1
Car alarms perform the function of notifying the vehicle owner about the penetration of unauthorized persons into the interior of the car. They come in different types; many manufacturers produce security systems for cars.
If the owner of the car found the right security system for himself and brought it to his home, this means that the system needs to be installed.
The motorist can trust professionals or his loved ones in this matter. But this is not particularly necessary, because instructions for installing an alarm are always included with the security device.
How to install an alarm system with auto start yourself?
The consumer can install the car alarm with his own hands. When performing a task, you must be sure to familiarize yourself with the operating features of the system and its connection; they are indicated in the service documentation.
Tools you will need for installation
Tools and devices that will be required for installation:
- set of wrenches;
- two screwdrivers - with a flat and a Phillips tip;
- plastic clamps;
- a roll of electrical tape;
- stationery knife;
- heat shrink tubes;
- digital multimeter (the use of test lights and probes is not allowed).
Selecting locations for installing alarm units
Before choosing a place to install modules, you need to consider the following nuances:
- The blocks must be positioned so that the planting site is as dry as possible. It is not allowed to place devices where lubricant or working fluid may leak.
- The anti-theft system pads must be installed downwards during installation. This will prevent moisture from getting inside the module through the wires.
- Blocks should not be placed in places subject to temperature changes.
- It is not recommended to install components of blocks and electrical circuits within the radius of moving parts and components of the vehicle.
Installation of power supply and wiring
Cable laying is carried out taking into account the following nuances:
- Wiring harnesses must be wrapped with electrical tape when laying. This will provide additional protection for the cables from rapid wear and damage. It is necessary to use black insulating tape so that it resembles the standard version. This will ensure the secrecy of wiring.
- The microprocessor module cables are routed according to the standard location of the main wiring.
- If the conductors are laid in the area of moving parts of the car, then protective tubes must be used to lay them.
- Cables may not be pinched or pinched during installation. If the wire must be turned, then the bend must be as obtuse as possible.
- Cables are laid from the engine compartment to the passenger compartment and luggage compartment through standard technological holes. You can use pass-through tubes for this. Drilling new holes in the body is not recommended.
- If the cables are being built up, then when performing the task you cannot reduce or increase the cross-section of the conductors.
The Adekwatt channel spoke in detail about cable routing and showed an example of connecting an anti-theft system.
Connecting the central alarm unit
Connection Features:
- The main microprocessor module must be installed in a hidden place. It can be installed under or behind the instrument cluster. You will first have to remove the control panel.
- Double-sided tape or plastic clamps are used to secure the device. The fixation of the block must be of high quality.
- The location of the microprocessor module under the hood of the car is not allowed. In most modern models, control units are not sealed. Exposure to high temperatures and moisture in the engine compartment will lead to rapid failure of the module.
- After completing the installation of the device, you will need to link the unit to the communicator.
- The module must not be installed near electronic components and car devices. Such places are characterized by increased noise saturation, which will lead to incorrect operation of the device.
- Any actions to connect connectors and wires are carried out after the installation of the blocks is completed.
Installing and making autorun work
Diagnostics and adjustment of all functions are carried out after the installation work is completed. Limit switches must be installed on the hood and tailgate, as well as triggers on the foot and handbrake lever.
For an automatic transmission, checking engine operation when the parking lever is disengaged is performed as follows:
- The gearbox selector is set to the parking position.
- The power unit is started remotely.
- The brake pedal is pressed.
- After performing these steps, the machine engine should stop. If this does not happen, then errors were made during the connection. All connections need to be checked. Also, the power unit should not start with the brake pedal depressed.
For a manual transmission, the procedure is as follows:
- The parking brake lever must be raised.
- The gear selector is set to the neutral speed position.
- The internal combustion engine is started remotely.
- The handbrake lever is lowered.
- The power unit should stop automatically. If this does not happen, diagnostics of all connected conductors and pads is performed. If the handbrake lever is lowered, the engine should not start either.
To check the functioning of the power unit in case of unauthorized opening of the engine compartment, perform the following steps:
- The transmission selector is set to the parking position.
- The engine compartment of the car opens.
- The internal combustion engine is being started remotely - the engine should not start. If this happens, you need to check that all connections are correct.
Using the Starline alarm system as an example, user Michael MNS showed how to set up and use the automatic engine start option.
Switching light and sound signals
Connection Features:
- The siren is installed under the hood of the vehicle.
- It is recommended to place the device away from high-voltage wires and the exhaust manifold.
- The siren horn must be turned so that it faces down. This will prevent moisture from collecting inside the device.
- When installing, it must be taken into account that there should be no access to the siren.
- The connection procedure is carried out according to the diagram included in the package. It is possible to connect the device through additional connectors of the microprocessor module.
Connecting the central locking
The connection of this device must be carried out taking into account its type:
- If the central locking has a positive control signal, then using a tester, you need to find the cables that come out of the doors. This refers to the conductors that open and close door locks when voltage is applied. If you cannot find these cables, then solder the contacts directly into the relay.
- In the case when the central lock has a negative polarity, then through the tester there are cables responsible for the operation of the locks when positive is supplied. The contacts are connected to these wires. If you cannot find the cable, then soldering is carried out on the contact elements of the relay.
- If the central locking has alternating polarity, then the system must be connected to the wires determined by the tester. To connect the contacts, relays purchased additionally are used. Common contact elements are connected to the conductors in the doors. Normally closed contacts are connected to the central locking button, and normally open contacts are connected to the positive contact of the car.
Install and configure tilt and shock sensors
Features of installation and configuration of controllers:
- Installation of regulators is carried out on a hard and level surface. Self-tapping screws, double-sided tape or plastic ties are used for fixation.
- Installation of devices on a plastic surface is not allowed. This is due to its possible deformation as a result of exposure to high temperature, which will cause false alarms.
- To adjust the sensitivity parameter, use a bolt or a special screw. It scrolls clockwise or counterclockwise.
- As a result of a change in sensitivity, the security system must respond to impacts on the bumper or an attempt to open the door with the handle.
- If the physical impact on the body is minor, the system should issue an audible warning.
The “Garage Upstart” channel, using the Sheriff alarm system as an example, showed the process of adjusting the sensitivity of the remote controller.
Installing hood and trunk sensors
Features of installing controllers:
- The hood sensor is mounted on a flat surface. It must have good contact with the vehicle body.
- Installation of devices in drains is not allowed.
- During installation, it must be taken into account that the stroke of the sensor rod should be about 5-7 mm.
Installation of secret tracking beacons with GSM and GPS/GLONAS communications
Recommendations for placement and use:
- The module must be installed in a secret place. It can be placed under decorative cladding, under an armchair, behind a glove compartment. You can hide the device in decorative elements.
- The signal from the GPS module is supplied according to a pre-configured scheme. This can be once a day, several times a day, or when the alarm mode is activated.
- Messages with vehicle coordinates are sent via SMS messages. The accuracy of determining the location of the car can range from 10 meters to 2 km.
- To change alert modes, the car owner sends commands in the form of SMS messages.
Auto electrician Sergei Zaitsev spoke about self-installation of a GPS tracker on a vehicle.
Options for additional features
Microprocessor car alarm modules often offer users additional features:
- separate opening and closing of door locks;
- unlocking the tailgate on command;
- short-term switching on of the vehicle's optical devices;
- installation and use of additional controllers.
Checking the completed installation
Features of diagnostics of the completed installation:
- When the security function is turned on, the anti-theft system should play a sound signal with a siren. The vehicle's optical devices will also work.
- It is necessary to lower all the windows and activate the security mode. When you try to open the door from the inside, an alarm should sound. The luggage compartment and hood sensors are diagnosed in the same way.
- Then you need to turn on the security mode and try to open the door locks with the key. The siren should sound when you try to do this. Then you need to try to start the engine. If the power unit does not start, all steps have been performed correctly.
Checking operation and adjusting sensors
The next task of the car owner who has installed sensors on the car is to check its performance and adjust the settings. The most accessible diagnostic method is to use the system for its intended purpose.
To do this, you need to activate the security functions and try to gain access to the car or hit it, gradually increasing the force of the impact. Having determined the degree of sensitivity to mechanical stress, you can change the settings. After that, open the door with the key and start the car - the alarm system should go off.
Make sure the other nodes are running smoothly.
Installing autorun with an alarm is always accompanied by some errors. Especially if the driver installs it on the car herself. The main thing is to know how to fix them in order to prevent negative consequences and system failure.
Experts recommend performing performance diagnostics at each installation stage.
If any device malfunctions, it is necessary to understand the reason for its occurrence. Many types of breakdowns have the same symptoms, so it is important for the driver to accurately diagnose them or immediately go to a service center.
First of all, you should check the functionality of the key fob by performing a visual inspection to determine external defects or damage. If the pager is exposed to moisture, condensation will form on the inside of the screen cover. As a result, the key fob will work unstably and will start to turn off spontaneously. If there has been no contact with water, but the device does not start, the batteries may have discharged.
If the key fob is fully operational, but there is no response, the car may be in an area of strong interference or there has been a software failure in the central microprocessor device.
Try to bring the pager to the part where the antenna is located and press the button. If nothing happens, the breakdown should be looked for in the vehicle itself or related elements of the car alarm.
The next stage is diagnosing the batteries and wiring. Be sure to check the battery charge level and inspect its terminals, making sure there is no oxidation there. A 100% charge is indicated by uninterrupted operation of the on-board electronics. To check the wiring, you should use a tester that rings the contacts. Make a visual inspection of the wires for defects or damage. Pay attention to the fuses that are located on the wire.
If the cause is still not found, a failure in the control unit or software cannot be ruled out. You won’t be able to fix the problem on your own, but even a beginner can solve problems with the software.
How long does it take to install a car alarm?
The installation time of an anti-theft system depends on its capabilities and characteristics, as well as the design features of the car.
If there are additional controllers and modules, alarm installation will be more labor-intensive. Accordingly, it will take more time to install it. On average, a qualified specialist installs a security system in 3-4 hours. An ordinary user without experience will be able to cope with this task in 4-6 hours, if no difficulties arise in the process.
"Sherkhan" Media One
This security system is manufactured in South Korea. The system is distinguished by the presence of an option to prepare the battery for the automatic start process. First, the headlights turn on - this will help warm up the battery electrolyte. Next, a command is sent to the starter. If for some reason it was not possible to start the engine immediately, the system will display a diagnostic message on the display of the included key fob.
For those who are wondering what kind of alarm with auto start to install on the Honda Civic, you can choose this model.
Video
User Vitaly Ershov in his video talked about how to independently activate the autostart of an internal combustion engine using the example of a Jaguar alarm system.
Do you have any questions? Specialists and readers of the AUTODVIG website will help you ask a question
Was this article helpful?
Thank you for your opinion!
The article was useful. Please share the information with your friends.
Yes (100.00%)
No
X
Please write what is wrong and leave recommendations on the article
Cancel reply
Rate this article: ( 1 vote(s), average: 5.00 out of 5)
Discuss the article:
Using a telephone - is it possible?
But what to do if the engine starting time is very long? A time relay must be used. But this is not always possible to implement, so it is quite reasonable to use a cellular network. In addition, this is relevant for systems that are located at a considerable distance. Even if you are in another region, it is possible to start a generator, for example, in a greenhouse, to provide heating. But you need to adhere to some requirements, which will be discussed below. Autostart must correspond to them. It’s not difficult to do everything with your own hands. You will also need to change the design of the phone used as the autostart tool.
Precautionary measures
To ensure your safety, you should make it a habit not to leave your vehicle at speed. Otherwise, the autostart, assembled with your own hands, will start the engine, the car will start moving, since the gear is engaged. It is better to have a good handbrake, but it is not recommended to use it in winter. In addition, please note that you must block all incoming calls. This measure was discussed in detail above. All electrical networks must be protected with fuses.
All power circuits of the electromagnetic relay windings must be connected to the battery only through fusible links. This will prevent a fire if a short circuit occurs. However, if you use a car alarm, all protection devices are included in the installation kit. It is also worth noting that starting the engine yourself using an alarm with feedback is the most reliable and reliable option. And the cost will not be too expensive.
Key programming instructions for Lada Kalina, Priora, Granta, etc.
- Close all doors. Turn on the ignition with the training key and wait in the on state for at least 6 seconds.
- Turn off the ignition. The indicator light in the warning lamp unit should flash quickly (at a frequency of 5 times per second) while the learning procedure is being carried out correctly. If the lamp stops flashing quickly, it indicates an incorrect operation, an out-of-time interval, or a malfunction. Remove the training key from the ignition switch.
- While the warning lamp is flashing (about 6 seconds), insert the remote control and turn on the ignition. The immobilizer buzzer should emit three beeps. If the buzzer does not sound and the indicator has stopped flashing, this means: - the time interval of 6 seconds has been exceeded and it is necessary to repeat the learning procedure, starting from step 1; -immobilizer is faulty
- Wait 6 seconds for the buzzer to emit two more beeps and turn off the ignition.
- If it is necessary to train the second remote control, then you should perform steps 3...4 again, using the second learning remote control to turn on the ignition. If not, continue from step 6.
- After turning off the ignition for no more than 6 seconds, while the indicator is flashing, remove the remote control, insert the learning key and turn on the ignition. The buzzer should beep three times. Wait 6 seconds until the buzzer beeps two more times.
- Turn off the ignition without removing the training key, wait 6 seconds until the buzzer sounds a single sound signal. The indicator should flash twice as fast. If the sound signal does not sound and the flashing indicator stops, you should return to step 1 and repeat the learning procedure. If a repeated failure occurs when performing step 7, this means that the ECM was previously trained with a different key, in which case the controller should be replaced.
- After the buzzer gives a single sound signal, no later than 3 seconds, turn on the ignition for 2...3 seconds and then turn it off (after turning on the ignition, the buzzer will sound three times and the indicator will stop flashing). The hazard warning lights should flash and the car horn should beep.
- Remove the learning key. Wait with the ignition off for at least 10 seconds. Insert the working key and turn on the ignition. Wait 6 seconds, if the indicator does not flash, test start the engine, the engine should start. If the indicator flashes, turn off the ignition and wait at least 10 seconds. Turn on the ignition. The warning light should not flash and the engine should start. If, after turning on the ignition, after 6 seconds the indicator lights up with a constant light, then the learning procedure must be repeated, starting from step 1.
A set of important requirements
The immobilizer bypass module housing is usually made of plastic. And this is not accidental. Such a module is placed away from metal so that it does not block itself with its interference. Another thing is interesting: the image of the module, if it is installed, is usually not shown in any photo report.
Having connected the signaling, program any option and then remove the battery terminal. If the settings go wrong, most likely the main unit needs repair. The video at the end shows something else. It shows how easy it is to hack an alarm. Based on this information, do not make selection mistakes.
