Leather interior is always a sign of high style, presentability, and solidity. The material is a mandatory attribute of expensive foreign cars and creates an individual style for the vehicle. During use, the upholstery gradually loses its newness, becomes smudged, cracks and minor defects appear. If you need interior leather repairs, do not rush to contact expensive workshops.
This procedure can be easily handled in a garage environment if you know the correct procedure.
Main types of damage and defects
First, you should decide what damage will need to be repaired - the progress of the repair work largely depends on this. The most common defects you can see on used car seats are:
- the seat suffered from various external mechanical damage, careless use - there were scratches and burns, cuts and tears on it;
- The upholstery is very worn, especially in the area of the armrests;
- the spring component of the seat is deformed;
- the casing is cracked from prolonged use;
- the cushion gasket has ceased to be elastic and has sagged;
- the chair was damaged during the accident;
- The design of the car seat itself is broken.
Preparation
Before starting repair work, you should prepare materials, tools
va and tools, placing them so that you don’t have to climb far to get them. It is better to carry out restoration in a warm environment or in the summer, when the sky does not predict precipitation.
Preparation of the workplace is carried out in 3 stages:
- unscrew the chairs so that nothing interferes with removing the covers and getting to the lower surfaces;
- remove the covers;
- shake the covers and turn them inside out if necessary.
To get rid of grease on the surface of leather upholstery, it is recommended to resort to an aqueous solution of dishwashing gel. For 1 liter of water, 50 grams of detergent is suitable. Instead of dishwashing gel, acetone, hydrogen peroxide, and white alcohol can be diluted with water.
Repairing cuts and tears in upholstery
The simplest procedure is to carry out local repairs to eliminate the consequences of mechanical damage or careless handling. The “cheap and cheerful” option is to choose a fabric that matches the tone, pattern, texture and make a patch. Therefore, if you reupholster the seats yourself, do not forget to leave a few pieces of material in case of such cosmetic repairs.
If you accidentally burnt the upholstery, proceed as follows:
- Dismantle the seats and remove damaged material.
- Press the metal clips to remove the covers.
- Spread out the removed trim, marking each element with a marker so as not to get confused.
- Using the old parts, mark on the new fabric.
- Look how intact the foam rubber is - if necessary, it also needs to be replaced. Take new material 0.5 mm thick with an adhesive base.
- Fix the foam rubber only with spray adhesive.
- Sew the new elements of the cover together, remembering to follow the marks.
- Also glue the seam flaps to make the result of the work look more aesthetically pleasing.
Benefits of painting
Painting leather seats and the entire car interior has a number of advantages:
- Careful and careful work using the latest materials guarantees the preservation of the original texture of the material.
- The time required to paint a car's leather is minimal. Complete painting of a leather car interior takes no more than 2-3 days. Whereas replacing a damaged interior element with a new one will not only take longer, but also be much more expensive. For example, it takes two to three weeks to produce a new leather case.
- At the request of the car owner, you can update the color of the interior leather or radically change its appearance with a different shade of paint.
- The price of materials for painting a car interior is significantly less than the cost of reupholstering the interior or replacing elements. Moreover, dyed leather is often not inferior in appearance to new elements.
Before you start painting, the car interior must be thoroughly cleaned using the latest technologies that do not cause damage to leather elements. If necessary, existing defects are eliminated. Then, for better adhesion of the coloring material to the surface, the skin should be degreased. After this, all elements that will not be painted must be protected from paint. Now you can proceed directly to painting the interior. It is not necessary to involve specialists to perform this procedure. Having studied all the nuances of the procedure and having the necessary materials, you can do the painting yourself.
Restoration of seams
Another popular problem is that during long-term use, the factory seam on the seat cover comes apart. In this case, there is only one plan of action - to re-flash the ripped part:
- Remove the seat from the interior.
- Remove the upholstery from the chair.
- Turn the fabric inside out so that you find the wrong side of the seam.
- On both sides of the hole, pull out the factory threads so much that you can securely fasten them with strong knots. If this is not done, the seam will continue to come apart as use progresses.
- Select new strong (preferably nylon, not cotton) threads, similar in color to the factory ones, at a sewing store.
- Using small, neat stitches, sew up the hole from the wrong side of the upholstery.
Sealing the slot
If there are even cuts in the leather upholstery, then to restore it you need to sew up the edges with a neat seam that should go through the edge. You will also need to attach a reinforcing mesh to the reverse side. The damaged area must first be degreased. Glue a plastic mesh over the damaged area, tightly connecting the cut area.
After the sealing from the inside is successful, the defect will look like an ordinary deep scratch, so all that remains is to pour liquid leather into it. After the repair of the damaged area is successfully completed, all that remains is to paint it in a color that will match the overall tone of the interior.
Comfort and coziness inside the car helps the driver to concentrate on driving the vehicle. Continuing this topic, we offer our article on how to glue sound insulation to a car?
Necessary tools and materials for replacing upholstery and filling
Please note that car seat repair instructions vary depending on the material used for the upholstery:
- thick fabric;
- fleecy material;
- synthetic leather;
- Alcantara is an artificial material that imitates suede.
Thus, for repair we will need:
- fabric, leatherette or other upholstery material;
- foam lining;
- glue or glue gun;
- chalk, soap or a special felt-tip pen for cutting;
- small hammer;
- stationery knife;
- hacksaw;
- sharpened scissors;
- car vacuum cleaner;
- needles of different sizes especially for handmade work;
- Screwdriver Set;
- awl;
- pliers;
- dense, strong threads - nylon, parachute, silk.
Painting process
To paint seats and other elements as well as professionals, you must strictly follow the technology. It is important not to apply a new coat of paint if the previous one has not yet dried. It is also forbidden to spray too much paintwork, because streaks will appear on the skin, which will then stand out unaesthetically against the general background. If any blemishes form, they are carefully removed with a microfiber cloth or other lint-free material.
Necessary materials
The durability of the upholstery directly depends on the quality of the dye purchased. Therefore, you should not save money - it is better to immediately purchase a better quality product. Aerosols are especially popular because they are very easy to apply. If you purchased liquid paint, you should additionally buy a brush or a small sprayer. You also need to prepare rags, solvent, and masking tape.
Preparation
Only a completely clean interior can be painted. Therefore, it is first washed at car service centers or independently and dried thoroughly. You can also use professional cleaning products suitable for upholstery. Next, the seats, steering wheel, dashboard and other parts that are to be painted must be degreased. This is required for good adhesion of the paint to the base material. Degreasing is done with alcohol or special automotive products.
It is better to remove defects of significant depth and size in advance. To do this, purchase skin putty and close the “wounds” with a small spatula. Then allow the putty to dry completely.
Before work, all unpainted joints should be covered with masking tape so as not to stain them. The seats and all parts that can be removed are removed from the interior.
Coloring
After completing the preparatory stage, painting begins. You should carefully read the instructions, since the rules for applying different brands of paints and varnishes may differ. Carefully spray, rub in with a brush or sponge, first covering the most worn areas and allowing them to dry thoroughly. If spraying is carried out from a can, it must be kept at a distance of about 15 cm. The can must be moved smoothly so that all the parts are painted and there are no drips.
The paint should be applied in several layers (usually 2-4), allowing each layer to dry for at least 15 minutes. This will help make the color rich, bright, and defects will not show through. After completion of work, you cannot use the machine for 1–2 days (as specified by the specific manufacturer). After final drying, you need to polish the interior with special napkins or brushes.
Work order
Let's now look at the range of work recommended for restoring chairs with a wide variety of damage.
Removing and disassembling the seat
This step can be skipped if only cosmetic repairs are required. Let's say, installing a patch on a cut, hole or other damage. If more complex work is required, we suggest following the algorithm:
- Remove the seat from the dealership and disassemble it into its component parts. It’s most convenient to lay them out on the table so that everything you need is at hand and you don’t get confused when reassembling.
- If this is your first time disassembling a car seat, it makes sense to sign and number each of the parts so that you don’t get confused about them later.
- Start by dismantling the external fasteners and carefully remove the upholstery itself.
- To remove the upholstery, you will have to use either a stationery knife or sharp scissors. Moreover, very carefully - with the tool we only rip out the seams.
- Some assemblers glue the upholstery to the internal parts of the seat - be as careful as possible in such areas. If the material does not give way, try treating the difficult area with gasoline or solvent.
- It wouldn’t hurt to use a portable vacuum cleaner - you’ll be surprised how, during use, so much debris and dust has accumulated inside the seat and under the upholstery.
- Now it’s time to remove the pillow and backrest from the frame. Dismantling completed!
If you notice damage to the seat reclining mechanisms themselves, you need to carry out the following procedures:
- At the base of the pillow, find the lining - remove it.
- Unscrew the bolts holding the hinges of the lower part of the structure.
- Remove the axle and then remove the backrest.
- At the base of the frame, remove the hinges of the now upper part of the structure.
- At the base of the pillow, use the same bolts to secure a new mechanism in place of the faulty one.
- Adjust the position of the upper part of the seat by aligning the holes.
- Using an axis, connect the pillow and the backrest.
- Using hand welding, connect the hinges and the backrest.
Reveal new parts
The next important stage of our work is cutting. It is best to buy suitable fabric in the required volume in advance. To avoid hassle with cutting, use elements from the old removed upholstery as patterns. Here, proceed just like in school: attach the desired part to a piece of fabric, and then use a sharpened piece of soap, chalk, or a special marker to trace it strictly along the contour. Of course, you need to work from the wrong side of the material so that the drawn lines do not stain the fabric.
It is important not only to accurately trace the pattern, but also to ensure that the direction of the fibers on the pile fabric coincides. Depending on what material you use, pay attention to how much its edges fray when cutting the fabric. To ensure minimal consequences, work with well-sharpened scissors. There is also a special tool that not only cuts tissue accurately and quickly, but also cauterizes it - an electric knife. If you are working with loose material with scissors, you can burn its edges with a regular lighter, avoiding a strong flame, which will only deform and ruin the material.
Connecting the parts of the new case
After the necessary elements are cut out, all that remains is to connect them together with the old parts. Depending on the material of the cover, either “parachute” threads or a glue gun are used.
You need to be careful with glue guns: the composition used may not be suitable for the upholstery material. The fabric either will not stick together or will deteriorate under the influence of the substance. Therefore, it would be a good idea to study the instructions and also test the gun on a piece of similar material.
If this is your first time repairing a car seat, keep in mind that the upholstery parts are connected in such a way that their edges end up on the wrong side of the cover. Do not allow excessive overlap of material, and even more so, folds and distortions of the fabric.
After you have stitched and secured the seam, place soft foam material under it and gently but firmly beat it with a small hammer. This is necessary so that the joints of the parts do not become brittle.
Replacing foam pads
The foam filler located under the seat upholstery may deteriorate due to external damage or over time. When replacing this material, make sure that there are no internal voids left. Otherwise, when you put everything back together, the car seat will lose its shape and “float.” It will become not only unattractive in appearance, but also very uncomfortable. So much so that you will have to redo the whole job again.
To prevent this from happening, we recommend that you immediately use high-quality foam filler. For car seats, a material with a glued fabric cover is suitable. Give your preference to a filler whose manufacturer guarantees the mechanism’s resistance to compression and long-term use.
After you have replaced the old foam rubber with a new one, you need to place the updated upholstery on this material. A special adhesive spray is excellent for gluing: it is evenly distributed specifically over the upholstery material, connecting it to the foam filling without spoiling the latter.
Assembling the chair
After all restoration measures, the car seat is assembled in the reverse order. It is important to follow simple instructions:
- Connect the seat hinges.
- Assemble the pillow and carefully put the cover on it.
- Using the same hinges, connect the seat to the pillow, and then securely fasten them with screws.
- After the car seat is assembled, install it in its original place in the car.
- To ensure that the updated upholstery regains its factory appearance, do not forget to steam it before use.
- The renovations are now complete!
Benefits of painting
ATTENTION! A completely simple way to reduce fuel consumption has been found! Don't believe me? An auto mechanic with 15 years of experience also didn’t believe it until he tried it. And now he saves 35,000 rubles a year on gasoline! Read more"
Painting leather seats and the entire car interior has a number of advantages:
- Careful and careful work using the latest materials guarantees the preservation of the original texture of the material.
- The time required to paint a car's leather is minimal. Complete painting of a leather car interior takes no more than 2-3 days. Whereas replacing a damaged interior element with a new one will not only take longer, but also be much more expensive. For example, it takes two to three weeks to produce a new leather case.
- At the request of the car owner, you can update the color of the interior leather or radically change its appearance with a different shade of paint.
- The price of materials for painting a car interior is significantly less than the cost of reupholstering the interior or replacing elements. Moreover, dyed leather is often not inferior in appearance to new elements.
Before you start painting, the car interior must be thoroughly cleaned using the latest technologies that do not cause damage to leather elements. If necessary, existing defects are eliminated. Then, for better adhesion of the coloring material to the surface, the skin should be degreased. After this, all elements that will not be painted must be protected from paint. Now you can proceed directly to painting the interior. It is not necessary to involve specialists to perform this procedure. Having studied all the nuances of the procedure and having the necessary materials, you can do the painting yourself.
Restoring cuts on leather seats
It is worth considering separately such restoration work as eliminating cuts on a leather seat.
In general, leather car seats have many advantages over seats made of other materials - they do not react to high humidity, temperature changes, and last a long time (with proper care). But if leatherette is exposed to direct sunlight, it becomes fragile - unaesthetic cracks and tears appear on the surface.
Since leather covers have a decent price, restoration is still preferable to replacing them. To carry out the work you will need the following:
- Substance of the “liquid skin” type.
- Hiking iron.
- Paint matched tone-on-tone to leather upholstery.
- Fine-grit sandpaper.
- Degreaser.
- Thermal powder.
- A special plastic mesh that is sold to eliminate small holes and cracks on surfaces.
We work with all of the above as follows:
- Redecorating. If you need to update and refresh the appearance of the seat, then using a polymer material will help. It is applied to the required area, and then wait until the substance dries completely. When applied correctly, it should copy the beautiful texture of leather upholstery. The resulting film is removed and applied to the “shuffled” area, while ironing it with a Teflon iron.
- If the damage only affects the top layer of paint. It is possible to eliminate the resulting abrasions and scratches using a special polish with filler and spray paint. Before actual work, do not forget to clean, dry and degrease the surface of the leather and leatherette. Only then can you spray the paint evenly. Once the dye is completely dry, apply polish on top. Special advice: do not allow paint to leak! They are very difficult to remove.
- If there are noticeable cuts or tears on the surface. Here, to restore the leather seat, it is advisable to use “liquid leather”. Gently sand the surface of the repair area with fine-grained sandpaper. Place a plastic mesh over this area and fill it with a liquid composition that imitates skin.
Make a leather patch if desired. To do this, degrease the surface, spread a mesh over it, and pour thermal powder on top. Apply a Teflon pad and run an iron over it, heated to a temperature at which the skin does not yet begin to melt. To ensure that the thermal substance is properly fixed, move the iron over the surface for no more than 15-20 seconds. To make the material look natural, attach briquettes used in thermal bags to it - they cool quickly.
How to restore leather in a car?
To maintain a neat appearance in the interior, it is enough to restore the leather in the car.
You can do this yourself, taking into account all the nuances in repairing leather seat coverings. Over time, the material on the surface may dry out, crack, or become discolored. If you use the seats in the car carelessly, neglecting all sorts of rules, then stains, scuffs, and holes may appear on them. To keep leather trim looking like new, just use one of several simple and inexpensive methods.
Repair of covers with heating system
Separately, we will look at car seats with a heating system - this option is very popular in the cold Russian winters. But on such chairs, not only the upholstery itself often deteriorates, but also the equipment for heating the seats. A separate difficulty is that it is not so easy to get to the heating, which is why removable capes and car covers with built-in heating systems are so popular. With other models of car seats you have to follow the following instructions:
- Remove the seat from the car interior.
- Disassemble the seat into individual elements and remove the upholstery.
- Find the location of the “accident” - for this, a special tester is used to accurately determine the location of the fault.
- The most common problem here is torn, broken or burned out wiring. Depending on the degree of damage, the wires are either soldered or replaced with new ones.
Tips for prolonging color results
Using interior paint gives excellent results. The integrity of leather parts is restored, the material becomes soft, elastic, and the effect of shrinkage and roughening of the skin is eliminated. The original color returns, or the interior completely changes its shade.
To preserve the results for a long time and avoid over-upholstering the sheathing, you must follow important tips. You should not carry animals or objects that tear or scratch the skin in your car, and do not use aggressive chemicals when washing. It is advisable to have a cover on the driver's seat to protect the upholstery during intensive use. Following the rules will allow you to enjoy the attractiveness of your car’s interior for up to 5–7 years without disappointment.
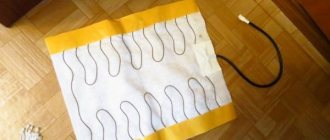
Soft backing
A soft lining can be glued to the back of the upholstery. It is especially relevant for the skin. This is a foam material with fabric. The material helps to hold the thread, and it does not fall through the material when sewing. This soft material performs three functions. Firstly, it helps to eliminate wrinkles on the fairly thin upholstery material, and secondly, the soft lining gives better tactile sensations to the surface. Thirdly, this material provides a smooth, even appearance and fullness of the upholstery after installation.
The soft backing is glued with special glue from a can with the soft part to the upholstery, and the fabric outside. The principle of gluing and leveling is the same as when repairing ceiling trim. In addition to gluing, you can additionally stitch along the very edge of the upholstery part. This way the backing is guaranteed not to come off. After this, the excess along the edges of the upholstery part is cut off and the individual upholstery piece can be considered finished.