For modern car enthusiasts, this device has much more functionality than the name suggests. After all, many devices are connected to the cigarette lighter socket. The most common:
- charger or power bank for mobile phones, tablets or other electronic devices;
- a navigator showing the way through city traffic jams;
- DVR recording traffic conditions;
- fan;
- compressor for inflating wheels.
Therefore, when the Lancer 9 cigarette lighter stops working and needs to be replaced, this is unpleasant news. Making repairs yourself is not difficult. You can learn from this material how to find out the cause of the malfunction, check weak points, and repair the device.
Required Tools
Before dismantling the cigarette lighter on a VAZ 2110, repairing it or installing a new device, or replacing a fuse, you will need to stock up on suitable devices. To work you will need:
- Phillips and standard screwdriver;
- protective gloves.
To fix a broken cigarette lighter or fuse, the following will be useful:
- multitester;
- blowtorch with solder;
- heat shrink tubes, electrical tape;
- wire cutters;
- needle file
This is interesting: Brake discs on the VAZ 2108: selection and replacement
Design and principle of operation
To find the reason why the cigarette lighter does not work, you need to understand its structure and principle of operation. The small device is made in a plastic case, inside of which there is a metal spiral. The functions of the heating element are performed by nichrome or other material with increased resistivity. The product is connected to the corresponding socket on the dashboard, and the positive contact is connected to the heater.
When heated, the nichrome spiral turns red. The system is equipped with a thermal relay that turns off the power supply when the permissible temperature threshold is exceeded.
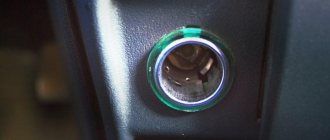
The cigarette lighter socket is illuminated, so finding it in poor lighting conditions is quite easy. There is also a 10 A fuse in the socket.
Before turning to specialists with the question of why the cigarette lighter stopped working, you should consider the main reasons for this incident.
Removing the Fuel Module
Before removing the module, it is necessary to relieve the pressure in the fuel line. To do this, remove the block located next to the seat of the fuel line hose and start the car to use up the gasoline that is already in the system. After the engine stalls due to lack of fuel supplied to it, the module is ready for removal.
First, disconnect the fuel line - it is attached to the tube coming out of the fuel module with a plastic latch. Next, unscrew the six bolts that secure the module retaining ring to the fuel tank. When removing the spare part, be careful with the float rod - with the help of this element, readings about the volume of remaining gasoline are transmitted to the fuel sensor. While working with the fuel module, the entrance to the gas tank can be covered with a tight-fitting piece of thick cardboard or plastic so that the car interior is not filled with gasoline vapors.
"Toyota"
If the Toyota cigarette lighter does not work, you need to start by checking the fuses. Car enthusiasts claim that the instructions for this car brand do not indicate anything about them.
On most models, the correct fuse box is located under the steering column.
Also, many owners replace the entire glass. There is an aluminum insert on the glass. She often burns out.
Downloading a book
The cigarette lighter and radio on the VAZ-2110 do not work: the main reasons
After successfully completing the payment (by any method) and returning to the KrutilVertel store from the payment system website, you will be taken to the successful payment page:
The book you purchased will be in your personal account, from where you can always download it.
Please note that after making the payment, you need to return back from the payment system website to the KrutilVertel website. If for some reason you did not return back to the site and closed the payment system tab with a message about the successful completion of the payment, please let us know - we will send you a letter indicating access to download the book
If for some reason you did not return back to the site and closed the payment system tab with a message about the successful completion of the payment, please let us know - we will send you a letter indicating access to download the book.
The main causes of cigarette lighter failure and their solutions
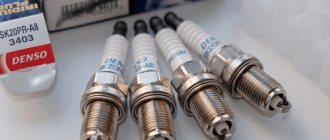
If the immediate first function of this device is important to you, try replacing the cigarette lighter head. This is the first and simplest action that should be performed in this situation. With intensive use, the heating coil burns out and stops performing its tasks. But this process should be carried out carefully - buy only the head that fits your car model.
If this process does not help, you should look for the cause of the problem directly in the electrical network that connects the cigarette lighter. To do this, you need to check all connections and make sure there are no burnt wires or connections. The main factors that are worth checking in this aspect are the following:
- the functionality of the fuse that is responsible for the operation of the cigarette lighter;
- integrity of all electrical connections of the equipment itself, wires on the cigarette lighter body;
- absence of carbon deposits and foreign particles in the cigarette lighter socket and on the contacts;
- serviceability of the plug when connecting certain devices to the cigarette lighter;
- absence of overloads on this unit during its operation.
These tests will help you identify the faulty unit. The easiest check is related to the fuse box. Check your car's owner's manual to see which fuse controls the cigarette lighter. Then replace it with a known working element of the electrical system and check the operation of the device.
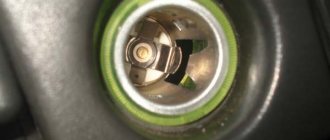
To check for oxidation of contacts or the presence of foreign objects in the socket, it is enough to visually examine the equipment, and if there are blockages, remove them using non-metallic objects. In all other cases, you will have to remove the cigarette lighter from its installation location and check the electrical connections.
Sochi restaurant menus
Sochi is a very sunny city, and this could not but affect the unique tastes of the dishes.
Many restaurants pay great attention to seasonal dishes and sauces, which is why Sochi restaurants are popular all year round. In general, the menu of various establishments is very diverse and depends on the concept of the restaurant.
Thus, one of the best restaurants in Sochi, Baran Rapan, treats its guests to seafood and the most tender lamb, and at the Red Fox restaurant you will be pleased with the most delicate pastries. In many restaurants, cuisines are not limited to one and the menu can offer dishes for every taste, but there are also narrowly focused restaurants, such as Fettuccine, which serves excellent Italian cuisine.
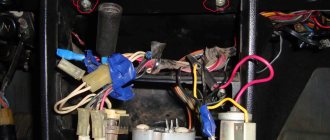
Wiring and terminals
If the fuse is intact, then the cause of the malfunction is elsewhere. To repair the Lancer 9 cigarette lighter, you will need to test the integrity of the wiring. To do this, you need to get a multitester and remember the pinout of the device. In total, three wires come to the device - two positive and one negative.
- Red, positive – connected to the battery. The circuit current is no more than 15 amperes, and if this parameter is exceeded, the fuse blows.
- Yellow. The positive wire is responsible for the backlight bulb.
- Black, minus. It comes to the body of the device, and the other end is a mass powered through the body of the car.
Where is the Lancer 9 fuse box located?
MB automotive fuses on the Lancer 9 car are located in several places - in the engine compartment, inside the cabin.
In the engine compartment
| Fuse number | Current strength, A | Purpose |
| 1 | 15 | Front PTF |
| 2 | 10 | Horn circuit and relay for turning it on |
| 3, 8, 10, 12, 16 | relays, fuses | Reserve, unused places |
| 4 | 20 | Chains of mass air flow sensor, DPKV, DHX, DKK, recirculation valve, ECU, electric fan, ignition coil, immobilizer |
| 5 | 10 | Air conditioning compressor |
| 6 | relay | Sound signal |
| 7 | 15 | ABS, engine ECU, additional brake light and tail lights |
| 9 | 15 | Additional electrical appliances |
| 11 | 7.5 | Generator |
| 13 | 10 | ETACS and turn signals |
| 14 | 20 | Automatic transmission solenoids |
| 15 | 15 | Gasoline pump |
| 17 | 40 | Egnition lock |
| 18 | 30 | Window lifters |
| 19 | 10 | Steering column switch, ETACS, front ECU |
| 20 | 10 | Clock, ETACS, radio |
| 21 | 7.5 | Control unit for air conditioning, ashtray and cigarette lighter illumination, instrument clusters, PTF switch, turn indicators, air recirculation control unit, rear lights, radio connector |
| 22 | 7.5 | Instrument clusters, side lights and license plate light |
| 23 | 10 | Right headlight |
| 24 | 10 | Left headlight and electric corrector of the light beam of the lamps |
| 25 | relay | Used lighting |
| 26 | relay | Fan motor |
| 27 | 60 | ABS ECU |
| 28 | 50 | Fan controller |
| 29 | 10 | Left headlight and high beam |
| 30 | 10 | Right headlight |
| 31 | 60 | Battery |
| 32 | 15 | PTF, signal lamp and relay for their activation |
| Number | Purpose |
| 1 | Connector for connecting the engine speed indicator |
| 2,3,4 | Reserve places |
| 5 | Ignition |
| 6 | Automatic transmission |
| 7 | Engine control system |
| 8 | Air conditioning compressor |
Lancer 9 fuse box in the cabin
| Fuse/relay number | Current strength, A | Protected |
| 1 | relay | Front PTF |
| 2 | relay | Reserve |
| 3 | relay | Gasoline pump |
| 4 | relay | Heated front seats |
| 5 | relay | Gasoline pump |
| 6 | relay | Window lifters |
| 7 | relay | Wiring harness blocks |
| 8 | relay | Electric fan of the power unit |
| 9 | relay | Rear window defroster |
| 10 | 30 | Electronic air conditioning control unit |
| 11 | 30 | Rear window defroster |
| 12 | 7.5 | Exterior mirror control panel |
| 13 | 7.5 | ABS electronic control unit |
| 14 | 7.5 | Backup fuse |
| 15 | 7.5 | Air Conditioning Compressor Relay, Automatic Transmission Control Module Relay, Rear Window Defogger Relay, Front Electronic Control Module, Heater, Heater Relay, Air Distribution Motor |
| 16 | 7.5 | Auxiliary relay and exterior mirror control |
| 17 | 7.5 | Backup fuse |
| 18 | 7.5 | Backup fuse |
| 19 | 7.5 | Backup fuse |
| 20 | 10 | Rear fog light, light indicator and rear fog light relay |
| 21 | 7.5 | Automatic transmission control relay, instrument cluster, electronic engine and automatic transmission control unit (for vehicles with automatic transmission), reverse light, electronic control unit for the ETACS system, output shaft speed sensors (for vehicles with automatic transmission), electronic control unit for additional security system (SRS) |
| 22 | 15 | Cigarette lighter fuse Mitsubishi Lancer 9 |
| 23 | 15 | Diagnostic connector |
| 24 | 7.5 | ABS warning light, low battery warning light, engine management system warning light, steering column switch, instrument cluster, ETACS electronic control unit, low fuel level warning light, oil pressure warning light, supplementary safety system (SRS) warning light, airbag system electronic control unit, vehicle speed sensor, brake system warning light |
| 25 | 7.5 | Electronic engine and automatic transmission control unit (for vehicles with automatic transmission), electronic engine control unit, fuel pump relay No. 1, fuel pump relay No. 2 |
| 25 | 15 | ETACS electronic control unit and rear window wiper motor (station wagon) |
| 27 | 10 | Capacitor (for 4G6 engines), ignition coils |
| 28 | 20 | Electronic lighting control unit, windshield wiper motor |
| 29 | 20 | Backup fuse |
How to check
Finding out whether the cigarette lighter in your car is working is easy. The first sign of a breakdown is lack of response when connecting external devices. Associated symptoms manifest themselves in the form of the clock, dashboard backlight, radio and other standard devices turning off.
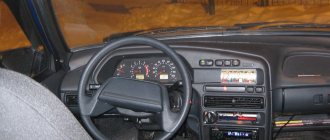
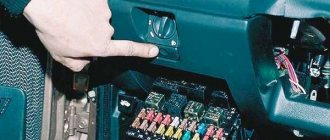
To check the functionality of the part, remove the mounting block and evaluate its condition. The placement of the block depends on the design features of the machine. In VAZ cars it is located on the front panel.
If the cigarette lighter does not work even though the fuse is working, pull out the wires and check their integrity with a multimeter.
Electrical equipment of the Mitsubishi Lancer X
The electrical equipment of the car is made according to a single-wire circuit: the negative terminals of sources and consumers of electricity are connected to ground. The function of the second wire is performed by the car body. Most circuits are protected by fuses. High-power electrical consumers are switched on through electromagnetic relays. To switch the main circuits of the car, a combined ignition switch (lock) is used, consisting of a contact part and a mechanical anti-theft device with a lock.
MOUNTING BLOCKS MITSUBISHI LANCER 10 Always carry a set of spare fuses with you - one of each rating. Do not skimp when purchasing fuses: lately, low-quality fuses are often found on sale, the electrical parameters of which do not correspond to the declared ones. Remember that fuses are designed to prevent fires in electrical wiring and, under certain circumstances, your life may depend on their quality, not to mention the cost of car repairs. Location of fuses and relays Most fuses and relays are located in separate blocks located in the engine compartment of the car, one block located in the cabin under the instrument panel.
This article provides electrical circuits for the Mitsubishi Lancer X
This article provides information about the electrical equipment of the Mitsubishi Lancer X:
Changing the cigarette lighter light bulb
Sometimes the backlight of the device burns out and the fuse trips. This will require dismantling the filter and replacing the light bulb. It’s easy to do work on a VAZ 2110.
- Remove the terminal from the car battery.
- We take out the metal cylinder.
- We bend the fixing antennae and remove the device from the hole.
- Disconnect the wire block.
- Remove the filter ring.
- We squeeze the lamp screen so that the legs come out of the slots.
- Remove the light bulb by turning it 90 degrees.
- We install a new element, and then assemble the device, following the reverse procedure.
Step-by-step replacement instructions
The hoses, which are visible in the photo above, should be carefully removed. You will also need to disconnect the wiring plug.
Attention. It will be more difficult to remove a fuel hose secured with a latch
It will take some effort to get her to give in.
Further actions:
the fastening nuts installed around the entire circumference of the fuel cleaning element are turned out;
Nuts around the entire circumference of the cover
the module is lifted (removed) upward.
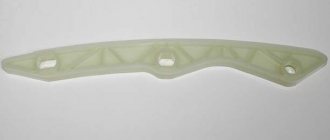
You must remove the filter with the submersible pump very carefully so as not to inadvertently bend the float with its fastening (the black float is shown in the photo below).
TF float with its mount
In order to disconnect the TF from the module, you need to:
- press the clips in the places shown in the photo below and the plugs will come out easily;
- using pliers, squeeze out the protective ring to separate the filter from the module;
- raise the top of the module;
- release the TF from the wires;
- replace the old filter with a new one.
The coarse mesh or tea bag is also changed.
New filter Lancer 10
What to do
Fixing cigarette lighter breakdowns does not take much time. However, the car owner needs to get a general idea of the repair and draw up a step-by-step action plan.
The simplest solution is to seek help from specialists. An experienced service center employee will return the product to working order in a short time. However, you will have to pay for such a service.
To do all the work yourself, follow the following instructions:
- Make sure the fuse is in the correct location. According to the scheme, it should be fixed in a common box and indicated by the symbol of a smoking cigarette or the inscription “Cigar”.
- If a part fails, replace it with a new one.
- If the product is working properly and continues to conduct current, evaluate the condition of the socket.
- Pay attention to the interior of the nest. It may be clogged with some debris. To remove a foreign object from the socket, you need to use tweezers. However, the action must be performed with extreme caution.
If there are traces of burning on the cigarette lighter, you will need to buy a new product. If there is a soldered wire, it is enough to solder it.
Required Tools
To repair the cigarette lighter, you should prepare the following tools:
- Tweezers.
- Screwdriver (phillips or flathead).
Also, a flashlight, a multimeter and a printed wiring diagram may be useful for the upcoming work.
How to remove the cigarette lighter
If you have found the cause of the cigarette lighter failure and prepared the necessary equipment, proceed to disassemble the part. The dismantling process involves the following steps:
- First you need to open the hood and remove the negative terminal from the battery.
- Next, you need to disassemble the facing panel to gain access to the socket connection connector.
- Then you can unscrew the screws and disconnect the block.
- The next step is to dismantle the metal cigarette lighter tube using a screwdriver.
- After removing the part, you must turn off the backlight.
A serviceable element can be repaired, but a burnt-out element will have to be replaced.
Car cigarette lighter button repair
Often the device stops working due to damage to the power button.
The problem is solved by dismantling the failed key and then restoring or replacing it.
The repair process does not take much time and is done with your own hands.
Cigarette lighter head repair
In some cases, it is necessary to perform partial repairs of the car cigarette lighter. To do this, the element is dismantled according to simple instructions and checked for defects under the housing. Inside the part there is a miniature mica plate, which acts as a semiconductor and often fails. The product must be removed, repaired, and then put back.
What not to do
Mitsubishi Lancer 9 fuses and relays
Cigarette lighter burnout is a common problem faced by many motorists. To prevent it, you need to follow a few simple rules and recommendations.
Firstly, you cannot clean the contacts with a knife or screwdriver without turning off the power supply. In most cases, the cigarette lighter always conducts power, so contact with a conductive object will cause a short circuit and combustion of the part. The device can only be cleaned after removing it from the socket and turning off the ignition. Contacts can be treated with a hard brush, which is pre-wetted in alcohol, or with a screwdriver and sandpaper.
Problems with the cigarette lighter occur due to wear of the bimetallic plates. This happens when connecting unsuitable electrical appliances and adapters, which violates the geometry of the plates. The parts become deformed and no longer hold the cigarette lighter in the right place. As a result, an untimely release of the device from operating temperature occurs.
The greatest danger is ignition of plastic parts, which occurs when the cigarette lighter is held in place excessively. Therefore, non-smoking drivers remove the part from the socket so as not to accidentally fix it.
Experts also do not recommend using car heaters that are powered from the cigarette lighter. They consume a lot of electrical energy and can damage the removable element. It only takes 1 minute to heat up the device, and the heater can operate for several hours. Even the most powerful cigarette lighters are not able to cope with prolonged exposure to high current.
Connecting an additional cigarette lighter
Some car owners install another socket. You will need:
- drill or screwdriver with a set of metal drills;
- a crown for cutting out a hole, the diameter must match the diameter of the car cigarette lighter;
- file;
- soldering iron with solder;
- wire cutters;
- screwdrivers;
- multitester;
- heat-shrink tubing;
- wire of suitable cross-section;
- fuse that can withstand the current recommended by the manufacturer - 25 amperes.
- We turn off the power to the car and choose a place to connect an additional cigarette lighter. It is desirable that it be a flat surface.
- We drill a hole of a suitable diameter and clean the edges with a file.
- We connect to the wiring, observing the polarity and passing them through the fuse.
- We check the functionality of the model and carry out assembly.
If the problem is in the cigarette lighter itself
If the protective element does not show signs of damage, repair or replacement of the device itself is required.
How to remove the cigarette lighter
The block is dismantled as follows:
- Gain access to the engine compartment. Remove the negative terminal of the battery located here. This will prevent the electrical circuit from failing during repairs.
- Take out the ashtray, which is located on the center console. Disconnect the gearbox handle, making it possible to remove the lining.
- Raise the decorative strip. Disconnect the contacts from the cigarette lighter. Turn the overlay over. Then you need to find the nut holding the 2 plates. It is unscrewed and the metal elements are dismantled.
- Disconnect the wire, unbend the clamps, and remove the cigarette lighter from its seat.
Repair
After disassembling the device, the integrity of the wiring and its other elements is assessed. Often the cable supplying the structure is damaged or burns out. If such a breakdown is suspected, the rear part is disassembled. Remove the burnt wire and insert a new copper cable into the technological hole. Reassemble the device by performing all steps in reverse order.
Replacing a part with a new one
If repair is impossible, the unit is completely replaced. It is not necessary to use the original device. There are several options for parts for Lancer, the cost of which is 500-1000 rubles.
You should avoid buying a spare part that is too cheap.
Cheap materials are used in manufacturing, which reduce the service life of the product. The part must be properly packaged to prevent damage during transportation.
Connection diagram
If a fuse has blown or another breakdown has occurred, during disassembly the pinout of the device is remembered or transferred to the drawing. There are 3 cables to the cigarette lighter - 2 positive, 1 negative.
The positive red wire connects to the battery. The current should not exceed 15 A. The yellow positive cable is connected to the backlight lamp, the black negative cable is connected to the cigarette lighter body. The opposite end is connected to the car body.
Starline a62 autostart
Power circuit protection
In Mitsubishi Lancer cars of the IX and X generations, the protection of electromechanical and electronic devices from damage caused by overload or short circuit in power supply circuits, as well as in other models, is carried out using fusible links, combined according to functionality and placed in close proximity to the protected units .
The fuse blocks of Lancer 9 and 10 cars are located both in the passenger compartment and in the engine compartment.
Central fuse block
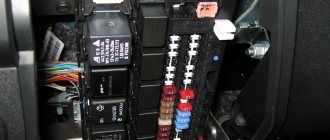
The central fuse box in Lancer 9 and 10 cars is installed in the passenger compartment and is hidden under the dashboard (on the left side at the driver’s feet) behind a drawer for small items.
In order to gain access to the fusible links located inside the car, you must:
- open the box lid;
- pull the drawer towards you;
- overcome the force of the latches to remove the drawer.
After the drawer for small items is removed, access to the Lancer's central fuse box opens.
In addition to fuse links, it contains blocks for connecting harnesses and relays:
- Front fog lights.
- Reserve.
- Electric fuel pump.
- Heated front seats.
- Electric fuel pump.
- Electric windows.
- Connectors.
- Electric fan of the power unit.
- Rear window defogger.
The purpose of electrical circuits that are protected by fuse links are given in the table:
Fuses in the engine compartment
Under the hood of the Lancer are located:
fuse link 26 installed on the “+” terminal of the battery;
mounting block installed above the left front wheel (indicated in the photo as number 7).
Structurally, it is made of two parts, access to which is closed by a common lid. Below it are:
Main block (10), the arrangement of elements in which is shown in the photo:
The on-board electrical circuits, which are protected by fuses installed under the hood, are described below:
Additional block (11), which contains:
- block to which a device is connected that measures the crankshaft speed of the power unit (1);
- ignition system relay (5);
- automatic transmission control relay (6);
- main relay of the motor control system (7);
- relay that turns on the air conditioning compressor.
There are also spare sockets for installing relays (2. 4).
The fuse responsible for the cigarette lighter not working
If the cigarette lighter does not work, you need to check the fuse responsible for its circuit. On the Mitsubishi Lancer 10, a jumper with a rated current of 15 A is responsible for powering the outlet.
Power outlet/cigarette lighter fuse location
It is necessary to check the integrity of the jumper. If the fuse is blown, you need to replace it with a new one with the appropriate rated current. If after this the insert fails again within a short time, you should check the electrical wiring and the cigarette lighter itself. Unreasonably installing a fuse of a higher rating is prohibited, as this may lead to a fire in the vehicle.
Fuse box Mitsubishi Lancer X
Fuses on Mitsubishi Lancer 10: where are they, diagram | uazlyuks.ru
Fuses and fuses in Mitsubishi 1 (from 2008) are located in three zones:
- under the dash,
- in the engine compartment,
- to battery + terminal.
The covers have pictograms and fuse labels. They can be done in different languages.
Replacement of faulty fuses is carried out using special tweezers.
Cabin fuses
They are located under the decorative cover on the dashboard. It can be easily removed without special tools.
Fig.1 Fig.2
Access to the fuses is normal.
Explanation for Figure 2
| Stove engine | 1 | 30A |
| Feet | 2 | 15A |
| Rear fog lights | 3 | 10A |
| Wipers | 4 | 30A |
| Additional devices | 5 | 10A |
| Central lock | 6 | 20A |
| Radio tape recorder | 7 | 15A |
| ECU main relay | 8 | 7.5A |
| Interior lighting | 9 | 15A |
| Emergency crew | 10 | 15A |
| Rear wipers | 11 | 15A |
| Dashboard | 12 | 7.5A |
| Cigarette lighter, additional socket | 13 | 15A |
| Start key | 14 | 10A |
| Power sunroof | 15 | 20A |
| Mirrors | 16 | 10A |
| Differential lock | 17 | 10A |
| Reversing light | 18 | 7.5A |
| Additional connector | 19 | 15A |
| Glass control | 20 | 30A |
| Heated rear window | 21 | 30A |
| Heated mirrors | 22 | 7.5A |
| Additional power (antenna amplifier) | 23 | 15A |
| Seat drive | 24 | 25A |
| Heated seats | 25 | 30A |
Fuses under the hood
The location of the block is shown in Figure 3 (position 11).
The appearance and dismantling of the cover is shown in Figure 4.
A photograph of the arrangement of elements is shown in Figure 5
Photo of the battery block
| Fog lights | I | 15A |
| ECU | 2 | 7.5A |
| Automatic transmission | 3 | 20A |
| Signal | 4 | 10A |
| Generator | 5 | 7.5A |
| Washer pump | 6 | 20A |
| Climate control | 7 | 10A |
| Damper power circuit | 8 | 15A |
| Anti-theft | 9 | 20A |
| Heated wipers | 10 | 15A |
| Rear door lock | 12 | 30A |
| Daylighting | 13 | 10A |
| Far left | 14 | 10A |
| Far right | 15 | 10A |
| Far/near left (xenon) | 16 | 20A |
| Far / near right (xenon) | 17 | 20A |
| Middle left with halogen | 18 | 10A |
| Middle with halogen light right | 19 | 10A |
| ECU | 20 | 10A |
| High voltage coil | 21 | 10A |
| ECU | 22 | 20A |
| Gasoline pump | 23 | 15A |
| Starter | 24 | 30A |
| Not used | 25 | — |
| ABS | 26 | 40A |
| ABS | 27 | 30A |
| Air conditioner fan | 28 | 30A |
| Radiator fan | 29 | 40A |
| Add. devices (antenna, etc.) | 30 | 30A |
| Sound amplifier | 31 | 30A |
| ECU (diesel) | 32 | — |
| Main fuse | 33 | 120A |
| Interior fuses | 34 | 80A |
| Additional | 35 | 80A |
| Engine compartment fuses, light | 36 | 120A |
| Interior fuses, fan relays | 37 | 80A |
The color scheme of fuses depending on the rating is shown in Fig. 7
For different car modifications, the description given may differ slightly in the purpose of the fuses.
It is allowed to increase the fuse rating by no more than 20% of that indicated in the tables.
General recommendations for troubleshooting faults related to blown fuses
- If several Lancer 10 electrical equipment systems fail, then most likely one of the fuses installed on the positive terminal of the battery or in the engine compartment unit has failed.
- If the engine fails to start, the fuses labeled ECU should be checked.
- Checking the fuses should be done with a multimeter turned on in the “dial” mode (buzzer).
The fuse must be removed from its original location. The visual inspection method should not be trusted. As a last resort, you can swap fuses of the same color (value).You cannot remove several fuses for testing at the same time.
It is allowed to increase the value of the cigarette lighter fuse when powering auto gadgets to 25 Amperes.
Cigarette lighter not from ignition
There is a way to connect directly to the car battery. This scheme has advantages: if you connect the cigarette lighter directly to the battery, you can avoid interfering with the wiring itself and the fuse. The work will take less time; the positive cables should be led directly to the battery, and the negative cables should be attached to the car body.
It is also important to remember that you need to select the right spare parts. Initially, this concerns the wires. Each square millimeter of cross-section is designed for 5-10 amperes of current. Should be taken with reserve. A cross-section of 3–5 mm is quite sufficient to transmit the required voltage. Otherwise, the wires may burn and the fuse will trip. This will result in a risk of short circuit. The circuit should be routed through an additional fuse with a rating specified by the manufacturer.
DOM
1 of 8
The restaurant complex is at the service of fans of large-scale gastronomic projects. There is a restaurant, cafe, and karaoke club under one roof. Outside the windows and terrace, the endless Black Sea with snow-white yachts worries.
The establishment maintains its brand very well. The key to a wonderful day for regulars is breakfast, consisting of cereals, omelettes, and pancakes. Excellent selection of seafood. You will be treated to excellent shrimp carpaccio, crab bruschetta and foie gras escalope. For main course – amazingly tender fried sturgeon.
Prices: a glass of the cheapest wine costs 890 rubles. A tuna roll with Kamchatka crab costs 1,800 rubles, a warm salad with seafood costs 980 rubles. A serving of rice – 260 rubles, a glass of milkshake – 380 rubles. Morning porridge 180, omelette 120 rub. Hookah is one of the most expensive on the coast - 2500 rubles.
Restaurant D.O.M. Sochi. 07/06/2016
00:25
Restaurant DOM Sochi 2022. Morozovs.
00:36
Sochi karaoke restaurant House! You are simply Cosmos Sash)))
03:40
Address: st. Nessebrskaya, 1a, Grand Marina Website: www.dom-restaurant.ru
How to connect the device to a cigarette lighter without a plug
Some owners decide to abandon the device itself and prefer to install other devices directly. To connect the device directly without a plug you will need:
- We dismantle the car cigarette lighter, gaining access to the cables.
- We connect the wires of the installed device, observing the polarity.
- We carry out the assembly.
- A constant minus. Comes to the car body.
- A constant plus. Connects through a fuse to the battery.
- Plus, coming up to the backlight bulb.
prikur
The Goetz has both a cigarette lighter (on the left) and a socket. The different designs of the end contact are clearly visible. The Goetz has both a cigarette lighter (on the left) and a socket. The different designs of the end contact are clearly visible.
One problem: since the central contact of the plug is spring-loaded, a poorly selected plug can easily jump out of the socket (either a cigarette lighter or a socket), especially if the elasticity and location of its side “ground” contact are also selected incorrectly...
YOU DON'T HAVE TO BURN OUT
It seems that no one is addressing the question of what nests should be like, neither abroad nor here. At the head research institute of auto electronics, the specialized department was completely disbanded. So what does the market offer the consumer?
Look at the photo. We easily found three plugs, the diameters of which increase in millimeter increments. What hundredths are there, prescribed in the standard! Moreover, the ground contact on one of them has moved so far back that when it vibrates, the plug actually falls out of the cigarette lighter/socket. Hence the threat of a spark, overheating and, as a result... you know what. On another sample of the plug, the ring contact should be fixed with a standard bimetallic plate of the cigarette lighter socket, but the plug does not fit into it at all!
They will object to us: the electrical circuit of the cigarette lighter socket is protected by a fuse, which is bound to blow out if something happens! The fuse does not always help. Look, the standard cigarette lighter works in short-term mode and does not have time to heat the socket with its heat. When instead you insert the same charger for a mobile phone, which does not connect well, sparks, heats up, but does not exceed the permissible current limits, the fuse will remain intact... How likely is the worst course of further events? Answer for yourself, remembering: weren’t you, tempted by the price and decent appearance, buying goods offered by helpful street vendors? Can you be sure of its quality? We are not. And you will doubt: samples of plugs with crappy filling are in front of you. Think about the consequences of this. And keep in mind that even the most loyal manufacturer in the world will put on a straight face when a fire-damaged motorist, who is also the owner of a device of unknown origin, demands compensation for the loss.
DelMar
1 of 9
Everything here is consistent with the name: the first line of the coast, the interior is in the Mediterranean style, in the summer not only the internal hall is open, ottomans and shell sofas are installed right on the beach. Sea, sun, light proximity - what else is needed for happiness.
You can enjoy pizza, pasta, risotto. The chefs know the recipe for making an amazing julienne of rapana and mussels in a creamy sauce. You won’t find a tastier “Caesar” on the entire coast, say guests. The sauce in it is worthy of praise.
Prices: Soups 250-300 rubles, pizza 450-600 rubles, pastas 400-500 rubles. For 100 gr. salmon steak costs 650 rubles, mussels 250 rubles, red mullet costs the same. Glass of milkshake 120 rub. The bill per person is not less than 2000 rubles.
Cafe terrace Del Mar |Book a table at the Del Mar restaurant in Sochi
00:44
Pizzeria “Del Mar” Sochi, prices in the cafe on the embankment
02:19
Video 360 degrees Sochi
Video with important moments
Below are videos that will help you figure out how to replace the cigarette lighter on a car with a Europanel.
The highlight of this article will be the VAZ 2110 cigarette lighter. Probably now you can’t find a driver who doesn’t use it. Unlike the old days, when it was mainly used to light a cigarette. Since every day there are more and more gadgets that take power from the cigarette lighter, the load on it is increasing. Therefore, cigarette lighter breakage became a common problem.
Therefore, very often motorists wonder how to replace the cigarette lighter. In this article I will tell you not only about replacement, but also about how to check the cigarette lighter.
Most often, a cigarette lighter breaks down not because it is used for its intended purpose (lighting cigarettes), but because various devices that require high current are inserted into it. And some also put tees on the cigarette lighter, which has a very detrimental effect on its operation.
Today, the cigarette lighter is an integral part of every car, where the cigarette lighter of the VAZ 2110 will be no exception. In the last century, it was required only as an obvious way to light a cigarette and was used mostly by smokers, but those days have sunk into oblivion. Nowadays, this is a great way to recharge your phone or connect a navigator, or even an entire DVR and other electrical equipment, instead of using the VAZ 2110 cigarette lighter for its intended purpose.
Cigarette lighter VAZ 2110
Device diagnostics
No matter how ironic it may sound, most VAZ 2110 cigarette lighters break down due to use other than their intended purpose, in particular, car owners begin to connect various types of electronics, which in turn consume large amounts of electric current. Any electrician will say that no matter how it sounds, in reality the electrical circuit is quite simple and the VAZ 2112 cigarette lighter does not require any special skills.
Select the vehicle modification to search for the fuel pump relay
Engine: volume – 1.3 liters, power – 82 hp, type – petrol, model – 4G13 (16V). Drive: front. Year of manufacture: 2003-2009
Engine: volume – 1.5 liters, power – 86 hp, type – petrol, model – 4G15 (12V). Drive: front. Year of manufacture: 2006-2009
Engine: volume – 1.5 liters, power – 87 hp, type – petrol. Drive: front. Year of manufacture: 2004-2009
Engine: volume – 1.5 liters, power – 86 hp, type – petrol, model – 4G15 (12V). Drive: front. Year of manufacture: 2006-2009
Engine: volume – 1.6 liters, power – 98 hp, code – CS3A, type – petrol, model – 4G18. Drive: front. Year of manufacture: 2003-2009
Engine: volume – 1.6 liters, power – 105 hp, type – petrol, model – 4G18. Drive: front. Year of manufacture: 2002-2007
Engine: volume – 1.8 liters, power – 121 hp, type – petrol, model – 4G93. Drive: front. Year of manufacture: 2003-2009
Engine: volume – 1.8 liters, power – 124 hp, type – petrol, model – 4G93. Drive: front. Year of manufacture: 2003-2009
Engine: volume – 2 liters, power – 115 hp, type – petrol, model – 4G94. Drive: front. Year of manufacture: 2010-2009
Engine: volume – 2 liters, power – 116 hp, type – petrol, model – 4G63 (DOHC 16V). Drive: front. Year of manufacture: 2003-2009
Engine: volume – 2 liters, power – 116 hp, type – petrol, model – 4G94. Drive: front. Year of manufacture: 2003-2006
Engine: volume – 2 liters, power – 116 hp, type – petrol, model – 4G94. Drive: front. Year of manufacture: 2003-2006
Engine: volume – 2 liters, power – 121 hp, type – petrol, model – 4G94. Drive: front. Year of manufacture: 2001-2007
Engine: volume – 2 liters, power – 121 hp, type – petrol. Drive: full. Year of manufacture: 2005-2006
Engine: volume – 2 liters, power – 125 hp, type – petrol, model – 4G94. Drive: front. Year of manufacture: 2005-2009
Engine: volume – 2 liters, power – 125 hp, type – petrol, model – 4G94 (GDI). Drive: front. Year of manufacture: 2003-2009
Engine: volume – 2 liters, power – 135 hp, code – CS9A, type – petrol, model – 4G63 (DOHC 16V). Drive: front. Year of manufacture: 2003-2009
Engine: volume – 2 liters, power – 154 hp, type – petrol, model – 4B11. Drive: front. Year of manufacture: 2007-2009
Engine: volume – 2 liters, power – 265 hp, code – CT9A, type – petrol, model – 4G63 Turbo. Drive: full. Year of manufacture: 2004-2009
Engine: volume – 2 liters, power – 275 hp, type – petrol, model – 4G63 Turbo. Drive: full. Year of manufacture: 2002-2005
Engine: volume – 2 liters, power – 280 hp, code – CT9A, type – petrol, model – 4G63 Turbo. Drive: full. Year of manufacture: 2006-2009
Engine: volume – 2 liters, power – 290 hp, type – petrol, model – 4G63 Turbo. Drive: full. Year of manufacture: 2005-2009
Engine: volume – 2 liters, power – 116 hp, type – petrol. Drive: front. Year of manufacture: 2006-2009
Engine: volume – 2.4 liters, power – 147 hp, type – petrol, model – 4G64 (GDI). Drive: front. Year of manufacture: 2003-2009
Engine: volume – 2.4 liters, power – 154 hp, type – petrol, model – 4G69. Drive: front. Year of manufacture: 2004-2007
Engine: volume – 2.4 liters, power – 156 hp, type – petrol, model – 4G69. Drive: front. Year of manufacture: 2005-2009
Engine: volume – 2.4 liters, power – 165 hp, type – petrol, model – 4G69. Drive: front. Year of manufacture: 2003-2006
Engine: volume – 2 liters, power – 68 hp, type – diesel. Drive: front. Year of manufacture: 2010-2009
In the next step, for an expanded selection, you can enter the vehicle's Vin code to go to illustrated catalogs, where you can find the layout of parts down to the bolt and duplicates that are not in the catalog of analogues.
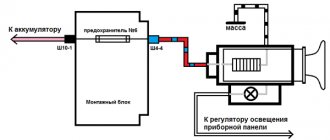
VAZ 2107 cigarette lighter connection diagram
Three wires are connected to the cigarette lighter of the VAZ 2107:
- the red wire goes to the battery plus and supplies voltage to the clock;
- the yellow wire goes to the battery plus and supplies voltage to the backlight;
- The black wire is responsible for connecting the ground.
In addition to the cigarette lighter itself, its connection diagram includes a fuse marked F6 installed in the mounting block.
Car salon
To gain access to the fuse mounting block located in the passenger compartment, remove the cover, overcoming the elastic resistance of the latches.
| Purpose of fuses in the block located in the interior of the Mitsubishi Lancer | |
| Protected circuit | Current, A |
| Heater (Fuse Link) | |
| Brake lights | |
| Rear fog light | |
| Windshield wiper | |
| Accessory circuits | |
| Electric door locks | |
| Audio system | |
| Control unit relay | |
| Interior lighting lamps (plafonds) | |
| Hazard warning lights | |
| Rear window wiper | |
| Instrumentation | |
| Cigarette Lighter Fuse/Power Socket | |
| Egnition lock | |
| Luke | |
| Exterior mirrors | |
| All-wheel drive system | |
| Reversing lights | |
| Power outlet | |
| Electric windows (Fuse link) | |
| Heated rear window (Fuse link) | |
| Heated exterior mirrors | |
| AC power supply | |
| Electric seats | |
| Seat heating | |
| Relay | |
| A | Optional equipment |
| B | Heater fan relay |
| C | seat heating |
| D | heated rear window |
Photo report on cigarette lighter repairs (from a sore point)
Photo report on cigarette lighter repairs (from a sore point)
Post by Madmax » Jul 16, 2013, 00:39
Re: Photo report on cigarette lighter repairs (from a sore point)
Post by kaimanchik » Jul 16, 2013, 11:49 am
cigarette lighters are designed for a load of no more than 120 W (see manual)
Thanks for the warning! I just looked at my Berkut 15 compressor, and it is 14.5A*12V=174W. Now I will be careful with it, although the kit includes wires for powering the battery. Thank you.
Post by Madmax » Jul 16, 2013, 3:00 pm
Post by kogeletov » 03 Sep 2013, 21:52
Post by Skazspb » 13 Aug 2014, 15:41
I have personally witnessed the consequences of using a copper insert. Miraculously, the car didn't catch fire. The fuse did not blow. and the cigarette lighter wire began to melt in the braid! (KZ) - melted a bunch of wires, miraculously the vital ones were not touched. everything was restored (not cheap entertainment), but the residue remained. (Lancer X). Incl. I would refrain from such advice. everything for the time being.
Photo report on cigarette lighter repairs (from a sore point)
Post by kvf777 » 28 Nov 2016, 19:35
Photo report on cigarette lighter repairs (from a sore point)
Post by Akhmadeev Ravil » November 28, 2016, 20:34
Photo report on cigarette lighter repairs (from a sore point)
Post by JazzRock » 28 Nov 2016, 21:42
Photo report on cigarette lighter repairs (from a sore point)
Post by Agrariy » 28 Nov 2016, 22:50
Photo report on cigarette lighter repairs (from a sore point)
Post by Agrariy » November 28, 2016, 10:51 pm
MOUNTING BLOCKS
Always carry a set of spare fuses with you - one of each rating.
Do not skimp when purchasing fuses: lately, low-quality fuses are often found on sale, the electrical parameters of which do not correspond to the declared ones. Remember that fuses are designed to prevent electrical fires and your life, not to mention the cost of car repairs, may depend on their quality under certain circumstances.
Rice. 10.1.
Mounting block located in the engine compartment
FUSE AND RELAY LOCATION
Most fuses and relays are located in a separate block located in the engine compartment of the car (Fig. 10.1).
Auxiliary relays are located in an additional mounting block (Fig. 10.2), located next to the main one. Some of the fuses and relays are located in a block located under the instrument panel on the left side of the steering column (Fig. 10.3).
The mounting block (see Fig. 10.1), located in the engine compartment, contains the following relays and fuses:
1–15 A fuse (circuit of the front fog lights, their turn-on indicator and the fog light turn-on relay);
2–10 A fuse (horn circuit and relay for its activation);
3rd place for the front fog lamp relay;
4 – fuse 20 A (circuits of the mass air flow sensor, crankshaft position sensor, recirculation valve, electronic engine control unit, engine control system relay, electric fan relay, idle speed control, ignition coil relay, electronic immobilizer control unit, injectors, concentration sensor oxygen and canister purge valve);
5–10 A fuse (air conditioning compressor circuit);
6–relay for turning on sound signals;
7–15 A fuse (circuits of the ABS electronic control unit, electronic engine control unit, additional brake light and rear lights);
8 – reserve place for relay;
9–15 A fuse (connector for additional electrical devices);
10 – reserve space for relay;
11–7.5 A fuse (generator excitation winding circuit);
12 – reserve space for relay;
13–10 A fuse (circuits of the electronic control unit of the ETACS system and direction indicators);
14–20 A fuse (automatic solenoid control unit circuit
15–15 A fuse (fuel pump circuit);
17–fuse link 40 A (ignition switch circuit);
18-fuse link 30 A (power window circuit);
19–10 A fuse (circuits of the instrument cluster, steering column switch, electronic control unit of the ETACS system, front electronic control unit);
20–10 A fuse (clock circuit, ETACS electronic control unit, radio);
21 – fuse 7.5 A (circuits of the electronic air conditioning control unit, ashtray illumination, cigarette lighter illumination, instrument cluster,
switch for fog lights, direction indicators, air recirculation control unit, rear lights, connector for radio);
22–7.5 A fuse (instrument cluster circuits, side lights and license plate lights);
23–10 A fuse (right headlight circuit);
24–10 A fuse (circuit of the left headlight and electric headlight corrector);
25-electronic lighting control unit;
26 – relay for turning on the fan electric motor;
27 – fuse link 60 A (ABS electronic control unit);
28-fuse link 50 A (fan controller circuit);
29–10 A fuse (circuit of the left headlight and the high-beam headlight signal lamp);
30 – 10 A fuse (right headlight circuit);
31–fuse link 60 A (battery charging circuit);
32 – 15 A fuse (circuits of front fog lights, warning lamp and relay for turning them on).
Fuses of different ratings are painted in different colors; In addition, the fuse is marked with a numerical value of the current for which it is designed (rated value).
COLOR OF THE FUSE CASE AND ITS COMPLIANCE WITH THE RATING
**The fuse is larger than the others.
Rice. 10.2.
Additional mounting block located in the engine compartment
Rice. 10.3.
Mounting block located inside the car
Table 10.1 FUSES OF THE INSTALLATION BLOCK
LOCATED IN THE VEHICLE PASSENGER