At the initial stage of remaking your own car, much attention should be paid to tuning the VAZ 2110 panel. Many owners of the “ten” adhere to the position that their car should not lag behind modern fashion trends in the world of four-wheeled high-speed “iron horses”.
Of course, everyone wants their car, despite some wear and tear and the already quite rich history of the VAZ 2110 brand, to look beautiful, “feel” powerful and provide high comfort inside the cabin for all passengers. While traveling in a vehicle, many passengers pay attention to the instruments.
Of course, they will always be more interested in original devices with exclusive design solutions that literally amaze and delight. Tuning the VAZ 2110 instrument panel should begin with searching for panels. To install such a part, you will have to use your own skills and dexterity if you don’t want to give your hard-earned money to various car dealerships.
Moreover, this work does not require the use of special tools. It will be enough to use pliers and a Phillips screwdriver.
How to create a new design for the VAZ 2110 dashboard
The entire process of updating your dashboard yourself will not take much time. All that needs to be done is dismantling the outdated “part” and installing a modernized model. You can find out how to remove the VAZ panel here and in the car repair and operation manual. But the main steps should be recalled:
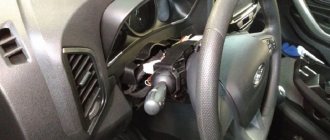
- First you need to disconnect the battery terminals. The steering wheel should be lowered to the lowest position.
- It is necessary to unscrew the screws that secure the panel trim.
- Next, we disconnect the connector on the left, in this situation we are talking about a machine switch for external refreshment. Then, using pliers, you should straighten the mountings of the instrument cluster.
- Next, remove it. Some models are attached using M5 screws. Finally, you need to disconnect the connectors.
After this, you can install the new panel in the reverse order. Such tuning of a VAZ 2110 with your own hands will always cause admiration among passengers and a sense of pride.
Installing a dashboard from another car
Every year, more advanced dashboards were created. An example is the Priora model, which has a rather attractive design and navigation screen. If necessary, you can adjust the dashboard to the vehicle in question. In general, we can say that it is possible to install the instrument panel from the Priora practically without changing it. The only thing to consider is:
- You need to match the power supply to the navigation screen.
- To control the active unit, a special joystick is installed, which is installed under the steering wheel on the right side.
- In order for navigation to work, you must install an antenna and connect it to the unit.
All the difficulties lie in connecting the power. The VAZ 2110 does not provide for the installation of a screen, which determines the absence of a feature. Therefore, you should understand the features of the car’s electrical system and select the necessary cables and chips.
Vibrant variety of colors
Today, the fashion for changing the dashboard lighting is gaining fantastic momentum. Almost everywhere cars have neon lighting or internal LED illumination. However, all these innovations are not a cheap pleasure, which not everyone can afford. The situation is different when replacing the factory backlight with a multi-colored one.
You can, no doubt, use ready-made tuning options, but this will also cost a lot. It is best to do it yourself. In this situation, the main thing is to have the necessary materials and patience. First you have to disassemble the “tidy”. The protective glass must be removed. Next we remove the arrows. To do this, you need to use a screwdriver and hard cardboard.
It should be placed under the arrow, and then pry it off with a screwdriver. Then you need to carefully and slowly lift it to the top. Next, remove the backing. A utility knife will be useful for this. It must be inserted between the panel and the substrate and a layer of sealant must be cut in a circle. Then remove the backing. Let's disassemble the panel and get started.
1. Remove the filter layer using a utility knife. A filter is a colored layer of paint. It is applied from the back of the substrate and gives color illumination to the speedometer numbers and other sensors. To completely get rid of the filter, you can use acetone or another liquid that contains alcohol.
2. Next, change the backlight color. First, you can change the odometer backlight. To do this, you will need to dismantle the odometer screen, and then remove the blue film and remove the backlight bulb. It should be replaced with a multi-color universal LED. He can change colors. We connect the LED to the socket of a standard light bulb. Reinstall the odometer screen.
3. Now you can start completely replacing the backlight. We attach the LEDs to the “tidy” frame. Such LEDs can be purchased complete with a color switch. We install them in place and attach them to the standard dashboard backlight contacts.
4. Let's move on. Now we need to make sure that the arrows have the ability to change the backlight. To do this, remove the layer of red paint from the arrows. For this operation, you can use a stationery knife and acetone. Once the arrow is clean, it can be painted using white nail polish. The main thing is that the arrow is white, since this color conveys the color scheme of the LEDs.
5. Before the final stage, you need to attach the LED color switch to the panel. Such a switch can be installed, for example, in the lower right corner of the dashboard. After this, you can install everything in place. First, the substrate is installed. For greater reliability, you can use a sealant. After this, we put the arrows in place. We insert the protective glass. After that we admire the result.
Changing the backlight of the shield
In order to tune the instrument panel on a VAZ-2110 car, you don’t have to resort to such radical measures. For example, a fairly popular option is to change the backlight of the shield by installing LED or neon instead of the standard one. At the very first stage, you should remove the protective glass of the shield. After this, you can begin to remove the instrument needles. This should be done slowly so as not to break anything. Next, remove the backing. Here you will also need accuracy and patience. In particular, you should trim the sealant by slipping a knife blade under the backing.
The first half of the work is done. Next, we disassemble the panel, remove the light filter from the substrate using a knife, and then remove the remaining paint with acetone. After this, we change the standard odometer bulb. The best option here is a multi-color LED. You just need to attach it to the original lamp socket. At this stage of work there will be nothing complicated. You just need to replace all the other standard lamps with LEDs, remove the old paint from the arrows, and then paint them white.
Now the finishing touch remains. The final step is to install a color switch in the LED. You can buy it at almost every auto store. The switch is fixed in any place convenient for you. After that, all that remains is to assemble the panel back, secure everything with sealant and admire the result.
How to beautifully illuminate the buttons of a VAZ 2110 panel
When tuning the panel of the presented car, among other things, you can also beautifully illuminate the “tidy” buttons. Let's take, for example, the rear fog light button. First you have to dismantle and disassemble it. To do this, you need to pull its moving part and body in different directions.
Once the button is pulled out, the light bulb can be accessed. If you wish, you can take it out. If you can’t pull out the light bulb, then we move on. Using a screwdriver or knife, pry up the latches on both sides. A switch mechanism will appear in front of us. Here we need a black staple. By prying it off, we will calmly scatter the entire mechanism.
Now we can easily remove the lamp; tweezers are suitable for this. Now you can use your imagination. You can purchase an LED lamp in any color. It should be borne in mind that the positive one is contact No. 6, and the negative one is No. 7. You can find out the polarity by looking at the back of the case. A block with wires is inserted here. Next, we check how the backlight works. If everything is fine, move on to the next part.
Getting rid of the green filter. It can be drilled, but this must be done carefully so that the drill does not go right through the entire structure. As a result, we remove the light filter from the structure and check its functionality.
It should be noted that almost all buttons, if desired, can be modified in this way. The only exception is the position of the negative and positive contacts; they need to be looked at in the electrical diagram. If there is no diagram, you can easily find a photo of it on the Internet. The negative contact is usually designated by a black wire, the positive contact by any color.
Most often he is white. You can remember, but it is better to sketch or photograph the contact connections; then there will be no confusion during the assembly process. The assembly process must be done in reverse order.
Installing tweeters in the dashboard of a VAZ 2110
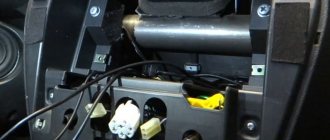
You can beautifully complement the panel by installing a tweeter (high-frequency speaker). One of the most problematic stages is drilling holes. The windshield makes it difficult to drill at right angles. But it’s impossible to do without a drill, because there is a metal strip under the plastic shell. In this situation, you should make something like a template or stencil out of paper.
Using a knife, you can remove the soft area of the panel (plastic on the outside, something like foam rubber on the inside). Then we take a drill and drill around the pre-marked area. It is better to use compact drills. Once the hole is drilled, the rough edges should be corrected. To do this, you can use special attachments for drills.
You need to drill at a distance from instruments and sensors. Please note that wires or brackets may be found under the metal strip. The mounted tweeter element must fit tightly into the hole. If there is a certain freedom, then it is necessary to seal this area with sealant. The wires from the tweeter can be hooked along the edges of the air ducts.
This tweeter is an important component if a speaker system is being built in the car. Without such a detail, the sound and sound volume will not be complete.
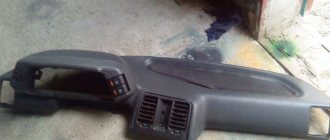
Repair of "tidy" VAZ 2110
The domestic car 2110 cannot boast of a high-quality panel. In severe frost or summer heat, plastic often begins to crack. In addition, sometimes its corner also comes off. The “tidy” of this machine consists of three parts: a central, upper lining and a lower plastic lining. The corner most often comes off through: unscrewing the screws that attract the top cover, or through the fact that its soft part has moved away from the metal part of the top cover.
In the first option, you need to remove the panel, because otherwise you won’t be able to tighten the top trim. If only the soft part has come off, then there may be several solutions. You can glue it, but it will not stick tightly to the plastic air deflector. Another option is to mask the gap that appears when the corner of the panel peels off.
You can, of course, cover the gap with wire. It is placed inside using a screwdriver. Instead of a wire, you can use a headlight seal. In this case, you can return the corner to its place. Polyurethane foam is used to glue the corner. The casing, thanks to the foam, will stick to the metal body, but first it needs to be cleaned and degreased.
Then we apply foam inside, using a wet rag to remove excess foam. Use paper clips to press the corners. There is no need to remove the foam immediately. You should wait until it dries. After the foam has dried, you need to paint over it with a marker. It may seem like the foam is bursting, but in fact, the corners of the panel will not come out.
Now you can move on to repairing the crack in the panel. To do this, use either a plastic repair agent or tighten the lining with material. As for the first option, it is the simplest, because during repairs you do not need to remove the cover. You can remove the crack using a special epoxy resin.
Cosmofen and cold welding are also suitable for use. To prevent the crack from standing out, you should repaint the dashboard. In the second method, when reupholstering this automobile part, leather or vinyl leather is used. First, the crack must be filled with putty. If the problem is in the corner of the panel that has come unstuck, then repairing it will not be difficult.
If the “tidy” is cracked, then it is very difficult to completely hide the crack and, at the same time, not remove it. If the matter concerns repairs, then it is better to immediately replace it with a European overlay. Here you can see in detail how to solder plastic.
Installation of LED light bulbs
Quite often, conventional lamps are replaced with LED ones. This is due to the following points:
- Diodes last much longer than regular lamps. That is why, by making just one change, you can eliminate the possibility of violating the integrity of the structure.
- Diodes tend to be smaller in size at high levels of illumination. Diodes tend to be brighter at smaller sizes.
- Electricity consumption is significantly reduced. By replacing all conventional lamps, you can significantly reduce the load on the electrical cable, generator and installed battery.
In general, we can say that installing LEDs leads to a significant change in the appearance of the dashboard. The work is quite simple:
- The dashboard is being dismantled.
- Selected LEDs are installed instead of conventional lamps.
In general, we can say that VAZ 2110 instrument panel tuning in this case will significantly change its design. The work does not take much time and money.
| Engine | 1.6 l, 8kl (Euro-2) | 1.6 l, 16cl (Euro-2) | 1.6 l, 16cl (Euro-3) |
| Length, mm | 4265 | 4265 | 4265 |
| Width, mm | 1680 | 1680 | 1680 |
| Height, mm | 1420 | 1420 | 1420 |
| Base, mm | 2492 | 2492 | 2492 |
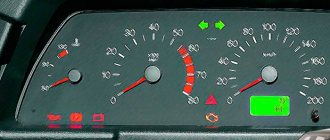
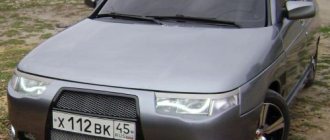
Stylish and modern overlay
Many VAZ 2110 owners quickly get tired of the boring standard panel (in the video), but they don’t want to buy an alternative one, which is equipped with a computer and costs a lot of money. What to do in such a situation? There is an excellent option that will allow you to carry out economical tuning yourself. One of the easiest ways is to buy an overlay.
You can find them without any problems in online stores (the photos presented there give a general idea of such details). To install it, you need to remove the “tidy” and carefully pull out the arrows. When installing the arrows in place, you should make sure that nothing interferes with their movement. Otherwise, you will have to disassemble everything again.
If you add illumination of the scale and arrows to this tuning option, you can almost instantly transform your own car beyond recognition.
Problems and their solutions
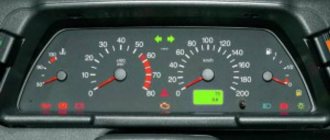
Old and new sample There are several common problems typical for the dashboard of the domestically produced VAZ 2110 model.
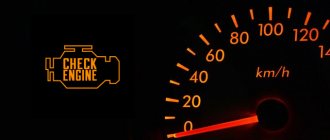
- The instrument panel lights on the VAZ 2110 do not light up. Check the contacts and the condition of the wiring that is responsible for the suspension. The fuses could simply have blown, or the light bulbs themselves could have burned out as a result of wear and tear or a short circuit. In fact, there can be many reasons, so it is not always possible to resolve the issue in a couple of minutes.
- The most serious failure for the instrument panel is a complete failure of the unit. In such a situation, all indicators stop working, the arrows fall down, and the warning lamps do not light up. To fix the problem, first check fuse 15, which is designated F6. You will find it on the mounting block. If this element is blown, simply replacing the fuse will not solve the problem. Look for the reason why it burned out. Usually this is a simple short circuit in the electrical network.
- The arrows jump up and down. This is also a common phenomenon, the cause of which in most cases is poor ground contact: This ground wire goes to the partition that separates the interior and engine compartment, from the instrument panel. To get to it, remove the radio from its seat. Check the quality of its fastening;
- Often, when installing an alarm system, the ground wire is moved to another location for more convenient access. Therefore, if you have an alarm system, but there is no wire under the radio, then look for it behind the interior trim near the driver’s left foot;
- The ground wire may be damaged when installing a new audio system. When the minus is connected, the mass is unscrewed and then often mounted back, only not as reliably as it was originally. Due to vibrations, collisions with bumps and holes, the fastening weakens and contact disappears. Hence the non-functional panel. Do not be lazy to properly wrap the bulk wire, since poor fastening is often explained by the inconvenience of performing this activity.
Problem with the instrument panel. To check if everything is fine with it, remove it as much as possible from the seat, but do not disconnect the wiring going to the pads. The white wire (X1) that goes to the first contact is checked. It would be a good idea to check the voltage on pins 10.9 and 6. During normal operation of the system, the device should give a reading of about 12 volts. Be sure to look at the back of the shield and make sure the conductive paths are intact. Cigarette lighter. It is not uncommon for the instrument panel on a VAZ 2110 to fail due to the cigarette lighter. You are probably no exception among drivers who connect all sorts of additional devices and devices through this socket. This is how many people charge their phones, connect tablets, video recorders and other equipment. By consuming a large amount of current, the devices damage the cigarette lighter or cause fuse F19 to blow. Because of this, the instrument panel turns off or does not work correctly. If the fuse is intact, simply disconnect the cigarette lighter connector. If such measures do not produce results, simply replace the fuse with a new one.
As practice shows, most problems associated with the failure of the dashboard can be solved independently. Especially when it comes to a car like the VAZ 2110.
Improve yourself. Perhaps soon you will be able to change to a more expensive, modern car. Then solving the electronics problem will be much more difficult. The VAZ 2110 is an excellent simulator that allows you to carry out repairs yourself, understand the structure of the car, and experience all the delights of self-repair
It is important for any man to be able not only to drive, but also, if necessary, to repair his car.
How to carry out high-quality soundproofing of a VAZ 2110 panel yourself
It's no secret that the VAZ 2110's panel often creaks. Eliminating squeaks is also called sound insulation. This process begins with disassembling the “tidy” into three parts, which are fastened together with bolts. Modelin can be used as an “anti-creak”, and bitoplast will act as a noise absorber.
In places where the panel parts come into contact, a model should be used. All bolt holes must be closed with model material to eliminate loss of heater air flow. The back of the dashboard needs to be covered with bitoplast.
The rest of it can be glued inside. This article provides more details on how to glue sound insulation. Often the black fuse box and glove compartment cause squeaks. At the bottom of the latter you need to lay bitoplast, and the sides should be covered with modelin. The sides of the black box that are in contact with the panel should be glued with modelin. It should be noted that the bitoplast is crushed during planting and there should be no problems with installing the “tidy”.
Nothing can please owners more than silence and the complete absence of various annoying squeaks in the car. The comfort in the cabin that occurs after soundproofing the panel causes only pleasant sensations.
Find more information here and here
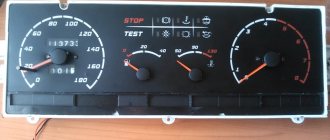
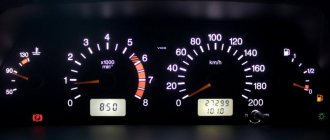
Device
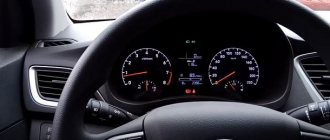
The entire instrument cluster is mounted on the panel with two bolts and consists partly of mechanical and partly of electronic components. The electronic component of a regular panel is a speedometer and tachometer, but some cars from the VAZ 2110 model range already have an electronic panel.
Also, there must be indicators: coolant temperature, availability, fuel level, as well as warning lights, of which there are 12 installed on the VAZ 2110.
All device connections are stored in a printed circuit board, which is mounted on the back of the case.
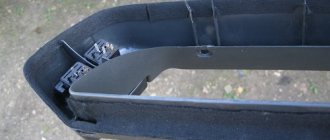
This material will help you figure out the pinout of the instrument panel of the VAZ 2110:
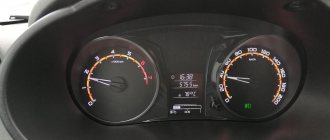
Dashboard of VAZ 2110 disassembled