02/19/2022 30,649 VAZ Priora
Author: Ivan Baranov
VAZ Priora cars replaced the flagships of the domestic manufacturer. Recently, more and more adherents of Russian cars are switching to Priora. But in these vehicles, as in any other, certain malfunctions may occur, especially when it comes to the gearbox. Today you will find out why first gear is difficult to engage in Priora and how to fix this problem.
[Hide]
Step-by-step instruction
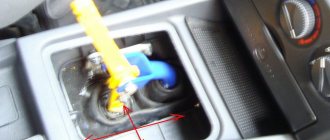
Disassembled clutch pedal
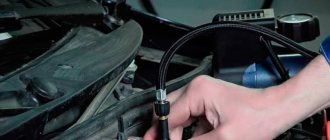
To change the clutch cable, you will need a set of screwdrivers and wrenches. Initially, the air filter, which is located in the engine compartment, is removed. The clutch cable is pulled forward. Then it is removed with a leash from the groove of the lever.
Using a “17” wrench, unscrew the nut securing the tip of the shell of this unit to the bracket several turns. You will need to hold it with a hex wrench. The tip is removed from the bracket. The last element is located in the Priora's interior.
The nut that secures the bracket is unscrewed with an “8” key. Since replacing the cable on a Priora is carried out in difficult conditions, to facilitate the work, it is recommended to firmly pull the clutch pedal. Using a screwdriver, pry up the rear edge of the last element. Then the pedal is dismantled.
The next step involves pulling the cable sealing boot out of the hole. After dismantling it, turn away and remove the leash from the tip. If the Lada Priora clutch sensor fails, it is replaced with a new device. As for installing the clutch cable, this procedure is carried out after checking the condition of the plastic bushing on the corresponding pin. If it is worn out, a new unit is installed. The pin and bushing will need to be lubricated with a special substance.
Installation of the clutch cable on the Priora begins with passing this element through the hole in the shield from the car interior into the engine compartment. Then the sealing cover is mounted, and the housing of the corresponding cable mechanism is put on the finger. After fixing it, the cable sheath is secured.
It is screwed onto the tip of the wires so that its end is flush with the similar element of the leash. The last element is installed in place. Next, adjust the clutch drive on the Priora. This procedure involves pulling the cable forward by its tip until it stops completely. In this position, the distance from the lever to the end is measured. This figure should be 27 mm.
On the first models of Russian VAZ passenger cars, with rear-wheel drive, the clutch was engaged using a hydraulic system. That is, as with the brake drive, when the pressure from the master cylinder is transmitted to the working, actuating mechanism. When developing a new series of VAZs with driving front wheels, this scheme was abandoned. A simple and reliable system for engaging the clutch mechanism using a special cable was developed. The principle of the rocker arm works here. When you press the lower part of the pedal, the upper working area, through the base (rod), goes in the opposite direction and pulls the cable along with it.
The other end of the flexible connector is attached directly to the clutch drive fork. When you press the pedal, the clutch disengages, making it possible to engage or change gear in the box.
How to fix the problem
If the gearbox on a Lada Priora refuses to work normally, it is necessary to disassemble and repair the unit. Below are instructions that will prompt you to solve some problems.
How to remove manual transmission
Dismantling the transmission is carried out as follows:
- Drain the gearbox oil. Drive the car onto a flat surface, into a garage with a pit or onto an overpass. Climb under its bottom and find a plug for draining the working fluid; place a container under the hole into which the “working off” will be drained. Unscrew the bolt with a wrench and wait about one hour until the fluid is completely out of the system. After this, the transmission is dismantled.
- The next step is performed in the salon. Under the control panel there is a fastening nut of the cable housing; it is connected directly to the pedal. Unscrew the nut with a size 8 wrench. After unscrewing, you can remove the stop from the bracket.
- Remove the locking assembly, as well as the housing of the driven pulley lining wear compensation mechanism; these components are connected to the so-called pedal pin. To dismantle, use a screwdriver with a Phillips head; the tool must be used to pry off the mechanism. Remove the plastic bushing from the pedal and inspect it carefully. The presence of damage and defects indicates the need to replace the part.
- Then the seal on the cable sheath is removed; this component is located in the engine compartment. Remove the tip from the fork by moving it forward in advance as the machine moves.
- Unscrew the nut that secures the tip to the bracket in the gearbox. This nut will require a 17mm wrench. Remove the cable end from the fastening hole. After this it can be removed. Remove the plastic plug and remove the plug with wires from the speed controller.
- Unscrew the three screws securing the crankcase cover; this will require a 10mm wrench. The cover is removed. A reliable support should be placed under the power unit of the machine. Unscrew the nut that secures the rear of the engine mount to the bracket; this will require a 15mm wrench.
- Remove the upper limiter of the rear engine mount cushion. Unscrew the screws that secure this element to the car body. Remove the cushion along with the restraint device.
- Unscrew the nuts securing the rear motor mount to the transmission. To unscrew, you will need a 13mm wrench. The number of nuts depends on the year of manufacture of the car. Using a size 8 wrench, unscrew the upper fixing screw, and then remove the rear support bracket.
- Remove the plastic plug and remove the block with wiring from the reverse optics activation mechanism. Unscrew the screw that secures the gear shift device hinge on the rod; this is where the speed selection takes place. To dismantle, use a 10mm wrench.
- Unscrew the screws securing the torque rod. Also unscrew the bolts that hold the front wheel hubcaps and remove them using a flat-head screwdriver. There are rubberized seals on the removed parts; be careful not to lose them.
- Using a 30mm wrench, remove the wheel retaining screws and wheel nuts. When performing this task, the vehicle must be on the ground and not on an overpass or lift. Secure the vehicle in place by lifting the parking brake lever. Support the rear wheels.
- Using a jack, lift the front of the car and remove the wheels. Then completely unscrew the hub nuts and remove the washers installed under them. Dismantled parts (we are talking about nuts) must be replaced. Disconnect and remove the rotating devices from the suspension arms, before doing this you should unscrew the mounting screws, use a 17 key. Remove both drives by pressing them out of their seats. Place a support under the gearbox to avoid damaging the unit.
- Unscrew the screws securing the transmission to the motor; this will require a 19mm wrench. Then move the unit as far as possible. The gearbox removal procedure is complete. Assembly is carried out in reverse order.
User Andrey Florida made a video about replacing the gearbox on a Priora; this video will help you understand the process of dismantling the unit in a garage.
How to change the gearbox lever axle bushings?
If the reason for poor engagement of first gear on a Priora is the failure of the lever axle bushings, replacing the elements is done as follows:
- Remove the tunnel lining on the floor of the car.
- Using a 13 mm wrench, unscrew the nut that secures the gear lever shaft.
- Remove the screw securing the axle support, after which the lever is moved to the side and dismantled together with the assembly.
- In front of you are two plastic bushings and one spacer bushing. If these elements malfunction, the parts must be replaced. Please note that plastic bushings are split in design, so do not confuse a cut with damage.
- Install all elements in reverse order. Before installing the bushings, they must be lubricated with Litol.
How to change the oil?
If you have filled your vehicle with oil that does not meet the transmission specifications, it will have to be replaced:
- The car is driven into a garage with a pit or onto an overpass.
- Unscrew the screws securing the power unit mudguard, and then remove it.
- Locate the drain hole on the transmission under the bottom of the car. Place a container under it in which you will collect the used oil. Use a wrench to unscrew the plug and wait until the fluid comes out of the transmission. After dismantling, the drain cover must be cleaned; all wear products and traces of dirt must be removed from it.
- Assess the quality of the drained oil. If it is too dirty, then it is advisable to wash the transmission unit. First, about 1.3 liters of flushing agent is poured into the box crankcase, and the filler neck is closed. After this, the front wheels of the car are hung on a jack, and the engine is started. The engine should run at low speeds, and the first speed should be turned on. Repeat the procedure for draining the flushing agent. If necessary, clean again.
- Remove the dipstick from the inspection hole. The procedure for adding fresh fluid is carried out using a syringe with a connected hose. Enough lubricant is poured into the gearbox housing so that its level is in the area of the MAX mark on the meter. This will require about 3.1 liters of liquid. Then the probe is installed in the technological hole to the end.
- Reinstall the engine splash guard. Perform a test drive on the car, wait until the transmission cools down, and then check the lubricant level again.
1. Unscrew the drain plug and drain the oil 2. Remove the dipstick and fill the hole with fresh lubricant using a syringe
How to replace the clutch cable?
The repair procedure is carried out as follows:
- Follow the first five steps of the transmission removal instructions. Remove the damaged cable from its seat.
- The new part must be passed through the technological hole located in the front panel.
- Attach the body of the compensating mechanism to the so-called pedal pin. This element is pre-treated with Litol.
- Reinstall the end of the cable sheath in the gearbox mount, tighten the fixing nut.
- Install the drive cable to its original position. When installing, remember that the distance between the leash and the fork should be no more than 27 mm.
- Press the clutch pedal five times, then check the distance again. If it has changed, adjust the mechanism.
How to change the ball joint and spherical washer?
These parts are replaced as follows:
- Repeat the first three steps from the instructions for dismantling and replacing the lever axle bushings. This will allow you to gain access to the retaining ring; this element is pryed off with a flat-tip screwdriver.
- Remove the ball joint from its seat. At the same stage, remove the spring element.
- Perform a visual inspection of the reverse lock mounting pad. Inspect the plastic axle stop; if it is damaged, replace it. To dismantle the cover it is necessary to unscrew the fixing screw and nuts.
- Having done this, you gain access to the spherical washer. By moving it away, you can remove the support. Damaged elements must be replaced. The same applies to the spring, which needs to be changed. All components are assembled in reverse order.
Maintenance and repair
Regardless of what kind of drive the car is made with, changing gears, as some drivers say, is a rather complicated operation during a trip. Driving skills are acquired over time. And the more often a person gets behind the wheel, the faster he gains confidence when driving. However, it should be noted that the gearbox experiences the greatest load during the adaptation period. This primarily concerns the mechanical design. A driver who is not confident enough either abruptly releases the clutch pedal or forgets to press it when changing gear.
The first signs that the box is not working properly are:
- Loud noise in the box;
- It takes effort to engage the gear;
- Spontaneous transmission shutdown;
- Oil leakage.
In this case, there is no need to wait for further developments. If you don’t have the skills to repair a vehicle, then you shouldn’t gain this experience by taking the opportunity to dig into the gearbox. Therefore, you should not postpone an extraordinary visit to the service station. When a cable box is installed on the machine, the likelihood of a breakdown is very low.
At the same time, we must remember that there is no such mechanism that cannot be rendered unusable by incorrect actions. Very often, the cause of breakdown is improper operation of the car in general, and the gearbox in particular. Poor quality oil and a faulty clutch play a negative role. The use of spare parts of dubious manufacture also makes a negative contribution. Just like the extreme wear of parts. It is necessary to mention the low quality of technical maintenance of mechanisms on the part of service station personnel. All these features must be taken into account when operating and repairing your machine.
Theory of gearbox operation
At the moment, all modern gearboxes are equipped with synchronizers, which are important elements of the gearbox. The essence of how synchronizers work is that they align the operation of the gearbox shafts.
Each driver, when moving from second to first, encountered a situation when he felt some kind of obstacle. What prevents you from engaging first gear when driving. This is a synchronizer.
If your transmission is new enough, you won't find yourself in this situation when shifting from high to low gear. The change will take place without problems. This occurs during operation and wear of the unit components.
If you have transmission problems, come to Ankar to diagnose and repair Mitsubishi, Toyota, Lexus, Land Rover, Jaguar, Infiniti, Mercedes, BMW, Audi and other brands.
Watch a video about the design and operating principle of the gearbox:
All the details of the box - what's inside
The five-speed gearbox of the Lada Priora is connected to the central gear and differential. The Priora gearbox consists of shafts: the input shaft is made as a block of central gears. The gears of the forward speed modes have oblique teeth, the reverse gears have straight teeth. They contact the gears of the secondary shaft. There is an oil sump at the bottom of the secondary shaft in the bearing area. It is responsible for distributing the oil emulsion and supplying it to the secondary shaft, and then to the driven gears of all gears. The design of the gearbox includes a gear synchronizer. Synchronizers for 3rd, 4th, 5th gears have a similar design. The only difference is the blocking circles. The parts of 1st and 2nd gears have a different design. They have two cone-shaped friction areas installed, which relieve the load, distributing it evenly among themselves.
There is a magnet in the core of the clutch housing. It attracts metal waste and shavings and prevents its penetration into the system. A mandatory element of the box is the drive. It should be treated with special care. In addition to the listed parts of the box, it contains a jet rod, which is fixed at one end to the motor. Thanks to this, independent gear changes while driving are excluded.
Video “Repairing the gearbox of a VAZ Priora”
This video describes a complete manual transmission repair of a VAZ car at home. The repair principle is identical for any VAZ car, including Priora.
Was this article helpful to you? Have you already experienced transmission repair on your car? Tell our users!
I've been reading a lot about this in the last hour and I don't understand what to do. My situation is as follows: I press the clutch too hard. but it turns on (but very strongly) also from the second, I still remember the words of the master at 15 thousand, how to turn it on on the second), so now in a second it’s unrealistic, well, if you go through this tight inclusion, then the next 1 and 2 once they enter in such a way that it breaks your smile (very easily), there were times when if you went super sharp, then there was a crunch, for example from the 1st to the 2nd, but somehow I got used to it and everything went away, the oil in the box was changed for semi-synthetics.
This is where I got confused. In such topics, they often throw this link or say that it is a first and second gear synchronizer, or they say that it is a box design. Like Vaz - I don't like these comments, so they won't be appropriate here.
In a stalled car, everything starts very easily. It’s also easy to always change gears 3 4 5, the car was already 12 years old. The car is still under warranty, so it would be nice to figure it out.
PS clutch pedal clicks when pressed and finally clicks when pressed)
When the speed in a car becomes difficult to activate, it not only causes discomfort but also makes operating the car dangerous. In this article we will look at the moments when the gears are difficult to ignite or do not work at all, which is usually associated with this.
The gearbox is a complex mechanism that requires constant maintenance. Including regular diagnostics and transmission oil changes. Ignoring these steps often leads to problems turning on programs.
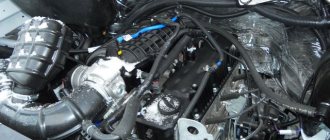
Possible engine malfunctions, their causes and solutions for the VAZ 2170 Priora
Repairing auto parts yourself is a responsible task that should be taken as seriously as possible. Sometimes a faulty spare part takes the driver by surprise, forcing him to spend a lot of time and money searching for a good service station, but there is an alternative solution to the problem; this requires a small amount of knowledge and a set of tools.
When repairing possible engine malfunctions, their causes and methods for eliminating the VAZ 2170 Priora, you need to be extremely careful and not neglect the little things. To get acquainted with the issue, car enthusiasts often use various Internet portals dedicated to auto parts. Some of them use narrowly focused forums. But, as a rule, only generalized information is provided there, which is known initially. Where can you find a reliable source that offers really useful things? Our portal is open for this 24 hours a day. Online mode allows us to help clients at any time convenient for them. Moreover, a mobile version has been developed that is available to everyone.
A detailed description of such a unit, such as possible engine malfunctions, their causes and solutions for the VAZ 2170 Priora, has a good structure with thematic headings. In addition, there is always the opportunity to familiarize yourself with the intricacies of installation. There are often situations when a driver is confident in his abilities, but when he gets down to work, questions begin to arise. Thanks to our portal, such moments can be easily avoided. The site is a database that is updated regularly. By using it as a support during repair work, the car enthusiast receives a serious advantage. Each of the articles has reliable support, tested in practice.
In addition to the repair manual, the owner of a personal car will be able to prevent a lot of breakdowns that occur due to the human factor, thanks to the information located on the site. Users are presented with a lot of useful recommendations for proper operation, which will help significantly extend the life of the unit and avoid many negative consequences.
Online support is an excellent and most convenient way to obtain the necessary information. Another significant plus is that articles are written for people. We understand that the reader will do everything with his own hands, and we try to make it as convenient and efficient as possible. Use the resource at any time of the day and find the answer to any question you may have regarding cars.
Main malfunctions of manual transmission and manual transmission
Breaking a gearbox is a costly affair, the only justification for which is the natural wear and tear of parts.
Other reasons for node failure are caused by owner oversight:
You can significantly delay the repair time of the VAZ Priora gearbox if you follow simple rules for operating and maintaining the transmission.
You also need to know the common problems with the box.
External manifestations of malfunctions can be caused by many reasons: wear of the synchronizer, breakage of gears, defective bearings, clutch problems, failure of the box fastening.
The robotic gearbox has its own damage:
Clutch disc and flywheel
In fact, wear occurs both at the clutch disc and at the flywheel itself. However, here, most likely, the gears will shift, but slip! You release the clutch pedal, but slippage occurs, that is, the car does not move, and it may jerk.
We look at the disk, maybe change it. We also look at the wear on the flywheel! If it is large, then we change it completely.
From experience I can say that our working VAZ 2111 was used mainly intercity, after 2 - 3 years the mileage was very high. The following symptoms began to appear: the gears turned on very poorly when the engine was running! We removed the manual transmission, looked at the basket - clutch disc - flywheel. And everything went for replacement, there was a lot of wear, and one petal on the basket was cracked. They even changed the release lever and the fork.
If the reason is not eliminated even now, then the problem is in the gearbox itself! It's worth taking it apart and looking at it
How to change gearbox oil
If you need to change your oil, then first of all, buy it. A four-speed gearbox will require three liters of transmission fluid. You will need to pour 3.3 liters into a five-speed gearbox. If you are changing the oil for the first time, then buy 80W-85 class fluid. It is perfect for use in the VAZ-2109 gearbox. Car owners prefer to purchase Lukoil brand products.
The work of changing the oil in the box is carried out as follows:
- Place the car on an overpass or over a pit, warm it up slightly so that the liquid is not viscous. Locate the oil drain plug on the bottom of the box.
- The unit has a rubber cap that needs to be cleaned along with the breather. After cleaning these parts from dirt, return them to their place.
- As soon as the preparatory work is completed, place the container, twist the plug with a wrench, and begin draining the transmission oil.
- The waste liquid will drain completely within half an hour.
- Screw on the plug, tighten it well, but do not strip the thread.
- Under the hood, find the transmission dipstick and remove it. In place of the probe, stretch a hose, at the other end of which a regular watering can or funnel is installed. Pour transmission oil into the box through the hose. On older units, the fill plug is located next to the drain plug.
After the work is completed, check the lubricant level with a dipstick and take a control measurement after 2-3 days. If necessary, add oil; if it becomes critically low, inspect the box for leaks.
Defective parts of the secondary shaft.
The most common malfunction is, of course, clogged teeth:
Moreover, this most often occurs in second gear. This is the main reason for transmission failure. Naturally, nicks appear not only on the ring gear, but also on the coupling. Therefore, the clutch also requires replacement. You should also carefully inspect the hub. The hub is made of cast iron, sometimes cracks appear in it and then it collapses. Therefore, it is necessary to carefully examine it; if cracks appear, it must be replaced. As a rule, the hub goes into spare parts assembled with the coupling. There are two types of hubs on these shafts with a 1-2 gear clutch. Nowadays, as a rule, they install double-cone synchronizers and clutches with gears with fine teeth. And the first years after these boxes were released, they put them like those in the second photo. They have ordinary couplings (VAZ 2108) only the hubs and gears of 1-2 gears are original.
On all gears, it is necessary to check the gap between the synchronizer locking ring; at least 0.6 mm is allowed.
You should also carefully inspect the shaft journals and internal surfaces of the gears for scoring, and replace worn parts if necessary. It is better to replace the rear ball bearing 6305 regardless of condition.
knocks out 2nd gear
I was driving and stuck the 2nd one. knocked out. when you keep it to the norm, repairing the gearbox or they told me about synchros, any thoughts on what to do? Tell me...
My opinion leans closer to the synchronizer, but by 40%, although I also had problems with the 2108, I actually changed the release valve and everything became normal.
I completely changed the clutch less than a month ago.
I have the same crap, I should say I need to fix the synchronizers and something else
So the synchronous gear needs to be changed and the 1st-2nd gear clutch needs to be changed.
gears, or are there none in the PP?
buddy, I have no idea myself, so I’m writing here for advice from experienced guys.
Thanks for the advice, but I’ll go with the simplest and cheapest)
The simplest and cheapest option can be taken from the arsenal of Tavrie breeders. It's called ROGULKA. This device is a stick 30-40 cm long with (as indicated in the name) a flyer at the end. Operating instructions (brief): 1) Engage the gear you have chosen (note - how to engage a gear is described in the instructions for your vehicle). 2) While holding the clutch pedal depressed, place the device (FLYER) so that its forked end rests on the gear shift lever, and the opposite end rests on the dashboard, or on the technological projections of the floor tunnel between the front seats of the vehicle. Note: the location of the stop of the opposite end of the device (FLYER) depends on the gear you choose. 3) Smoothly release the clutch pedal while lightly pressing the gas pedal. This product is patented and protected by the Copyright Law and before its use, copying and mass production it is necessary to contribute funds to the Fund for Support and Development of the Transmission Department of KB MeMz. Whoever can.
thanks for the advice, IMHO collective farm, with my driving habits it will crash after a few traffic lights, I would prefer normal repairs. WITH RESPECT, for the information provided.
100% second gear synchronizer with fork. Repairs at the service center will cost 5-6 rubles)) The second gear assembly is ready for replacement. At the same time, you can check the other gears))
If it's a synchronizer, why change the transmission assembly?
Source
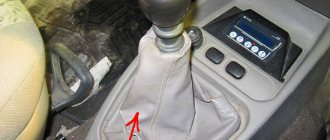
How to adjust the rocker on a Priora
It would seem that such an element as the backstage cannot be modified or modernized, because everything here is extremely simple. However, tuning is also possible here, we’ll talk about this in this article, and as an example we will have a VAZ-2110 car. Many car owners prefer to change the standard rocker because it has too long a stroke; instead, they install a short-stroke one. This is good because the clarity of switching improves and less time is spent on it, but at the same time, car enthusiasts for some reason forget that the rocker needs adjustment.
If there is no adjustment, the driver will soon feel difficulty changing gears. It is recommended to do the work together with an assistant, although, if desired, you can do everything alone.
In this case, the owner of the “ten” replaced the rocker, did not adjust it, and had problems when shifting from reverse to fifth gear. The adjustment can be done in different ways; we will consider several options with you.
1. In the first case, the adjustment is made in reverse gear. We switch the box to reverse mode, then climb under the car and tighten the clamp. That's it, the work is finished, the problem is solved. But what to do if it is impossible to switch to reverse gear? For this we have the following method.
2. Here the “ten” link is adjusted when first gear is engaged. We switch the gearshift knob to first speed, unscrew the bolts securing the rocker clamp, to do this you will have to crawl under the car. Next, the drive must be rotated counterclockwise. We twist until the gearshift lever collides with the plastic rear speed lock. Now you just need to tighten the clamp bolts and the setup is complete.
Do you want to adjust the transmission neutral position? Then you will have to calculate the fit of the rocker on the “tens” cardan. So, we learned that when replacing the rocker, it is imperative to adjust it so that in the future there will be no problems with switching gears. Moreover, we learned to do it ourselves, and this saves us money. However, if you are a specialist and have done such work for the first time in your life, then it will not be easy to assemble the mechanism perfectly.
Very often, after self-upgrading, extraneous sounds appear in the gearbox. Some people don't pay any attention to the rattling noise and drown it out with music, but we're not one of those people, so we need to eliminate the cause of the sound. The problem can be solved quite simply; all you need to do is buy a spring and put it on the slide. This spring will hold the gearbox and the formation of unpleasant noise will stop. Let's go back to the adjustment once again and repeat how to do it:
1. Set the gearbox to neutral position.
2. Turn the gear selector rod counterclockwise. We do this until the adjusting pin fits into the hole in the rod.
3. Remove the gear lever trim.
4. After fixing the gearshift knob and the gear selection rod, fix the adjusting bolt.
The travel of the gearbox handle is adjusted individually, this is done by adjusting the length of the link arm.
A slightly worse option
Often, reverse gear is lost due to problems with the solenoids in the gear locking mechanism. This is how you should proceed for verification purposes.
Find the correct one in the fuse box, marked F21. He is 8th from the left; if it is burnt out, replace it; Raise the cover on the gearshift knob
There is a connector that is connected to the switch, you need to carefully disconnect it; The connector contacts are closed directly. If the missing gear appears, we change the switch, if not, we dig further; The connector is removed from the solenoid, and the voltage is measured in it
It should be 12 V, you can throw in a 5-watt light bulb to control it.
If everything is in order, things are worse than you thought - the cause has not been found. If there is no voltage, check the wires and look for an open.
Priora won't start, starter turns
| Possible malfunction | Diagnostics | Remedies |
| There is no gasoline in the tank | On the instrument panel the fuel level indicator is at zero. | Pour gasoline |
| Battery is low | The voltage at the battery terminals without load is less than 12V. When trying to start the car, a crashing sound is heard from under the hood. | Charge the battery or replace it with a new one |
| Oxidation of battery terminals or wire terminals, their fit is not tight | When you try to start the engine, the voltage in the on-board network drops much more than at the battery terminals. In this case, a crash may be heard under the hood. | Clean the contacts, lubricate them with petroleum jelly and tighten the terminals |
| Unreliable connection of electrical circuits of engine control and power supply systems | Check the connections of the connectors and the reliability of the contacts in the blocks. | Fix faulty wire connections |
| Increased resistance to rotation of the crankshaft (scores on the shafts, bearing shells, cylinder-piston parts, deformation of the shafts, frozen engine oil, jammed generator, jammed coolant pump) | The crankshaft turns slowly. If the engine is started in severe frost, and the engine was working properly the day before, then most likely the engine oil has frozen. If you hear extraneous noise when starting the engine, check the free rotation of the pump and generator pulleys. | Use the recommended engine oil. Repair the engine. Replace the pump and generator. |
| Malfunction in the ignition system | Check for spark. | Check the circuits and devices of the ignition system. Replace faulty system elements. |
| The high voltage wires are connected in the wrong order or the wire is disconnected | Inspect. | Connect the wires in the correct order |
| The timing belt is broken or the belt teeth are cut off | Open the front timing cover and check. | Replace timing belt |
| Disturbed valve timing | Check the marks on the crankshaft and camshaft pulleys. | Set the correct shaft position |
| Malfunction of the computer (brains), its circuits, crankshaft position sensor or coolant temperature | Check the supply of +12V to the ECU, the sensor circuit, and the absence of damage to the sensors themselves. | Replace ECU, sensors. |
| The idle air regulator (IAC) or its circuits are faulty | Check the idle air control. When starting the engine, lightly press the gas pedal. If the engine starts and stalls when you release the gas pedal, the sensor is faulty. | Replace sensor |
| The fuse is blown or the main relay of the control system is faulty | Check fuse and relay. | Eliminate the cause of the blown fuse. Replace fuse and relay |
| Fuse blown, fuel pump relay. Circuit, relay or pump is faulty. | When the ignition is turned on, there is no sound of the pump running. Check the fuse. Apply voltage to the pump from the battery. | Clean contacts, replace faulty circuits, replace fuse, pump and relay. |
| The fuel filter is dirty, the water in the fuel line is frozen, the fuel line is damaged | Check the pressure in the fuel rail and the condition of the fuel lines. | Replace the filter, blow out or replace the fuel lines. |
| Insufficient pressure in the fuel rail | Check the pressure in the fuel rail, the pump strainer and the condition of the fuel lines. | Clean the filter. Replace pump, fuel pressure regulator |
| Faulty injectors or their power supply circuits | Check the injector windings with an ohmmeter. Check the chains for breaks. | Replace injectors, replace chains |
| Air leak into the intake tract | Inspect the joints and fittings of the hoses and clamps. During start-up, turn off the vacuum brake booster and plug the receiver fitting. | Eliminate air leaks, replace vacuum booster |
Procedure
The idle speed control is an executive element of the engine (mechanical sensor), and if it is not working correctly, the light indicating a malfunction will not light up. The regulator is a stepper electric motor including a cone needle. The regulator may be located on the throttle body to ensure a specific level of airflow bypassing the closed throttle body.
And it, in turn, is set by the car’s electronic system so that the engine runs stably and evenly, regardless of external factors.
First you need to disconnect the battery. It will not be enough to simply turn off the ignition. You need to turn off the ground. We dismantle the idle air regulator. The second point that you should pay attention to is unscrewing the fasteners that hold the regulator. This will allow you to remove it completely. As we said, the adjuster can be found on the throttle body, to which it is screwed with a pair of screws. In some car models, the screws can be filled with special paint or, even worse, drilled out. In such a situation, it may be necessary to completely dismantle the throttle body, after which disassembly and removal of the regulator will be carried out. Point number three involves cleaning the landing channel. It will be enough to rinse it and then treat it with a strong air stream. This is done using a can of compressed gas or a conventional compressor.
The regulator must be disassembled with great care so that its winding is not damaged. Now it’s time to check the guide bushing, especially if the conical needle can move freely around its axis with clearance
If this is the case, then the bushing must be replaced with a new one. In a situation where the conical needle does not contain significant damage or abrasions on its surface, it can be left. But, when you have even the slightest doubt about its serviceability, then it must be completely replaced with a similar model. The fourth paragraph of the instructions talks about the process of determining the integrity characteristic of the pressure spring. Also, using a special measuring device, you can check the integrity of the regulator winding. In addition, it would not be superfluous to clean the contacts of this very winding. And only after this can you reassemble the idle air control. But, before installing the regulator on the car, it is necessary to measure the distance from the flange of its body to the tip of the cone needle. This figure should be twenty-three millimeters. If the distance differs from the specified one in any direction, then the needle must be replaced with a new one. This also applies to situations where there is no visible damage to the needle. The fifth and final point is that you will need to install the idle air control in its place. As you could already see during the process of dismantling it, it has its own seat. It is located in the throttle body. After this, you can connect the control plug to this same regulator. Next, turn on the car's electrical power again. And this is where the “interesting” part begins. You need to start the engine and test it under different operating conditions. If the problems persist or have not disappeared completely, then you may need to re-disassemble the idle air control. But, if the second attempt is not successful, then the breakdown should be looked for in other places. In particular, the reason may be the firmware of the on-board computer, especially if you bought the car second-hand.
New Lada: Frequency of replacement of consumables on Priora
VAZ 2170 Adjusting the gearshift drive rod
Adjusting the gear shift rod
Park the car, apply the handbrake and turn off the ignition.
Only for models up to 1994.
Only for models after 1994.
Locate the locking hole on the top of the transmission housing adjacent to the nameplate. Remove the plug from the hole (indicated by the arrow). Place the gear lever in fourth gear, then take a screwdriver with a blade approximately 4mm in diameter and insert it into the hole; this will lock the gearbox in the fourth gear position - the screwdriver handle will not allow it to fall inside the gearbox.
| 1. Inside the vehicle, to gain access to the gearbox control lever housing, remove the control lever collar and mounting frame. Take a screwdriver with a blade approximately 4 mm in diameter and insert it into the locking hole in the side wall of the lever housing. |
| 2. If the screwdriver is inserted without difficulty, then the linkage is adjusted correctly and, therefore, is not the cause of poor gear shifting; Next, it would be best to remove the gear shift drive rod and inspect it for wear and damage (Section Removal, inspection and reinstallation of the gear shift drive). 3. If the screwdriver does not fit into the locking hole, the position of the rod is not adjusted correctly. |
| 4. At the point in the engine compartment where the selector rod passes through the bulkhead, loosen the selector rod pinch bolt (A) near the rubber coupling (B) to allow free play between the two halves of the selector rod. |
| 5. Move the gearbox control lever so that the tip of the screwdriver is inserted into the locking hole in the lever housing; Make sure that the lever is still in the fourth speed position. 6. In the engine compartment, tighten the pinch bolt on the gear selector rod to the required torque. 7. Remove the screwdriver from the locking hole and install the plastic plug. 8. Remove the screwdriver from the locking hole on the transmission control lever housing. 9. Reinstall the selector lever guard and mounting frame. 10. Before driving the vehicle, make sure that the gearbox control lever moves from the neutral gear position to all six gear positions. |
Priora acceleration time according to the passport
The Priora passport contains the following technical indicators of car acceleration: If the car is a sedan, hatchback, station wagon or coupe model with an engine designed for 1.6 liters, the manufacturer indicates an acceleration time of 11.5 seconds. If the engine is 1.8 liters, it will take only 9.9 seconds.
On the market you can also find the “Sport” model, the engine of which is fixed at 1.6 liters and the power is 125 hp. With. With this engine, Priora accelerates to a speed of 100 km/h in 9.5 seconds.
How does the manufacturer measure these values? The two people in charge at the plant, whose combined weight is up to 120 kg, occupy the driver's and passenger's seats. 10 liters of grade 95 fuel are poured into the tank. Starting from a standstill is not done idle, and the one who changes gears is a professional driver who has passed more than one test drive. 10 races are carried out in a row, after which the average is displayed, which is then rounded.
Priora's first gear falls out
Hello friends! There is a problem. The car is a Priora Coupe, in the box there is a 12.1 shaft. The second gear started to slip out. The issue was resolved simply. I disassembled the box, changed the second gear, synchronizers and clutch. At the same time, I changed the third gear and also the synchronizers and clutch. The second gear gear shows obvious signs of wear:
2. The second one stopped crashing, everything is fine, but... immediately after assembly the first one started crashing! According to the proven scheme, I disassembled the box, changed the first gear gear... and having examined the gear, I did not see much wear, at least in comparison with the second:
But the job is done and the gear is now new!
PROBLEM: The first one still crashes! There are all new gears, synchronizers and clutches! Where to look for the root of evil?
As a rule, it crashes not if you turn on the first one, accelerate and turn on the second one, but if you turn on the first one, accelerate a little, squeeze the clutch, let’s say, to run over a traffic policeman... And that’s it, neutral... Thank you!
Why are gears difficult to engage?
First, we suggest finding out what is the reason why reverse or first gear is sometimes or systematically difficult to activate.
The reasons why the gear is difficult to engage may be different, let’s consider them in detail:
- If it is difficult to switch between first and second gears, the problem may be that the clutch is not fully activated. On a VAZ Priora, the reason often lies in damage or disconnection of the cable on the pedal. This problem can be identified by diagnosing it. If the pedal is sunk into the floor, the cable must be replaced.
- Failure of the drive rod for controlling the gearbox activation mechanism.
- Damage or incorrect operation of the transmission's torque rod.
- Loosening the fixing bolts on the gear selector rod lever or on the hinge. It is necessary to determine the reason why the screws may have become loose.
- Making mistakes when adjusting the gear activation drive.
- Failure or damage to plastic components that are installed on the Lada Priora gearbox control drive.
- Mistakes made when adjusting the scenes. This unit on the VAZ Priora is designed to connect the gearbox to the selector in the car interior. As a result of long-term use, the plastic bushings on the rocker could wear out.
- Failure of synchronizer elements. These mechanisms are made in the form of brass bushings, which are used for more simplified gear shifting. Brass is a soft metal and will wear out over long periods of use. If the first and reverse gears are difficult to engage, and the reason lies in the synchronizing elements, when you try to change gear, an unpleasant crunching or grinding noise will be heard. When there are no problems with activating gears, but there is an uncharacteristic sound when the gearbox is operating, then in the future you will encounter difficulty changing gears.
- Failure of bearing elements due to damage or wear. This type of malfunction is not common, but over time the bearings wear out, so every car owner can encounter it. If a part breaks, one of the transmission pulleys is no longer able to rotate, which leads to problems when activating speeds. Usually we are talking only about the first gear.
- Failure of the box shaft. This unit is not subject to wear or critical loads during its entire service life, but it may break due to a manufacturing defect. Even minor errors made by the manufacturer when assembling the vehicle can lead to shaft failure. Because of this, the car owner will face the problem of not only difficulty engaging first gear, but also a breakdown of the transmission unit as a whole.
- The reason may lie in the car's engine mounts. The power unit hangs on them and is connected to the transmission. During long-term use of the car, the fastening fails or is unscrewed from its seat. This leads to sagging of the car engine or transmission. As a result of subsidence, damage to the backstage may occur.
- Failure of the clutch fork.
- Clutch basket malfunctions. This assembly breaks due to wear or damage to the petals. The “spider” of the basket can also fail. This element is a bearing mechanism that is fixed on several stretch marks. If they tear, they cannot fully stay on the basket, which leads to difficulties in changing gears. Due to damage to the paddles, it will be impossible to release the clutch disc. If the disk itself is worn out, this will lead to the appearance of wear. When the wear of the part is too great, it will be impossible to switch on the speed.
- Damage to the ball joint or spherical spring.
- Often such problems occur as a result of changing the transmission fluid. The main feature of the Priora gearbox is that the gear ratios in the first and second stages of the unit differ as much as possible. When the driver changes gears, it is necessary to wait for the input shaft to slow down during the process. If it takes longer than usual to slow down, it may be due to low viscosity lubricant or slight underfilling.
User Sergey Tsapyuk made a video in which he talked about the problem of poor gear engagement on a Priora.
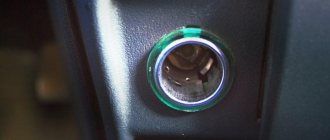
Instructions for activating immo
System programming is usually carried out by dealers when selling cars.
The blocker training procedure is carried out differently in Kalina cars of the first and second versions.
Activation on Kalina-1
To enable the immobilizer yourself, perform the following steps:
- A training master key is prepared and equipped with a red mark. It must be installed in the lock.
- The key is then turned in the switch to the ignition activation position. As a result of the blocker being disabled, after 6 seconds the indicator light on the control panel will turn on. If the light does not light up, this indicates that the system is active. Accordingly, the blocker is trained and its activation is not required.
- Then the ignition is turned off, and the immo indicator light will operate in rapid flash mode. The car owner has six seconds to install a regular key in the switch.
- Then the lock cylinder is turned until the ignition is turned on. If the actions are performed correctly, the beepper will turn on three times. If the buzzer does not sound, the reason may be that the time interval allocated for installing and turning the key has been exceeded. Perhaps the problem lies in the engine blocker itself.
- Then you need to wait about six seconds, the beepper will emit another double signal. Afterwards the ignition in the car is turned off. The key is removed from the lock.
- Now the car owner has another 6 seconds during which he must activate the ignition with the master key. The immo indicator diode will blink on the control panel of the car.
- After activation, the beepper will emit a triple beep; until the next series, which consists of two separate beeps, you need to wait 2-3 seconds.
- The ignition is turned off, but the key does not need to be removed from the lock. After a certain time interval, the beeper will give another signal, and the indicator on the control panel will blink at high frequency. About 15 seconds will pass between deactivation of the ignition and the light switching to accelerated mode. But the time interval is also determined by the model of the microprocessor unit.
- Then within 10 seconds you need to quickly turn on the ignition for 3 seconds. and turn it off.
- The machine's light alarm will give three signals, this indicates the successful completion of the programming procedure.
- Then you need to wait until the indicator light on the control panel stops blinking completely. The master key is removed from the ignition switch.
Activation on Kalina-2
On this version of the car, the programming procedure is performed slightly differently:
- When the driver inserts the master key into the lock and activates the ignition, the beepper emits a triple beep. After the last pulse the system turns off. The key must be removed from the lock. If Kalina was previously started using a master key equipped with a red mark, the lock will not emit sound signals. Then you will have to wait a few seconds and perform the steps described in the second paragraph.
- For 6 sec. the key is installed in the lock and the ignition is reactivated. The buzzer will emit a triple beep and, after a short pause, a double pulse.
- Then the key in the lock is changed to the next one, for this the owner must have time to change them himself in 6 seconds. Having activated the ignition with the master key, the buzzer emits a triple sound pulse, and then a double one.
- The ignition in the car is turned off, the key must be in the lock. The beepper will beep. The key is then turned to turn on the ignition. The car's standard steering horn should sound. This indicates that the transponder tag has been successfully written to the microprocessor memory.
- The ignition in the car is turned off. The indicator light on the control panel will go out. If this does not happen, then the device is faulty.
The Avtodopka channel talked about activating the anti-theft device on Kaliny.
Engine malfunctions of Lada Priora, VAZ 2170, VAZ 2171, VAZ 2172
With a certain skill and care, many malfunctions of the VAZ 2170 engine and its systems can be quite accurately determined by the color of the smoke coming out of the exhaust pipe. Blue smoke indicates oil getting into the combustion chambers, and constant smoking is a sign of severe wear of the cylinder-piston group parts. The appearance of smoke during throttling, after prolonged cranking with the starter, after long idling, or immediately after engine braking usually indicates wear of the valve stem seals. Black smoke is a sign that the mixture is too rich due to a problem with the engine management system or injectors. Blue or thick white smoke mixed with moisture (especially after the engine overheats) means that coolant has entered the combustion chamber through a damaged cylinder head gasket. If this gasket is severely damaged, the liquid sometimes penetrates into the oil sump, the oil level rises sharply, and the oil itself turns into a cloudy whitish emulsion. White smoke (steam) when the engine is not warmed up in wet or cold weather is normal. Quite often you can see a car standing in the middle of a city traffic jam with the hood open, emitting clouds of steam. Overheat. It’s better, of course, to prevent this by looking at the temperature gauge more often. But no one is immune from the fact that a thermostat, electric fan, or simply a coolant leak may suddenly fail. If you miss the moment of overheating, do not panic and do not aggravate the situation. Overheating is not as dangerous as its possible consequences. Never immediately turn off the Prior's engine - it will suffer thermal shock and, perhaps, when it cools down, it will refuse to start at all. When you stop, let it idle, then fluid circulation will continue in the system. Turn on the heater at maximum power and open the hood. If possible, run cold water over the radiator. Only after achieving a decrease in temperature, stop the Lada Priora engine. But never open the expansion tank cap right away: on an overheated engine, a geyser from under the open cap is guaranteed. Take your time, let everything cool down, this way you will preserve the health of the Lada Priora car and your own health. Almost all instructions for the car contain a recommendation to be sure to depress the clutch when starting the engine. This recommendation is justified only in case of starting in severe frost, so as not to waste battery energy on turning the shafts and gears of the Lada Priora gearbox in thickened oil. In other cases, this is simply a recommendation to ensure that the VAZ 2172 does not move if the gear is turned on due to forgetfulness. This technique is harmful for the engine, since a significant force is transmitted through the depressed clutch of the Priora to the crankshaft thrust bearing, and during startup (especially cold), lubricant does not reach it for a long time. The bearing quickly wears out, the crankshaft receives axial play, and starting off begins to be accompanied by strong vibration. In order not to spoil the Lada Priora engine, get into the habit of checking the position of the VAZ 2171 gear shift lever before starting and start the engine with the parking brake applied, without pressing the clutch unless absolutely necessary.
Types of gearbox repairs
The controllability of the car, and therefore the safety of the crew, depends on the operation of the gearbox.
After a competent troubleshooting at the service station, they will discuss with you the remaining service life of the unit and the feasibility of restoring the structure. Afterwards they will offer to repair the Lada Priora gearbox:
- capital (with complete disassembly of the unit);
- partial (without removing the installation from the machine).
The first option after comprehensive diagnostics and dismantling includes:
- GTR - torque converter bulkhead;
- hydraulic repair or replacement of its elements;
- maintenance of the electrical network and ECU;
- replacement of consumables.
After assembling, configuring and installing the unit in place, the rocker is adjusted and output diagnostics are carried out.
Repair of the Lada Priora gearbox
Situational repairs may include:
- restoration of shaft journals;
- cleaning of threaded connections (if necessary, restoration);
- cleaning nicks on splines;
- discarding and replacing shaft teeth;
- welding cracks on the body;
- elimination of play in the gear shift lever.
The list of work is long, and often DIY repairs only complicate matters. For example, not every ordinary driver will be able to correctly press bearings onto shafts, because before the procedure the latter need to be heated to 90-100°C.
Made with German precision
When this concept was transferred from paper to a real exhibit, and the mechanism began to work correctly, the module went to Germany, to. The Germans brought the knot to fruition. The company has long been developing various transmission systems and manufacturing engines. German experts carefully looked at the development of Russian engineers and proposed the following. Using a 3D center plate instead of a locking spring return system would make more sense. The special spatial shape of this plate was calculated using computer programs and manufactured using high-precision equipment. This accuracy is due to the fact that a special locking ball moves along the plate. And it is the plate that regulates the effort when selecting and engaging gears. The characteristics that the new cable gearbox will have were selected using a simulation stand. The man sat down on a chair and switched on various gears. Automatic systems simulate shift patterns, lever forces and strokes. And just like that, in small steps, the Germans managed to find the optimal settings. With the help of a computer, parameters and a mathematical model were selected, according to which these plates would then be manufactured.
How to get rid of gearbox noise on a LADA, the reasons are in gears and bearings
Why is the LADA gearbox noisy (howling, humming)? Extraneous noise can be caused by poor processing of the teeth of the gears and the main pair. AVTOVAZ specialists reported that factory equipment does not allow processing gearbox gears with higher precision, therefore, without significant investments in updating the machine fleet, these sounds cannot be dealt with. However, you can fix the problem yourself or under warranty.
Causes of the most common gearbox defects
:
| Defect manifestation | Article and part name | Code | Place | Name of defect | Method for eliminating the defect |
| Noise when driving in 2nd gear | 1701127 Gear 2nd gear of the secondary shaft | 096 | 000 | Noise in 2nd gear | Gearbox repair |
| Noise when driving in 3rd gear | 1701131 3rd gear gear of the secondary shaft | Noise in 3rd gear | |||
| Noise when driving in 4th gear | 1701146 4th gear gear of the secondary shaft | Noise in 4th gear | |||
| Noise in all gears | 1701033 Main shaft bearing | 001 | Input shaft bearing noise | Bearing replacement | |
| 1701031 Front input shaft bearing assembly | 000 | Drive shaft bearing noise | Gearbox repair |
An example when it was decided to eliminate the noise (hum) in the Lada Kalina gearbox yourself. During the repair of the gearbox, several malfunctions were identified: wear of the secondary shaft bearing, wear of the second speed synchronizer, rustling of the release bearing and leakage of the crankshaft main oil seal. The work cost RUR 3,500, plus spare parts.
Let us remind you that AVTOVAZ previously gave recommendations on diagnosing noise in the input shaft bearing of the gearbox of LADA cars. It shows an algorithm that can be used to gradually isolate noise from the general noise of a car in various modes.
What's the result?
So, the main reasons why gears are difficult to engage are problems with the clutch mechanism and gearbox. However, most of them can be eliminated yourself if you have tools, spare parts and certain skills.
We also recommend reading the article about why gears do not engage after replacing the clutch. From this article you will learn about the main reasons why, after replacing the clutch, engaging gears is impossible or very difficult.
Why may it be difficult to engage gears or why first gear, second, reverse, etc. may not engage? The main causes of gearbox malfunctions, recommendations.
Reasons for difficulty shifting gears with the engine running. Transmission oil and level in the gearbox, wear of synchronizers and gearbox gears, clutch.
How to change gears without a clutch: driving a manual car without a clutch in case of malfunction. Tips and tricks.
Manual transmission gears (speeds) do not engage after replacing the clutch: main reasons, settings and adjustments. Diagnosis of problems, useful tips.
Clutch: basket, release, clutch disc. Purpose and design, principle of operation of the clutch basket. How to increase clutch life.
The automatic transmission does not change gears: the car does not move forward or backward, the automatic transmission does not switch to individual gears, reasons.
Folks, the problem is this: 1st and 2nd gears didn’t stick in perfectly before, it took some effort. The other day it was completely impossible to stick it in, I already used force, but I stuck it in. I went to the miracle workers, they worked with the cardan, it got better, but not much. Tell me where climb, the clutch is not slipping, but the release lever is already creaking. Thanks in advance for your answers