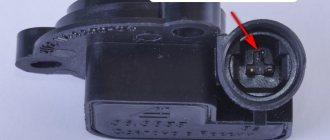
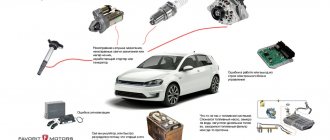
An oxygen sensor or lambda probe is a device installed in the exhaust manifold. Its main task is to control the amount of oxygen remaining after combustion of the fuel mixture. According to standards, this mixture is formed in a proportion of 1 to 14.7; if this indicator deviates, the lambda probe transmits a command to the ECU about a violation of the quality of the air-fuel mixture. In some cars, a second probe is installed after the catalyst. If the operation of the oxygen sensor is disrupted or it fails altogether, problems arise in the operation of the engine:
- the car reacts inadequately to pressing the gas pedal;
- there is a smell of fuel in the cabin;
- fuel consumption increases significantly (up to 2 times);
- the exhaust has a pungent odor.
Why do you need an oxygen sensor?
This structural element appeared in 1976, and the first lambda probes were produced by the German concern Bosch. Its appearance was caused by the fact that in the mid-70s of the last century there was a sharp jump in oil prices, so most car owners thought about the efficiency of their cars. Thanks to the sensor, it was possible to achieve noticeable fuel savings without reducing power.
The lambda probe analyzes the amount of unburned oxygen in the exhaust. If there is a lot of it, then the mixture supplied to the cylinders is lean; when there is not enough of it, the air-fuel mixture is too rich. Thanks to this data, the electronic control unit regulates the ratio of air and fuel in the mixture, which allows for maximum operating efficiency, and this leads to fuel savings. The ideal indicator is that 14.7 kg of air should be consumed to burn 1 kg of fuel. The standard oxygen sensor is located in the exhaust manifold.
Since the 90s, two lambda probes began to be installed on cars - an upper oxygen sensor directly at the engine outlet, and a lower sensor after the catalyst. The first probe monitors the quality of the supplied fuel mixture, and the second monitors the condition of the catalyst, which is important for compliance with environmental standards.
Due to poor fuel quality and other problems, the downstream oxygen sensor often fails. They are trying to solve this problem in different ways, one of them is software shutdown, the other is mechanical deception of the lambda probe. This oxygen sensor trick works very simply - an additional hole is made in it or a mesh is installed to allow air to enter from the outside. As a result, the concentration of exhaust and harmful substances in it decreases and the probe believes that everything is fine with the environment. A more reliable option is to flash the ECU.
Consequences of malfunctions
What types of sensors are there, and how does the fake differ from the original version? Of course, it makes sense to purchase such equipment from trusted online stores or retail outlets.
A low-quality product (as mentioned above) is unlikely to be able to transmit reliable information to the control unit. Today you can find lambda probes on sale with or without this function. Products equipped with heating have a longer service life.
In short, any serious malfunction of this sensor leads to the following consequences:
- increased fuel consumption;
- reduction in engine power characteristics;
- the appearance of soot due to incomplete combustion of the fuel mixture;
- accelerated cylinder wear;
- interruptions in idle speed;
- increased emissions of harmful substances into the atmosphere.
Lambda probe device
To understand the principle of operation of the oxygen sensor, you need to know its structure. The lambda probe has two electrodes. The outer electrode interacts directly with the exhaust, the inner electrode interacts with atmospheric air. Between these electrodes there is a layer of zirconium dioxide. There are titanium probes that do not require contact with the atmosphere, but they are very rare and expensive.
As a result of interaction with different media, different voltages arise on the electrodes, the resulting value of which is transmitted through the wire to the ECU. From these data, a conclusion is drawn about the richness or poverty of the mixture. At values from 0.1 to 0.45 V the mixture is lean, in the range of 0.45-0.9 V the mixture is rich. The ideal air-fuel mixture ratio is achieved at 0.45 V.
The first models of oxygen sensors worked only up to 3000 engine speeds, and after that it switched to average parameters for enriching the mixture. But modern lambda probes operate across the entire rev range, which provides better efficiency and economy.
Oxygen sensor signs of malfunction
Checking the response to poor fuel condition
- First, disconnect the hose from the positive crankcase ventilation (PCV) valve leading to the intake manifold. This will allow more air to enter the engine. If you need to find a PVC valve, consult your vehicle's service manual.
- Check the sensor signal voltmeter readings. It interprets the increase in oxygen as fuel lean and emits a signal close to 200 mV (0.20 V). If it does not respond appropriately or takes time, the sensor is not working properly.
- Connect the hose to the PCV valve.
We recommend reading: Do-it-yourself thermostat replacement
Check the reaction of the oxygen sensor to the saturated condition of the fuel
- Disconnect the plastic channel from the air filter assembly on your vehicle.
- Block the air duct opening leading to the engine with a clean rag. This will reduce the amount of air entering the engine.
- Check the voltmeter readings. It interprets the decrease in oxygen as a rich fuel state and emits a signal close to 800 mV (0.80 V). If the sensor does not respond appropriately or takes time, the sensor is not working properly.
- Connect the air duct to the air filter assembly and turn off the engine.
If your car's oxygen meter responded correctly to your tests, you may have a problem with another component that affects fuel efficiency. The engine may have a vacuum leak (broken hoses, air leaks), a problem in the ignition system, or something similar. If your sensor does not respond properly to your tests, it has stopped working and you will need to replace it.
Replace the oxygen sensor at the manufacturer's recommended interval for best engine performance.
Once you know how to test an oxygen sensor, you can check whether the device is actually working or needs to be replaced. These tests will save you money and time—and help you get your car fixed faster. Additionally, you can check the service interval for your O2 meter in your repair manual. As mileage accumulates, exhaust byproducts coat the tip of the device, which protects the sensing element. Then the efficiency of the lambda probe decreases, causing problems with engine operation. Eventually, it stops working. Therefore, it is recommended to replace it on the recommended schedule to restore fuel efficiency and reduce emissions.
How do you like the article?
Diagnostics
The lambda probe is checked without removing it from the car. To do this, take a special device and attach it to the eclectic system, after which the engine starts. For the sensor to start working, it needs to be heated to 300 degrees, and the titanium probe - to 700.
The voltage values on the device should change in the range from 0.1 to 0.9 V approximately 8 times every 10 seconds. This means that the sensor is working correctly and there are no problems with it. If the frequency of reading changes decreases, the probe is not working properly and will soon fail. In the event of a complete failure, one value is displayed on the screen of the diagnostic device.
Life time
The manufacturer does not provide a scheduled period for servicing or replacing oxygen sensors on Priora.
Depending on the modes in which the car was operated, the service life of the oxygen sensor may vary. With normal operation and periodic maintenance, a lambda probe can last up to 100 thousand kilometers of a car.
Factors that reduce the resource capabilities of the lambda probe:
- aggressive driving style;
- refueling with low-quality fuel;
- frequent heating of the engine to the maximum temperature;
- rare vehicle maintenance;
- constant ingress of moisture into the engine compartment and directly onto the wiring, connector and lambda probe housing;
- careless maintenance of engine components and mechanical damage to the sensor;
- Ignoring signs of engine trouble.
What happens if the oxygen sensor is faulty?
If the lambda probe malfunctions, when the voltage on it does not change, the ECU begins to enrich the working mixture; it will not lean it, since this leads to more serious consequences.
A specific smell begins to penetrate into the cabin, and fuel consumption doubles. At the same time, the car accelerates much worse, since fuel fills the cylinders, and sometimes characteristic popping sounds are heard from the exhaust pipe.
Effect on fuel consumption in a car
How does high fuel consumption occur? With the so-called “correct proportion” of preparing the working mixture, it should contain 1 part air to 14–15 parts fuel. If there is not enough air, the resulting mixture is overly enriched and does not burn out completely. As a result, fuel consumption is only increasing. If there is excess, the mixture becomes lean, and this, in turn, causes a drop in the power of the power unit.
Once we are convinced that the lambda probe has a direct effect on reducing fuel consumption or, on the contrary, can increase the car’s fuel consumption, we will analyze possible actions. In order not to pay extra money for gasoline, experienced car enthusiasts recommend promptly diagnosing the operation of the sensor. It is advisable to evaluate its performance every 30,000 kilometers traveled, and carry out a complete replacement after a run of 100,000 km. However, as experience shows, car enthusiasts think about this only after real problems begin.
What causes lambda probe failure
The design of the oxygen sensor is such that its main enemy is high temperatures. When catalysts are removed without appropriate compensation, the temperature of the exhaust gases increases, which over time leads to probe failure.
The second problem is antifreeze getting into the exhaust gases. But if coolant gets into the combustion chambers, and from them into the exhaust manifold, a breakdown of the oxygen sensor is the least of the problems.
The third common cause of breakdown is oil getting on the electrodes. This happens when the oil thrown out of the engine reaches the turbine, where it burns out, and the vapors enter the lambda probe, which fails. Burning oil spray significantly increases the temperature in the exhaust manifold.
When making tuned exhaust systems, the oxygen sensor is sometimes installed at the bottom. This is a mistake, since the resulting condensation and solid deposits will lead to rapid corrosion of the electrodes, and the device will break. Therefore, the lambda probe is installed on top of the line and at an angle of 45 degrees so that the flow of exhaust gases occurs more correctly.
About the importance of the sensor
The outlet sensor is a device that has a number of functions. The correct injection system ensures universal and uniform fuel consumption and reduces the influence of toxic gases. Since the data is fed into the vehicle's computerized system, it is very important that the dashboard displays accurate data. A motorist will notice a malfunction, and this may happen at the most inopportune moment.
Many characteristics are important while driving. The air temperature is measured, then how cool the liquid is, and the location of the throttle valve is taken into account. The device is necessary to dose fuel. But how it provides information about this is not always clear.
How long does the lambda probe work?
The first versions of oxygen sensors, with two wires, worked in the region of 50 thousand km during normal operation. The new design of probes with three or four wires will work in the region of 80 thousand km. Lambda probes installed in modern cars can last about 150 thousand km before replacement.
A separate subtype of these sensors are broadband lambda probes, which cover at least 150 thousand km, having a number of advantages. They are equipped with a separate output scale, so the driver can see in real time what mixture is being supplied to the engine. This device operates across the entire rev range and processes information at a much higher speed. Such sensors are especially useful for car owners who like to tune their engines.
Video: Lambda! Oxygen sensor and increased fuel consumption
What to do if the mechanism fails
First of all, you need to make sure that the lambda sensor is faulty. In this regard, the easiest and most reliable way is to contact a service station. If you have the desire and opportunity, you can do a visual check yourself. You need to start by inspecting the connectors, checking the reliability of their fixation. Then you should inspect the oxygen sensor:
- Soot on the body is an indicator of combustion of an enriched mixture or excessive overheating of the probe;
- Shiny deposits are created by fuel with excess lead;
- White and gray deposits are caused by the use of oil and fuel additives.
What to do? If lead deposits appear on the lambda sensor, the device must be replaced, since lead damages not only the probe , but also the catalyst . The same applies to deposits from additives. If we talk about soot, you can try to clean it yourself using phosphoric acid.
Wideband lambda probe
There are 2 main types of broadband lambda probes, which differ in the principle of reading information.
- 4-wire. Used on Toyota, Lexus, Subaru, Suzuki cars.
- The 5-wire (possible 6th wire for the calibration resistor) has an additional chamber - an oxygen pump. Usually used on German cars.
These oxygen sensors have a common feature - they do not just show a lean or rich mixture, but are able to measure the composition of the mixture over a wide range. This allows you to more accurately maintain the required mixture composition. It also becomes possible to keep the mixture composition λ not equal to 1. This may be required in transient modes or partial loads, which allows for better efficiency and improves other indicators.
The operating principle of these sensors is described in detail in many sources. Therefore, we will not dwell on it.
Rear lambda probe operation
The catalyst decomposes nitric oxide into nitrogen and oxygen. Free oxygen is also bound to unburnt fuel (from CO we obtain CO2). Many other complex reactions also take place in the catalyst.
As follows from the above, there is noticeably less oxygen behind the catalyst than before the catalyst. The ability of the catalyst to accumulate and release oxygen determines the inertia of changes in oxygen content after the catalyst. Therefore, the main indicator of a serviceable catalyst is the predominance of voltage from the rear lambda probe of more than 0.6 V, even if the voltage of the front lambda probe remains at a low level for a significant time.
READ Lambda probe readings at idle
On modern cars with Euro-4 standards and higher, the rear lambda B1S2 also affects fuel corrections in order to ensure the most optimal mixture for the operation of the catalyst. Therefore, the efficiency of the catalyst directly affects fuel consumption. As catalyst efficiency decreases, fuel consumption increases. This occurs because the amount of oxygen that the catalyst decreases, and the system tries to retain it. Adding fuel behind the catalyst.
For example, on modern cars (for example Subaru and some others), aging or lack of a catalyst causes a significant increase in fuel consumption - up to 30% (if no measures are taken to solve the problem with the catalyst). In addition, using lambda, the temperature of the exhaust gases behind the catalyst is measured and the ECU strives to warm up the cold catalyst by controlling the fuel supply and EGR, since the heating time of the catalyst is also regulated by EURO standards (Temperature is determined by measuring the resistance of the lambda heater and the impedance of its sensitive element).
A sign of normal operation of the catalyst with Euro-4 standards and higher is that the voltage at the rear lambda probe is maintained at around 0.6. 0.7 volts at stable operating conditions. At the same time, fuel corrections for the rear B1S2 and front B1S1 lambda probes should be about 0%. If the catalyst is not operating correctly, fuel corrections based on the rear and front sensors may differ greatly from zero.
But not only the voltage from the lambda probe and its dynamic characteristics affect the operation of the control system of a modern engine. Since the lambda depend on the composition of other components in the exhaust gases, the control system can indirectly determine their concentration. The system can also indirectly determine the temperature of the catalyst, which is approximately equal to the temperature of the lambda probe. The internal resistance of its sensitive element and the ceiling of the generated voltage depend on the temperature of the lambda probe. Based on the upper and lower voltage flanges, the ECU can indirectly judge the concentrations of other impurities.
Based on the above, it follows that modern engine control systems are able to not only maintain the oxygen concentration behind the catalyst. Additionally, the temperature of the catalytic converter is kept within the required range, indirectly monitoring and retaining other impurities behind the catalyst.
Diagnostics of the OXYGEN SENSOR (lambda probe) and CATALYST in 5 minutes
Unfortunately, the catalyst has a limited resource. And at the moment when a car owner is faced with a problem with a catalyst, he has a choice - to purchase a new catalyst or solve the problem in another way. Our man, looking at the smoking chimneys of factories and the cost of the catalyst, is of course looking for an alternative option. On modern cars, it is not at all easy to deceive the control unit, since the process involves many parameters with a narrow corridor. Therefore, traditional methods in the form of spacers and resistors with capacitors are no longer suitable. Even if these methods do not work in some cars, fuel consumption inevitably increases. In view of this, manufacturers of catalyst emulators are constantly improving emulation algorithms to most accurately recreate all required parameters. In a modern catalyst emulator, about 10 different parameters are emulated: voltages in various modes, dynamic parameters, the amount of stored oxygen, catalyst efficiency, internal resistance of the sensor, impedance, cut-off time, response to manipulation of the gas pedal, catalyst temperature, warm-up mode, reaction speed of the sensitive element , change in catalyst efficiency with load changes.
READ Where is the catalyst located on Kalina
Where is the oxygen sensor located?
The front oxygen sensor DK1 is installed in the exhaust manifold or in the front exhaust pipe in front of the catalytic converter. As you know, the catalytic converter is a major part of the vehicle's emissions control system.
The rear oxygen sensor DK2 is installed in the exhaust after the catalytic converter.
On 4-cylinder engines, at least two lambda probes are installed. V6 and V8 engines have at least four O2 sensors.
The ECU uses the signal from the front oxygen sensor to adjust the air/fuel mixture by adding or decreasing fuel.
The rear oxygen sensor signal is used to monitor the performance of the catalytic converter. Modern cars use an air-fuel ratio sensor instead of a front oxygen sensor. It works similarly, but more accurately.
Method one
Involves cleaning the heating element from carbon deposits (used when a malfunction of the oxygen sensor heater occurs). To implement this method, it is necessary to provide access to the sensitive ceramic part of the device, which is hidden behind a protective cap. You can remove this cap using a thin file, with which you need to make cuts in the area of the base of the sensor. If it is not possible to completely dismantle the cap, then it is possible to make small windows about 5 mm in size. For further work, about 100 ml of orthophosphoric acid or rust converter is needed.
When the protective cap has been completely removed, you will have to use argon welding to restore it to its seat.
The recovery procedure is performed according to the following algorithm:
- Pour 100 ml of phosphoric acid into a glass container.
- Immerse the ceramic sensor element in acid. Do not completely immerse the sensor in acid! After this, wait about 20 minutes for the acid to dissolve the soot.
- Remove the sensor and rinse it with running tap water and then allow it to dry.
Sometimes it takes up to eight hours to clean the sensor using this method, because if you don’t succeed in cleaning the soot the first time, then it makes sense to repeat the procedure two or more times, and you can use a brush to mechanically treat the surface. Instead of a brush, you can use a toothbrush.
Third party sensors
To improve engine performance or simply notice a failed oxygen sensor, car owners turn to options from third-party manufacturers who also produce wideband sensors. To do this, it is better to take products from well-known companies, among which the following are popular:
- AEM performance electronics;
- INNOVATE motorsports;
- Depo Racing.
Each of these brands offers several types and generations of oxygen sensors that offer acceptable levels of accuracy and reliability. There are certain complaints about the broadband probes from Depo Racing, but many experts would argue here too.
INNOVATE motorsports probes require prior calibration. To do this, they need to be connected in air so that they set the desired value, and only then installed in the exhaust system. Sometimes they have problems with controllers and other electronic components. AEM performance electronics have the fewest problems, but they are the most expensive.
When installing a broadband lambda probe, you need to know that it does not tolerate overheating. Therefore, they are installed at a distance of at least 40, and preferably 50 cm from the turbine or the beginning of the exhaust manifold.
Buy a lambda probe decoy
The easiest and most effective way in terms of installation and saving time is to purchase a ready-made oxygen sensor.
In Moscow, a lambda probe blende can be purchased in 2022 for:
- 1500 rubles is for a catalyst emulator (electronic blende). Installation will cost about 500 rubles.
- Up to 1400 rubles - this is for the corner version of the blende.
- Up to 1200 rubles - this is for the second lambda sensor with a metal minicatalyst. Suitable for vehicles with Euro 4 engines.
- 500 rubles is for the most common option, a mechanical blende manufactured by Fort Luft. It does not contain a microcatalyst. Installed on cars up to 2001.

