Almost any motorist can repair the ignition switch. To do this, you just need to know its structure and sequence of actions. In most cars, its design is similar, and differs only in minor features. The most common problems due to which you have to repair the ignition switch yourself are failure of the cylinder, oxidation of the contacts, and destruction of the insulation on the wires. Next, we will provide you with maximum information so that you are able to carry out repair work yourself, and also provide repair algorithms using the example of popular cars in our country - VAZ 2110-2112, Honda Civic, Ford Focus 2, Opel Omega B.
Functions and design of the ignition switch
First, let's list the functions that the lock performs. These include:
- performing switching to connect/disconnect the vehicle’s electrical system to the battery;
- connecting/disconnecting the primary (low-current) circuit of the ignition system to the power source;
- short-term connection of the starter to the electrical system while starting the engine;
- ensures the functioning of energy consumers when the engine is not running (for example, radio, headlights, alarm, etc.);
- when the engine is not running, it locks the steering wheel (not on all cars).
How to remove the ignition switch? The lock design may vary slightly for different car models. Accordingly, the process of dismantling and checking it will consist of different stages. You will need a Phillips head screwdriver, a thin awl and an electrical tester. VAZ-2108 car in our country . It’s worth mentioning right away that the lock and ignition system of this model are in many ways similar to all front-wheel drive VAZs.
Dismantling the ignition switch of a VAZ 2108 occurs according to the following algorithm:
- Remove the negative terminal from the battery.
- Remove the steering shaft housing. To do this, use a screwdriver to unscrew the screws securing it. The casing will split into two parts and can be easily removed.
- Next you need to remove the front part of the lock. Also disconnect from it the plug with the power wires and the plug with the wires coming from the relay.
- Before dismantling, set the ignition key to the “0” position in the lock. This will disable the steering lock.
- Unscrew the fastening screws and remove the lock.
- Then you can use the tester to check or diagnose and troubleshoot if one is detected.
An awl may be needed during operation if it is necessary to replace the contact group. This tool prys up and removes the retaining ring that holds the lock core inside the case. The contact group can only be removed by dismantling it.
When you reinstall the ignition switch, insert the key into it and turn it to the “Ignition” position. This way you will remove the lock latch and it will move into the body.
What does the ignition switch consist of?
Now you need to familiarize yourself with what parts the lock consists of and what can break in it. Please refer to the attached drawing. It shows a cross-section of the ignition switch. Numbered parts:
- Locking rod.
- Ignition switch housing.
- Roller.
- Contact disk.
- Contact sleeve.
- The block, a, is a wide protrusion of the contact part.
Now that we know what parts the ignition switch consists of and how to disassemble it, it will be easier for you to understand what malfunctions may occur in its mechanism.
Instructions for removing the element
For disassembly you need to prepare a simple set of tools:
- 10 mm head and ratchet drive;
- Phillips screwdriver;
- narrow chisel (width 5-8 mm);
- hammer;
- round nose pliers with tapered, curved ends.
Ignition switch replacement tool
To successfully install a new or repaired lock in place, it is advisable to purchase 4 special fastening bolts with M6 threads with a head size of 10 mm and a length of 20 mm. Their feature is the heads that come off with a key at a certain tightening torque. After tearing off the heads, semicircular caps remain on the surface, which are much more difficult to unscrew for an untrained person. But you will have to do this during disassembly.
The battery must be disconnected before starting work.
Like any event related to tampering with the electrical part of the car, dismantling the ignition switch begins with disconnecting the negative terminal of the battery. Then proceed in this order:
- Using a Phillips screwdriver, remove the screws holding the two halves of the plastic frame of the steering column together.
- Lower the handle that fixes the position of the steering wheel during adjustment all the way down and remove the plastic panels. Disconnect the ignition switch block and carefully cut the tape connecting your bundle of wires to the common harness. In order not to cling to the steering column switch during operation, it can also be pulled out of the connector.
- On the metal casing of the steering column you will see a lock mount consisting of two clamps. They are held together by 4 bolts with the heads torn off (visible on the left side). Pointing the chisel at the semicircular caps, use a hammer to loosen the tightening of these bolts one by one.
- Using pliers and then your hands, unscrew all 4 bolts and remove the ignition switch.
Unscrewing the plastic steering column cover
Note. There are “dozens” in which not all the bolt heads are torn off during assembly. This simplifies the matter; the fasteners can be easily unscrewed with a 10 mm socket.
Bolts with intact heads can be unscrewed with a wrench
At the stage of disconnecting the connectors, it becomes possible to check the functionality of the contact group by measuring resistance, as described in the previous section. If you remove the lock due to the loss of the keys and want to move on, then after dismantling you need to do the following:
- On the “mother” block, which remains hanging after the lock is turned off, find contacts with thick wires of purple and blue color (the latter with a black stripe).
- Connect these terminals with any conductor, after which the ignition will turn on.
- The thick red wire leads to the starter. To start, its contact must be temporarily connected to the installed jumper. When the engine starts, the red wire must be disconnected.
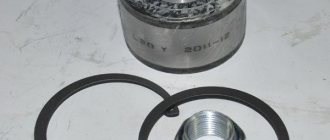
Possible faults
The ignition switch is a fairly simple device. Therefore, the malfunctions that arise are typical. Next, we will briefly list the most common ones that car owners of different cars encounter. These include:
Ignition switch assembly
- Oxidation or melting of contacts . It occurs for various reasons - moisture getting on them, an increase in voltage in the car’s electrical network, their mechanical failure due to damage or aging.
- Destruction of wire insulation or contact group . It can occur due to mechanical damage or simple aging, when the insulation dries and crumbles. As a rule, this malfunction can be determined by the failure of several electrical appliances at once that are clearly not interconnected (having different fuses and electrical circuits).
- Malfunction of the lock cylinder . Usually this is simple mechanical damage caused by aging and wear. In this case, the key in the lock can jam, slip, and so on. It may also be caused by small particles or dirt getting inside. If the larva is not very worn, then you can try to restore it, otherwise it is better to replace it.
- Wear of internal parts of the lock . This happens naturally over time. As the machine is used, the ignition switch parts gradually wear out and may become unstable or completely fail. The way out of this situation would be to completely replace the cylinder or lock (depending on what failed).
- Key wear . This doesn't happen often, but if you own an old car, the possibility still exists. The key may also become deformed or mechanically damaged. In this case, you need to either use a spare key or completely change the lock with new keys.
Now that we have dealt with the causes of the malfunctions, we can move on to the issue of eliminating them. Let us analyze in detail the process of repairing the ignition switch using the example of specific popular cars in our country.
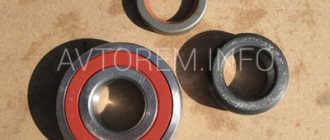
When replacement is required
Ignition switch kit
There are several basic situations when a car owner may urgently need to replace a unit. The reasons for the malfunction of the VAZ 2114 ignition switch include:
- Mechanical failure of keys;
- Lost key;
- Damage to the lock as a result of an attempted theft;
- Broken ignition contacts.
Repair of ignition switch VAZ 2110
Video of replacing the ignition switch of front-wheel drive VAZs (VAZ 2110-2112, “Kalina”, “Priora”)
You can identify a malfunction of the “tens” ignition switch using a tester. To do this, you must first dismantle the lock. Briefly, the algorithm of actions will be as follows:
- Disconnect the negative terminal from the battery.
- Unscrew the cover around the steering column.
- Disconnect the ignition switch connector.
- Insert the key into the lock and move it sequentially to positions I and II. In this case, using an ohmmeter it is necessary to measure the resistance between the contacts (see diagram and table).
- If the ignition switch and contact group are working properly, the resistance should be 0.
Below we provide you with a table that provides information about which contacts close and open in different key positions, as well as what machine mechanisms they are responsible for.
| Key position | Which contacts are under voltage? | Closable circuits |
| Position "0" (off) | Contact 30 | None |
| Position I (ignition on) | Contacts 30-15 | Ignition system circuits, generator excitation, power supply to headlights, turn signals, control panel, windshield wipers and windshield washers, electric heater fan motor is powered, rear window heating and cigarette lighter are turned on. |
| Position II (starter running) | Contacts 30-15 and 30-50 | All the above circuits, as well as the starter, are running. |
Ignition circuit for VAZ 2110
To dismantle the ignition switch of the VAZ 2110, you need to continue the steps started earlier (you have already disconnected the battery, and also removed the plastic covers from the steering column). Next you need to proceed according to the following algorithm:
- Disconnect the steering column switches (to do this, just disconnect the latches).
- Since the bolts securing the ignition switch have cut heads (for safety reasons), they are unscrewed using a hammer, chisel and pliers. To do this, place the chisel on the head and hit the chisel with a hammer so that the bolt follows the thread. When the tightening is loosened, you can use pliers.
- Next, remove the fastening bracket from the column and remove the ignition switch directly.
Replacing the lamp
Lock repairs may vary. Let's look at the main ones - replacing the backlight bulb, replacing or repairing the ignition switch contact group, replacing the microswitch. Let's analyze these processes separately. So, to change a light bulb , you need to:
- Disconnect the connector connecting the lamp to the power supply.
- Remove the lamp socket using small pliers.
- Replace the lamp and reassemble everything in reverse order.
Replacing the contact group
Replacement of the contact group is carried out according to the following algorithm:
- Using a screwdriver, move the locking latches to the side.
- Dismantle the old contact group.
- Replace it with a new one, install the latches in place.
To replace the microswitch, perform the following steps:
- Unscrew the three screws that hold the structure together.
- Remove the mounting rod.
- Release the latch.
- Dismantle the switch.
- Installing a new switch is performed in the reverse order.
Replacing the microswitch
Also a popular repair operation is replacing the ignition lock cylinder . To do this, you will need the following tools - a chisel, a hammer, pliers, a drill with a thin drill, a screwdriver with a Phillips head, a thin watch screwdriver with a thin tip, and of course, a new cylinder. Replacement steps must be performed in the following sequence:
- As described above, you need to disconnect the battery and remove the outer casing from the steering column. However, the lock itself does not need to be removed.
- Pull out the fastening pin that holds the cylinder in the lock. To do this you need to use a thin clock screwdriver and a hammer. If the pin cannot be pulled out, you can drill it out with a thin drill.
- Next you need to replace the larva with a new one.
- Collection occurs in reverse order.
If you have completely removed the ignition switch, then before reinstalling it, do not forget to insert the key and turn it to position I (ignition). At this moment, the steering shaft latch, which locks the steering mechanism, will hide in the lock body.
To replace the ignition switch on the “ten”, it will be useful for you to know its catalog number - 2110370400530, and the catalog number of the cylinder - VAZ00015448.
A few words about the principle of operation
Modern cars and trucks have a battery ignition system that uses the battery as the power source. When you turn the key, power supply voltage is supplied to the vehicle’s instrument panel, electronic control unit and other systems of the vehicle’s electrical circuit. A further turn of the key makes a connection through an additional starter relay to start the engine.
The figure shows the electrical circuit of the ignition switch, which shows the principle of operation of the switch
Almost all switching of consumers is carried out by the contact group of the lock. Different models of machines have switches that differ from each other in their operating algorithm. There are models in which only installing the key supplies voltage to individual systems. Recently, the start button has become widespread, as well as the stop button. This installation allows you to use it instead of a lock, the power unit is started and at the same time the starting circuit is unloaded. The button used should not have a fixed on position.
The same start button is often installed by car owners themselves, especially those who do not have an unloading relay. Typically, a button with the start function has powerful power contacts; only they can relieve the contact group from the starting current of the starter solenoid relay. Switching circuits with high current requires the use of high-quality materials to produce a device that can withstand high temperatures from heating and have good insulating qualities.
Honda ignition switch repair
Honda ignition lock cylinder repair
Let's consider the issue of dismantling and repairing the ignition switch using the example of a Honda Civic. According to reviews from the owners of this car, many of them periodically encounter this problem (childhood disease of this model). The dismantling process is largely similar to that described above. In particular, to dismantle the lock, you must:
- Remove the front panel parts that block access to the lock. To do this, you need to unscrew the 3 bolts located at the bottom, under the steering column.
- Break off the mounting bolts. The lock itself is mounted on two bolts with shear heads. They are designed to protect your car from theft. These bolts need to be removed using a chisel and hammer. Instead, you can later use two 8 bolts.
- Disconnect the toggle switch.
Castle in parts
The lock cylinder, as in the previous version, can be replaced without completely dismantling the lock. Although it is still better to do this, since it will be more convenient for you to work. But in any case, the operation to replace and repair the larva is performed according to the following algorithm:
- The first step is to remove the cotter pin securing the cylinder in the lock body. This should be done with a thin metal object, such as an awl, knife or clock screwdriver. They hit it with a hammer, knocking it out of its seat. If you cannot get the cotter pin using this method, you can simply drill it out.
- Insert the key into the cylinder and remove the cylinder with the cylinder.
- To disconnect the cylinder and the cylinder, you need to pull out another cotter pin. To do this, again you need to use a long metal object. And then remove it with pliers.
- Next, they take out the larva and carry out the necessary repair work depending on the problems that arise.
When dismantling the cylinder, do not forget to remove the spring that is located inside. Check its condition. Replace if necessary. It ensures that the key returns to the ignition position from the starter position. Therefore it plays an important role in the castle.
Also, when making repairs, lubricate the cylinder. As in other cars, when installing the cylinder with the cylinder in the lock body, remove the key from it and press the steering wheel lock pin as deeply as possible.
Some car owners throw out one or more secretions from the larva during repairs. This absolutely cannot be done for several reasons . Firstly, this significantly reduces the anti-theft properties of the ignition switch. Secondly, a situation may arise when, over time, the driver removes the key from the lock in the ignition on position. And if you leave the car in this position for a long time, the battery will discharge. Because of this, you will not start the engine, and the immobilizer may also become out of sync.
Installation of a new larva
To replace the lock core due to mechanical failure, remove it from the vehicle as described above. Then follow this algorithm:
- Insert the key into the slot and use a Phillips screwdriver to unscrew the 3 screws holding the 2 halves of the lock body together.
- Separate the housing while holding it with the key facing up. If you hold the lock in a different position during disassembly and do not insert the key, the insides will spill out and you will not understand how to put them back together. In this case, the ball with springs may get lost.
- Remove the locking mechanism, which consists of two spring-loaded parts, and pull out the spring itself.
- After removing the key, carefully remove the core so that the ball with the spring (located on the side of the cylinder) is not lost.
To disassemble the case, you need to unscrew 3 screws
Before replacing, it is necessary to remove the return spring from the old cylinder, since it is not sold complete with a new core. The spring is inside the part on the back side in a cocked state; it must be installed in the same form on the new cylinder. Also, do not forget to remove the thin spring from the hole where the ball is inserted.
The locking mechanism tongue peeks out from the bottom of the case
Important point. Remember that if you replace the core because it is broken, the new key will no longer fit the door lock. There are 2 options: use two separate keys or simultaneously change the cylinder in the door. The last method becomes the only applicable one when all the keys are lost.
The larva must be pulled out so as not to lose the details
When installing the core, you need to move the spring for the ball into the hole and insert the part into the body. Then push the larva all the way, while simultaneously inserting the ball into the socket. After that, all that remains is to assemble the locking mechanism and tighten the housing with screws. When finished, check the operation of the ignition switch by turning the key to different positions.
The ejection spring from the old core needs to be moved to the new one
Ford Focus 2 ignition switch repair
Ford Focus2 ignition switch repair
By analogy with other cars in the Ford Focus 2, to repair the ignition switch, you first need to dismantle it. This operation is carried out in the following sequence:
- Disconnect the negative terminal from the battery.
- Remove the steering column cover by first unscrewing the two mounting bolts at the bottom (under the steering column).
- Using a screwdriver, press the lock of the immobilizer antenna unit and move it to the side without disconnecting the wire from it.
- Insert the key into the lock in position I.
- Insert the pin into the hole located in the lower part of the lock body, and then press the latch.
- The lock cylinder mount will be released and you can easily remove it from its seat.
Further repair work depends on the problems encountered. It is necessary to wash all the elements of the lock and lubricate them. On the opposite side of the lock there is a contact group. It is advisable to remove it and check the state of wear. It is secured with two latches. Check the condition of the brushes and replace worn ones if necessary. In any case, it is necessary to clean the dirt from it. Take everything apart very carefully, there are a lot of small parts and springs inside. Assembling the mechanism and installing it in place occurs in the reverse order.
Replacing the contact group
In the event that, as a result of diagnostics, a malfunction of the contact group is detected, you will still have to remove the ignition switch, since it will not be possible to get to it in any other way. After removing the element, disassemble it using the following algorithm:
- Disconnect the connectors with the backlight power wires.
- Remove the decorative plastic cover by releasing the 4 latches. Work carefully because these clips are easy to break off, and buying a cover separately is quite a task. It is not advisable to change the entire lock because of it.
- By bending the 2 clamps holding the contact group, remove it from the ignition switch.
The plastic cover can be removed using a screwdriver
Note. You will additionally need a small flat-head screwdriver as a tool to bend the latches.
The contact group is located immediately under the cover
First of all, examine the status of the contacts. If they have darkened (oxidized), then clean the current-carrying surfaces with fine sandpaper P1000. Then put the group in place and, without installing the lock, connect it to the vehicle's on-board electrical system to check its functionality. If unsuccessful, the part must be replaced. The same will have to be done if the contacts are burnt or the group does not work without any external signs of malfunction.
The part is removed after bending two latches
Repair of the ignition switch "Opel Omega B"
Let us conditionally divide the stages of breakdown of the ignition switch of an Opel Omega B car into three stages according to their complexity and neglect. So:
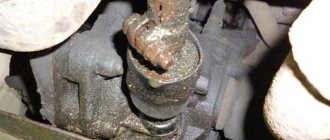
- Periodic jamming of the key in the lock . The easiest way at this stage is to remove the lock, wash and lubricate it. The easiest repair option is to spray WD-40 into the well and twist the wrench in it.
- Does not restart . As a rule, this problem manifests itself in a situation when the car starts and drives normally, and you can stop the engine with the key. However, when turned on again, the motor does not start. To do this, you need to remove and reinsert the key. Here you definitely need to disassemble the lock and carry out diagnostics and repairs.
- The key doesn't turn . It is better not to reach this stage. After all, in this case the steering wheel will inevitably lock, which can lead to troubles on the roads.
To dismantle and disassemble the ignition switch, you need the simplest locksmith tools - a screwdriver with a Phillips head, pliers, a knitting needle or a piece of hard thin wire, a hammer, a chisel.
When disassembling the lock, you can photograph the sequence of actions. This will help you a lot during reassembly.
We will describe the disassembly process separately for the cases described above. Let's start with the simplest first and second, when the key is still turning. The disassembly algorithm for them will be the same:
- Remove the steering column tilt lever, as well as the trim located on the ignition switch.
- Remove the steering column protective cover (its lower part), to do this, unscrew the three fastening bolts in the lower recesses with a Phillips screwdriver.
- To separate the upper and lower parts of the steering column casing, you need to unscrew two screws on the right and left of the steering wheel. They are hidden with special plugs. They can be removed using a screwdriver or knife. To get to them you need to turn the steering wheel right and left respectively.
- Next you need to release the turn signal and wiper mechanisms. They are mounted on rails using simple plastic clips at the bottom and top. To do this, you need to move them left and right respectively. This is done to provide access to the lock mounting bolts.
- The bolts mentioned have self-cutting heads. Therefore, to unscrew them you need to use a small chisel and a hammer.
- After the bolts have been removed, the car's steering wheel is freed, and the ignition switch hangs on some wires of the contact group. It needs to be removed completely.
- To do this, unfasten the 3 latches there. The top two of them have open access, but the bottom one does not. Therefore, you first need to use a screwdriver to open the two accessible latches. After this, you need to turn the lock from top to bottom to release it from the third latch.
- All that remains is to remove the lock and place it on the table for further disassembly. Also have paper and pen ready for this.
- In order to remove the cylinder clip, you need to use a thin wire. Using pliers, bend it in the shape of the letter G. If you look from the key towards the column, you can see a small hole into which to insert the prepared wire. You need to press on it, thereby turning off the stopper. At the same time, turn the ignition key to position II and pull it towards you. In this case, the cylinder should come out of its seat.
- Next you need to pull out the stopper with the spring. To do this, pull the key and remove the cylinder from the cylinder. At the same time, make sure that the stopper and the spring itself do not fly out under the action of the spring.
- Now you can move on to repairing the larva. There are 10 slats and 10 springs underneath them. Holding them, carefully remove the key from the cylinder.
- Next you need to get the slats. First of all, you need to act carefully. The main thing is to remember their location. To do this, write down on paper where each of them stood.
Prevention and lubrication of the contact group
After complete disassembly, you can perform diagnostics and identify problems with the lock. As a rule, they occur due to dust or dirt getting inside the mechanism. It is also possible that the lamella or spring has become jammed. These small malfunctions can be easily treated with a needle file, as well as by washing and lubricating the mechanism. It is not recommended to remove the slats (we wrote about this above). This can only be done as a last resort.
Now let's move on to a situation where the key in the lock does not even turn. Accordingly, the cylinder in the lock also cannot turn and press the stopper. For repairs, you also need to remove the lock. How to do this is described in the previous list in paragraphs 1 - 8. Next will be the following steps:
- The first thing to remember is. that when dismantling the larvae it is necessary to keep the lamellas and springs intact. But the body of the larva will have to be sacrificed.
- In order to dismantle the cylinder, you need to pry the cylinder cover with a screwdriver and carefully remove it.
- And the place where the cover was removed and where the key is inserted will have to be drilled out to gain access to the lamellas and springs.
- Next, the lamellas and springs are inspected. If necessary, they are aligned and installed in place. The mechanism must be washed and lubricated.
- Assembly is carried out in reverse order.
With the cylinder drilled out you can still drive for a while. However, the best solution would be to buy and install a new one . Do not throw away lamellas from damaged larvae; you may still need them in the future.
Results
As you can see, the principle of repairing the ignition switch is the same for many cars, and the procedure itself can be done even by a novice car enthusiast. The main thing you must remember is that at the slightest manifestation of malfunctions, you should not delay prevention and repair . Otherwise it could end badly. To begin with, you can not even remove the lock, but simply spray WD-40 into the well and then turn it with the key several times so that the liquid gets on the parts located there. In most cases, this is enough to get rid of the problems that have started.
Choosing a new lock
It’s not enough to know how to change the ignition switch on a VAZ 2110 with your own hands; you also need to make the right choice of a new product. Existing fake options that do not survive for a long time.
During the selection process, attention is paid to the following criteria:
- impossibility of tearing off the characteristic holographic sticker;
- the correct shape of the casting of the body;
- the key must enter without visible resistance;
- high density packaging;
- the protruding tongue is distinguished by a light shade.
Existing articles of ignition switches for the VAZ 2110, which are distinguished by their reliability, for example: lock VAZ 2110-3704005-30.
Professional advice
Such advice is as follows:
- Even having an understanding of the rules for replacing larvae and contact groups, it is better to refrain from this work. The repair process is complex and time-consuming. If you have an idea of how to change the ignition switch on a VAZ 2110, then it is better to replace the entire assembly.
- Graphite grease is used as a lubricant for the cylinder. It reduces the risk of biting the part.
- Even knowing how to change the ignition switch on a VAZ 2110, as well as how to change the door lock on a VAZ 2110, in the process of work you should give preference to branded products.
The procedure for replacing the ignition switch on a VAZ 2110 is a simple type of repair work. Even a beginner will not experience big problems. The main thing is to have the necessary equipment and tools on hand, and also to read the instructions well.