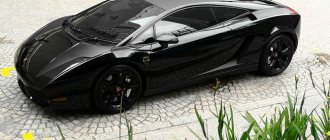
Window tinting is not a way for many motorists to stand out or make their car look attractive. This is a necessity. With the help of tinting you can protect yourself from prying eyes, reduce the impact of sunlight and ultraviolet rays on the skin and interior upholstery.
But the law prohibits the use of dark tints, limiting light transmission to 70-75%. Therefore, with the introduction of new fines, everyone had to abandon the usual tinting. To compensate for this problem, new materials have been developed. But they are much easier to install and remove with your own hands. These are silicone removable films.
How to glue tint
Almost any professional car service can apply tint to any of your car windows. It is worth entrusting such work to a service station if the car owner himself does not have the time or desire to do tinting. It’s not at all difficult to do this yourself, the main thing is to be patient in your work, to be careful and attentive.
1 Requirements for tinting and its features
Thanks to darkening, the appearance of the car is transformed, it becomes more stylish and elegant. Moreover, such a change does not require much time and, most importantly, costs. But how to glue tint, what are the features of such work?
Dimming car windows We recommend that you read
- How to properly glue carbon film
- Removable silicone tint
- Do-it-yourself electric tinting
- Auto scanner for self-diagnosis of any car
You can do tinting in various ways, but the simplest is to stick a special film. It is made of polyester, it has high wear resistance, strength and varying degrees of darkening. In certain modifications, the car glass, after covering it with a film in the sun, not only shimmers, but can even change color. It all depends on the angle at which the sun’s rays hit the glass, and you can apply this coating yourself.
The networks sell films of various assortments, ranging from cheap Chinese ones to expensive branded ones. Every car enthusiast will be able to find a suitable option for the windows of his car. Of course, when making a choice, you should not forget that the film matches your car - first of all, its color.
2 What is the benefit of dimming?
The main advantages of tinting are the following: the car interior is less exposed to heat; during an emergency, passengers and the driver are protected from glass fragments; the overall appearance of the machine is improved; the driver is more comfortable behind the wheel, as the level of glare from oncoming headlights, snow, and other sources is reduced.
Car tinting
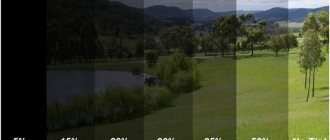
When buying this or that tinting film for car windows, you must remember that there are certain standards. That is, the degree of shading of the glass should not exceed the norm, otherwise problems with traffic police officers may arise on the road. We are talking specifically about the transparency of car windows, especially the windshield.
3 How to prepare for gluing?
Every motorist should have a universal device for diagnosing his car.
You can read, reset, analyze all sensors and configure the car’s on-board computer yourself using a special scanner.
Let's figure out how to apply tint and what to pay attention to. If a car enthusiast does tinting with his own hands and is doing such work for the first time, he should gain some experience before doing so. It wouldn’t hurt to go to a service station and see how professionals do tinting; you can watch videos of similar work. You shouldn’t buy expensive film for your debut, as it can simply be ruined the first time.
Car tinting by professionals
It is necessary to understand an important thing - if you approach the process responsibly, then everything can turn out perfectly. It is better to use the help of a friend for the debut, since it is harder to cope alone. Before starting work, clean up; cleanliness in this case is truly the key to success. Since any contamination that gets between the glass and the film will significantly affect the quality of the work and may even negate the efforts made. It is best to apply tint film to car glass in a clean room while working on a table.
Of course, if you do the tinting yourself, you will definitely need a certain set of tools. Let's look at the minimum option:
- sharpened knife;
- rubber spatula or non-rigid plastic version;
- hair dryer;
- dry and always clean cotton fabric (lint-free);
- soap solution, temperature within 40 degrees;
- spray.
4 How to properly apply tint?
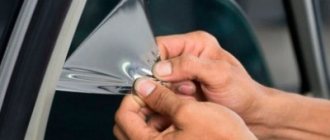
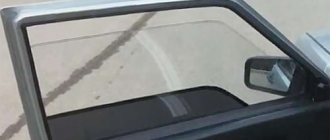
You can glue the tint directly on the car without removing the glass, after only dismantling the seals around the perimeter. True, only professionals can work in this mode; if you do everything yourself and for the first time, it’s better to remove the glass. Start applying the film to the side windows. It is much easier to glue tint onto a flat surface, and at the same time you can gain certain skills in the work.
Gluing tint
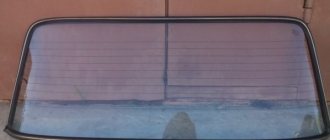
Perhaps the main rule in do-it-yourself tinting is perfectly clean glass. Film tinting must be done on the outer part of the glass.
If you stick it on the inside, the film will get scratched in a short period of time, begin to peel off, and fray. The most difficult thing to do when gluing film with your own hands is working with the rear and windshield windows. Firstly, they do not have the correct geometric shape, and secondly, unlike the side windows, the front and rear windows are curved. As a result, it is impossible to perfectly press the film onto the glass manually, even with a spatula. Here they use additional equipment - a hair dryer. They heat up the tint material, thereby smoothing it out and preventing the appearance of cracks, bubbles, film bends, etc.
When doing the gluing yourself, be sure to carefully measure the tinting parameters. Since the film on the application side has a protective layer, after removing it, this side is glued to the glass. True, this should be done using a soap solution. Without it, it is impossible to do a high-quality job, and the service life of the tint is reduced by at least half in the best case.
Varieties: silicone, PET and others
To produce removable tinting, different materials can be used, which determine the appearance and technical parameters of the finished product. Among the common types are the following:
- Silicone, capable of absorbing ultraviolet rays. Due to the specificity of the tinting, the possibility of creating a mirror effect and blinding the light of other vehicles is eliminated. In order to install silicone film, a special approach is required, since quick gluing poses the risk of a loose fit to the glass. It is easy to stretch such a film, as well as straighten it.
- Photochromic (electrochromic) film, which becomes lighter or darker depending on the degree of voltage applied to the glass. The advantage of this tinting method is that the transparency of car windows can be changed independently at any time. The disadvantage is the high cost compared to other options.
- Monopolycarbonate based tint, also called static plastic. This film reliably adheres to glass and has a relatively low cost. However, the visibility of the road with this tint is greatly reduced at night, so whether to hang it or not is a moot point.
- Tinting using double glass technologies, one of which is darkened and lowered separately from the standard transparent glass. Despite the maximum convenience in everyday use, tinting a car using this method is much more difficult.
Removable tinting can be soft or hard, depending on the needs of the car owner.
How to tint: the most popular options for removable structures on video
DIY tinting
Tinting car windows is one of the first steps in car tuning. In fact, doing tinting yourself is not difficult and you can find many reports on tinting on the Internet. But you won’t find complete instructions on tinting with photos and videos in one place. That’s why I decided to look at this issue in more detail and collect all the useful materials on tinting in my report.
Due to the introduction of new fines for car tinting, the so-called “Do-it-yourself removable tinting” or “Automatic tinting” has recently become increasingly popular. In this report I will show you how to tint a VAZ 2110 in a simple way.
Pros of tinting
- The biggest advantage of tinting yourself is saving money compared to tinting at a car service center. That is, tinting a car at a service center will cost about 10 times more than tinting it yourself.
Choosing a film for tinting
The main questions when buying a tinting film are usually: Which tinting film is better? What is the difference between tinting films? Which manufacturer should I choose for tint film?
At the stage of purchasing a film for tinting a car, I suggest not saving on time and price, but it is better to find a product from a trusted manufacturer than to buy just anything and do the window tinting work at home.
List of quality films with certificate and guaranteed performance:
- SunTek Film by Commonwealth Laminating & Coating, Inc.,
- llumar film by Courtaulds Performes Films.
- Sun Control film produced by Garware Polyester Ltd.,
- Sun-Gard, Glass-Gard and Safe-Gard film from Film Technologies International, Inc.
- Johnson Window Films.
- Films MСС/Solar Gard
- Films from 3M Corporation
The package usually contains 1.5-2 square meters of film, a plastic spatula for smoothing and a knife. The simplest and most short-lived film for tinting is single-layer with a colored adhesive layer. The highest quality film for tinting is multi-layer, neutral in color, coated with metal.
Preparing a car tinting tool
All necessary consumables and tools for car tinting:
- A roll of tint film (usually 2 sq.m. of film per roll, this is enough for 4 side windows. About 3 sq.m. of film is needed for the side windows and rear window); Price: from 200 rub./roll.
- Rubber spatula or plastic scraper (the latter is less desirable as it leaves micro-scratches). Price: 30 rub.
- Shampoo (for example, Johnson's Baby 100ml). Either a similar shampoo or soap solution, but the main thing is not to use window cleaning liquid. Price: 100 rub.
- Spray bottle (for example, “Mr. Muscle” without contents).
- A sharp utility knife with a retractable blade. Price: 150 rub.
- Dry, lint-free cloth
- Clean/filtered warm water
- A technical or home hair dryer (not necessary for tinting side windows, but preferable). Price: 800 rub.
Preparing for car tinting
Prepare a 10-20% solution of shampoo in water and pour it into a spray bottle.
I recommend starting tinting with your own hands from the side windows. And only after you have some experience, move on to the rear or windshield.
The further scenario can unfold according to two scenarios: 1-Tinting with glass removal For more convenient and high-quality tinting, it is better to remove the glass. How to remove glass in a VAZ 2110? It takes a little pain, but you get a really pleasant and useful effect. Window tinting should be done in a clean place. If indoors, then without dust, because... dust is one of the causes of bubbles. 2-Tinting without removing the windows If you decide to tint the windows without removing them from the car, then you need to clean the car interior from dust. It is advisable to do car tinting on a cloudy day, after rain (then there will be less dust) and in the absence of insects That's it, let's move on to tinting the car windows.
Bonding tint material
At the next stage of work, it is necessary to make patterns from the tint film. Removable tint requires gluing the plastic mold on both sides.
- The tinting material is applied to the plastic base, the necessary marks are made, and the outline is trimmed. Then you need to remove the protective film from the pieces of tint material. You can't do without an assistant here. It is important to carefully remove the protection and leave the pieces of tint film for 10-20 minutes. During this time, the static effect will disappear, which creates problems when laying on plastic in the form of bubbles and swelling.
- After waiting the specified time interval, you should spray the surfaces to be bonded. It is not worth saving on detergent, so that during the process of aligning the film along the contour of the plastic blank, premature gluing does not occur.
- All that remains is to apply the tint film to the workpiece, make the necessary adjustments and begin smoothing the material using forcing. The first pass from the center to the edges is done without pressure. During the second and third smoothing, the forcing is strongly pressed against the workpiece. In this case, it is necessary to wet the film for good glide.
- When the film adheres perfectly to the plastic base, use a sharp utility knife to trim off the excess film along the contour of the workpiece.
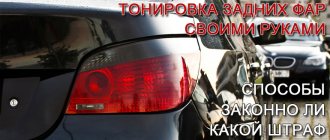
Fines for tinting. Removal of license plates for tinting in 2017. What tint is allowed?
Good afternoon, dear reader.
This article will talk about the features of car tinting in 2022, as well as possible penalties for applying tinting film to the glass (in 2022, along with fines, the removal of license plates for incorrect tinting is no longer used). In addition, we’ll talk about permitted tinting, which can be used legally without fear of fines.
Let me remind you that several articles related to auto glass tinting have already been published on PDDMASTER.RU:
- Car window tinting. Fines and documents.
- Features of checking car tinting.
- Tinting 2011. What's what?
However, these articles do not provide answers to all the questions that arise from readers. Therefore, I will continue to consider the topic of tinting and talk about possible penalties for tinting in 2017, as well as provide answers to the most common questions regarding tinting.
What car window tinting is allowed in 2022?
So, first, let's look at what car window tinting will be allowed in 2022:
- Car rear window tinting;
- Car rear side window tinting;
- A strip of transparent colored film on the top of the windshield;
- Tinting of any car glass if its light transmittance exceeds 70 percent.
Car window tinting: pros and cons
The high demand for different types of tinting coatings is due to the following advantages of the film:
- increasing the comfort of the driver and passengers is the main advantage;
- formation of an invisible barrier to ultraviolet radiation;
- visual protection of interior contents from intruders;
- the efficiency of the machine increases;
- the cost of the vehicle increases upon further sale;
- The upholstery does not fade and remains presentable longer.
Along with the advantages, it is worth knowing about the disadvantages, which should be treated with caution:
- another reason for traffic police officers to check your car for compliance with standards;
- at night, car tint film reduces visibility;
- Difficulty when reversing in the evening and at night.
Features of tinting
Today, tinting is widely used on various car models. It has both positive and negative sides. They largely depend on the quality of its implementation. Pasting car windows is a difficult job, as it requires knowledge, skills, experience and accuracy. Otherwise, the appearance of the car will be ruined. If the pasting is done poorly, air bubbles appear and it will quickly peel off.
It is also worth paying attention to the material that is used. It is worth giving preference to leading manufacturers who have long been known in the market and have won the trust of consumers. This approach will guarantee long-lasting tinting service. At the same time, do not forget the operating rules. Violating them is strictly prohibited.
The main indicators of a quality film is its appearance after gluing. It should not crack, move away from the surface, or change color. In addition, the film must have a number of properties. Protect from sunlight, be resistant to mechanical stress, and have a high thermal insulation rate. At the same time, her appearance is quite natural.
Tools and materials for creating and gluing film
You can make tinting for car windows yourself using special consumables. To create, you will need a sheet of polyester (PET) no more than 0.5 mm thick and a film that will be applied to the plastic. The following set of tools is also required:
- knife with replaceable blades;
- pencil for drawing outlines;
- metal scissors;
- forcing to smooth out irregularities on the film;
- a spray bottle for applying a soap solution to the surface of the glass.
The compound can be purchased at a construction supply or outdoor advertising store.
In addition to tools and materials, you must first prepare a clean and smooth surface on which the film will be applied to the plastic. For this purpose, you can use glass with a thickness of 15 mm or more.
Car window tinting: requirements
Today, tinting is a regulated procedure. There are a number of requirements that traffic police officers place on her. If you do not comply with them, you may receive a fine.
The main indicator of tinting is the degree of its light transmittance. It depends on the purpose for which you are using the film on the car glass. To hide everything that is happening and the salon itself from prying eyes, this figure should be 5%. It is rarely used, since law enforcement agencies prohibit this type of tinting.
Advantages and disadvantages
Removable silicone tint objectively has more advantages than disadvantages.
Let's start with the strengths. These include the following points:
- installation does not require the use of glue, which simplifies installation and dismantling of the product;
- high-quality films are reusable, which allows them to be reused after removal, and many times;
- externally, removable elements are no different from ordinary films;
- Silicone is practically not affected by high temperatures, frosts or high humidity levels;
- the material additionally protects the glass from mechanical damage;
- this is excellent protection from prying eyes;
- the material can be folded in several layers, since it is not afraid of bends;
- the material does not reflect light;
- helps protect the interior from burnout;
- installation takes minimal time;
- for installation there is no need to contact specialists;
- They cannot issue a fine for it if it is withdrawn on time.
According to the law, if it is possible to eliminate the discrepancy on the spot, the driver is obliged to do so. In this case, the traffic police officer does not have the right to issue a fine.
Everything is simple here. If a driver is stopped for suspicion of tinting that does not comply with the rules in terms of its light transmission characteristics, he may be required to use a device to evaluate the indicators. At this time, the film is removed and removed in a matter of seconds. There can no longer be any complaints.
How to properly glue removable tint?
As practice shows, the most favorable period for gluing film is the warm season. In winter, experts do not recommend this procedure. This is because it is difficult to remove all the water from the glass.
Bonding removable tint
Even if insignificant particles remain, all the work will go down the drain. Because in cold weather, water quickly freezes even under the film. Then bubbles will appear on it, which will ruin the appearance of the car and cause the tint to begin to peel off.
Where to buy reusable original film for cars from M TONIC and what is the price for it
Specialized products are rarely found on the shelves of regular stores, but have been spotted in several retail outlets and can be purchased in: Novosibirsk, Yekaterinburg, Moscow and the region, Ufa, Chelyabinsk, Saratov, St. Petersburg (St. Petersburg), Yaroslavl, Vologda, Voronezh, Krasnodar, Kaliningrad, Rostov-on-Don, Kazan, Tula, Nizhny Novgorod, Khabarovsk, Perm, Krasnoyarsk, Irkutsk, Minsk, Stavropol, Novosibirsk, Omsk, Other cities of Russia and the CIS (Belarus, Ukraine, Kazakhstan).
Procedure technology
Car window tinting is a labor-intensive process that consists of a number of interrelated works. The first thing to start with is preparing your work surface. To do this, remove dust and other dirt from it. Then dry thoroughly. There should be no water left on it.
Now you can proceed directly to gluing the film. To do this, it is well wetted in a specially prepared solution. It consists of water and soap. The glass must also be coated with the same mixture. Moreover, all work is first performed inside the car. This will allow you to determine the required size and shape of the film.
To fix the tint on the glass, it is dried using a hair dryer. After all the work is completed, you should not open the doors for two to three days. During this period, the tint will be firmly and securely fixed. As a result, it will have a long service life.
What law governs
The installation of tinting on a car is subject to strict regulatory standards for the light transmission of vehicle windows. You can install a tint film if the following conditions are met:
- The percentage of light transmission of the front and side panels is at least 70.
- The percentage of light transmission of the windshield is 75%.
If the tinting does not meet these requirements, the owner will have to pay a fine. Currently, the fine is 5,000 rubles; until 2022, the fine was five hundred rubles.
General procedure
Glass tinting occurs using a soap and water solution in the proportion of 3 to 5 drops of washing shampoo per liter of water.
It is necessary to mix this solution thoroughly; it is advisable to use an automatic sprayer.
Then the external glass cleaning is carried out. This must be done not only without fail, but also very efficiently, since the technology requires complete cleanliness of the tinted surface. Any grain of sand may end up being an air bubble.
In this way, you can tint any domestic and foreign cars.
General stages of work:
FIRST STAGE. The glass is cleaned from dust and dirt, as well as degreased. If you are going to tint the windows without removing them, it is advisable, but not necessary, to remove the rubber seals. SECOND PHASE. It consists of making a solution of shampoos or non-aggressive detergents. It needs to be poured into a special spray bottle.
Pay attention to the correct preparation of the solution. Add 5 drops of detergent to 1.5 liters of water and shake the entire mixture vigorously.
It is better to pour the resulting solution into a container with a sprayer. THIRD STAGE. Making paper patterns. They will be needed to cut the tint film into the required shape. If you are unsure of your measurements, leave a slight tolerance. They are then easily removed using a cutter. If your hand is already full, then this point can be missed. FOURTH STAGE. The pattern and the tinting process itself.
Applying film for tinting on car side windows
Wet the surface of the side glass and use a scraper to clean its lower part. Then lower the glass a few centimeters, wet it and also clean the rest of the surface using a scraper.
Clean the surface with the blade consistently and make sure that there are no uncleaned areas.
Next, wash the glass with a hard sponge and wipe dry using a rubber pad. Wipe the edges of the glass with a napkin. Moisten and wipe the glass again with a rubber pad.
- Before applying the tinting film, wet the glass generously.
- Then it is necessary to remove two-thirds of the liner protecting the adhesive layer from the workpiece and moisten the adhesive surface. It is convenient to carry out this operation on the rear window of the car by placing the pattern with the adhesive layer facing outwards.
- It is better to cut off the excess liner removed from the workpiece before applying the tint film.
Wet your fingers. Your fingertips must be clean, since in the process of tinting the glass you will need to touch the adhesive layer of the film.
Carefully take the workpiece and place it on the prepared glass surface.
Try to ensure that the adhesive layer only touches the surface of the glass and does not touch the seals or other surfaces.
Align the tint film along the top edge. Make sure that there are no gaps or gaps anywhere, and begin to carefully squeeze the solution out from under it.
Follow a few simple rules:
- Hold the pattern with your hand, since when you initially squeeze out the liquid, the workpiece will slide along the glass.
- Squeeze water from the center to the edges.
- Use rubber and then hard forcing. Using hard distillation, expel the liquid in the same directions - from the middle to the edges.
- Then, using a forcing tool and a hair dryer, fix the film at the top edge of the glass.
- After this, use a knife to remove the excess tinting film protruding onto the upper edge of the glass - this technology allows you to avoid leaving gaps along the upper edge.
Raise the glass. Bend down the bottom part of the pattern protected by the liner and generously moisten the glass with the solution. Remove the liner completely.
Do this extremely carefully and make sure that the film without a liner does not touch anything other than the glass with its adhesive layer!
Carefully tuck the tint film under the glass seal
Squeeze out the horizontal inner seal using a force and, when inserting the film for tinting, make sure that it does not break - this operation also requires certain skills, so be especially careful (pay attention to how the master will carry out this operation in the video tutorial below)
- Squeeze the solution out from under the film using hard forcing: squeeze out the water in successive movements from top to bottom and from the middle to the edges.
- Finally remove any remaining moisture using a distiller wrapped in a napkin and a hairdryer.
- Make sure that no water bubbles remain under the film during the tinting process.
The technology for cleaning and sticking small fixed glasses will be identical.
Preparing everything you need
Before applying the tint, you need to prepare a clean and dry place to work, as well as a standard set of tools:
- Tinting film that meets the requirements of GOST 5727-88. Light transmittance for the windshield should be at least 75%, for the front side windows - 70%, for the rear side and rear - any. Typically, 4 side windows require 1 roll of film filter.
- Liquid soap (without dyes) to fix the film. It is better to use special installation compounds that do not leave streaks, or a 10-20 percent solution of any transparent shampoo.
- Plastic sticker for smoothing tint. Usually it comes complete with a film filter, but if you don’t have one, you can use any elastic plastic, rubber spatula or construction rubber eraser. Also in the store you can find special distillers for removing bubbles (chisler - for hard-to-reach places, slammer - for squeezing the edges, bloomax - for forcing out liquid).
- Scrapers for cleaning glass surfaces. 12 cm products of various shapes are best suited.
- Spray bottle (manual) for applying soap solution.
- Blade or utility knife. The latter is made of mild steel, so it is convenient to cut the film without fear of the glass being scratched.
- Soft rags, clean rags or napkins made of lint-free material.
- Industrial dryer.
If you are tinting your car yourself for the first time, it would be a good idea to purchase special camouflage markers and tapes. With their help you can correct minor errors.
You should also ensure that you have easy access to clean, cold tap water. The room should be free of insects and dust.
If everything is prepared, you can start cutting the film filter.