03/02/2022 2,249 Air and cabin filters
Author: Victor
The VAZ 2114 cabin filter is a device designed to filter air in the cabin of a vehicle. Its performance is important not only for the driver’s health, but also affects the safety of driving a car in general. In this article we will look at how to build a cleaning device with your own hands and change it in a VAZ 2114 car.
[Hide]
Replacement frequency
In order for the heater air purifier installed in the car to remove dust and debris to work correctly, it must be changed periodically. According to official regulations, the cabin filter in the VAZ 2114 must be replaced every 10 thousand kilometers. But if we take into account the dustiness of domestic roads, then the replacement interval for the device must be reduced to 7-8 thousand kilometers.
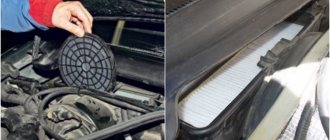
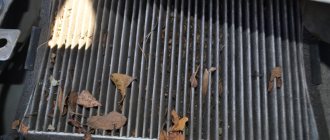
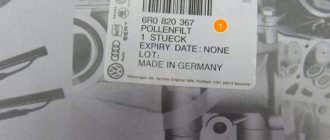
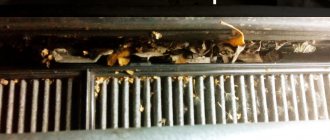
Used and new cleaner
There are several signs that indicate the need to replace the device:
- The air flow leaving the heating system has become too weak.
- There was an unpleasant smell of dampness in the car interior.
- The car windows sweat regularly.
Location
Where is the cabin filter located on the VAZ 2114? Let's start with the fact that it may not be in the car at all. The fact is that not all previous VAZ models entered the production line with ready-made, installed filters. We are talking about VAZ 2114, 2113, 2115.
Here is the cabin filter on the VAZ 2114
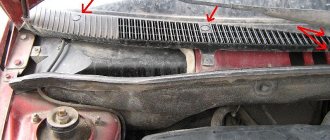
However, its presence in the car can be easily determined independently; you just need to press down the heater casing with force. If, when pressing under the stove, a free cavity is felt, it means there is no filter, and if the space is occupied, then, to the joy of the owner, it is already installed. As you probably understand, the filter is located directly under the hood of the car. In more detail, under the frill, or under the casing of the car heater.
Filter selection
The manufacturer recommends using only original spare parts for repairs. Therefore, it is better to buy a cabin filter produced by VAZ. The article number of the original device is VF 014.
How to do it yourself?
Instructions for making a cleaner at home:
- Remove the old VAZ 2114 cabin filter from its seat.
- Remove dirty padding from the device. You can use a utility knife to quickly remove residue.
- After removing the padding polyester, you will be left with a plastic frame. Cut a new piece of padding polyester from the prepared material. The dimensions must correspond to the dimensions of a standard filter. Glue the material to the base.
User Dmitriy Belogrivtsev showed in his video how to make your own cabin filter element.
Cabin filter adapter
If the cleaning device cannot perform its task and the air flow entering the cabin remains dirty, a special adapter can be used. This component is a more advanced housing for the ventilation blower. The adapter is designed as a detachable device, made of steel and powder-coated.
Main functions:
- using the adapter, the car owner can install a more effective cleaning device in his vehicle;
- increases the service life of the cabin filter as a whole;
- cleans the air flow entering the cabin and makes it fresher;
- prevents the formation of dust and dirt deposits in the car interior.
You can build such an adapter with your own hands from metal, using drawings and diagrams that can be found on the Internet. If such a task is beyond your capabilities, then it is better to purchase a ready-made device in a store.
What does the cabin filter look like and what functions does it perform?
The structure of this filter is very simple and lightweight. It is made of a plastic frame. And already inside it there is some special material.
To enhance the effect of the filter itself, you can install an additional filter yourself. Sometimes car owners can assemble it themselves.
Cabin filter cleaning functions:
- This cabin filter can automatically purify the air that enters the car from the street.
- This cabin filter can remove dust, as well as various debris, or even exhaust gases from other vehicles.
- This cabin filter can provide your car with clean, moist and fresh air.
How to change it yourself?
If the cleaning device cannot effectively filter the air flow entering the interior of a car with an injector engine, it is necessary to change the device. You can replace the filter yourself or with the help of specialists. Since this procedure is simple, below we will tell you how to do it yourself.
User Alexey Romanov provided a video that shows the process of dismantling the filter device on the Four.
Tools and materials
What to prepare:
- new cleaning device;
- a Phillips head screwdriver;
- clean rags;
- sealed glue.
Algorithm of actions
How to remove and install a new filter:
- Stop the engine and open the hood of the car. Find the installation location of the filter device. Remove the rubber seal along with the fasteners.
- Using a Phillips-head screwdriver, unscrew the screws securing the casing located in the area of the center of the windshield. Self-tapping screws are secured with nuts.
- Remove the plastic plugs from the seats.
- Remove the plastic casing of the heating system. Remove the mesh located inside. This will give you access to the cleaning element. Remove it and install a new filter. To install the device, first the product itself is mounted, after which the frill is installed and the filter element is pressed against it. Before installation, lubricate the joints of the casing with the vehicle body, use sealant for this. This will allow the frill to fit most tightly to the filter.
- Screw the screws back in. The procedure for replacing and installing a new filter is completed.
Step-by-step instructions for making a cabin adapter
Lada 2113 JACKAL Logbook Air filter pipe
Printed from Compass 3D V12 1:1
After this, we take the resulting stencils, metal scissors and cut out the galvanized parts.
Next, we bend the parts in a large vice, using a wooden mallet so as not to spoil them.
Then we drill holes with a drill, metal drill bit 3.
We fasten the parts with M3 bolts.
Next, you can install our craft. First, the part for the motor. Then on top is the part with the frame for the filter.
To make installation easier, the plastic grille to protect against leaves was removed.
We treat the adapter itself with glass sealant, carefully coating all the cracks and joints so as not to siphon, otherwise the whole point of the installation will be lost.
We also treat the places where the adapter comes into contact with the car body with auto sealant (silicone will not work)
The final touch is a rubber seal on the top of the adapter to protect the hood trim.
Now you can install a cabin filter of the new tenth sample.
Bottom line: if you wish, you can also paint the resulting upgrade and begin to fully enjoy the clean air of the cabin!
Photo gallery
Photos of filter replacement are shown below.
1. Remove the old cleaning device from its seat
2. Install a new filter, securing it with sealant to the frill
Video “How to correctly change the filter product on a VAZ 2114”
User Alexander Chkalov provided a video that shows in detail the procedure for replacing the air purification device in the cabin of the Four.
Do you have any questions? Specialists and readers of the AUTODVIG website will help you ask a question
Was this article helpful?
Thank you for your opinion!
The article was useful. Please share the information with your friends.
Yes (66.67%)
No (33.33%)
X
Please write what is wrong and leave recommendations on the article
Cancel reply
Rate this article: ( 3 votes, average: 4.67 out of 5)
Discuss the article:
