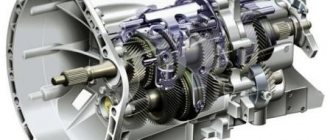
Changing the coolant is an important aspect of car operation. But there are brands of cars whose cooling system is a problem area and requires constant repair or revision. This is especially true for domestic passenger cars of the ninth model “Lada”. When faced with such a problem, you need to not only know how to properly drain or fill the coolant, but also how much antifreeze is in the VAZ 2109.
Replacing coolant on VAZ 2108, VAZ 2109, VAZ 21099
Welcome! Coolant - it is needed only for the cooling system and in other systems of the car it is not used anywhere else, thanks to it the engine is cooled during operation and thus the engine takes longer to boil (If the system is working properly, it practically does not boil at all), if the liquid is removed from system, it will work, but it will boil so quickly (in about 5-10 minutes) that you will have to constantly turn off the engine of the car and wait until it cools down at least a little, besides, you will not be able to find out the temperature of the engine without liquid , because the sensor that monitors the temperature usually reads the temperature not of the engine (It’s just that everyone is already accustomed to calling it that, although the temperature of the liquid and the engine may even differ) but of the coolant itself, and how will it determine the temperature if this liquid is not there, therefore For the future, under no circumstances should you drive a car if all the fluid suddenly leaks out, since you won’t drive far and will most likely ruin the car’s engine.
Note! To replace this fluid in a car, you will need: An empty container of at least 10 liters (Although you can take less, it is best to stock up on a 10 liter container to avoid spilling the liquid), as well as wrenches, and a clean rag to use. wipe your hands and if liquid gets on the car engine, wipe it off it; in addition, you may need hex keys and different types of screwdrivers!
When should you change the coolant? If you follow the manufacturer’s advice (we don’t recommend doing as the manufacturer says, but just take a note to yourself), then the fluid needs to be changed in cars of the Samara family every 50,000-75,000 thousand km. mileage, but in real life the liquid may become unusable earlier, factors such as the quality of the liquid are responsible for this (If it is fake, then even 1000 km
enough for it to change its color) and its expiration date (Each coolant has its own expiration date and after its expiration it must be drained and replaced with a new one, otherwise all the additives that are in it stop working and the engine first it will boil faster and secondly, corrosion inside the parts will begin where the liquid leaks, the liquid has an anti-corrosion additive and thus when the shelf life of the liquid expires, then all additives stop working as they should), by the way it will begin when the liquid becomes unusable let's talk, any liquid you probably paid attention to when purchasing has a color (Red, blue, etc.), if after a short period of use the liquid changes its color to reddish (a shade of rust), then the liquid is fake, it must be immediately replaced with a new one, In general, high-quality liquids have a very stable tint and they retain their color for quite a long time and in the end they only darken, so if your liquid immediately changed color after filling and not driving the car for a long time, then you also filled in a fake, which is best replaced with a new one liquid
Note! When you come to a car store (Unlikely, but they can), we recommend that you check the fluid there for its quality, of course you will have to open it to do this, but if you first buy the fluid and later check it with the sellers, then you should not have any problems with the purchased fluid, You can find out in more detail about how you can check a liquid for counterfeit and find out how antifreeze and antifreeze differ from each other in the article: “Useful information about antifreeze and antifreeze on VAZ cars”, everything is described in detail there!
What is better for VAZ 2109 antifreeze or antifreeze
Beginning car owners of the domestic automobile industry, learning the basics of car ownership, often ask various questions about servicing and repairing VAZs. One of the most frequently asked questions regarding the cooling system: which is better - Antifreeze or antifreeze for VAZ?
The question is quite interesting and is asked often, especially from owners who purchased a car, but were unable to get a clear answer from the former owner as to what was poured into the cooling system.
And before the winter period, when car preparation is required, this question comes up and makes you think. Let's try to figure it out.
Level control and required volume
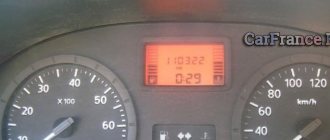
Before changing the working fluid, the car owner should know what the volume of the Nine’s cooling system is and how much refrigerant it will contain in order to buy the required amount of fluid to complete the task. When changing, the plastic reservoir under the hood will hold about 8.7 liters of antifreeze. If the working substance is not completely drained from the system, then approximately 7-7.5 liters will be poured into it. As for the level control, it is carried out according to the expansion tank marks in the engine compartment. Please note that when the car engine is warm, the fluid volume may be higher. Therefore, before checking, the engine must be turned off and allowed to cool.
Serber24 user Sani4 in his video clearly demonstrated the procedure for changing antifreeze in a VAZ 2109 car.
https://youtube.com/watch?v=tl-mlYESTfE
For what reasons is coolant consumed?
There are several reasons why the volume of refrigerant will decrease in the refrigeration system:
- Low negative temperatures. In severe frost, the liquid decreases in volume. This reason cannot be called a leak, but car owners in winter often confuse this problem with a fluid leak. During the cold season, experts recommend adding refrigerant to the system.
- Formation of cracks and damage in the expansion tank or on its cover. As practice shows, if the defect on the container is insignificant, it will not be easy to detect it visually. The crack may resemble a scratch. Detailed diagnostics will be required. To identify the location of the leak, you will have to use a special dye that is added to the liquid.
- Lack of tightness in the connections of the lines or damage to the pipes. This problem can be clearly identified. In places of malfunctions, wet traces of refrigerant are visible. If the defect is minor, then it will also not be possible to detect it through visual diagnostics. You will have to add dye to the refrigerant.
- Damage to thermostat or gasket. If there are defects in the device seal, liquid will leak out, and over time its amount in the cooling system will decrease.
- Damage to the radiator device of the heating system. During operation, the radiator wears out. If it has already reached the end of its service life, refrigerant may leak through cracks formed on it or through the hose connected to it. Adding liquid is not practical; the cooling radiator must be replaced.
- Presence of defects on the cylinder head gasket. If there is damage, a leak will form. As a result, the antifreeze will begin to mix with the engine oil, which will enter the coolant. Repairing the problem involves replacing the cylinder head gasket.
Topping up
The coolant addition procedure is performed with the engine cold. In order to add antifreeze, you need to open the hood of the car and unscrew the cap of the expansion tank. The required amount of liquid is added to the reservoir, after which the lid is screwed on.
If it is not known what fluid was used previously, it is better to change it. Because mixing different types of refrigerants will cause the substance to lose its properties.
Air lock and methods of dealing with it
Now we’ve figured out how much antifreeze to pour into the VAZ 2110, now it’s worth talking about the air in the cooling system. It can only get there when new liquid is poured, and here you do not need to pour the entire canister at once, gradually at certain intervals.
Where to press to remove the traffic jam
How much to pour into the VAZ 2110, it was said 7.8 liters . There are situations when air does not leave the system, so you should put the car on a hill and unscrew the tank cap a little, then start the car and warm it up. After wearing gloves, since the system has heated up, you need to press slightly on the pipes to release all the air. And after that, you can add antifreeze again, to a certain level.
How to get there?
There are two ways to get to the radiator. First
(it can be called classic) is carried out strictly in accordance with the manual for the operation, maintenance and repair of VAZ 2109 vehicles and involves draining the coolant from the engine cooling system and removing the instrument panel.
The second one
belongs to the category of “folk” and does not require such complex manipulations. In this article, consider both methods, but you will decide for yourself which one to use.
The classic method of replacing a VAZ 2109 heater radiator
After this, the old radiator of the VAZ 2109 stove is directly replaced with a new one and all elements are installed in the reverse order. This is exactly how replacements should be made in auto repair shops and service centers. For those who decide to do this work on their own, it is necessary to take into account that the entire process will take from 4 to 6 hours.
"Folk" way
Folk craftsmen - brave and desperate craftsmen - offer a less labor-intensive method. Its essence is that the stove is replaced without draining the coolant and dismantling the dashboard.
In this case, in your VAZ 2109, replacing the heater radiator will be carried out according to the following scheme
:
- Close the heater tap.
- Remove the right front seat (for ease of work).
- Unscrew the two screws securing the panel on the right side, one screw that is located in the glove compartment, and, pulling the panel towards you, place a wooden block. Now you can get to the heater radiator from below on the passenger seat side./li>
- Place rags on the floor of the cabin and prepare containers to collect coolant that spills from the heater radiator and pipes.
- Loosen the screws on the pipe clamps and carefully remove them one by one from the radiator, placing a container into which 200 - 300 g will drain. coolant.
- After unscrewing the three bolts securing the radiator to the heater, pull it down to the right.
- Install the new radiator in reverse order.
Determining the causes of a windshield wiper malfunction on a VAZ car
wipers If suddenly the wipers on your car stop working, this is not a reason to panic. This device is quite simple and, if desired, anyone can independently eliminate the cause of the malfunction by following the further instructions. And so, let's find out why the wipers on your VAZ-2105 do not work.
How to independently replace CV joint boots on a VAZ 2109.
The CV joint boots are a front-wheel drive unit, which is popularly called a “grenade”. The reasons that lead to their damage can be different: aging of the material, hitting an obstacle, as well as careless operation of the car.
Learning to repair Lada Priora: dismantling and installing the main brake cylinder
In the current Lada Priora model, AvtoVAZ engineers were able to eliminate some errors that occurred in the tenth series.
Lada 110: techniques for removing and replacing the radiator Part 1
If the car owner notices an antifreeze leak, then the heater radiator installed on the VAZ 2110 should be replaced.
What fluid is best to pour into a car's cooling system?
Before figuring out which is better - antifreeze or antifreeze, it is worth correctly deciphering the subject of the dispute.
https://remam.ru/vozdsys/ustanovka-dopolnitelnyh-otopitelnyh-elementov-na-vaz-2109.htmlhttps://autoflit.ru/1594-dorabotka-pechki-vaz-2109-i-2110-svoimi-rukami- tepla-malo-ne-byvaet.htmlhttps://lada-na-remont.ru/remont/vaz-2109/30-radiator-pechki-na-vaz-2109-i-vse-chto-s-nim-svyazannohttps: //avtocity365.ru/ustrojstvo-i-ekspluatatsiya-avtomobilya/ustrojstvo-pechki-vaz-21099/https://mashinapro.ru/343-zamena-radiatora-pechki-vaz-2109.html
examination
Checking for OJ replacement is easy, but the importance of this procedure should not be underestimated.
- Start the engine and let it run for a few minutes at medium speed;
- When the new antifreeze is heated by the return flow, the coolant will flow into the expansion tank;
- If the liquid spills out, you did everything right;
- Check the operation of the thermostat, temperature sensors, cooling fan;
- When the engine temperature rises, the thermostat opens when it is in good working order. Feel the bottom of the thermostat. If it's warm, everything works great;
- Wait until the fan turns on automatically, cool the system, and turn it off. Again, this behavior indicates the sensor and fan are working.
As you can see, it is not at all difficult to change the antifreeze (or antifreeze) on a VAZ 2109 yourself. Therefore, there is no need to pay someone to do a job that takes literally an hour of your time and does not require complex dismantling procedures.
Volume and principle of operation of the VAZ-2109 cooling system
The VAZ-2109 has a forced circulation cooling system. What does it mean? It's simple, when engine parts heat up, the cooling unit takes away their heat.
The cooling unit is a closed, sealed system that circulates liquid. It has valves (inlet and outlet) that maintain pressure when the car is moving.
The cooling system circuit consists of the following kit:
- expansion tank. It, together with the valves, ensures that pressure is maintained;
- a pump that pumps liquid. It moves in large and small circles;
- a fan that increases air flow into the car body;
- sensors that transmit all information to the electronic control unit;
- radiator. In the VAZ-2109, it doesn’t matter whether you have a carburetor or an injector, because they have the same design;
- thermostat. They automate all the work of the OS;
- pipes and clamps. They perform the function of supplying fluid.
What to choose?
Today, when replacing coolant on domestically produced cars, people most often talk about antifreeze. But in addition to antifreeze, antifreeze is actively used for more modern cars.
For the VAZ 2109 cooling system, it is quite possible to use antifreeze rather than antifreeze.
| Coolant type | Peculiarities |
| Antifreeze |
|
| Antifreeze |
|
Variety of assortment
Taking into account the characteristics of each of the presented types of coolant, certain conclusions can be drawn:
- If we take into account the quality characteristics, antifreeze is significantly superior to antifreeze.
- Antifreeze is more practical, given its adaptability to our cars. Its composition is developed with an eye to the local climate, car quality and road conditions.
- You can ask for antifreeze from any oncoming driver passing by if your VAZ 2109 breaks down.
- The characteristics of antifreeze are quite sufficient to ensure the normal functionality of the CO.
Practice shows that it makes no sense to overpay for antifreeze to fill the cooling system of a VAZ 2109.
Device
Cooling system elements
The process of draining coolant from the radiator
In order to understand how and why it is necessary to drain the coolant, you need to have a little understanding of the design of the car and the cooling elements. Also, you need to know how the coolant circulates in the engine and have an idea of the places where it can be drained.
So, let's look at the complete diagram of the engine cooling system and how the coolant circulates:
Cooling system diagram
1 – element in the form of a plug for the expansion tank; 2 – expansion tank; 3 – hose for draining liquid from the pipe; 4 – hose passing between the radiator and the expansion tank; 5 – hose leading from the radiator; 6 – tank to the left of the radiator; 7 – aluminum tube; 8 – plug systems; 9 – tank to the right of the radiator; 10 – drain plug; 11 – middle of the radiator; 12 – casing for electric fan; 13 – plastic wings of the electric fan; 14 – electric motor; 15 – toothed pump pulley; 16 – pump impeller; 17 – camshaft drive belt; 18 – engine block; 19 – pump pipe; 20 – radiator hose with supply function; 21 – heater radiator hose with drain function; 22 – hose supplying coolant to the throttle pipe; 23 – exhaust pipe; 24 – hose for refilling; 25 – heater radiator hose with supply function; 26 – thermostat; 27 – coolant temperature sensor; 28 – coolant level indicator sensor.
Coolant drain options
There are two options for draining coolant from the system. They depend on what operations the motorist intends to perform with the car. So, let's look at both options separately.
Draining without removing the engine
This method is often used to replace coolant in the system, as well as to change cooling elements. The procedure is quite simple. Let's look at how to properly drain the liquid from the cooling system completely:
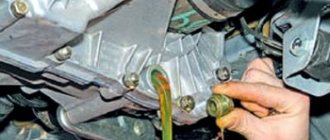
- We find the cooling system plug on the cylinder block.
Location of the coolant drain plug on the cylinder block
Remove the expansion tank cap
Unscrew the plug on the radiator to drain the coolant
Installation of faucet
Drain faucet
For the convenience of subsequent draining and repair work, you can install a faucet. Moreover, you have already unscrewed the standard plug.
Draining with engine removal
- Unscrew the plug on the expansion tank.
- We unscrew the plugs from the cylinder block and radiator.
- Next, when the liquid has flowed out, you need to unscrew the pipes leading to the radiator.
- Of course, some liquid remains in the system and must be drained completely. This can be done in two ways: by blowing it out with a compressor or by disassembling the engine.
This “slurry” has already served its term
- Development of a full resource of use. It is recommended to carry out once every 90-100 thousand km. This is due to the fact that the coolant, due to a constant temperature difference, which is its operating temperature, loses its technical and physicochemical properties. After such a mileage, it can no longer effectively provide cooling of the engine and its elements, which can lead not only to failure of the thermostat and pump (most often these are the spare parts that suffer), but also to boiling of the engine, which can have unpleasant and material consequences .
- During engine overhaul. When the engine is dismantled for major repairs, the coolant will need to be completely drained.
- Replacing the radiator will also require draining the coolant completely from the system, but it is done according to a simplified option (the second one, which is indicated above).
- Replacement of other individual elements that will require draining the coolant from the system.
Refueling procedure
After installing all the removed parts in place, you can begin the procedure for filling the cooling system. To properly fill antifreeze into a VAZ 2109, you will need almost 8 liters of liquid . First of all, old antifreeze is poured in. In this case, it is better to use gauze again. If the quality of the drained antifreeze does not inspire confidence, it is better to completely replace it with a new one.
Refueling occurs through the opening of the expansion tank, but all the liquid will not fit at once; you will have to warm up the engine so that it swallows the already filled volume and makes room for the remainder. It is important to remember that refueling is done to the minimum mark, because antifreeze expands when heated and can break through the pipes, tank or lid.
Source
Replacing coolant in the engine cooling system of VAZ 2108, 2109, 21099 cars
It would seem that a simple procedure for replacing the coolant (coolant) in the cooling system of a carburetor or injection engine of VAZ 2108, 2109, 21099 cars and their modifications has some features without knowledge of which, as a result, you can get a number of problems (for example, constant overheating of the engine and knocking out the cover expansion tank).
Therefore, we will analyze the replacement procedure taking them into account.
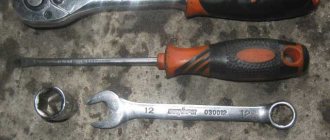
Necessary tools, accessories and spare parts
— Socket wrench or socket “13”
— A canister or two coolants (antifreeze, antifreeze) – 8 liters
Details about choosing antifreeze or antifreeze: “Choosing coolant for the engine cooling system of VAZ 2108, 2109, 21099 cars.”
— Wide container for collecting old coolant (basin) with a capacity of at least 8 liters
— Funnel for filling liquid
— Phillips screwdriver for removing the pipe clamp
Preparatory work
— We install the car on a pit or overpass
— Remove the engine crankcase protection
— Remove the mudguards of the engine compartment
— We place a container under the engine to collect old coolant
— Let the engine cool down
The procedure for replacing the coolant in the engine cooling system of VAZ 2108, 2109, 21099 cars
Draining old coolant
— Drain the coolant from the radiator
To do this, unscrew the radiator drain plug by hand. Drain the liquid.
— Drain the coolant from the engine cylinder block
Unscrew the drain plug on the cylinder block. We use a key or head at “13”. Drain the liquid.
— Remove any remaining old coolant from the system
Unscrew and remove the plug from the expansion tank
After which a little more old fluid will flow out of the radiator and cylinder block drain holes.
We squeeze the radiator pipes with our hands to expel the last remaining liquid.
— We screw back the drain plugs of the radiator and block
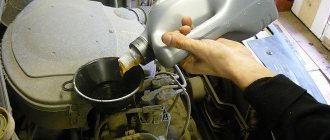
Adding new coolant
— Remove the supply pipe from the carburetor heating unit or throttle assembly of an injection engine
— Fill in new coolant
Insert a funnel into the hole in the expansion tank and pour liquid through it. There is no need to add all the liquid at once. Fill in a couple of liters and squeeze the cooling system hoses. A couple more liters, then squeeze again. In this way, air is removed from the system. Air will also escape through the removed carburetor heater hose or throttle body. When liquid appears from it, put the hose back and tighten it with a clamp.
Stop adding fluid when the level in the expansion tank reaches between the MIN and MAX marks. This is the norm.
— Start the engine and wait until the pump circulates the coolant through the system
When the level in the expansion tank decreases, add fluid and bring it to normal.
— Reinstall the expansion tank cap
You can first rinse it under running water and blow it with compressed air.
— Warm up the engine to operating temperature
At the same time, we check how much the level in the expansion tank rises (no more than to the MAX mark), check that there are no leaks from under the hoses, and that the thermostat opens on time. After this, we can assume that the work of replacing the coolant in the engine cooling system of VAZ 2108, 2109, 21099 cars is completed.
Notes and additions
— After draining the liquid from the cooling system, there will still be about a liter left in it. This must be taken into account when calculating the amount of new fluid poured into the system.
— In the engine cooling system of VAZ 2108, 2109, 21099 cars, the coolant is replaced once every 75,000 km or once every five years.
— The exact volume of liquid in the system is 7.8 liters.
— The work of replacing the coolant in the engine cooling system of VAZ 2113, 2114, 2115 cars is similar to that described in the article for VAZ 2108, 2109, 21099.
More articles on the engine cooling system of VAZ 2108, 2109, 21099 cars
— Is it possible to mix antifreeze of different brands and colors?
Comparative car repair test
— Replacement of coolant in the cooling system of VAZ 2105, 2107 cars
How many liters of coolant
Since the volume of radiators, channels, engine, cooling jackets are different, then, accordingly, the volumes are different for different brands. Therefore, we present data for certain cars.
How much antifreeze or antifreeze is needed in the car cooling system:
- VAZ 2101 - 8 liters;
- VAZ 2102 - 8 liters;
- VAZ 2103 - 8.6 liters;
- VAZ 2104 - 8.5 liters;
- VAZ 2105 - 8.6 liters;
- VAZ 2106 - 8.6 liters;
- VAZ 2107 - 8.6 liters;
- VAZ 2108 - 7.8 liters;
- VAZ 2109 - 7.8 liters;
- VAZ 21099 - 7.8 liters;
- VAZ 2113, 2114, 2115 - 7.8 liters;
- VAZ 2110, 2111, 2112 - 7.8 liters for both 8 and 16 valve engines;
- VAZ 21213 “NIVA” - 10.7 liters;
- VAZ 2111 “OKA” - 4.8 liters;
- Lada Granta VAZ 2190 - 7.8 liters;
- Lada Kalina VAZ 23009 - 7.84 liters;
- Lada Priora - 7.84 liters;
- Lada Vesta - 7.84 liters;
- Lada Xray (X Ray) - 7 liters.
Coolant volumes for UAZ vehicles:
- UAZ 469 - 13 l.;
- UAZ Patriot - 12 l.;
- UAZ 452 - 13.4 l.
Volumes of antifreeze Gazelle:
- Gazelles of all modifications: from 9.7 to 11.5 liters.
- Gazelle 3110 - 10.5 liters.
Replacing coolant requires knowledge not only of the process itself, but also of the safety rules for carrying out work. For example, you cannot change the fluid when the engine is hot, that is, you cannot open the engine cooling radiator cap when the antifreeze, antifreeze or water in the system is hot. You may be burned by steam or escaping coolant.
The cooling fluid must be replaced periodically in compliance with the rules and regulations. You also need to know that you cannot mix antifreeze with antifreeze; you can dilute it with water, but this will deteriorate the properties of the coolant.
For cars of the VAZ family, it is recommended to change the coolant after a mileage of 60 thousand km. Some people are used to changing them yearly, for example, they replace antifreeze or antifreeze every 2-3 years.
Replacement
Now we can talk directly about how the coolant is drained and new antifreeze is added.
We noted that 7.8 liters of antifreeze are required to fill the entire volume of the coolant tank. But it is best to purchase a 10 liter canister. This is useful in case you spill some of the liquid past the neck, and also if you need to top up the coolant over time.
If you carry out the work in a clear sequence, watch preliminary training video instructions, then replacing antifreeze or antifreeze will become an easy task for you.
- Remove the main motor protection. To do this, there are four fasteners under the engine compartment. Although not all cars have protection.
- Remove the protective cover. It is located in front of the body under the engine.
- Unscrew the cap from the expansion tank.
- We climb into the cabin and open the heater tap all the way. This will prevent some of the coolant from remaining inside the system when drained.
- Prepare a container where all coolant from the system will be drained. A basin or other wide dish is better suited so that nothing spills past.
- There is a drain plug on the radiator. You will find it on the lower left, in close proximity to the radiator.
- Don't rush to drain the coolant. First, be sure to protect the generator from antifreeze. To do this, you can wrap it in plastic and put on a bag.
- Now drain all contents from the radiator.
- Give yourself access to the drain plug on the cylinder block. To do this, you will have to remove the three bolts securing the ignition module.
- Place the module aside. Underneath it you will find a plug.
- Unscrew the plug and drain the old coolant solution.
- Let the car sit for about 15 minutes. This time should be enough for all the coolant to leave the system. Just remember, the engine must be cold.
- At this stage, you can flush the system if desired and necessary.
- After draining and flushing the system, tighten all plugs.
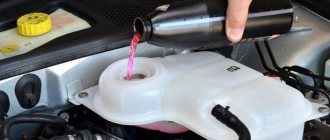
- Arm yourself with a canister and go to the expansion tank, which is located in the engine compartment. Remove the lid and begin to gradually pour in antifreeze or antifreeze.
- To avoid spilling the mixture, use a funnel. By inserting it into the fill hole, the coolant update procedure will be much easier.
- Be guided by the amount of coolant remaining in the canister. In some situations, an air lock may form in the system.
- To get rid of the plug, compress and release the upper hoses on the radiator.
- When filling is complete, you should have no more than 2 liters of liquid left in the canister.
Removing the airlock
Useful tips
Finally, we want to share a few very useful tips that will help you avoid mistakes that beginners often make:
- Coolant can only be changed when the engine is cold. If you do this on a hot engine, there is a huge risk of serious burns;
- When adding coolant, make sure that the required amount of mixture is in the system. If it is not enough, there is a high probability of engine overheating;
- Be sure to cover the generator with thick polyethylene or other material so that the solution does not get on it;
- If you mix antifreeze and antifreeze, nothing bad will happen. But try to avoid such situations, so as not to run into problems with the operation of the cooling system.
This is not to say that draining and replacing the coolant is a simple procedure. There are some nuances when updating the contents of the cooling system on a VAZ 2114. But with the right approach, even a car owner without repair experience can cope with this task.
Loading …
WHEN IS IT NECESSARY TO REPLACE ANTISELF?
- This issue should not be overlooked in any case. Because if the antifreeze is unsuitable, the engine will not cool properly.
- If the engine does not cool to the required degree, then there may be problems with the cooling system (partial failure) and spare parts will have to be replaced.
- In the worst case, the engine may boil - this does not bode well for you and your car.
- Thus, the engine must be well cooled, especially in winter. In winter, problems most often arise with the cooling system.
- In view of this fact, it is better to prepare in advance. That is, in the fall it is necessary to change the antifreeze.
- It is advisable to change antifreeze every autumn closer to winter. You should also replace parts of your car's engine cooling system that are damaged or close to failure.
Note! It is especially recommended to change antifreeze every year on older cars, since there is a greater likelihood of rust contaminating the radiator and other parts of the cooling system.
- Also, if rusty antifreeze is detected in the car’s cooling system, it is extremely necessary to flush the system. This will be mentioned below.
WHAT TO CHOOSE?
Many car owners often wonder about the choice of coolant - antifreeze or antifreeze: which is better? Let's try to figure out what's what without going into deep truths.
- In fact, all coolants are and are called antifreeze. And antifreeze is no exception to the rule.
- In fact, antifreeze is just the name of one of the types of antifreeze developed in our area, for our area and for our cars.
- In terms of its performance and characteristics, antifreeze is in many ways inferior to other antifreezes.
- The price of antifreeze is much lower than other coolants.
- Antifreeze is more common among domestically produced cars.
- There are very, very many antifreezes in the world. They differ in composition, base, color, and so on.
- Various antifreezes include various special additives that help better maintain the car's cooling system and at the same time increase the service life of the antifreeze itself.
- The cost of antifreeze is higher than antifreeze, and it is quite widespread.
Summarize. Antifreeze or other antifreeze?
- Antifreeze is undoubtedly better in quality.
- BUT antifreeze is much more practical for several reasons.
- Antifreeze was SPECIALLY designed for our climate and our cars.
- Antifreeze is available in almost every domestic car that passes you.
- And this can sometimes save (in case of a breakdown on the road).
- There is enough antifreeze for the car to function normally and the cooling system to work as expected.
It is more practical and cheaper (which is very important) to use antifreeze.
WE CHANGE THE ANTIFICE OURSELVES
How to replace antifreeze on a VAZ 2109 yourself? The answer to this question is discussed below and until the end of the article. Be careful.
Important! Before replacing antifreeze, make sure that all parts of your car's cooling system are in working order and do not require repair. If this is not the case, then you should first repair the damaged parts or replace them, and then (or simultaneously) change the coolant.
Tools and accessories
What will be needed to ensure that the replacement of antifreeze on a VAZ 2109 occurs without wasting extra time and effort?
Prepare the following in advance:
- Antifreeze or antifreeze - 8 liters
- Container for drainage (to fit under the car)
- 13mm socket, extension and ratchet
- Or a 13mm wrench (open-end or socket)
- Key for 8
- Key for 10
- Screwdriver
- Watering can
Have you prepared? You can start working.
Draining antifreeze
Now we begin to drain the antifreeze. Remember, car repairs are best done in an inspection pit or overpass.
It’s still good on a lift, but this phenomenon is rarely seen in a garage:
Advice! Do not forget - you should replace the antifreeze on a cold engine. Under no circumstances should you fill in cold new antifreeze if you have just driven the car into the garage and it has not yet cooled down sufficiently. This threatens a crack in the cylinder block.
- So, our VAZ 2109 is in the pit and ready to drain the antifreeze.
- Before you start draining it, take a 10mm key and be sure to unscrew the negative terminal of the battery so that when you drain the antifreeze, a short circuit does not occur, and you don’t have to repair it later with an electrician.
- Place a previously prepared antifreeze container under the car, which should be about 10 liters in volume.
- Remove the cap on the expansion tank of the cooling system.
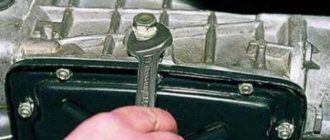
- Take a 13mm socket with the rest of the accessories or a 13mm wrench and unscrew the drain plug from the cylinder block.
Attention! Hold the plug so that the pressure of the coolant does not blow it away and you do not lose it.
- After all the antifreeze has drained from there, you can screw the plug back on.
- Next, you need to drain the antifreeze from the radiator of the cooling system.
- To do this, unscrew the plastic plug, and the liquid also flows into the antifreeze container located under the car.
- Screw the plug back - it can be screwed in and out simply with your own hands (no tools required).
The first stage of replacing the antifreeze in the VAZ 2109 has been completed - we have drained the antifreeze. Go ahead!
Flushing the cooling system
Washing is done in some cases. One of them is rusty drained antifreeze. This means that the system is contaminated, and clean new antifreeze will not remain so for long - it will quickly become unusable.
- Flushing is done using two means: a special flush for the cooling system or ordinary water (preferably distilled, but, in extreme cases, regular running water can also be used).
- The flushing fluid is poured into the cooling system through the neck of the vehicle's cooling system expansion tank.
- Then the engine starts and the car runs at low speeds for ten minutes.
- Next, you should turn off the engine and repeat the process of draining the coolant, which has already been described above.
- The system flushing procedure is repeated until the drained water is more or less clear in color or according to the instructions for special flushing of the cooling system.
How to drain and replace antifreeze in a VAZ 21099?
A pressing question for novice motorists is how to replace the coolant. Every driver can do this with his own hands. The coolant performs a very important function. By circulating through the cooling system, it prevents the engine from overheating, and in cold weather helps it quickly reach operating temperature.
Timely replacement of fluid is important for proper operation of the engine and cooling system. If the driver neglects this procedure, the car will be damaged. Firstly, the engine will constantly boil, which will lead to malfunction. Secondly, corrosion of metal parts will begin.
Some drivers use water instead of antifreeze. Such savings are useless and detrimental to the design of the machine. The cooling system mechanisms are subject to corrosion and quickly fail. In winter, the water in the radiator freezes. This leads to the fact that the car simply stops starting.
Malfunctions in the system
In a domestic car VAZ-2109, you can independently identify problems in the cooling system.
For example, system overheating occurs if:
- lack of coolant - check, add if necessary;
- the pump belt is torn or worn - replace it;
- the radiator is clogged with dirt - flush or replace;
- The fan may be broken.
There are also a number of other malfunctions:
- Coolant leak. Hoses may be damaged or parts may crack. If fluid is lost, the system is overfilled.
- Corrosion can occur if the water is contaminated or the antifreeze solution is not formulated correctly.
- Air locks (warm up the engine properly, then let the car sit, remove the hose and start the engine again - this will help expel the air).
How to change antifreeze and antifreeze on a VAZ 21099
Coolant replacement:
- We park the car on level ground.
- We move the heater tap in the cabin to the maximum level.
- Unscrew the plug on the expansion tank. This will help depressurize the system.
- Remove the crankcase protection.
- Place a container under the radiator. We will drain the coolant into it. Unscrew the cap on the radiator. Drain.
- On the front of the cylinder block we find the drain plug. On a car with a carburetor, unscrew it. We continue to drain. On a car with an injection engine, an ignition module is installed above the plug. You can get to it using a 13mm socket with an extension. If there is no head, then you will have to remove the module. First, we turn off the power to the car. Removes three nuts securing the ignition module; they need to be unscrewed. Remove the module from the bracket to which it is attached. After the module has been removed, unscrew the plug and continue to drain the antifreeze.
- We wait until the antifreeze drains completely. We screw the plugs back. If the ignition module was removed, put it in place. We return the battery terminals to their place.
- If the drained brake fluid is dirty or has a rusty tint, then the system is flushed. To do this, pour water or flushing liquid into the tank, open the heater tap in the cabin and start the car for 3 minutes. Then let the liquid cool and drain it. It is advisable to ensure that the water is clean when drained. Not all drivers flush the cooling system. This item is optional. But if the system is dirty, then soon the coolant will need to be replaced again.
- After flushing the system, fill in new brake fluid. If the car has an injection engine, simply fill the antifreeze through the tank to the mark. If the engine is carburetor, then you need to open the fitting and fill in the liquid until it flows out of it. We tighten the fitting.
- We drive the filled coolant through the cooling system. To do this, turn the tap on the stove and start the engine. Then we check the coolant level and top it up to full if necessary.
Changing the coolant is actually easy
It is important not to forget about safety measures. Hot liquid causes severe burns
If you do not disconnect the ground before removing the ignition module, you can cause a short circuit.
If antifreeze or antifreeze has changed color, it is better to start replacing it immediately. Otherwise, this may result in serious repairs.
And finally. Coolant performs a very important function. Therefore, there is no need to save on it. Red antifreeze is best for replacement. It is more expensive than antifreeze and even more so than water. But it will protect the mechanisms from corrosion and prevent engine overheating. In addition, due to its properties, red antifreeze helps to quickly heat the engine to operating temperature. This means that the interior will heat up faster in winter. Passengers and the driver will not have time to freeze.
Source
How many liters of antifreeze should I pour into a VAZ 2110?
Now it’s worth figuring out how many liters of antifreeze you need to fill in the VAZ 2110. And here the cooling system comes in second place after the fuel tank, while the manufacturer’s recommended number of liters is 7.8. The very first cars of this generation had several types of engines, and the first one had 8 valves and was equipped with a timing belt. A little later, manufacturers released a new unit with 16 valves, but still in both cases the figure for pouring antifreeze does not change. And therefore, 7.8 liters must be poured into these two types. This is all due to the fact that the block of these engines is the same, and the quantity can easily cool both the block and the engine itself.
7.8 liters
Instructions for replacing antifreeze
Purchase. It’s worth choosing a high-quality, suitable antifreeze (indications and characteristics should be looked at in the instructions for the car, checking the manufacturer’s label).
Preparation. You need to start the car and let it run for 10 minutes without load. After this, set the heater (stove) to the maximum value. After some time, turn off the engine.
Draining the system. Drain the used fluid from the entire cooling system. For convenience, it is better to park the car so that the front part is slightly lower than the rear. This will allow the antifreeze to flow more intensively. Then you should turn the cap on the expansion tank to relieve pressure in the system (in some car models you need to turn the cap on the radiator, sometimes you need to turn both of them). After the liquid does not pressurize the system, it will quickly cool down, which will prevent injury or burns. When you can touch the plug with your hand, you need to unscrew it completely.
Then you should also carefully open the radiator drain valve, having previously prepared containers in which you can later transport the used coolant to the disposal site.
Flushing. After all the antifreeze has been drained, it is necessary to flush the cooling system
This procedure is carried out only when switching to another brand of coolant or in the case when preventive maintenance is performed. Distilled water removes scale well and washes away corrosion deposits. If the system needs more thorough cleaning, then special flushes for cooling systems should be used. After deciding on the means by which this operation will be performed, all taps should be closed (it is advisable to carry out manipulations with a cold engine to avoid burns). Then pour the flushing agent into the expansion tank, tighten all the plugs and start the engine for 10–15 minutes. Then drain the rinse and repeat all steps 2-3 times.
Filling the system. After cleaning the system, it is advisable to pour only new antifreeze that was purchased earlier. Coolant should be poured into the expansion tank, preferably without stopping, so that air does not enter the system along with the antifreeze. But there are car models where the coolant is poured into the radiator neck. You should perform these steps very carefully and not confuse the expansion tank with the washer fluid reservoir, since they are located mostly next to each other and are very similar to each other. It is advisable to fill antifreeze to the maximum value, because the liquid will spread throughout the entire system over time.
Air release. When filling of the cooler is completed, you need to bleed the air from the system. This is done by unscrewing the screw located on the cylinder block. When the first drops of antifreeze appear (this will mean that all the air has escaped), the screw is tightened until it stops. After this procedure, you should start the car engine again and let the engine run for several minutes, slightly increasing and decreasing the speed. After this, you need to turn off the engine, wait a while and check the coolant level in the expansion tank. If necessary, add antifreeze to the normal level. Also, after replacing the antifreeze, it is worth checking the cooling system daily for a week, since it is during this period of time that hidden problems in the system that were previously invisible can be identified.
What if you don’t add antifreeze/antifreeze?
Most often, antifreeze is presented in stores with a volume of 5 liters, and to replace it you will need two such canisters. After draining the used liquid, only 5 liters can enter the tank, and this is, in principle, normal; the rest can be added when the antifreeze passes through the entire cooling system. When the fluid has been replaced, you need to start the car and warm it up to a certain temperature, then turn it off and look at the expansion tank, all the fluid should go there. And if this happens, then you can add the remaining liquid.
REPLACING THE COOLANT OF A VAZ 2114 WITH YOUR OWN HANDS
Before replacing the coolant, the engine must first be cooled; work should be carried out on a cold engine. It goes without saying that the liquid should be purchased in advance. How many liters of antifreeze in a VAZ 2114 should be prepared for replacement? Although according to technical specifications the coolant should be about 8 liters, it is better to immediately purchase a 10-liter canister - in case it spills past the radiator.
On the VAZ 2114, replacing the coolant is easy. Let's consider an example of carrying out all operations on a car with an 8-valve engine.
Coolant replacement
We carry out the work in the following order:
- We unscrew the main engine protection. It is attached to the bottom of the engine compartment using four fasteners. Accordingly, if the protection is not worth it, then there is no need to turn it away.
- We remove the protective cover, which is located under the engine in the front part of the body.
- Remove the expansion tank plug.
- In the cabin, fully open the heater tap. This must be done so that when draining the coolant does not remain in the heating system.
- Prepare a container for draining the coolant. It is better to take a wide dish, for example, a basin. In this case, the coolant will not spill past.
- We find the drain plug on the radiator; it is located at the bottom near the generator. Before draining the radiator, you should somehow protect the generator from liquid getting on it.
- Drain the contents of the radiator.
- In order to get to the drain plug in the cylinder block, remove the ignition module. It is secured with three bolts.
- We remove the unscrewed module to the side; under it there is a drain plug. Unscrew it and drain the old coolant.
- We wait 10–15 minutes until everything merges.
- We tighten all the plugs.
How to add antifreeze to the cooling system? We place a funnel in the expansion tank and carefully pour the contents out of the canister, trying not to spill it past. After filling, we install all the removed parts in place. Then we start the engine and begin to warm up.
It should be noted that there is a high probability of an air lock forming in the cooling system, so it may not immediately enter the system. The volume of VAZ 2114 coolant is approximately 8 liters. Be guided by the amount of liquid remaining in the canister. If a blockage occurs, you should remove one of the hoses that go to heating the throttle valve and try to compress and release the upper radiator pipes. Antifreeze must pass into the system, making room for new fluid. There should be about two liters left in a ten-liter canister after all procedures.
A FEW TIPS
- Replacing antifreeze on a VAZ 2114 is carried out on a cold engine. It is not recommended to work on a hot internal combustion engine - there is a risk of burns.
- Before draining the coolant, protect the generator from moisture.
- When pouring antifreeze, you need to ensure that the entire required volume of liquid enters the cooling system. If it is less than required, the possibility of engine overheating cannot be ruled out.
- When mixing antifreeze and antifreeze, nothing particularly terrible will happen, but still, if possible, do not do this in order to avoid unexpected troubles.
In general, that’s all you need to know about how to replace the coolant on a VAZ 2114. The procedure is not complicated, you just need to do everything carefully and take your time.
Sources
- nadomkrat.ru/ustroistvo-avtomobiley/ohlazhdeniye-i-otopleniye/samye-poleznye-sovety-po-zamene-oxlazhdayushhej-zhidkosti-na-vaz-2114
- autovaz-2114.ru/heating-and-cooling/menyaem-oxlazhdayushhuyu-zhidkost-na-modeli-vaz-2114/
- drive2.ru/l/484689740486934803/
fill
To fill with new antifreeze, you don’t have to do anything complicated. You only need a special watering can. Many containers in which antifreeze is sold are not particularly convenient for pouring directly from them. Use a funnel to avoid spilling coolant.
It is extremely important to know how much tosol is in the cooling system. Coolant for the VAZ 2109 requires 7.8 liters. Therefore, antifreeze should be purchased in 8-liter containers.
- Take a watering can and insert it into the neck of the expansion tank. This way you won't waste precious grams of antifreeze.
- Make sure all drain plugs are securely tightened. Otherwise, the coolant will simply pour onto the floor and he will have to buy new coolant.
- Begin gradually pouring in new antifreeze.
- Stop periodically for 1-2 minutes to allow the liquid to distribute through the system.
- When filling the system, pour the coolant into the middle of the expansion tank level.
- Then the most important thing. get rid of the air received from the cooling system.
- Air accumulates in the upper pipe. To remove it, you just need to squeeze the top tube a few times. Squeeze until you feel there is liquid inside.
- Remove air from the cooling system. To do this, unscrew the clamp that holds the return hose to the CO expansion tank (return) using a screwdriver or a size 8 wrench.
- Now close the throttle with your finger, which is put on the return channel, so that the air cannot go out.
- Then you need to blow up the expansion tank. Just imagine trying to inflate a tank like a balloon.
- In this way you create pressure and the refrigerant will begin to flow out of the expansion tank into the CO, and excess air will flow through the return.
- As soon as the antifreeze begins to flow out, the procedure can be stopped.
- Return the backflow to the seat, tighten the clamp.
- connect the negative terminal of the battery, close the cap of the expansion tank and check the quality of the work done.
It is not recommended to start active operation of the vehicle without checking.