How to set the time on the Lada Granta on-board computer?
VAZ 2190 Lada Granta how to set the clock on the on-board computer
- You need to make sure that the on-board computer
displays the total mileage of the car, and not the daily mileage. ... - Next, press and hold the daily mileage reset button until the clock numbers start flashing;
Interesting materials:
What food should you take to the sauna for your birthday? What to take with you from food to the bathhouse? What food should you take with you outdoors in winter? What kind of service is contact in Beeline? What kind of service is contact? What is advisable to eat after chemotherapy? What does Botox 1 unit mean? What does it mean if a dog doesn't want to eat? What does it mean that there are Unrecorded tickets on the card? Why do you eat raw potatoes?
Step-by-step instruction
1. First, on the on-board computer display, you need to select to display the clock.
This can be done using the on-board computer control button.
2. Hold the reset button for a few seconds until the clock blinks on the display.
3. Next, go to the on-board computer control button.
Click the button down and thereby set the clock.
If we click the up button, we set the minutes.
We set the exact time.
4. After setting the time, click on the reset button, and the time you set will be saved.
Video lesson
Source
How to set the clock in Lada Kalina
Lada Kalina Cross. INSTRUMENT CLUSTER - PART 2
Lada Kalina Cross. Setting the clock
Switching to the clock setting mode is carried out by pressing and holding the button on the front panel of the instrument cluster for more than 2 seconds when the total mileage is displayed. Time correction is made using the ▲ (minutes correction) and ▼ (hours correction) buttons on the right steering column switch. Exiting the correction mode is by pressing the button on the front panel of the instrument cluster or by not pressing the buttons on the steering column switch for more than 5 seconds. ATTENTION!
Rotation of the button is not allowed!
19 — liquid crystal indicator (see section “Liquid crystal indicator”).
20 - open door alarm. Lights up in red if the driver's door or (in the optional version) any of the passenger doors of the car is fully open. When opening the door lock to the first fixed position, the open door alarm in the instrument cluster may not operate, which is not a malfunction.
21 — fuel reserve indicator. Lights up yellow when refueling is necessary to avoid interruptions in engine operation.
The fuel reserve indicator lights up when two or fewer segments of the fuel level indicator on the liquid crystal display are illuminated. The turning on of the warning light is accompanied by an intermittent sound signal from the buzzer. Simultaneous flashing of the indicator and the “empty” contours of the fuel indicator segments indicates a malfunction of the fuel level sensor circuit.
22—indicator for emergency reduction of tire pressure (in a variant). Lights up yellow when tire pressure decreases.
23 - electric power steering indicator. Lights up yellow when the ignition is turned on and goes out after the engine starts.
In all other cases, the lighting of the indicator indicates the occurrence of a malfunction, the elimination of which must only be carried out by a LADA dealer.
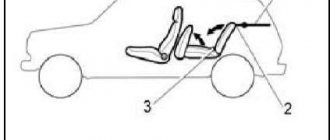
24 — warning device for unfastened seat belts (in a variant).
Lights up red when the ignition is turned on if the seat belts are not fastened.
When the car is moving at a speed of more than 10 km/h, the warning light turns on
immediately duplicated by an intermittent buzzer sound; At speeds up to 10 km/h, the sound signal will sound after 60 seconds of non-stop driving.
When driving a car, be sure to wear a seat belt and do not carry passengers who are not wearing a seat belt!
25 — transmission fault indicator (in a variant version).
26 — airbag warning light (in a variant). Lights up yellow every time the ignition is turned on and goes out when the airbag system self-test mode ends (after 3 seconds). If the indicator does not light up in self-test mode when the ignition is turned on, this indicates a system malfunction; in this case, you must contact your LADA dealer as soon as possible. ATTENTION!
In all other cases, the lighting of the indicator indicates the occurrence of a malfunction, the elimination of which must only be carried out by a LADA dealer.
27 - alarm indicator. Lights up with a red flashing light when you press the hazard warning switch button.
The instrument cluster has a self-test mode. For
To activate the self-test mode, you must press the trip counter switch button, then turn on the ignition without releasing the button (without starting the engine).
After turning on the ignition, the arrows of the indicating instruments (tachometer and speedometer) will begin to move from zero to the maximum value (4 times), while all segments will light up on the liquid crystal indicator (LCD) and all indicators controlled by the microcontroller of the instrument cluster will turn on. For variant execution
instrument cluster with on-board computer without outside temperature display:
-OverDrive warning light, ABS, transmission fault, tire fault, doors not closed.
For the optional instrument cluster with on-board computer and outside temperature display:
-high beam headlights, low beam headlights, ESC, ESC OFF.
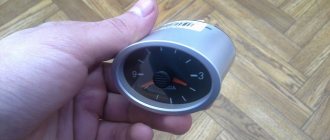
Technical features of the insert for Lada Kalina 8V
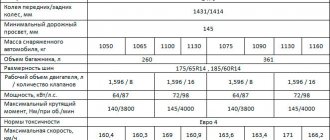
Two types of tuning inserts are available, depending on the location of the pipes. In addition, each design is aimed at a specific power unit:
- Insert 4-1 is installed on supercharged engines in the 5,000 to 10,000 rpm range and is designed to fit 16-valve engines only.
- The 4-2-1 insert works in a wider range and is considered “low-end”. You can increase engine power by about 3-5%. This model is most often installed on the VAZ 1118.
Since it is not possible to install a pre-flame damper on this VAZ vehicle, you will have to be careful when choosing an insert. The installation process of the part will not take much time if you follow all the recommendations.
How to set the clock on Lada Kalina 2
The Lada Kalina 2 watch is located in the instrument cluster, as is the case with many other cars. To set the clock, many people try to intuitively turn the button on the front panel of the instrument cluster, which is not correct. Today we will tell you how to correctly set the clock on the first and second generation Lada Kalina.
Setting the clock on Lada Kalina.
How to set the time on Kalina 2
The process is similar, except for switching to the clock setting mode; in this case, to do this, press and hold the button on the front panel of the instrument cluster for more than 2 seconds when the total mileage is displayed.
Further adjustment of the clock is also done using the right steering column switch:
— Minutes are corrected with the up button— Hours are corrected with the down button
The clock setting mode is exited by pressing the button on the front panel of the instrument cluster or by not pressing the buttons on the steering column switch for more than 5 seconds.
Let us recall that in the previous article we looked at how to replace the light bulbs in the headlight of a Lada Kalina 2 with your own hands.
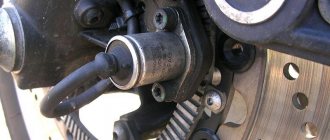
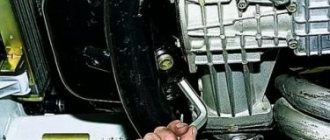
Backstage adjustment
Adjusting the KAlina-1 gear shift lever consists of finding and fixing its optimal position on the cardan drive, which is selected automatically when selecting the position of the lever in the car. Its longitudinal movement during adjustment can be only a few millimeters. When changing the location of the clutch clamp, it is important not to exceed the length of the drive pin of the universal joint. Do not use excessive force to secure the nut. This surface knurling ensures a secure fit between the two parts of the mechanism when they meet.
Video instructions for setting the clock on a Lada Kalina car
Recently, in one of the latest topics, a question was asked about setting the clock on the display. So I decided to make a detailed video instruction specifically for this matter in order to explain everything as clearly as possible and visualize it. Everything is done in literally three minutes, just like two and two.
I think that everything was clear in the video above, but if you still have any questions, write in the comments, we’ll figure it out together. I hope that I helped someone set the time on the on-board computer of your Kalina.
Similar articles
Please tell me, sometimes when I turn on the ignition, the clock lights up, when I start the engine, the clock disappears, and pressing the up-down button does not change anything. What do I need to do to ensure that the clock always shows when the engine is running?
Greetings. Let's set up the clock on Kalina.
How to set the clock on Kalina 1st and 2nd generation
| Kalina's watch is located in the instrument cluster, as is the case with many other cars. To set the clock, many people try to intuitively turn the button on the front panel of the instrument cluster, which is not correct. Do you know how to set the time on Kalina 1st and 2nd generation? |
The process is similar, except for switching to the clock setting mode; in this case, to do this, press and hold the button on the front panel of the instrument cluster for more than 2 seconds when the total mileage is displayed. Further adjustment of the clock is also done using the right steering column switch:
- Minutes can be adjusted using the up button.
- The clock is corrected using the down button
The clock setting mode is exited by pressing the button on the front panel of the instrument cluster or by not pressing the buttons on the steering column switch for more than 5 seconds.
- SledgeHammer logbook
Similar materials
How to set the time on the Lada Kalina
Hello everyone, today I will tell you and show you how to set the clock on a Lada Kalina car. You can also configure it on Priora in a similar way. So, we set the clock on the panel; this is done by pressing the buttons on the right of the switch.
Then you need to press the Reset button and hold until the clock dial starts blinking.
Next, use the up and down buttons, as shown in the photo, to set the time we need.
Well, that's all, now we know how to set the clock on Kalina.
Setting the Lada Kalina watch
Greetings. You can set the clock on your Kalina.
Step-by-step instruction
1. To display the clock on the on-board computer display, you must first select this option.
On the on-board computer, you can use the control button for this.
2. Hold the reset button for a few seconds until the clock starts flashing. At the same time, the driver must carefully monitor the behavior of his car so as not to miss symptoms indicating a malfunction.
3. To control the computer, select the on-board control button.
Use the down button to set the clock.
If you press the up button, you can set the minutes.
Set the correct time.
4. After setting the time, press the reset button and the set time will be saved.
Video lesson
The types and brands of ECU (electronic control unit) determine the capabilities of auto diagnostics. The type of ECU depends on the year of manufacture of the vehicle and the engine (ecology and engine number).
The following are most often installed on Kalina 1, 2 cars: ira
- Engine 21116 - ECU M74
- Engine 21126 - Bosch Me17.9.7 or M75 ECU (with or without CAN bus).
- Engine 21127 - M74 - 638 ECU (similar to M74 with modified printed circuit board). January and Itelma ECUs were installed on cars until 2008.
The ECU is located in the Lada Kalina under the central panel, and to see the number and type of the ECU you need to remove it (lift the panel).
Engine control units have their own firmware, but for OBD2 diagnostics, only the presence of a CAN bus is important. The diagnostic adapter must support CAN if the system has CAN.
IMPORTANT: If ECUs without CAN bus support are installed, the KKL VAG adapter must be used.
Every 10,000 km and at every maintenance it is necessary to diagnose the ECU. Example: Bosch unit with serial firmware b173CR03 without CAN.
FAQ Frequently asked questions
The USB connector is located in the glove compartment. In some cars, the USB connector is not routed (when assembling the instrument panel) into the glove box and is left hanging inside the instrument panel. Even in the latest MMCs, the USB connector is located on the back of the case. And it is brought into the glove box using an extension cord 2192-7905030.
How to find out the software (firmware) version?
1. The version of the native software is indicated on the MMC case.
2. In the standard shell, in the “INFO” menu, you can see the version of the installed firmware.
2+. For those who are too lazy to read the instructions: Turn on MMS (I hope you don’t need to explain how to do this) and go to the main menu.
Next, press the “Right” arrow (6) and see the continuation of the main menu. In continuation of the main menu, press the “INFO” button (1).
What is "Firmware"?
Firmware is a build of Windows CE with built-in add-ons and a standard shell. The firmware consists of 4 files: Chain.bin - header file of the firmware, there are no files there, only offsets needed by the bootloader. chain.lst - a list of firmware files, needed for the bootloader so that it knows what to flash. NK.bin - archive of main files. TINYNK.bin is a very important file, it contains firewood for the flash memory of the SD card, the registry and the main files needed to start the box before Windows boots. Firmware for MMC Grants and Kalinas/Priors are not compatible!