Car owners who love innovation and change always make attempts to improve their cars, and Kalina is no exception. They install spoilers, increase engine power, and modify the interior. Car headlights can greatly change the appearance of a vehicle. But before you start tuning the lighting system, you need to find out the characteristics of the standard Kalina lights. This will allow you to understand what replacement options exist and whether it is worth changing anything at all.
Characteristics of standard Kalina headlights of different configurations and models
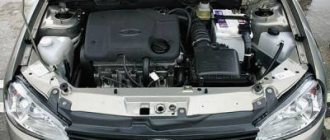
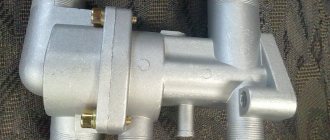
Car headlights are devices that are designed to illuminate the road at night or when visibility is insufficient due to bad weather conditions. Headlamp structure (see photo):
- Frame.
- The wire.
- Glass.
- Lamps.
- Reflector.
- Decorative insert.
- Headlight plugs.
The block headlight on Kalina includes three sections:
- low beam;
- high beam and side lights;
- direction indicators.
When you turn on the low beam, only the low beam lamps light up, when you turn on the high beam, the low and high beam lamps come on. Front direction indicator sections
| Number in photo | Name | EEC | Power, W |
| 1 | Low beam light | H7 | 55 |
| 2 | High beam light | H1 | 55 |
| 3 | Front turn signal lamp | PY21W | 21 |
| 4 | Side light bulb | W5W | 5 |
The difference between the headlights in different versions of Kalina:
- sedan, hatchback and cross – rectangular glass with a bend in the upper part;
- station wagon – elongated headlights with increased area;
- sport - has an increased area to illuminate a larger section of the road.
In the “Lux” configuration, the headlights received a modified design and increased brightness.
The manufacturer installed two and Bosch headlights on Kalina. Information about the manufacturer can be found by inspecting the product. If the AL index is marked on the glass, it means the manufacturer is Bosch.
It produces low beam lamps from polycarbonate without a cap. JSC "Avtosvet" also produces products from polycarbonate, but its distinctive feature is the presence of a low-beam lamp cap. The elements have proven themselves to work well, but like many other devices, they can also fail.
LED flashlight that duplicates the “dimensions” and brake light
There are several useful tuning options suitable for the Kalina-2 car in any configuration. A common modification method is to install an additional brake light located behind the rear door glass. An LED flashlight rated for 12 Volts can be purchased ready-made.
The easiest way to connect the LED assembly is to the wire of the standard brake lights. The negative contact coming from the LEDs is connected to the neutral wire. As a result, the brake light will perform its function, that is, it will light up when you press the brake. In this case, the electrical circuit should not contain additional parts, and what is shown further in the video corresponds to a more complex option. Let it be required that the additional brake light burns along with the side lights. It is then that the circuit will contain diodes.
It must be remembered that introducing additional load into any electrical circuit can lead to undesirable consequences.
The wiring cross-section is selected with a reserve, and the fuses in the car are designed for a slightly higher current strength than the standard equipment consumes. However, the possibility of tuning was not initially included in the design of the car, and we must not forget about it. Many companies produce equipment designed for installation in VAZ cars. But you need to use such tempting offers wisely.
Possible problems and methods for solving them
The fact that the Lada Kalina headlights stop working is due to many factors that the driver cannot influence. These are exposure to moisture, metal fatigue, and a combination of minor deformations that have appeared over years of operation. The most common problem that owners of this car face is the breakdown of the high or low beam.
A similar nuisance can occur while driving. Driving such a car in the dark is unsafe and can endanger the health of the driver, passengers and pedestrians. It is advisable to repair the breakdown immediately, in the field. Fortunately, in most cases the problem is resolved within 10 minutes.
Lada Granta: repair, operation, tuning and maintenance
The front and rear bumpers, which fit so beautifully and harmoniously into the appearance of the car, perform a specific function: to protect the vehicle from damage in the event of an impact or during unsuccessful parking.
Therefore, all over the world, the presence of a bumper on cars is strictly stipulated, and its replacement due to damage is mandatory. However, many car owners use the opportunity to replace this part with another goal - to carry out tuning, giving the car an individual, more original look.
And the owners of the Lada Grant are by no means an exception to the general number.
Since the front bumper installed on the Grant must provide vehicle protection, but at the same time be lightweight, it is made of unstructured ABS plastic. The material was not chosen by chance, as it is characterized by increased resistance to moderate impacts. The production of bumpers for Granta is carried out using a thermo-vacuum method, which guarantees:
- necessary wear resistance;
- elasticity;
- adhesion when coating with primer, varnish, paint;
- frost resistance;
- no toxicity;
- resistance to acids, fuels and lubricants and alkalis.
The factory-made front bumper, with which tuning is carried out, can withstand temperatures dropping below 40 degrees, constant dampness and loses its properties during hot periods.
Initially, the creators of the Lada Granta decided not to give the car an aggressive, flashy look, making its bumper rather modest.
But the Granta has been produced on our market for quite a long time, thanks to which you can find many unique parts in the market offers to tune the car and with their help completely transform it.
The most common and at the same time expensive model for Grant is “ I am a Robot ”, after installation, which vehicle is unrecognizable.
It becomes like an expensive model from a well-known brand. As a rule, to avoid disharmony, rear and front bumpers are purchased for installation at the same time. The product occupies the entire front part of the Lada car, is equipped with meshes for air flow to the radiator grille and a plane where Grant numbers are attached.
Those who want to see how their Lada becomes sporty prefer to tune the car using the “ Sniper ” bumper.
The name of the product fully conveys the sensations that arise after installation: power, mobility, sharpness. In addition, the impression is enhanced by the trapezoidal recesses for the air intake, without which the front bumper is impossible.
No less beautiful, but more economical tuning using the STM bumper. In addition to aesthetics, it offers drivers the opportunity to solve their problems with systematic cooling of the brake system. This happens due to the fact that the product is equipped with a relief protrusion, which captures a large volume of air while the car is moving.
Front tuning with the help of STM protects the Grant from chips, small stones, and dirt getting into the radiator grille. A beautiful additional touch for tuning lovers is the original connectors for the air collector and fog lights on the Grant, with which the Lada will become unique.
The low beam lamp on Kalina burned out
The first step is to check the integrity of the low beam lamp. The design of the headlights on Kalina requires the presence of high and low beam lamps, the performance of which does not depend on each other. It is likely that if the low beam has disappeared and the high beam is present, the problem is a burnt out light bulb.
To replace the lamp you need:
- remove the protective cover from the headlight housing by pulling one of its petals;
- disconnect the wires from the lamp;
- disengage the spring clip and move it away from the light bulb;
- remove the low beam lamp from the Lada Kalina headlight housing.
Installing a new headlight is carried out in the reverse order. If the high beams do not work, the procedure is similar:
- disconnect the wire block from the lamp;
- remove the latch by squeezing its ends;
- remove the lamp and install a new one.
Lada Kalina lamps are halogen and should not be handled with bare hands. Failure to comply with this recommendation may result in darkening of the light and rapid failure of the product. You need to use gloves (they often come with the lamps). If you don't have gloves at hand, you can use a napkin or dry cloth.
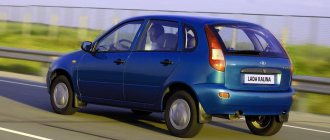
Lada Kalina II: 4 pluses, 3 minuses and 3 “depending on your luck”
The second generation of Kalina differs from the first (2004–2013) by a modernized body and suspension. The exterior, interior and equipment were also refreshed. In particular, a multimedia system with a touch screen appeared. The 1.4 engine disappeared, an updated 1.6 engine and two types of automatic transmission were added.
They produced a five-door hatchback and a station wagon, which has a Cross version (plus 23 mm of clearance to the base 185 mm).
Advantages
- Economical and simple motors.
- Good equipment for an inexpensive car.
- Large selection of modifications.
- Excellent ground clearance.
- The body is prone to corrosion.
- Lots of extraneous noise.
- The resource of many components is low.
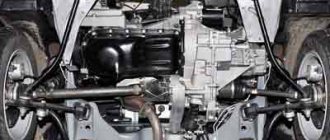
Motors
The “second” Kalinas used two types of 1.6 engines: eight-valve (87 hp) and with sixteen valves (98, 106, 114, 136 hp). The two most powerful ones went to the charged versions Sport and NFR. A common advantage of the motors is their high maintainability.
The basic 87-horsepower VAZ-11186 engine with a lightweight connecting rod and piston group is simple and reliable. Usually it only requires an oil change and careful monitoring of the condition of the timing belt, which often does not withstand the recommended 75 thousand km (and all engines are “plug-in”, that is, when the belt breaks, the valves “stick” into the pistons). The 16-valve VAZ-21127 is equipped with hydraulic compensators and is generally more complex, but there are few complaints about it. With a declared service life of 200 thousand km, engines can withstand, as a rule, significantly more.
Troubling and difficult starting in cold weather are often associated with dirty spark plugs or injectors. The ignition coils and starter may also be capricious.
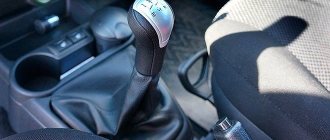
Gearboxes
The noisy five-speed manual VAZ-2181 runs its 150 thousand, despite leaks and rapid wear of the synchronizers. Its repairs are inexpensive and established at every corner.
Since 2015, Kalinas have been equipped with mechanical-based robots (AMT). It quickly became clear that clutches deteriorate en masse after 10–30 thousand kilometers. Modernization only partially solved the problem - the box remained twitchy and brittle.
Nissan's Jatco four-speed hydraulic automatic transmission is ancient and brooding, but has undergone several modernizations, is unpretentious and reliable. The resource costs 250 thousand.
Operational problems
- The suspension is energy-intensive, all elements serve the expected period. By 40–50 thousand, stabilizer struts, ball and rear wheel bearings are sold out. The steering mechanism (tips and steering shaft propeller shaft) may also show wear. CV joint boots need constant monitoring.
- The most capricious areas of Kalina-2 are electrical and electronics. The plant carried out a recall campaign on the central electronics unit, which is responsible for almost everything. We also reflashed the standard multimedia systems - they were much faster, however, they did not become much faster. The generator resource is extremely unstable. With luck, replacement may be required every 2–3 years. For many problematic items (for example, ignition coils, sound signals and window regulators), the plant changed suppliers.
- Thermostat failures are frequent and regular. It is important to notice in time that this unit has failed: overheating of the motor can lead to unscheduled overhauls.
Euro NCAP: not tested
The most popular aftermarket offer: Kalina 1.6 (87 hp) manual transmission
Optimal choice: Kalina 1.6 (87 hp) manual transmission or 1.6 (98 hp) automatic transmission
For the same money: Renault Sandero, Datsun mi-DO, Skoda Fabia, Opel Corsa, Lada Granta
Fuse blown
To fix the problem, you need to replace the part. It is necessary to open the block in which all Kalina's electrical fuses are concentrated and find the blown one. It is worth using a location diagram if a person does not know where the right one is located. Finding and changing the fuse is a matter of two minutes.
Are fuses blowing at an unenviable rate? It makes sense to test the car's wiring yourself or seek help from a professional electrician. If the fog light has disappeared, the solution to the problem is similar.
Fuse block diagram for Lada Kalina
Installation instructions
Here we consider a step-by-step algorithm of actions that will be required for execution so that the entire procedure is completed successfully.
1. First we remove the LADA Kalina bumper. To do this, unscrew the entire list of fastening components.
The screws are located on:
- lower bumper panel along the perimeter;
- in the wheel arches.
Now we remove the sidewalls of the element from the arched openings and completely remove the bumper from the car.
2. Next, remove the plugs by bending their latches. Here we use a flat screwdriver.
3. Unscrew the screws securing the fog lights. Each of the products is secured by three such fastening components.
4. We move inside the Lada Kalina salon. In the area of the pedal assembly we find a wiring harness. At this point we push out the sealing element and use a metal wire to pull out the wiring relating to the power supply to the fog lights. These cables are located next to the main trunk harness.
5. We connect the PTF wiring with the main wires.
6. Now we position and fix the power cables for the fog optics so that it is as convenient as possible to remove the connectors from the device terminals.
7. We attach the negative terminals to the screws of the LADA Kalina body.
8. The power consumed by anti-fog optics reaches 110 W, so we connect these devices using a relay with a button.
9. The button itself can be installed directly on the panel in the cabin, for example, next to the cigarette lighter.
10. To provide the lighting components with supply voltage, you will need to connect the pink wire to the relay. It is located in the safety block.
11. To protect the circuit of the headlights we are considering, you will need to use a fuse link with a rating of 15 A.
12. The power contact group of the relay with terminals “30” and “87” is connected to the cables leading to the fog lights.
13. Upon completion of all switching work, we check the correct installation and connect the battery power.
14. We press the button installed inside the cabin. If all connections are made correctly, then the fog lights illuminate the space, delighting the owner.
15. We install the bumper using the reverse algorithm of manipulations.
Do-it-yourself headlight installation is completely completed.
Other causes of breakdowns
The reasons for the loss of light may be a broken wire, loose contact of connectors, breakdown of controls, etc. If the problem cannot be visually detected, it is recommended to test the wiring to identify network breaks. Calling did not bring results - contact an auto electrician. Neglecting the problem can aggravate the situation and lead to breakdown of other electrical elements in the network, then repairs will cost much more.
Kalina's headlight glass may fog up, which leads to a decrease in light brightness. If frequent fogging is observed, there is a high probability of depressurization of the headlight housing. It is recommended to remove it and thoroughly coat the joints with sealant.
Reasons and methods for replacing light elements on Kalina
You may need to replace the headlight on a car of this model for a number of reasons. Impacts to the body from other drivers or animals, careless driving on uneven roads, rough repairs of parts under the hood can damage the integrity of the fasteners. Light elements become loose and can fall out at the most unsafe moment on the road. Headlights that do not fit well in the grooves must be replaced.
Replacement is a simple process if you approach it responsibly and without nerves. For an experienced master, this operation takes about 3 hours. But even if you have never encountered such a situation before, these instructions will help you replace the headlight without any problems.
The entire process of removing the Kalina headlight can be divided into 5 main stages:
- unscrewing the bolts from the crankcase protection;
- removing the license plate (will allow you to get to the lower radiator grille);
- removing the lower and upper radiator grilles;
- unscrewing the front bumper (you will have to remove a large number of bolts and screws);
- removing the bumper amplifier (it interferes with dismantling and putting back the headlight).
When the screws holding the headlight on top and bottom are unscrewed, you should remove its housing, first carefully clamping all the wires. During repairs, it is recommended to inspect the inside of the bumper and the metal underneath for signs of corrosion. If such formations exist, you need to clean them and coat them with a rust converter.
After carrying out these operations, reassembly follows. During the process, you need to monitor the position of the rear, front, left and right illuminator - the headlight should fit into the connector without effort.
Rules for adjusting light
After installing the headlight, you need to adjust the luminous flux. You can do this yourself or by contacting a specialist. When making adjustments yourself, you should direct the light from the headlight to the wall with the markings. There should be 5 meters between the car and the wall.
We measure the distance from the ground to the car headlight (H), draw a vertical line on the wall parallel to the center of the car, then draw a horizontal line equal to the height H+10 cm. Set the Kalina headlight adjustment switch to position 0 and turn on the lamps. Using the adjustment screws, we adjust the luminous flux as shown in the figure.
Replacing a headlight on a Kalina with a little skill and patience is a simple process, although it takes several hours. Basic recommendations: put screws and bolts in one place to prevent their loss, check the functionality of the lamps before assembly, do not be nervous.
How to install fog lights on a Kalina car?
Installation is carried out without the need to dismantle the bumper. In order to perform installation, you only need to unscrew and remove the front parts of the fender liners. The bumper plug can be removed using a flathead screwdriver. The manufacturer often includes a special frame mount in the kit. It is installed instead of a plug in the bumper. The optics themselves are installed and secured last.
But there is an installation method where it is necessary to dismantle the bumper. To do this, first unscrew the screws and the mounting bolt, and then remove the sides of the bumper from under the wheel arches. Next, the plugs are removed and fog lights are installed. "Kalina" continues to stand still. From the inside, the PTF is secured to the bumper with three self-tapping screws. Outside, until it clicks, a decorative frame is installed in place of the plug.
Tuning options
You can increase the attractiveness of your car for yourself and others by tuning the lighting system. Main options:
- tinting;
- installation of bilens;
- installation of LEDs in dimensions;
- creating angel eyes.
Many car enthusiasts choose tuning of headlights on Kalina, such as tinting - applying a special film over the entire surface of the glass of the device to give the car an original design. Another popular option is installing xenon. Almost all workshops offer this service, but only experienced craftsmen can carry out the installation efficiently.
Bi-xenon installation
With their own hands, car enthusiasts can install bilens into the lighting device. The first step will be acquiring the necessary elements. Attention should be paid only to those products that can easily fit into the cavity of the Kalina headlight. For example, if you buy a G-5 kit, you will have to cut the lenses.
Work begins with dismantling and disassembling the headlight. Then, using a file, they cut the seat in the shape of a cone, due to which the lens will fit into the body by about a centimeter. It is necessary to remove the cap so that it does not block the flow of light, and then mount the lens in the prepared place. The element is secured using factory fasteners.
After installing the lenses, the car owner needs to stop by the stand to adjust the luminous flux and position of the lamps in accordance with the current GOST.
Tuning “REVENGE” LSD VAZ 2190 Granta (to replace headlights from Kalina-2) reviews
Average customer rating: (2) 5.00 out of 5 stars
Please note that delivery is at the customer's expense and is not included in the initial cost of the order. Please wait until the company manager confirms your order to receive the total order amount. The period for generating and sending an order is 3-10 working days after receipt of payment in our accounts and depends on a number of factors:
– Orders that do not include a painting service , subject to product availability, are completed within 3-5 business days (estimated time frame). – Orders that include a painting service , subject to product availability, are completed within 7-12 business days (estimated time frame). – Individual orders are completed within 7-14 working days (approximate terms).
Pickup from pick-up points in Tolyatti
In order to place an order for the product you are interested in, select the delivery method “Pickup from the store”. Then fill in your contact information and wait for your order to be confirmed.
Delivery point address:
RF, Samara region, Tolyatti, GSK "Plamya", st. Officer 14