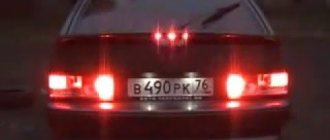
On all cars of the Tenth Family, the power lines for the lights contain many elements. There are lamp health relays, switches and fuses. Therefore, if the brake lights on a VAZ-2112 do not light up, you need to check the entire chain.
But the reason may look simple: sometimes the lamps do not turn on because the socket does not contact ground. Circuits are easy to analyze, but finding the cause of a breakdown is difficult. Let's look into the details.
If the lamps do not light, it is simply replaced.
Standard version of the brake light operating diagram
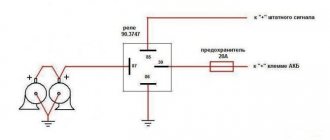
Power is supplied to fuse F17 from the battery, then the current goes to limit switch contact 11, and then, if the limit switch is closed, a circuit is formed with the filament of lamps 7. But note: part of the circuit is relay K1, more precisely, its contacts 5 and 4.
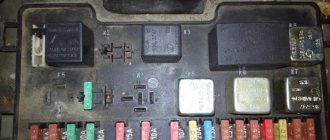
If the brake lights do not light up, on the VAZ-2112, as on all Tens, check one fuse. It is called F17 and is located in the mounting block to the left of the driver.
It is important to know: voltage is always present at one of the fuse terminals. Check it out!
What else can you do?
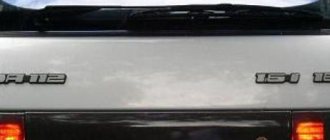
Another option for modifying the rear of the car is to install additional rear fog lights on the VAZ-2110. But such lighting elements will have to be purchased.
And then the PTFs are installed on the bumper and connected to the vehicle’s on-board network. Attaching additional lights to a standard bumper will not be easy, since you will have to cut holes for them. But you can also buy a tuning bumper, which has niches for PTF.
There are two ways to power the fog lights. The first one involves connecting them to the side lights. In this case, the fog lights will light up when the headlights are turned on.
In the second method, the PTF is also connected to the dimensions, but a power key is additionally embedded in the circuit, which is then installed on the dashboard.
Didn't find the information you are looking for? on our forum.
A few words about the “serviceability relay”
The lamp health relay is called K1, and it is the largest in the mounting block. If you remove this relay, then when you press the pedal you can dial the voltage at terminal 5 (but not 4). Look at the diagram again, and it will become clear what we are talking about.
The largest relay in the block. All relay contacts are numbered. Check the voltage at the block terminals:
- – “mass” potential;
- – voltage “+12”, but only after turning on the ignition;
- – “+12” by pressing the pedal;
- – the terminal rings like a ground tap.
If the potential “0” is not generated at terminal “4,” it means that the lamp filaments are burnt out or there is a break in the wiring. Now consider something else: the ground potential has been detected, but the lamps do not light. This is where suspicions of a short circuit arise.
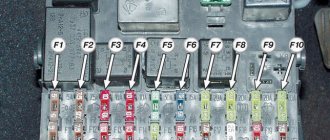
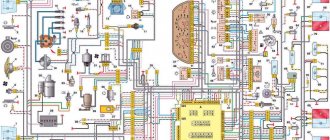
Electric sema VAZ 21102
| 1 — block headlight | 35 — instrument lighting switch |
| 2 - front brake pad wear sensors | 36 - ignition switch |
| 3 - reverse light switch | 37 - mounting block |
| 4 — electric motor of the engine cooling system fan | 38 - recirculation valve switch |
| 5 - sound signal | 39 — heater controller |
| 6 — gear motor for locking the right front door lock | 40 - hazard warning switch |
| 7 - power window relay | 41 — lamp illuminating the heater control levers |
| 8 - 8 A fuse | 42 — glove box lighting lamp |
| 9 - starter | 43 - glove compartment light switch |
| 10 - accumulator battery | 44 - cigarette lighter |
| 11 - generator | 45 — display unit of the on-board control system |
| 12 - windshield washer motor | 46 - ashtray lighting lamp |
| 13 — washer fluid level sensor | 47 — brake light switch |
| 14 — gear motor for locking the left front door lock | 48 — gear motor for locking the left rear door lock |
| 15 - left front door power window switch | 49 - left rear door power window switch |
| 16 — coolant level sensor | 50 — electric window motor of the left rear door |
| 17 - windshield wiper motor | 51 — socket for a portable lamp |
| 18 - recirculation valve | 52 - watch |
| 19 — micromotor gearbox for heater damper drive | 53 — electric window motor gearbox of the right rear door |
| 20 — electric heater motor | 54 — right rear door power window switch |
| 21 — trunk lock switch | 55 — gear motor for locking the right rear door lock |
| 22 - right front door power window switch | 56 - side turn signal |
| 23 — electric window motor reducer of the right front door | 57 - parking brake warning lamp switch |
| 24 — control unit for the door lock system | 58 — driver's seat belt sensor |
| 25 — additional resistor for the heater motor | 59 - directional lamp |
| 26 — brake fluid level sensor | 60 - interior lamp |
| 27 — electric window motor reducer of the left front door | 61 — cabin air temperature sensor |
| 28 - outdoor lighting switch | 62 — switch in the front door pillar |
| 29 — instrument cluster | 63 — switch in the rear door pillar |
| 30 - rear fog light switch | 64 — external rear light |
| 31 — fog light indicator lamp | 65 - internal rear light |
| 32 — indicator lamp for heated rear window | 66 — license plate lights |
| 33 — rear window heating switch | 67 - trunk light |
| 34 - Understeering's shifter |
How to and how not to check potential
Let’s agree right away that we only work with a voltmeter. Voltage “+12” is caused by connecting one probe to ground. The presence of potential “zero” is checked differently: any of the probes is connected to a terminal with positive voltage, and then the second probe is connected to the wire being tested.
Consider the error: one probe is connected to ground, the second to the terminal being tested, and vol. Here they conclude that there is a “mass” potential, but this is wrong! If the contact with ground is broken, the device will also show “0”. That is, the number “0” does not contain information.
LED indicators
Each of the indicators has its own meaning and a symbolic, intuitive picture.
When the indicator lights up, there is a malfunction in the following vehicle functions:
- Oil level.
- Washer fluid.
- Coolant.
- Doors.
- Headlights.
- Seat belts.
Data-lazy-type=”image” data-src=”https://vazremont.com/wp-content/uploads/2017/08/foto-3-3.jpg” alt=”LED indication bsk” width=” 533″ height=”330″ class=”lazy lazy-hidden aligncenter size-full wp-image-3746″ srcset=”” data-srcset=”https://vazremont.com/wp-content/uploads/2017/08 /foto-3-3..jpg 300w" sizes="(max-width: 533px) 100vw, 533px">
Wiring test on non-working brake lights
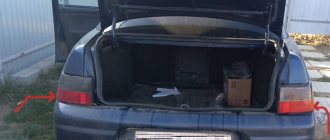
Let's look at the basic diagram: the brake lights and the reversing lamps have a common ground pin. If contact with this pin is broken, the reverse lamps will not turn on. Well, brake lights too.
On the left side there is a connector through which the wiring goes to the fifth door. The connector has black and red wires. Check the voltages on them. Most often the ground on the black wire does not ring. But maybe the connector itself needs to be cleaned.
Usually, if the ground breaks, another pin is used - the one that is connected to the glass heating coil. If the “plus” does not come to the red wire, we check the “frog”. It's simple here:
- Disconnect the connector with two wires from the limit switch;
- Using 17mm wrenches, loosen the two nuts: holding the lower nut, rotate the upper one;
- The end switch is removed as an assembly and checked with an ohmmeter.
By the way, one of the connector terminals receives a voltage of “12 Volts”. Check it!
If all the steps do not lead to results, there is only one thing left: contact a qualified electrician. We wish you success.
Removing headlights
Removing the rear headlights is not always required only for upgrading the VAZ-2110. This operation may also be required if the lighting elements are damaged or the lenses burn out.
Removing headlights
To dismantle the optics, you only need two tools - a screwdriver and 8-mm wrenches (you can use a tool with a wrench). Removal is done like this:
- First, we dismantle the part of the canopy mounted on the wing. To do this, we provide access to the fastening nuts;
- Unscrew the fasteners;
- Carefully push out the equipment;
- After it comes out of the seat, disconnect the block with the wires;
- Let's move on to the second part of the lantern;
- Disconnect the block;
- Unscrew the fastening nuts;
- We remove the lighting element;
And then repair or replacement of the rear lights of the VAZ-2110 is carried out.
Now about modernization. It can be of two types - install lighting elements in which the design of the VAZ-2110 rear lights differs from the standard ones, or slightly alter the “native” headlights.
Common problems with brake lights
There may be several reasons:
- blown fuse;
- faulty sensor;
- frayed or broken power cord.
The most common cause is a blown fuse responsible for protecting the signal light circuit. This fuse is located on a block built to the left of the steering column. This capacitor can withstand a current of 7.5 amperes, as evidenced by the inscription on it. It is located in the bottom row, fourth from the right edge.
If after replacing this circuit element the problem has not been resolved, other possible causes of failure should be considered.
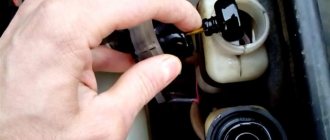
The next troubleshooting point is to check the brake light sensor. To do this, you need to check whether voltage is entering and exiting the sensor. In this case, you need to use a control lamp.
If the lamp does not light up when connected in front of the sensor, then the problem may be in the wires going to the sensor. If the lamp works before the sensor, but not after, then the problem lies in this part. You can also simply disconnect the input and output of the sensor and close it “directly” using a copper wire; if after these manipulations the lights in the brake lights light up, then the reason is precisely in the sensor.
Source
How to remove the mounting block - all steps in one video
Checking brake lights
Left: If the turn signals work properly but the hazard warning lights do not turn on, the cause is usually a faulty hazard warning light switch. If you press the switch firmly several times, most often it will start working normally. If this does not happen, then remove the switch (2), squeezing its locking tabs and removing it from the groove, check the contacts of the pin connection (1). Right: When installing the brake light switch (2), it must be pressed against the pedal support (3) so that the switch pin also presses the switch when the pedal (4) is released. For perfect operation, the pin block (1) must be correctly connected.
Brake lights should be checked as often as possible in the interests of safety.
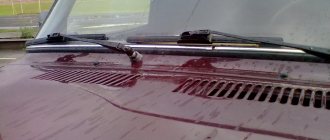
- The garage wall behind your car should give off a red glow when you press the brake pedal.
- When driving, check using your rear view to see if the light from your brake lights is reflected in the headlight reflectors or on the paintwork of the car behind you.
Brake light switch
When you press the brake pedal with your foot, the spring in the brake light switch (it is mounted in the brake pedal suspension holder) presses on the control pin. At the same time, the contacts in the switch and the electrical circuit to the brake lights are closed. If the brake pedal is released, the pedal pin presses the control pin to its original position and the brake signal goes off.
Checking the brake light switch
If both brake lights do not light, check as follows to see if the brake light switch is the cause.
Replacing the brake light switch
Trouble-shooting
Brake lights
What technical solutions exist
There are a lot of technical solutions for tuning VAZ cars. Starting from tuning the VAZ engine and gearbox to major changes in the design of the car.
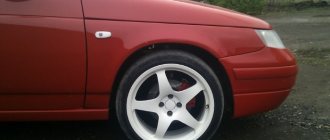
After tuning a VAZ car with your own hands, the driver gets new driving sensations
The transformed car clearly stands out from the crowd of cars of the same type and attracts attention, but if the tuning of the vases with your own hands is done correctly, then operating the car will become much more convenient
And although such changes in cars are among the most expensive, many owners of VAZ cars, at the first opportunity and having the necessary funds, try to add something new and unique to their car.
There are as many VAZ car models as there are technical solutions for tuning them. And those decisions, in turn, are divided into several more.
We can safely say that there are several models, and as many VAZ cars exist with their owners, there are as many technical solutions for their tuning.
Since every car owner, when tuning a VAZ with his own hands, brings in something new, unique and distinctive from other cars of the same type.
It is impossible to consider every case of tuning vases with your own hands.
Therefore, we will look at the example of one solution, which, in turn, turned out to be successful.