The most expensive part of a car is the body; even the engine costs less. Moreover, it is the body that can quickly deteriorate and require repairs. It is not surprising that many motorists strive to protect their bodywork by any means from the negative effects of the external environment. One such method of protection is coating with liquid rubber.
This method has many advantages. In addition, its implementation does not require the help of specialists. Today we have to understand the advantages and disadvantages of liquid rubber, learn how to coat a car with this paint, and also remove it from the surface of the car.
What is liquid rubber?
First of all, it’s worth understanding what liquid rubber is. Many hobbyists want to change their car, but without radically repainting it. For this purpose, they came up with vinyl and other methods of quick transformation. One of these is liquid rubber paint. We are talking specifically about rubber-based paint. This structure makes it easy to apply it to the surface, as well as easily remove it, if necessary.
Liquid rubber for cars
This type of coating is used as protection and to quickly change the style and color of a car. The rubber in the composition ensures long-term operation compared to film. Rubber paint is used for cars when completely repainting and changing some parts.
Depending on the application method, you should buy in aerosols and canisters. The price fluctuates depending on the manufacturer and quality.
The colors that liquid vinyl offers do not represent a wide range; there are 6 popular varieties:
- Neon (advantage of an unusually bright color).
- Metallic (impeccable style).
- Chameleon (the color scheme changes depending on the point of view).
- Mother of pearl (shine and play of colors).
- Transparent (the coating does not hide the factory color of the car).
- Thermal (color changes depending on temperature).
Features of the technology
In many ways, the application process and performance characteristics of “liquid rubber” resemble paint and varnish and polyurethane coatings. All differences lie in the composition and technical and physical qualities of the applied layer. The basis of the material is silicone, as well as oil-containing products (about 70%). The remaining components are additives and solvents, which each manufacturer adds at its discretion. Despite its high density, “liquid rubber” for car painting in some cases causes less hassle during application than traditional types of body treatments.
However, there are also some nuances in operation. The opinions of experts regarding the resistance of the coating to mechanical stress are not so clear. But here a lot depends on the composition used, consistency and proportion of ingredients. For example, for SUVs that are used for fishing trips, the composition should be harder, but for city sedans you can choose a standard elastic coating.
Liquid rubber for cars: pros and cons of painting a car with the substance
Of course, the main advantage of covering a car with liquid paint is its protective effect. Vinyl is significantly inferior; liquid film for cars not only hides some defects, but also prevents the formation of cracks, scratches and other damage.
The main advantage of covering a car with liquid paint is its protective effect.
The undoubted advantages include the following properties:
- Creates a protective layer, the paintwork remains intact.
- It has several texture solutions, creating a matte or glossy effect.
- Can be used on the entire body or on individual parts.
- High waterproofness and elasticity.
- Shows resistance to ultraviolet radiation.
- Gives the car impeccable style and status.
- Painting with liquid vinyl is applied to hard-to-reach areas. For example, a tire will look like new after painting.
- There is no need for additional requirements, the complete technology is much simpler.
There are also disadvantages. The main disadvantage is that the service life is maximum 2 years; the first signs of wear appear after a year. In addition, the rubber layer can leave sticky marks and can only be removed by polishing. Another drawback, or rather feature, is the monotony of color. It is impossible to create a drawing or three-dimensional figure.
The main disadvantage is that the service life is maximum 2 years, the first signs of wear appear after a year
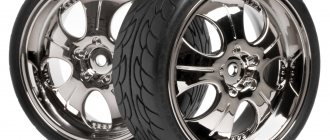
Why are discs covered?
What does such coverage provide, is there any benefit or is it a collective farm show-off? This type of tuning is considered not a simple decoration:
- Rubber provides additional protection against moisture, scratches and chips on metal. Scratches on the disc occur from pebbles flying from under the wheels;
- This is a design method of giving a car a unique style, not prohibited by law;
- A good way to hide disc defects, scratches, chips, small dents, and give them a new life;
- Applying a spray from a can will cost less than replacing discs or contacting a service center for painting.
Technology of coating a car body with liquid rubber
The complete painting process takes several hours, followed by a day of drying. It all depends on where the liquid rubber is used, whether the entire car will be covered or only parts of it. The technology is not complicated and consists of several stages:
- Preparing the car. Talk about washing, cleaning and priming, if necessary. It is worth understanding that complete rubber coverage completely hides all defects.
- Hiding elements that will not be painted. They must be removed or sealed with tape.
- Rubber application. How long it will last depends on the method of application.
- Drying. It takes at least a day. Until this time, the machine cannot be used - it may disrupt the entire process.
It is important to adhere to safety rules when carrying out painting work. A respirator, gloves and no open fire are required.
You can actually do the painting yourself or use the services of specialists. This requires additional funds, but the result will be impeccable.
Rules
There are simple rules for applying rubber that must be followed:
- A total of 5-7 layers are applied to each disc, with one application;
- It is better to apply the first layer by spraying;
- On the second pass, pay more attention to the corners and spokes;
- Subsequent passes are needed to increase the thickness and strength of the layer;
- Rubber is applied at angles of 60-90 degrees;
- Damaged areas with noticeable defects can be passed separately several more times to smooth them out and hide them under the thickness of the layer;
- Drying of the first layer is about 15 minutes, subsequent layers are 30-40 minutes;
- It is recommended to dry a fully treated wheel for another day.
Unsuccessfully applied rubber can be carefully torn off from the surface, without harm to it, and applied again. I have everything, my friends. Now you can handle the coating of rims with rubber yourself, decorating your car. I recommend reading my article “Do-it-yourself repair and painting of stamped wheels.” Subscribe to updates on the site and share the link with your friends.
Preparing a car for painting with liquid rubber
One of the main points is preparing the car for painting. First, it must be cleaned, washed, and when drying has occurred, a mandatory step is degreasing. A similar process is necessary so that the material lays evenly on the car and bubbles do not appear.
Preparing a car for painting with liquid rubber
If there is serious damage, it must be hidden with a primer. An important point: after applying it, it is not advisable to paint it. All defects will be hidden under the rubber.
The next stage of preparation is to dismantle the parts that will not be painted. First you need to remove the license plates, windows and headlights. If paint will not be applied to some parts, but they are difficult to remove, they should be sealed with a special film. But it needs to be done very carefully. Place special emphasis on windows.
Let's move on to the wheels, if painting them is in the plans, then masking tape should be used on the brake drums. If the discs will not be painted, they need to be wrapped in a tight film or painted in the removed position.
Preparing the car. the washing up
Like any other work, covering with liquid rubber requires special preparation of the car before work.
We wash the car like for a wedding, even better
You need to wash the car very well and dry it completely. To do this you need to at least use compressed air and a hair dryer.
Drying is very important, as any moisture that remains on the surface of the body will interfere with the uniform application of the rubber.
In addition, adhesion to the surface may not be as good, or small bubbles will appear on the surface of the liquid rubber. And, over time, they will turn into spots. So, you need to dry everything with a hairdryer with special care.
Pay attention to the places under the handles and rubber bands, on the mirrors, under the hood, doorways, and so on.
In addition, if you plan to also paint doorways, then the procedure must be repeated again with greater care in the areas of the inner door space. Everything there should be well washed, degreased, and dirt should be completely removed.
Protecting the interior from paint exposure
After all the procedures described above, the doorway is carefully sealed so that the paint does not penetrate into the interior. In addition, you will also have to seal the door, along with the glass and cards. In short, protect all areas that are not going to be painted.
Preparing liquid rubber and spray for painting
In order for the painting to be successful and the result to be impeccable, it is worth choosing the right equipment. An important element is the choice of paint itself - the basis of the entire process. You can buy it ready-made, but the thick consistency is not suitable when applied to a surface. Additional solvent required. It can also be purchased complete with paint. It is very simple to prepare the solution: you need to mix the paint with the solvent in a 1:1 ratio and stir until a homogeneous mass is obtained. All necessary instructions are indicated on the packaging.
A special automotive spray gun is used for painting. Fill the prepared solution only up to half. Particular attention should be paid to the filter.
Spray gun for liquid rubber DeVilbiss PRi Pro Lite
Comparison table of characteristics
We compared the characteristics of modern liquid rubbers in a general table.
| Model | Volume, ml | Weight, g | Type of equipment | Manufacturer country |
| ASTROhim | 520 | 345 | Cars, Motorcycles | Russia |
| RUNWAY | 450 | 450 | All | China |
| DECO FLEX | 520 | 365 | All | Russia |
| Larex Black | 520 | 311 | All | Russia |
| 1NEW Liquid Rubber | 400 | 283 | All | China |
| ColorFlex | 520 | 520 | car, motorcycle, bicycle and other equipment | Russia |
| Rubber Paint | 1000 | 400 | automotive industry and more | Russia |
Applying liquid rubber to a car
Any type of painting can leave marks on human skin, so be sure to use protective clothing. Moreover, all areas of the body must be covered. Wear wide glasses and a respirator. Only people wearing such equipment should be in the room.
Painting starts with the big details. First the hood, roof, doors, then difficult areas. The technology involves parallel application of paint to the car in layers, the distance should be 15 cm. In order to improve fixation, it is better to make the first layer thin. There are only 10 layers, there are options for applying less, but then the quality suffers.
The layers must be applied slowly, after each layer drying is required for 20 minutes. After applying the last coat, leave the car to dry indoors for 24 hours. The temperature is not so important, but it is better not to be very hot. The temperature is often maintained at 18-20 degrees in the absence of drafts. Remove protective stickers only after complete drying. Carefully remove the film and tape, cutting at the joints with a knife.
Disadvantages of rubber paint
Liquid rubber has a number of advantages over other types of car painting:
- No toxicity;
- Cheaper than vinyl film;
- High elasticity;
- Resistance to moisture and temperature;
- Good adhesion;
- Resistant to impacts and scratches;
- Easy to apply (spray from a can);
- Does not require special knowledge or serious effort during application;
- Easy to apply with your own hands;
- Available for purchase in stores and online;
- Available in any volume;
- Easily removed from the surface of the car;
- Can be applied to surfaces both horizontally and vertically;
- Seamless structure;
- Can be applied to a damaged vehicle;
- Painting work takes no more than 12 hours;
- Possibility to paint the car in parts.
In addition, liquid rubber can be used not only for painting clear-coated cars. It can be applied to plastic. In addition, with the development of technology, there are no restrictions on the color palette. If the desired color is not in the standard set, they can be mixed to achieve the desired result.
Among the many advantages, there are also disadvantages to using rubber paint:
- Not such a long service life for a fairly high price - no more than 2 years. Although, on average, liquid rubber is removed from a car after 6-12 months after painting;
- There is no possibility of drawing and volume;
- If not removed correctly, rubber paint may leave unwanted marks on the car's clear surface. Such a trace is almost impossible to remove;
- The color of rubber paint may fade over time;
- The coating will not be able to protect the car from the impact of sharp objects with great force.
In addition, in some cases, after improper painting, fingerprints or stains may appear on the car.
Opinions differ about the advantages and disadvantages of this painting method; the only thing that remains unchanged is the opinion that for a successful result it is worth using high-quality materials.
The main rule when painting is to follow the instructions from the manufacturer. When painting involves the use of a spray gun, you need to dilute the paint with a special solvent, the name of which is indicated in the instructions for the paint. The main thing here is not to save money, otherwise the result of painting may be unexpected.
Step-by-step instruction:
- The sprayer should be located from 13 to 16 cm from the car;
- The paint should be applied smoothly and without sudden movements. The car should be painted in at least 10 layers (12 layers is even better);
- The first layer should be made as thin as possible to better adhere the paint to the car. The first layer can be transparent;
- After applying the 1st layer, you need to let the rubber dry for 10-15 minutes, then proceed to subsequent painting;
- The second coat must be applied slowly and carefully. After application, the rubber may still remain transparent;
- Let the layer dry again for 10-15 minutes;
- Next, the next layer is applied and dried. And so on until the state you want to achieve. The more layers, the brighter the color.
- After applying all layers, you need to let the car dry for at least an hour;
- Then remove the masking tape from the headlights, windows and mirrors;
- Wait for the rubber paint to completely harden within 24 hours. During this time, it is advisable to leave the car in the paint booth.
DETAILS: Routine maintenance of Ford Mondeo 4 All work schedule for TO1 TO2 TO3 TO4 TO5 and TO6
| What are they painting? | How much paint will be needed? |
| Wheel rims | · Radius 13-14/15-16 – 2 aerosols; · Radius 17-18 – 3-4 aerosols; · Radius 19-20 – 4-5 aerosols. |
| Hood | 1.5-2 aerosols. |
| Car roof | 1.5-2 aerosols. |
| trunk lid | 1.5-2 aerosols. |
| Full painting (class A, B) | 3-5 liters. |
| Full painting (class C, D) | 5-7 liters. |
| Full painting (class E, S, F) | 9-12 liters. |
Today, liquid rubber is quite popular in Russia, which is not surprising given all the advantages of such a coating. The main advantage is independence of work, that is, there is no need to overpay for coverage. In addition, a car with such a coating looks unusual and stylish, attracting the attention of others. The choice of such tuning is the choice of an extraordinary and creative person who strives to stand out in the world around him.
The advantages of rubber coating include:
- the ability to paint any, even the most difficult-to-reach body parts;
- no need to dismantle elements;
- low labor costs for preparatory work - the car does not need to be sanded and primed, it is possible to Plasti Dip directly onto the paint layer;
- possibility of self-painting;
- less stringent requirements for room preparation and working conditions;
- after painting, the vehicle looks very impressive and prestigious, standing out among the crowd of cars;
- easy removal, after which the car body takes on its original appearance.
The disadvantages of the method are:
- very short service life. Manufacturers promise a service life of the coating from two to five years, but many car owners who have tried this type of painting claim that it needs to be removed after six months to a year;
- there cannot be any images on the coating, and there is also no three-dimensional effect;
- after removing the liquid rubber, traces may remain on the surface of the car, so, most likely, you will have to resort to deep polishing of the body;
- Careful operation and maintenance of the machine is necessary.
The painting process consists of several stages, including the preparation of materials, the vehicle and the coating of the car itself with liquid rubber.
Necessary materials
In order to cover a car you will need:
- liquid rubber;
- appropriate solvent;
- masking tape, cardboard. You can also stock up on plastic wrap and newspapers;
- paint sprayer;
- knife (useful for removing remaining dried paint.
Car preparation
Before painting, the car must be thoroughly washed and dried using a hair dryer or compressed air. Particular attention is paid to cracks in doors, mirrors, and door handles, since even a small amount of moisture will worsen the quality of the process. Next, you need to wipe the surface of the body with a degreaser.
- frames for fastening state license plates;
- radiator grille;
- bumper grilles and air intakes;
- glass and rubber seals;
- wheels.
In this case, the headlights and taillights do not need to be covered at all - the dried liquid rubber can easily be removed from them.
Preparation of materials
Painting a car with liquid rubber should be carried out in a well-ventilated, dry and dust-free area. To protect the respiratory tract from toxic substances, it is better to prepare a respirator in advance.
Rubber paint is quite thick, so it must be diluted with a solvent in the proportions specified by the manufacturer (usually a ratio of 1:1 or 1:2 is recommended).
To avoid the appearance of defects due to coarse paint particles entering the sprayer, it must be poured through a mesh filter. Do not fill the spray tank to capacity; the optimal amount of paint is 1/2 or 2/3. The supply of coloring composition is adjusted to the very minimum. Before painting the car, you need to check the operation of the sprayer on a foreign surface.
Spraying liquid rubber
There is no need to try to cover the car with a thick layer in one go, even if gaps are visible. The layers should be as thin and uniform as possible - so each subsequent layer will cover the flaws of the previous one, creating the most even surface possible. An approximate work flow looks like this:
- Painting begins from the rear pillar, with a smooth transition to the roof of the car.
- Gradual painting of the left pillar, trunk lid, rear and bumper.
- Applying paint to the left fender all the way to the front door and back.
- Painting the front door.
- The next object is the front door and headlights.
- It is recommended to paint the hood starting from the left side to the middle, and then from the right side to the middle.
- Painting the taillights and grille.
- Finally, they begin painting the right front fender and doors.
- The final stage is painting the rear wing.
DETAILS: Operating principle, malfunction symptoms and testing
All subsequent layers (their number can reach 6-10, depending on the desired result) are applied according to the same scheme.
In practice, painting a car with liquid rubber does not require removing the main layers of varnish and paint, and most importantly, disassembling the car (with the exception of the rims that need to be removed). However, preliminary cleaning of the surface from dirt and grease stains is necessary.
The next stage is to protect the elements of the body and interior that will not be painted. This is very important, since the technology of painting a car with liquid rubber involves spraying paint, which means it can easily get on adjacent parts. For protection, polyethylene, cardboard and tape (painting tape, if possible) are used.
The spray gun cylinder is filled with a mixture of paint and solvent to two-thirds of its volume, which ensures a more uniform supply. When painting, the spray gun nozzle (or can) should be held at approximately right angles to the surface.
The paint is sprayed by moving the hand back and forth, creating a couple of thin layers. In this way, the entire body or selected parts are covered (after the first layer, the paint will look uneven and translucent). Next, the first layer must be dried for about 15 minutes, unless the instructions for the brand of paint used indicate a different drying time.
The second layer is applied similarly to the first, but trying to make the coating more uniform. When painting rims with liquid rubber yourself, at this stage it is important to pay attention to the curves, corners and edges. After the entire surface is painted, it is again given time to dry. The remaining layers are applied in the same way.
Approximate consumption of liquid rubber when painting
This paint is a very expensive material, so car enthusiasts are interested in the cost of painting and how much it costs. It all depends on the type of paint chosen and the specific car. Consumption is indicated on the packaging for full coverage, but not more than 7 layers. Usually this is not enough, so the dose should be slightly exaggerated.
You can fully calculate the consumption with the help of specialists. You will need the characteristics of the car.
Applying liquid rubber to a car
Material advantages
Nowadays, liquid rubber for cars appears as one of the best materials on the market, since it has a whole set of modern parameters:
- this material forms a smooth surface without seams (this is clearly visible in many videos on the Internet), due to the fact that it is applied using cold spraying;
- the high adhesive properties of the composition cause the most reliable adhesion to virtually any part of the car body, no matter what material it is made of;
- the adhesion of liquid rubber does not depend on the temperature of the base surface, its age or stage of hardening;
- The cold spray technique makes it possible to apply coatings to car parts of complex shapes, while avoiding increased consumption of the composition.
For a car, liquid rubber can sometimes be an alternative option that replaces painting, since when processing vertically located parts, the composition does not flow down even in hot weather.
The final coating is characterized by reliability, resistance to damage, chipping or weather conditions.
Consumption of liquid rubber in aerosol cans
As for liquid rubber in aerosols, the consumption will depend on the scale and area of painting. It is worth mentioning that spray cans are rarely used in case of complete painting; they are convenient for finishing small parts, for example, tires. But there are cases when aerosols are used over the entire area of the car.
The calculation occurs according to the following scheme:
- Large elements such as the hood, roof and trunk each have 2 cans.
- Smaller parts, for example, doors are best painted using 1 aerosol.
Thus, a complete painting requires approximately 15 cans.
Saturation of the Russian market
The leader among car enthusiasts in Russia is the American Performix tires from Plasti Dip. To coat the body with paint, paint is usually used in spray cans using a special solvent.
In addition to the American manufacturer, manufacturers from England, Spain, and Switzerland enjoy trust.
The cost of liquid rubber depends on the manufacturer, seller, and packaging. The average price per liter varies from 1,400 to 1,600 per liter, while when buying 5 liters in a jar at once, you can save about 1-2 thousand rubles.
Based on the brand of car, the cost of painting will be from 9 to 20 thousand rubles, and the cost of materials depends on the manufacturer and the size of the painting area - from 10 to 23 thousand rubles.
Consumption of liquid rubber concentrate for car painting
If you use a concentrate, painting is done using a spray gun. A car of class A and B - you will need from 3 to 5 liters, class C and D - up to 7 liters, class E, F, S - up to 12 liters. These are approximate figures, they are indicated based on the application of no more than 7 layers of rubber. In addition, there is a difference depending on the radicalness of the repainting. If the factory color is dark and dark rubber is applied, then less paint will be needed. In case of a radical change in color, additional layers are required, and therefore more paint.
Liquid rubber in a can
How much should I buy?
If you paint 4 discs with a spray, how many cans will be needed in total? Many authors forget to answer this crucial question. Meanwhile, you need to take into account that the coating is applied in 5-7 layers. The options are:
- 2 cans of spray should be enough for 4 discs if the coating is 5-7 layers;
- If you want a final layer of a special color, then add another can of final coating, the previous layers will serve as a strong base;
- For large and patterned rims, it is recommended to take one can per wheel.
To summarize, I will say that it all depends on your skill and the number of layers applied; for a car - a passenger car, you need a maximum of 4 bottles of spray.
Review of car painting with Plasti Dip liquid rubber
On popular Internet pages, you can find many reviews about Plasti Dip liquid rubber. Luxury car lovers are happy to share their impressions.
Egor: “This paint is a wonderful thing, the pros and cons are visible the first time you use it. It is worth saying that there are more advantages. I decided to start small and applied paint to the rim grilles. The car was immediately transformed. The paint is very easy to apply. The only downside is the rather high cost.”
Karina: “I wanted my swallow to stand out from the cars in the crowd, so I chose liquid vinyl. I was completely satisfied with the result. Just a day later I received a completely new car, I chose the bright Plasti Dip color. The native red is not visible. The only negative I can say is that after a year, namely in the middle of summer, the color began to lose its brightness.”
Valentin: “Plasti Dip was recommended at the salon. They assured that the material is durable, the coating is stylish and unique. I chose a metallic color with a glossy structure. The car came out great. I think that everyone can choose their own individual style. After 20 months, I removed the coating on my own without any extra effort. There were no marks or scratches left on the car.”

