It is important for VAZ 2110 owners to remember that the cylinder head gasket is a disposable part, therefore it must be replaced whenever this unit is disassembled.
In our material today we will talk about when and how to change the cylinder head gasket. These recommendations are equally suitable for owners of the “ten”, under the hood of which engines with 8 and 16 valves are installed.
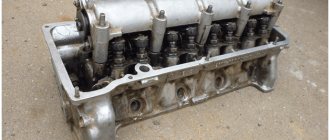
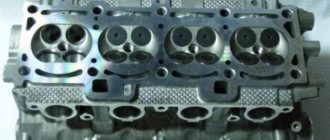
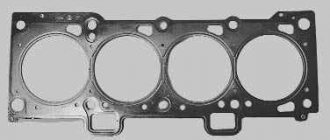
Element appearance
When is replacement required?
The primary issue that concerns car owners is the frequency of replacing the element. Even if the unit is not disassembled, the seal has a certain service life.
In general, the lifespan of a gasket directly depends on the quality of the material used in its manufacture. Also, the frequency of replacement is affected by the intensity of use of the vehicle.
As we have already noted, replacement should be performed when disassembling the BC head, or when primary signs of wear appear.
What is this?
What exactly is this gasket?
This is a rubber element that has a certain elasticity. With use and wear, elasticity is lost. This reduces the quality and efficiency of performing the main task of the element - sealing the connection between the cylinder head and the cylinder block.
In order for the engine to work properly and without problems, the gasket must be installed efficiently and reliably. Ignoring its wear will lead to a serious reduction in engine life.
Signs of wear
If your old gasket is worn out, it won't be difficult to determine. There are several characteristic signs of loss of elasticity of a rubber element:
- White steam starts coming out of the exhaust;
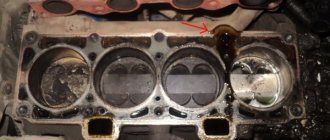
- Traces of coolant or engine oil leakage appear at the cylinder head joints;
- Traces of oil appear in the coolant;
- An impressive amount of lubricant accumulates in the pan;
- Foam forms around the filler cap.
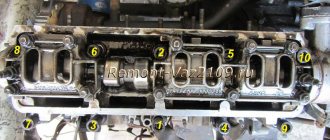
Tightening process and diagram (on an 8-valve car)
As we have already said, the procedure for tightening the cylinder head bolts on an 8-valve and a sixteen-valve unit is very similar. The tightening torque is the same in both cases, but the bolts are unscrewed and then tightened according to a completely different pattern. It is important to thoroughly clean the contacting surfaces before installing a new or old VAZ 2110 cylinder head. It is highly undesirable to do this with sandpaper, a file or other hard objects that can damage these surfaces.
Rough cleaning of the surface can lead to depressurization of the cylinder block system with ensuing dangerous consequences. For this purpose, special liquids are sold in the store. They are applied to a surface that may have remnants of an old gasket or other contaminants and are left to dry for some time. After some time, they are carefully removed and the surface remains perfectly clean.
When should you change?
The need to replace the cylinder head gasket on a carburetor or injection car arises when, during use and due to natural wear, the seal loses its elasticity. This leads to a decrease in the quality and efficiency of fulfilling the main purpose - reliable sealing of the cylinder head connection with the cylinder block itself.
It is necessary to replace the cylinder head gasket on a VAZ 2110 in the following cases:
- If oil drips appear at the junction of the head and the block. There may also be a refrigerant leak in this area.
- The presence of light-colored foreign impurities or foam in the motor fluid. This can be detected by removing the dipstick from the inspection hole. The formation of a foam emulsion and the appearance of impurities occurs as a result of mixing engine and coolant fluids.
- Change in color of exhaust gases. A more saturated white-blue gas comes out of the car's muffler. This indicates that water has entered the combustion chamber of the cylinder block.
- The appearance of oil stains in the expansion tank with antifreeze.
- Increase in power unit temperature. As a result of exhaust gases entering the cooling system, the antifreeze heats up much faster. This leads to an increase in engine temperature.
User Sergei Tsapyuk showed in his video the consequences of a burnt-out head gasket in a VAZ car.
In what cases is it necessary to tighten the block?
It becomes necessary to tighten the bolts if the cylinder head was removed to change the gasket or repair some components. Also, some car owners recommend tightening after a certain period of operation of the car or after a certain mileage of the VAZ 2110. It is important to know that before installing the head it is always recommended to install a new gasket.
Reinstalling an old one, even if it is in good condition, may not give the desired result. A new gasket is inexpensive and for VAZ 2110 cars they are sold in almost all car stores. You also need to know that the bolts that secure the cylinder head wear out over time and, under constant stress, can even stretch to some extent. Re-installation of bolts is permissible, but only when their length is no more than 9.5 centimeters.
The length should not exceed 9.5 centimeters
They are also free from damage and rust. But since they are inexpensive, it is better not to skimp and purchase a new set of bolts.
How to change it yourself?
Replacing the cylinder head gasket on a VAZ 2110 with an injector or carburetor engine requires certain knowledge and skills.
To change the head mechanism on an 8 or 16 valve engine, you must carefully prepare for this task.
Tools and materials
If you change the cylinder head gasket yourself, you will need:
- star key;
- a set of ratchet wrenches with socket heads;
- Phillips and flat head screwdrivers;
- torque wrench for tightening cylinder head bolts;
- spark plug key.
Channel Sdelaj Sam! Pljus interesting! published a video that will help you understand how to correctly determine the burnout of the cylinder head gasket between the cylinders of the power unit.
Step-by-step instruction
A detailed guide on how to remove and change the cylinder head gasket on a VAZ 2110 is given below:
- Drive the car into a garage with a pit or onto an overpass; if possible, it is better to use a lift, since some of the work will be done under the bottom of the car.
- Open the hood and loosen the bolt securing the battery terminal, disconnect it. This is necessary in order to prevent voltage surges during repairs.
- Then disconnect the intake line from the exhaust pipe.
- If the car is equipped with a carburetor engine, then the carburetor itself must be removed.
- Disconnect the lead cables from the spark plugs. A wire with a connector is connected to the power unit temperature controller; it also needs to be removed. After this, disconnect the plug from the pressure and engine fluid level controller.
- Loosen the fastening and disconnect the vacuum booster tube that is fixed to the intake manifold.
- Disconnect the connectors and disconnect the ignition distributor controller.
- Remove the gasoline pump with all its components. Loosen the clamps and disconnect the pipes connected to the pumping device. Some fuel may come out of it, so use a rag when dismantling it.
- Using a wrench, loosen the screw securing the timing belt tension roller. This will allow you to remove the wheel along with the belt.
- Next, secure the camshaft toothed disk to prevent it from turning during further repair work.
- Unscrew the fixing screw and remove the pulley from its seat. To perform this task, you need to use two screwdrivers at the same time.
- Next, locate the nuts securing the rear timing cover. You need to unscrew them and remove the cover. Using a Phillips head screwdriver, loosen the clamps to disconnect the pipes connected to the cylinder head exhaust pipe.
- Using a hex wrench, remove the cylinder head mounting screws, there are ten in total. The bolts are removed along with the washers. Assess the condition of the latter. If washers or bolts are damaged, they must be replaced with new ones. The screws themselves are reusable parts, but they often wear out, leading to the need for replacement. You can tell how worn the bolts are by their length. If it is about 13.55 cm, then purchase new clamps in advance.
- Then the cylinder head with the failed seal is dismantled.
- During further installation of the GB, new screws must be lubricated with engine fluid. This will ensure simple and reliable fixation of the parts. In addition, lubrication will prevent accelerated wear of the bolts.
- The contact surfaces of the head and the block must be thoroughly cleaned of wear and contaminants. These elements usually show signs of an outdated gasket. Thoroughly clean and dry the surfaces before further installation of the service seal.
- Perform a visual inspection of the mounting screw holes. Often when repairs are carried out, they contain residues of the sealing element, engine fluid or antifreeze. Any dirt in the holes must be removed.
- A new seal is being installed, which must first be cleaned and dried. During installation, make sure that the hole used for the passage of engine fluid is located between the fourth and third cylinders. Also, when installing the gasket, make sure that the valve elements of cylinder 1 are closed.
- When the installation procedure is completed, you need to correctly tighten the cylinder head bolts, taking into account the sequence and torque. First, the two middle bolts are tightened - the bottom and the top, and then all the rest. On the first tightening circle, the torque should be 20 Nm, this indicator is controlled using a torque wrench. On the second lap the torque should be about 69.4-85.7 Nm. On the third circle, all the bolts are rotated 90 degrees in the prescribed order, and they are turned by the same amount on the fourth circle.
- Further assembly is done in reverse order. When performing the task, it is not allowed to rotate the crankshaft and camshaft until you install the timing belt. The camshaft pulley is mounted in such a way that the protruding part of the hub is directed towards the car engine. When the repair procedure is completed, check the correct assembly and make sure there are no gaps on the valves. Also adjust the timing belt tension.
Operating procedure
- Disconnect the wire from the “–” terminal of the battery.
- Set the piston of the 1st cylinder to the TDC position of the compression stroke
- Drain the coolant.
- On fuel-injected models, reduce fuel system pressure if work is being done immediately after driving.
- Disconnect the muffler exhaust pipe from the exhaust manifold
- Remove the thermostat
- Unscrew nut 1 securing the bracket to the water pump supply pipe and loosen nut 2 securing the bracket to the exhaust manifold.
- Move the bracket to the side.
- Disconnect the block with wires from the oil level sensor in the engine crankcase.
- In addition, on the engine mod. 2111 unscrew or loosen the nut securing the support bracket 1, unscrew the bolt securing the support bracket 2 and...
- ...disconnect the block (white) with wires from the crankshaft position sensor by pressing the plastic latch.
- Remove the camshaft drive belt from its timing pulley, tension roller, water pump timing pulley, move it to the side and remove the tension roller.
- Secure the camshaft timing pulley from turning by inserting a screwdriver (shown by the arrow) into its hole and resting it against the pin, unscrew the pulley mounting bolt and remove it along with the washer.
- Using two screwdrivers, remove the pulley from the camshaft. Do not damage the camshaft oil seal.
- Unscrew the nuts securing the rear timing belt cover. Let's dismantle it.
- Next, loosen all the clamps on the pipes using a Phillips screwdriver connected to the cylinder head exhaust pipe. We disconnect them.
- Using a 10mm hexagon, unscrew the bolts (studs) securing the cylinder head to the block itself.
- Be careful as the bolts are removed along with the washers.
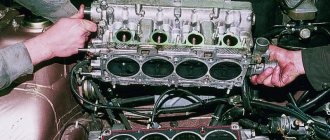
- Now you can dismantle the head along with the old gasket.
- Removed bolts should be checked for tension. Their length should not be more than 135.5 mm. Otherwise, replace them with new ones. Before installation, it is recommended to lubricate them with appropriate lubricant or engine oil (working will do).
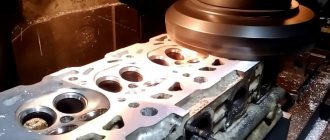
- The surfaces must be thoroughly cleaned of the old gasket and its adhering parts. The contact between the head and the cylinder block must be smooth, without defects, otherwise the cylinder head must be ground on a machine. Check all holes to ensure there is no oil or coolant in them.
- The new gasket being installed must be dry and clean. When installing, pay attention to the oil hole, which should be located between cylinders 3 and 4.
- In the installed cylinder head, the valves of the first cylinder must be in the closed position.
- The bolts should be tightened with a torque wrench strictly in the sequence indicated in the photo according to the following scheme: The first pass is 20 Nm, the second is 70-85 Nm, the third is turned by 90°, the fourth by another 90º.
- Then assembly occurs in reverse order. The camshafts and crankshaft should be kept stationary until the timing belt is installed. The camshaft pulley is installed with the protruding part of the hub facing the engine.
- Finally, it is necessary to adjust the timing belt tension and valve clearances.
We invite you to watch a video about removing the cylinder head.
Consequences of untimely replacement
If the cylinder head gasket on the “Ten” is damaged or worn out, this will lead to the following malfunctions:
- The engine fluid will begin to get into the antifreeze, and the coolant, accordingly, into the oil. This problem will cause the engine to overheat and the coolant to boil.
- Steam will come out of the exhaust pipe, and the power of the power unit will be reduced to a minimum.
- The engine may stall at idle and when driving uphill, and failures may occur when you press the gas pedal.
- The coolant that gets into the lubrication system will make it difficult for the oil to work due to the fact that when mixed, the substances will lose their original characteristics.
As a result, regular use of a car with a worn gasket will reduce the service life of the car’s engine.
Replacing valve seats
If the seats burn out and are destroyed, as well as if the heads are strongly recessed into the body (“sucked”) or have been subjected to repeated countersinking, they need to be replaced. The seats are replaced on a milling machine. The defective seat is bored with a milling cutter and removed from the socket. Then, according to the technology, the head is placed in a thermal oven and heated to 120-150 degrees. Saddle blanks in the form of rings are placed in liquid nitrogen to reduce their temperature to minus 40 degrees. Using tongs, place the cooled rings of future saddles into the sockets and lightly tap them into the body of the head. Further operations for processing seat chamfers are performed on a special milling machine or manually with a set of cutters.
Video “Visual aid to replacing the cylinder head gasket”
User Vyacheslav Kravchenko suggests familiarizing yourself with the process of replacing the cylinder head gasket using the example of a sixteen-valve “Ten”.
Many owners prefer to repair their cars themselves, so it will be useful for them to know how to replace the cylinder head gasket on a VAZ 2110 (2112) 8 and 16 valves. This part plays an important role in the overall design of the engine. It is possible to perform such an operation yourself, but you will need to use a special torque wrench to tighten the bolts securing the head to the cylinder block. It can be easily found in most garage cooperatives.
Replacing the cylinder head gasket on a VAZ 2110 (2112) 8 and 16 valves
performed each time the head is removed from the cylinder block. This is provided for in the conditions of maintenance, operation and repair of this vehicle. The replacement procedure itself is important, but approximately the same, with rare exceptions, for all car models. Therefore, we believe that the article will be useful for many car owners.
What is she?
This part of internal combustion engines serves as a seal to the place where the cylinder head is connected to the cylinder block. The engine has another gasket that seals the valve cover with the cylinder head. These parts cannot be confused with each other; these are completely different products, their design, purpose and application are different.
This part seals three separate but interconnected engine systems at once. These are lubrication, cooling and gas distribution systems. It is because of this that very high requirements are applied to it. During the compression of the fuel mixture, high pressure is created in the combustion chamber, therefore, after each removal of the cylinder head, the gasket must be replaced.
If it is reused, it may burn out, causing the engine oil to mix with the coolant. This means that you will also have to change the engine oil with filter and antifreeze in the cooling system. Several types of such products are produced:
- Gaskets made on a non-asbestos basis
are characterized as products that are easily restored and have minimal shrinkage; - Products made from asbestos
. Their high heat resistance, elasticity and elasticity are noted. They are recommended for use as repair kits; - Metal gaskets
. Today they are considered products that have high efficiency and quality, allowing the created pressure to be evenly distributed over the entire sealed surface.
Reason for replacing it
There can be many reasons for this, both for used cars and for new cars. In most cases, it is impossible to predict the timing of its replacement. There are certain signs by which one can judge the need for such an operation, but this often occurs suddenly.
Let's look at a few of the most common signs:
- Noticed the appearance of drops of engine oil or coolant at the sealing area of the head and block;
- The presence of whitish exhaust from the exhaust pipe is evidence of the penetration of coolant due to burnout of the gasket;
- When checking the oil level on the dipstick, it was noticed that this is a sign of coolant entering the lubrication system;
- The presence of oil stains in the coolant, which can be seen in the expansion tank or radiator;
- Bubbling of the coolant is evidence of exhaust gases breaking through the burnt gasket into the engine cooling system.
Features of repairing the cylinder head of the Lada Granta
The engine of the Lada Granta car has differences with the Kalina engine. The block head, in comparison with the Kalinovskaya one, has been increased in height by 1.2 mm. This is due to a change in the combustion chamber. Lightweight pistons installed. The timing belt has been modified and operates in a temperature range from minus 40 to plus 40 degrees. The declared belt mileage is up to 200 thousand kilometers.
The main feature of Granta cylinder head repair is the use of metal-ceramic seats. By car Kalina, 2114, etc. Cast iron saddles are used, which can be processed manually using a set of domestic cutters.
Machining cermet seats requires wear-resistant cutting tools. In order to successfully process them, the head is installed on the NEWENContour - BB machine, designed specifically for the rapid processing of seats and valve guides with digital control or manually with a Neway tool.
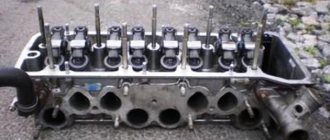
Instructions for disassembling the cylinder head of a VAZ 2110
2.Unscrew the two fastening nuts and remove the eye.
3.Unscrew the fastening nut one or two turns and remove the bracket for the water pump supply pipe.
4.Unscrew the screw securing the fuel pipe holder and remove the holder.
5. Unscrew the three nuts securing the receiver and the two nuts securing the bracket for the fuel pipes.
6.Remove the fuel pipe bracket.
7.Unscrew the remaining two nuts securing the receiver.
8.Loosen the nut securing the receiver bracket.
10.Unscrew the three nuts securing the receiver bracket and remove the bracket.
11.Unscrew the four nuts securing the inlet pipe. Remove the inlet pipe.
12.Unscrew the two nuts securing the exhaust manifold and remove the manifold.
13.Carefully remove the two gaskets from the intake pipe and exhaust manifold.
14.Install the cylinder head with the bearing housings facing up, placing wooden shims under it to avoid damaging the valves.
15.Unscrew the two nuts and bolt securing the rear cover of the cylinder head. Please note that there is an O-ring under the bolt head. Remove the rear cylinder head cover.
16.Remove the spark plugs.
17. Unscrew evenly the four nuts securing the front 1 and six nuts securing the rear 2 camshaft bearing housings and remove the washers. Then remove both housings.
18.If the key in the camshaft groove does not fit tightly, remove it so as not to lose it.
20.Remove the oil seal
from the camshaft.
21.Remove the valve pushers 1 along with the adjusting washers.
Having taken out the next pusher, mark it and the adjusting washer with serial numbers so that during assembly you can install them in their place. At the same time, do not remove the adjusting washers from the pushers unless necessary, so as not to confuse them.
