The low beam of car headlights has an established cut-off line, the position of which is regulated by international rules and standards. This is a conditional line of transition of light into shadow, which must be chosen in such a way as not to blind other road users. On the other hand, it must provide an acceptable level of road illumination. If the position of the car body changes due to some reason, then the position of the cut-off line also changes. In order for the driver to be able to adjust the direction of the low beam, i.e. cut-off line and the headlight range control is applied.
Purpose of the headlight range control
Initially, the correct headlights are adjusted on an unloaded vehicle, when its longitudinal axis is in a horizontal position. If the front or rear is loaded (for example, with passengers or cargo), the position of the body changes. An assistant in such a situation is the headlight range control. In Europe, all cars since 1999 must be equipped with a similar system.
Headlight position for normal and heavy loads
Results
Automatic headlight leveling is required for cars equipped with standard lighting. This module will have a positive effect on the quality and direction of lighting, even if your car is loaded to the maximum. With autocorrector, you don’t have to worry about the fact that your car’s light can negatively affect the comfort of oncoming drivers. If the car is equipped with an auto-corrector, then you are guaranteed an easy and unhindered passage of the next technical inspection. Let the light in your car be correct.
Types of headlight correctors
Headlight correctors are divided according to the principle of operation into two types:
- forced (manual) action;
- auto.
Manual adjustment of the light is carried out by the driver himself from the cabin using various drives. By type of action, drives are divided into:
- mechanical;
- pneumatic;
- hydraulic;
- electromechanical.
Mechanical
Mechanical adjustment of the light beam is made not from the interior, but directly on the headlight. This is a primitive mechanism based on an adjusting screw. Typically used in older car models. The level of the light beam is adjusted by turning the screw in one direction or another.
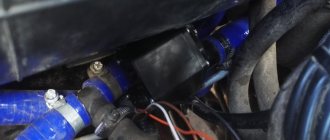
Pneumatic
Pneumatic adjustment is not widely used due to the complexity of the mechanism. It can be adjusted automatically or manually. In case of manual pneumatic adjustment, the driver must set the n-position switch on the panel. This type is used in conjunction with halogen lighting.
In automatic mode, body position sensors, mechanisms and a system control unit are used. The reflector regulates the air pressure in the lines that are connected to the lighting system.
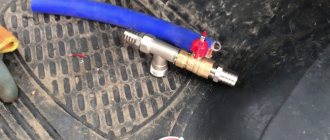
Hydraulic
The principle of operation is similar to mechanical, only in this case the position is adjusted using a special liquid in sealed lines. The driver adjusts the lighting position by turning the dial in the cabin. In this case, mechanical work is performed. The system is connected to the main hydraulic cylinder. Turning the wheel increases the pressure. The cylinders move, and the mechanism turns the rod and reflectors in the headlights. The tightness of the system allows you to adjust the position of the light in both directions.
The system is considered not very reliable, since over time the tightness at the junction of the cuffs and tubes is lost. The fluid flows out, allowing air into the system.
Headlight hydrocorrector
Electromechanical
The electromechanical drive is the most common and popular option for adjusting low beam in many cars. It is adjusted by the driver rotating a wheel with divisions inside the car on the dashboard. There are usually 4 positions.
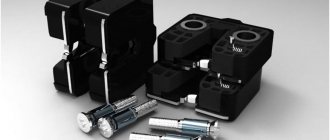
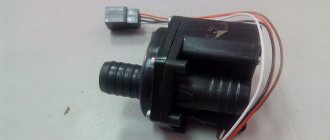
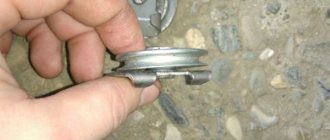
Geared motor
The actuating mechanism is a gear motor. It consists of an electric motor, an electronic board and a worm gearbox. The electronic board processes the command, and the electric motor rotates the shaft and rod. The rod changes the position of the reflector.
How to make automatic headlight leveling with your own hands
If it is almost impossible to make a dynamic auto-corrector with your own hands, then an electromechanical corrector (EMKF) can be made independently. Such a device can replace the hydraulic corrector on all models of domestic cars for which this is provided for by the design of the head optics.
The typical design of an electromechanical corrector consists of gear motors installed on each headlight and a control unit. The corresponding components can be purchased freely. Plus you will need a soldering iron, wires, fasteners, terminals, pads, casing, PVC tube or other insulating material.
It is necessary to select components for the EMKF in such a way that their dimensions correspond to the dimensions of the standard hydraulic corrector installed on your car.
Automatic headlight leveling
If the car has an automatic low beam correction system, then the driver does not need to adjust or turn anything himself. Automation is responsible for this. The system usually includes:
- Control block;
- body position sensors;
- actuators.
Sensors analyze the vehicle's ground clearance. If there are changes, a signal is sent to the control unit and the actuators adjust the headlight positions. Often this system is integrated with other body position systems.
The automatic system also operates in dynamic mode. Lighting, especially xenon lighting, can instantly blind the driver. This can happen when there is a sudden change in ground clearance off-road, when braking and suddenly moving forward. The dynamic corrector instantly adjusts the light output, preventing bright light from blinding drivers.
According to regulatory requirements, cars with xenon headlights must have automatic low beam level control.
Principle of operation
The purpose of the mechanism is to adjust the degree of illumination limit in low beam. When the far mode is turned on, this option is not necessary to use, because the device is not able to accurately indicate the line of light and shadow. Headlights must create high-quality illumination of the road, without blinding oncoming drivers.
The shadow line depends on how the reflector is positioned. The tilt needs to be adjusted, because it depends on how loaded the car is and which parts of it have the greatest load pressure. The headlights of an unloaded car emit a luminous flux that illuminates the area of the road in front of the car. If the tilt angle is adjusted as a result of loading, the direction of the light flux also changes. Using a spotter allows you to maintain the direction of light rays after changing the angle of the car body.
All correctors work on approximately the same principle. They differ only in the type of setting, which can be manual or automatic. The first type of device is equipped with a regulator, which is located inside the car. The driver rotates it manually, thus adjusting the degree of inclination of the reflector. In the second case, the system adjusts to the angle of inclination of the car automatically.
Forced adjustment
With this approach, the light flux is controlled manually, for which a special switch is used in the car interior. Changing its position leads to a change in the position of the lighting fixtures.
Depending on the type of drive used in such a device, there are:
- electromechanical headlight range control;
- mechanical headlight range control;
- hydraulic;
- pneumatic, etc.
As an example of how any of the devices mentioned works, consider an electric headlight range control unit. It would be more correct to call it not electrical, but electromechanical. It includes:
- position switch;
- electric gear motor located on each headlight;
- connecting wires.
The principle by which such a device works is quite simple. When the position of the switch in the car is changed, an electrical signal (voltage) is supplied to the gearmotor. Its rod, one end of which is located on the headlight reflector, moves. This movement of the rod leads to a change in the position of the associated reflector and, ultimately, in the luminous flux.
Automatic luminous flux correction
When an automatic headlight leveler is installed on a car, the driver does not need to do anything additional; in this case, the automation works for him. It includes:
- device control unit;
- ride height sensors;
- actuators.
As already mentioned, its operation can occur in static and dynamic mode. In static mode, the automation controls the vehicle's ground clearance, and when it changes, due to additional loading of the vehicle, the control unit sends an electrical signal to the actuators to adjust the position of the lighting fixtures.
However, this mode of operation, with the beginning of the use of xenon lamps, turned out to be insufficient. The light flux they generate is so powerful that even its short-term exposure can blind oncoming drivers. Therefore, to prevent such a phenomenon, a dynamic corrector appeared.
Its main difference is speed. The operation of such a corrector is capable of changing the direction of the light flux in a fraction of a second. This allows you to keep the luminous flux within specified limits when accelerating the car, braking it, cornering and on uneven roads. Thanks to this, when adjusted correctly, even bright headlights do not blind oncoming drivers when making maneuvers.
This is interesting: Troubleshooting and troubleshooting if the oil pressure light comes on at idle
Headlight range control has become a mandatory element of car design. Its use improves driving safety at night by ensuring constant illumination of the road surface and reducing the possibility of dazzling other drivers.
Corrector installation
If your car does not have such a system, you can install it yourself. There are various sets available on the market (from electromechanical to automatic) at very different prices. The main thing is that the device matches the lighting system of your car. If you have special skills and tools, you can install the system yourself.
After installation, you need to make adjustments and adjust the luminous flux. To do this, you need to draw a special diagram on the wall or shield, which indicates the points of deflection of the beam. Each headlight is individually adjustable.
Headlight adjustment
Replacing the device
It is not difficult to replace a broken headlight range control unit with your own hands. The sequence of work is as follows:
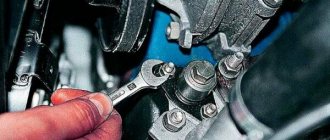
- unscrew the screws securing the pipeline clamps to the mounting brackets;
- remove the handle from the main cylinder;
- unscrew the nut securing the main cylinder to the instrument panel;
- disconnect the main cylinders from the headlamp;
- we push the actuator cylinders into the cabin along with the seals;
- install the new unit in the reverse order of assembly.
It will be useful: Replacing the low beam lamp on the Lada Kalina with your own hands: instructions
- disconnect the negative terminal from the battery;
- turn the main cylinder counterclockwise and dismantle it;
- change the o-ring;
- install the electric corrector in place of the main cylinder;
- dismantle the main cylinder lever in the cabin;
- connect the positive terminal to the socket of block 20;
- We fix the negative terminal on one of the body studs under the instrument panel;
- instead of pipelines, we lay the corrector wiring or along the electrical power harness;
- connect the negative terminal to the battery.
After all this, you just need to check the functionality of the device.
How to check functionality
Body position sensors may be different. For example, the service life of potentiometric sensors is 10-15 years. The electromechanical drive may also fail. If there is automatic adjustment, you can hear the characteristic buzzing of the adjustment drive when you turn on the ignition and low beam. If you cannot hear it, then this is a malfunction signal.
The performance of the system can also be checked by mechanically changing the position of the car body. If the luminous flux changes, then the system works. The cause of the breakdown may be electrical wiring. In this case, service diagnostics are necessary.
Headlight range control is an important safety element. Many drivers do not attach much importance to this. But you need to understand that the wrong or blinding light can lead to dire consequences. This is especially true for cars with xenon headlights. You shouldn't put others in danger.
What does the automatic headlight leveling system consist of and how does it work?
autocorrector system can install from one to three ride height sensors; they are placed in front and behind the body. In addition, the system uses a non-contact rotation angle sensor, the operating principle of which is based on the Hall effect. The sensors are attached to the body and connected to the suspension using special rods. The sensor itself consists of a moving rotor with permanent magnets and a stationary stator in the form of a Hall sensor.
The position of the body in relation to the suspension is recognized thanks to sensors and a rod that changes its position by turning the rotor, which in turn changes the magnetic flux. This flow is taken into account by the Hall sensor, after which the headlights are adjusted taking into account the specified algorithms. Cheaper automatic headlight leveling systems use only one sensor - ultrasonic. The only sensor is mounted in the rear of the body according to the principle described above. The signal that comes from the sensors is received by the ECU (electronic control unit) of the auto headlight leveler . The control unit is guided by certain algorithms that take into account information about the current speed of the vehicle, as well as the state of the sensors. After this, the ECU issues a command regarding the angle at which the headlights need to be raised or lowered.
Such a simple and at the same time useful system allows you to always keep the headlights in the correct position, eliminating the possibility of dazzling other road users. More perfect and advanced in terms of traffic safety and automatic headlight adjustment is the adaptive lighting system, which allows you to adjust the light beam not only in the vertical, but also in the horizontal direction, but that, as they say, is a completely different story...
I have everything, I hope everything is clear to you? Thank you for your attention, and see you again at Fara Info.
The low beam of car headlights has an established cut-off line, the position of which is regulated by international rules and standards. This is a conditional line of transition of light into shadow, which must be chosen in such a way as not to blind other road users. On the other hand, it must provide an acceptable level of road illumination. If the position of the car body changes due to some reason, then the position of the cut-off line also changes. In order for the driver to be able to adjust the direction of the low beam, i.e. cut-off line and the headlight range control is applied.
Content
PTF adjustment
Draw a horizontal line on the screen 50mm lower than the height from the fog lights to the ground. The light spot should be positioned so that the upper border on the screen is at the level of the drawn strip. The adjustment is made by rotating the adjusting screw, which is located next to the fog lamp.
Let us remind you that we previously told you how to independently replace the lamps in the Priora headlights, as well as install PTF.
Keywords: Lada Priora headlights | external lighting for Lada Priora
- AvtoVAZ increased prices for LADA for the third time in 2022
- Beautiful photos of Lada Largus
- Removing the interior lamp of Lada Vesta, XRAY, new Granta
- Replacing lamps in headlights of Lada Largus
Expert opinion
It-Technology, Electrical power and electronics specialist
Ask questions to the “Specialist for modernization of energy generation systems”
The process of adjusting the light Not long ago, this technology was adapted for city driving and added to the Future Bus, which will be able to accelerate. Ask, I'm in touch!
PTF adjustment
Draw a horizontal line on the screen 50mm lower than the height from the fog lights to the ground. The light spot should be positioned so that the upper border on the screen is at the level of the drawn strip. The adjustment is made by rotating the adjusting screw, which is located next to the fog lamp.
Let us remind you that we previously told you how to independently replace the lamps in the Priora headlights, as well as install PTF.
Keywords: Lada Priora headlights | external lighting for Lada Priora
- Coronavirus has an impact on AvtoVAZ, new details
- Replacing the internal tie rod ends of Lada Vesta with your own hands
- AvtoVAZ named the reasons for overheating of the starter, and when it is replaced under warranty
- Review of cilia for rear lights of Lada Vesta
Expert opinion
It-Technology, Electrical power and electronics specialist
Ask questions to the “Specialist for modernization of energy generation systems”
Electrical corrector The light spot on the road will become more blurred, since the light will not concentrate at a certain distance from the car, the level of illumination of the road will drop significantly. Ask, I'm in touch!