It is very possible to start a car engine without using an electric starter. To do this, you will either need to push the car well, or ask someone to take you in tow. But, you must admit, there are not always passengers in the cabin with you who would help you start the car from the pusher, and not every driver you meet will agree to carry you.
Unfortunately, problems with engine starting occur everywhere on domestically produced cars. As for the starter, it itself fails quite rarely. But the parts that ensure its operation often fail.
In this article we will talk about what a starter solenoid relay is and understand its design using the VAZ-2114 as an example. In addition, we will consider its malfunctions, as well as possible malfunctions of other elements of the engine starting system that have similar symptoms.
Where is the VAZ 2114 solenoid relay located?
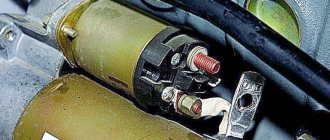
The starter device on the VAZ 2114 model is not much different from other cars of this brand. The fairly simple design of the motor starter allows it to serve for a long time without breakdowns. Jamming and complete failure of the retractor relay makes normal use of the starter impossible. To replace it yourself, you need to know the location of the relay. The photo below shows the exact location of the retractor element.
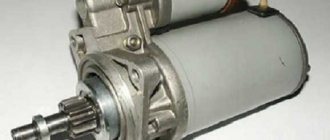
The photo shows the assembled device. At the top of the picture there is a cylinder to which the power wire goes. This part is the solenoid relay. With some manipulations, dismantling the part takes about 10 minutes. Quick replacement of the VAZ 2114 starter relay is possible due to the convenient location of the element. If desired, you can completely dismantle the part and start replacing the spare part.
Video that clearly demonstrates the replacement process:
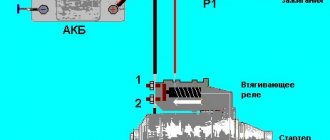
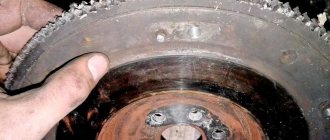
The main task of the solenoid relay is to close the circuit in a timely manner. When you turn the key in the ignition switch, the core located in the relay housing is activated. Next, this core drives the bendix, which leads to the operation of the rotor. The gears together with the bendix drive the flywheel. As soon as the engine starts, the driver turns the key to the initial position and the circuit opens.
Signs of malfunction of the VAZ 2114 retractor relay
The difference between a breakdown of the solenoid relay is that it does not happen unnoticed. Even a faulty element can perform its function for some time. The difficulty of starting the engine if the device is worn out will depend on the number of attempts to turn on the starter.
In frosty weather, this problem will become more pressing, because... Poor VR operation will quickly drain the battery. Before carrying out work to replace a part, you need to make sure that the breakdown is accurately diagnosed. To do this, you need to know the signs of a malfunction in the VAZ 2114 VR:
- When the key is turned to the position of supplying power to the starter, a characteristic buzzing sound is observed, indicating that the starter is not engaging with the flywheel;
- There are clicks from the starter device, but it does not turn on;
- When the engine is running, the unit continues to operate and does not turn off even when the key is turned to the initial position.
It is recommended to replace the VAZ 2114 starter solenoid relay if one of the problems occurs. Sticking the starter in the on position accelerates its wear. Where the unit's bendix is located, there should be maximum engagement with the flywheel, so slipping is unacceptable. The design of the starting device is made taking into account a short period of continuous operation, so sticking when turned on wears it out.
REPAIR
It is advisable to repair the VAZ 2114 starter solenoid relay when the structure is collapsible, and when it makes sense to repair it.
Often the cause of VR failure is jamming of the core in the device body. This defect appears due to dryness inside the case. It is enough to lubricate the core with liquid oil (for example, motor oil), and the part will continue to serve properly for a long time. During repairs, it is also necessary to clean the contacts or, if necessary, replace them.
Checking the functionality of the solenoid relay with the starter removed is carried out as follows:
- A ground wire is “thrown” onto the starter housing from the negative terminal of the battery;
- We connect the positive wire on one side to the “plus” terminal of the battery, and on the starter we connect the wire to the upper contact on the solenoid relay (where there is a thread for the nut, but not to be confused with the lower contact that secures the stator winding):
- Then we take a piece of wiring, and from the top terminal we supply power to the smallest contact on the VR (it is this that receives power from the ignition switch);
- If the VR is working properly, it should work and the starter will start spinning.
Relay 2114 can serve for quite a long time, but it can often fail due to overloads. For example, if the engine does not start immediately and you have to turn the starter for a long time, the contacts on the VR may overheat and burn out. It should also be remembered that the VAZ car itself is Russian-made, and the quality of domestic spare parts may not always be at the proper level.
1200 rub. for the photo report
We pay for photo reports on car repairs. Earnings from 10,000 rubles/month.
Write:
The starter solenoid relay is an electromagnet that performs two functions in the ignition system. The first is to bring the Bendix starter gear to the flywheel ring gear. The second is its return to its original position after starting the engine. A breakdown of the solenoid relay may result in the engine simply not starting . There are not many reasons for relay failure. In this material we will try to describe the signs and causes of failure, as well as diagnostic and repair methods.
Necessary tool
Without tools, dismantling and installing a new part cannot be accomplished. The procedure for removing the solenoid relay or starter assembly requires a simple set of wrenches. The following tools will be useful for trouble-free work:
- Socket wrench and open-end wrench 13.
- Phillips and flat head screwdrivers.
- Key for 10.
- New retractor.
A simple set with all types of keys will be useful to any driver, because... No one is immune from sudden breakdowns of VAZ cars. The advantage of the 2114 model is that repairing most components is cheap, and even a novice driver can change the retractor on a VAZ 2114.
REPLACEMENT
We figured out where the starter relay is located on the VAZ 2114, now all that remains is to find out how it can be changed. There are two options for replacing this part:
- With the removal and installation of the starting unit itself;
- Without removing the starter.
In any case, you should have the necessary tools:
- Combination key 13;
- A screwdriver (it would be better to have several of them - Phillips and slotted ones);
- Key for 10.
A set of keys - always necessary to have in stock
Let's look at how to replace the solenoid relay on a VAZ 2114 with removing and installing the starter (by the way, this makes it much easier to replace):
- Remove the battery terminals;
- Unscrew the two bolts securing the air filter housing (10mm wrench);
- Disconnect the connector of the air flow sensor (MAF);
- Unscrew the air pipe clamp and dismantle the housing;
- We pull off the wire chip of the solenoid relay (held on a plastic clip);
- Using a 13mm wrench, unscrew the nut securing the positive terminal;
- We unscrew the fastenings of the starter itself (it is secured with three 13 nuts);
- We take out the mechanism;
- With the starting device removed, use a 13mm wrench to unscrew the wire on the VR cover going to the stator winding;
- Using a screwdriver, remove the three screws securing the VR and dismantle this device.
Now you need to install the new part and put everything back together in reverse order. That's it, the replacement of the retractor on the VAZ 2114 is completed. Of course, you can try to get to the relay mounting screws right in place without removing the starter, but it’s up to you to decide how easier it is to remove this device.
Replacing the solenoid relay on a VAZ 2114
If there is a problem with normal engine starting, you should repair the starter device. First of all, prepare the tool and work area. For normal dismantling, you can free up space under the hood by removing the air filter housing. Next, the replacement process can be described in several steps:
- Remove the terminals from the battery for safe operation.
- Disconnect the power plugs.
- Using a 13mm wrench, unscrew the terminal screwed to the starter housing.
- Unscrew the fastenings of the main body of the unit (3 nuts by 13).
- Remove the unit from the seat and use a size 13 wrench to unscrew the wire from the cover.
- Unscrew the screws securing the solenoid relay with a screwdriver and remove the part.
It is recommended to install only a new one in place of the old device. Even if there is a slight malfunction of the device in the core, the housing assembly should be replaced. It is clear that this approach may not be suitable for some, but the cost of this device is not so high that you can try to restore its operation using improvised means.
Another way to replace the retractor on the starter
On Friday we went to the dacha. The traffic jam this time was much larger than usual. We left at 17:00 and arrived at the place at 23:00, despite the fact that the drive was only 40 km. Well, in general, while we were stuck in a traffic jam, the car was turned off more than once for 20-30 minutes, then started, because the traffic had started to move. And then at one of these moments, the car suddenly wouldn’t start.
They began to push me to the side of the road and look for the cause; during this time, not a single motorist came up to offer their help. After checking the battery, all fuses and relays, they began to unscrew the wire on the starter retractor, because the starter did not turn over. So, when they began to unscrew this bolt, the retractors simply fell apart. Well, to be more precise, a piece broke off along with the bolt.
Okay, having started the car from the pushrod, we decided not to get stuck in the traffic jam anymore, but like many others, we drove along the oncoming side, along the side of the road, along the oncoming side of the road. The next day we assembled the broken retractor (with the help of Cosmofen glue and electrical tape) into one piece so that the car would at least start. And upon arrival home, we bought a new spare part and installed it on the starter.
new and old
Price of the retractor relay VAZ 2114
The new design part is manufactured by several companies. Let's consider several product options:
- Spare part from . Quite a quality option. Price - about 600-700 rubles .
- An analog version from the Belarusian one can be purchased at a price of 500-700 rubles , depending on the region. Medium quality.
- The highest quality VR option starts from 1000 rubles .
When searching for a spare part, be careful, because... There are often fakes.
Source
Replacing the starter retractor relay on a VAZ 2114
starter retractor relay VAZ 2114
More than once it was advised to deal with the filling of the hood of the fourteenth yourself, in this case there will be no abandonment of tradition. The retractor relay is located directly on the starter, having two wires: a thin red one (with low current from the ignition switch) and a thick positive contact from the car's charging battery.
No clicking of the solenoid relay
The absence of a click may indicate that either there is no voltage supplied to it, or there are problems with the pull-in winding. First of all, we check the wiring. To do this, visually inspect the positive wire going to the relay from the battery, and then the thin wire from the ignition switch. If possible, check the voltage level with a voltmeter (multimeter), connecting its positive probe to the terminal on the relay from which the wire goes to the battery, and the negative probe to ground. The device should show battery voltage. If this indicator is lower, you need to look for a problem in the wiring.
Principle of operation
The battery powers the starter coil, which, in turn, acts on the armature under the influence of a magnetic field. It moves and compresses the spring (return), causing the bendix to mate with the splines on the flywheel. At the moment the contact elements close, the retractor winding remains without power, and the magnetic field holds the armature inside the system. Then, after the elements are closed and the engine is started, power stops flowing to the holder coil, and the armature falls into place, as a spring acts on it (as a result, the bendix disengages).
Where is the starter relay located on a VAZ 2114
Having understood the principle of operation and determined the place where the starter relay is located on the VAZ, we look at how it can annoy the owner of the fourteenth.
Malfunctions
Everything is obvious here: charred wires, stuck contacts, burnt windings, and general wear and tear also happens. So that trouble does not take you by surprise, you need to listen to the symptoms of the imminent death of the draft relay:
- The engine starts, but the starter continues to spin. Its sound is unnatural and loud.
- On the contrary, the ignition is turned on, but the starter does not turn. Although the click of the relay was audible.
- The ignition works, the starter idles because the engine does not respond.
The pull rod on the unit can be disassembled, although most often not (especially after nine). You can understand the structure of the device itself by replacing the failed part, but it is better to take a new one.
The price of the VAZ 2114 starter solenoid relay is from 300 to 600 rubles, depending on the region of the country.
Malfunctions and their symptoms
Troubleshooting
But it is not at all necessary to disassemble the assembly in order to recognize the signs of a faulty solenoid relay. They look like this:
- The engine runs, but the starter still turns. At the same time, the sound is too loud and uncharacteristic;
- When the ignition is turned on, the starter does not spin, although the relay makes a characteristic click;
- The ignition is turned on, but the starter is idling and the engine does not respond.
All this suggests that there is a high probability of your transmission on the VAZ 2114 breaking. Therefore, it must be removed and a new element installed in place of the damaged one.
How to remove and install
For convenience, it is better to remove the starter, although many people do without it. On the other hand, you can replace the relay and diagnose the starter at once, you just need to remove it more carefully.
To remove the traction device itself, first of all we disconnect from the battery power, this moment is very important, otherwise you may get a good shock and you will definitely burn all the wiring. It would be good to clean the starter itself from accumulated dust and dirt, it will be easier to work. The process will be described for the type of relay that is assembled and whose parts can be replaced; it is more complicated than a non-assembled one for objective reasons.
- It’s easier to remove the battery terminal with the tenth key (remove the minus!).
- You need to remove the red wire from the relay itself, or rather its terminal.
- Using the eighth key, unscrew the nut of the brush assembly, it is located on the back of the relay, on the bolt, remove the contact that it held.
- Now we unscrew the fastenings of the relay to the ground (these are the same coupling screws).
- You need to remove the power wire and then pull out the pull-out relay.
- Now unscrew the end mounting nuts and remove the upper part of the relay.
- The old relay core must be replaced with a new one.
- And now we remember how we took everything apart and put it back together in reverse order.
When you halve one part of the relay from the other, be careful, firstly, the core may slip out, and secondly, the spring.
Replacing the solenoid relay on a VAZ 2114 is a simple matter. It’s even easier when it’s non-separable; in principle, you don’t have to do anything special, just remove the unusable part and replace it with a working version. The nuts are still the same, we’ll just screw them around the body.
Dismantling and replacement
To make it more convenient to replace the relay, it is recommended not to be lazy and still remove the starter itself. This will allow you to simultaneously check the condition of the starter while replacing the relay.
The removal procedure described below concerns an assembled relay, which has the ability to replace individual structural elements.
- Disconnect the negative terminal from the battery.
- Disconnect the red terminal from the relay. This is a red wire.
- Using an 8 mm wrench, unscrew the nut securing the brush assembly. You will find it behind the relay.
- Remove the contact that this nut held in place.
- Unscrew the fastening of the solenoid relay to ground. We are talking about coupling bolts.
- Next, you need to dismantle the power wire, after which the relay itself is pulled out.
- The fastening nuts are unscrewed from the end part, which allows you to remove the upper part of the relay.
- It is advisable to immediately replace the relay core with a new one.
- Install a new relay.
- Proceeding strictly in reverse order, reassemble the assembly, which will allow you to complete the replacement of the unit.
- When separating the relay into its two component parts, be sure to ensure that the core does not slip out and the spring does not jump out.
But there is one more very important point. Even if all the facts indicate that the starter or retractor relay is not working, another unit - the ignition switch - may still be the cause of ignition problems. Take the time to check its serviceability before buying new parts.
Functionality check
Still, despite the obvious symptoms of wear on the draft relay, you can make a mistake with your conclusions. Therefore, let's first check the starter. Having installed a new solenoid relay, there is a high probability that if something does not work, it will be the starter.
Turn the key in the ignition, the starter should start to wind, the relay click should be heard. In a situation. If the starter fails, you need to change it, not the relay.
We check the traction device itself in this way: we attach two contacts to its back cover (these are copper bolts), the starter winds - the traction relay is definitely faulty. By the way, there is no need to remove the starter, this way the readings will be more accurate.
If you still removed the entire system. Then the actions are as follows: we match the wiring of the contact of the draft relay with the positive of the battery, with another contact we match the battery charger and the ground of the starter. When the contacts touch the marks of the relay, it should respond and start working, with a click before the process. If it works, but as if in slow motion, check the contacts, they could oxidize or burn out.
In order not to spend extra money in the store and not to buy a new retractor, if suddenly the problem is not in it, there is a simple way to distinguish a breakdown of the starter from a breakdown of its pull relay.
How to remove the solenoid relay?
It is worth noting that when replacing the retractor, it is not necessary to remove the starter, but if, in addition to the retractor, you want to service the starter, then read: How to remove the starter?
To replace the solenoid relay we need:
- Wrenches from “10” to “8”.
- Flathead screwdriver.
- New retractor.
- Remove the negative terminal from the battery with a key set to “10”.
- We find the solenoid relay and remove the red wire terminal from it.
- Then, using a key “8” from the back of the relay, unscrew the two bolts securing the traction relay (shown in the figure).
- We remove the power cable of the retractor and remove the relay.
Important. You need to remove the relay carefully: make sure that the core remains inside . There is also a spring in the retractor relay - make sure it does not fall out.
