After replacing the wheel bearing, an important moment comes - tightening. You need to lock it not with your “bare” hands, but with the help of a special device - a torque wrench. Since the service life of the equipment and the quality of control of technical means directly depend on the completeness of the tightening.
Each car has its own torque on the wheel bearings. This is clearly described in the operating instructions. If for any reason the manual is lost, you should use the Internet or contact your nearest auto repair shop for clarification.
How hard should you tighten the wheel nut on your car?
Torque standards are established for each car, since the tightening force for the locknut depends on the following factors:
- Bearing dimensions;
- Regulated axial clearance;
- Diameter and thread pitch.
The following are the force indicators for properly tightening the nut. The database will be gradually replenished.
Advice:
If you have not found the tightening torque values for your car (Skoda Octavia, Subaru models, Toyota Corolla), find the bearing you have installed and the same thread diameter or ask a question in the comments.
ATTENTION:
Maintaining a clean operating environment is essential for proper operation and long service life of hub gears.
Be sure to clean the outside of the hub gearbox and adjacent parts to prevent dirt from entering the gearbox when removing it. Before assembling the gearbox, also clean all parts, both old and new.
All moving parts must be lubricated before assembly. Be sure to use the lubricant recommended in group 0 of this technical manual.
Dismantling the hub under the heading "Refurbishment" is carried out in order. If, for example, you need to change the wheel bearings, skip the sections entitled "Replacing the Driven Gear Bearing" and "Replacing the ABS Pulsating Wheel."
The numbers after the names refer to the perspective drawing.
Tightening torques for the front wheel bearing on a VAZ (LADA)
| No. | Automobile model | Force, N•m | Hub nut diameter/thread size |
| 1 | VAZ 2101 - 2107, OKA | 196 – 199 | M18x1.5 |
| 2 | NIVA VAZ 21213 and 21214 | 196 – 199 | |
| 3 | Kalina, Granta, Priora, Largus, Vesta | 226–247 | M20x1.5 |
| 4 | VAZ 2108, VAZ 2109 - 2110, 2111 - 2115 | 226–247 |
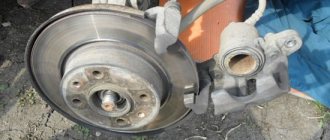
How to determine that you need to remove the bearing from the hub and replace it
Most often, bearing failures are the consequences of such problematic situations:
- mileage marks reached values within the range of 130-190 thousand kilometers;
- the occurrence of extraneous noise when moving;
- When performing a turning maneuver with the steering wheel, non-standard braking of the car occurs.
If any of the above situations occur, it is imperative to draw up an action plan that will determine how to remove the bearing from the hub and replace it with a new one.
You can confirm the presence of a malfunction by lifting a wheel on a specific car suspension. You just need to scroll it by hand. If extraneous noise, hum or play is detected during rotation, this indicates the inevitable need for repair work.
Tightening torques for the front wheel bearing on Ford
| No. | Automobile model | Force, N•m | Hub nut diameter/thread size |
| 1 | Focus 1 | 45 (further tighten another 90 degrees) | M18x1.5 |
| 2 | Focus 2 | ||
| 3 | Focus 3 | ||
| 4 | Mondeo | 35 (then tighten another 90 degrees) | |
| 5 | Fusion | 35 (then tighten another 90 degrees) | |
| 6 | Transit | 53 | M20x1.5 |
Refurbishment
Removing the axle shaft
Special tools
Support mechanisms
587 121 Wheel lift trolley
1 Place axle supports under the rear axle cardan.
2 Remove the wheels. Use a dolly to lift the wheels.
ATTENTION!
Never work under a vehicle that is supported only by a jack. Use axle stands. If the front axle has air suspension, the air reservoir must be deflated.
3 Rotate the hub so that the magnetic plugs 40
were strictly up or straight down.
ATTENTION!
The valve in the hub cap may be clogged. Use safety glasses as oil may spray out under high pressure when the oil plug is removed.
4 Drain the oil from the hub by removing both magnetic plugs.
5 Remove any metal particles that have accumulated on the magnetic plugs.
6 Remove four bolts 34
, cover
14
and thrust washer
22
.
7 Screw one M10 bolt into the tip of the axle shaft and pull it towards you approximately 20 cm. If the axle shaft comes out completely, the internal seals are damaged.
8 Remove the retaining ring 33
.
9 Remove the thrust washer 27
, drive gear
17
, thrust washer
22
and retaining ring
28
.
10 Screw two M6 bolts into the protective coupling 99 286. These bolts will make it easier to remove the coupling later. The protective coupling protects the oil seal 23
from damage when the axle shaft is completely removed. Lubricate the coupling outside and inside.
11 Insert the protective sleeve over the axle shaft.
Do not press the clutch too tightly, so as not to damage the axle shaft, and, in addition, the clutch will be difficult to remove later. Note:
A safety coupling must be used to protect the seals
23
.
Tightening torques for the front wheel bearing on a Chevrolet
| No. | Automobile model | Force, N•m | Hub nut diameter/thread size |
| 1 | NIVA | 191 – 195 | M18x1.5 |
| 2 | Lanos | 184 - 204 (then weakens and tightens 15.3 - 18.4) | M20x1.5 |
| 3 | Aveo | ||
| 4 | Lacetti | 254–300 | |
| 5 | Cruz | 50, turn 40˚ | M20x1.5 |
Shoe brake front axle of Scania trucks
Technical description and repair manual
Exploded view…. ………………………………..…… 2
Repair manual ………. …………………………………….………. 4
Checking the wheel bearing clearance……………………………………..… 4
Replacement of wheel bearings……………………………………………..…. 5
Special devices and tools………. ……………………………………. 8
Tightening torques for the front wheel bearing for Renault
| No. | Automobile model | Force, N•m | Hub nut diameter/thread size |
| 1 | Logan | 175 | M20x1.5 |
| 2 | Megan 1, Megan 2 | 280 | |
| 3 | Sandero | ||
| 4 | Duster 4x4 | 280 | |
| 5 | Duster 4×2 | 175 |
How to tighten the hub nut to the correct torque
To tighten threaded connections, where it is recommended to maintain a certain torque, use special torque wrenches . Inside the tool there is a dynamometer with a scale or a special device with a limiter, which is activated when the required tightening force is reached. Keys also come with value intervals, for example 5-25 (minimum 5 N•m, maximum 25 N•m).
The threaded connection is tightened until the arrow shows the required value or the limiter operates. There are also expensive and exact analogues - with an electronic display, but for the operation and repair of passenger cars a mechanical version is suitable.
The photo shows the main types of such keys.
- With preset torque, not adjustable.
- With preset torque value, adjustable.
- With tightening force indicator.
- With digital display of applied torque.
Watch the video on how to use a torque tool:
How to use the torque wrench scale:
How to use a torque wrench:
Removing and installing front wheel drives
The front wheel drives are removed to replace them if damaged or to replace the hinges and their covers. In addition, the front wheel drives may need to be removed to gain access to other units. NOTE. The drives of the left and right front wheels differ in design (the drive of the right front wheel is made integral with the intermediate shaft), therefore the left and right drives are removed partially using different techniques, described separately for each drive. You will need: all the tools to remove the engine crankcase protection (see Removing and installing the mudguard and engine crankcase protection), disconnecting the ball joint from the steering knuckle (see Replacing the ball joint), tie rod from the steering arm (see Replacing the outer tie rod end ), as well as a socket head and a “13” wrench, a wrench for wheel nuts.
How to tighten a hub nut without a torque wrench
Many car enthusiasts, when repairing their car, consider it not advisable to purchase torque wrenches or other specialized devices (pullers, etc.). There is a good way to tighten the fastener to the required torque without using a torque gauge.
The following equipment will be required:
- Ratchet with a head for a lock nut;
- Pipe for extending the ratchet to create the required “shoulder”;
- Roulette;
- Marker;
- A load that can be hung on the “shoulder” (for example, a 32 kg weight).
The essence of the method is to calculate the moment using the formula from elementary physics classes:
M = P•l, where
P is the applied force, N; l is the distance from the hub to the point of application of force - the “shoulder”, m. The ready-made formula for our case will be as follows:
P1 = (M2•100)/(M1•10) (•10 (or •9.8) - translated into Newtons), where
P1 is the distance at which the sinker is attached to the “shoulder” relative to the torsion point, cm; M1—cargo mass, kg; M2—required torque, N•m.
Calculation example for a Ford Focus 2 car
P1 = (M2•100)/(M1•10) (•10 (or •9.8) = (45•100)/(32•10) = 4500/320 = 14 cm.
Conclusion: to ensure a tightening torque of 45 N•m, a sinker weighing 32 kg will be required, located on the pipe at a distance of 14 cm.
Sequencing:
- First screw on the locknut and tighten it slightly.
- We mark a distance of 14 cm, where the rod should hang;
- We hold the ratchet with one hand and hang the sinker with the other, thereby tightening the fastening;
- The operation continues until the fasteners stop tightening under weight, which means that we have achieved the required force. Accuracy +/- 5%.
Algorithm of actions
Place the Hyundai Solaris on a flat surface and place shoes under the wheels.
Raise the car using a jack and remove the wheel. Loosen the nuts only when the car is on the ground.
Take a 32mm wrench and use it to unscrew the hub nut, securing the brake disc with a flat screwdriver.
Remove the wheel rotation sensor.
Remove the brake disc.
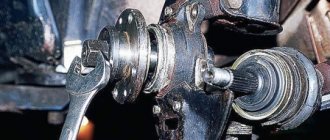
Dismantle the tie rod ends and remove the ball joint.
Unscrew the steering knuckle from the post and remove the latter.
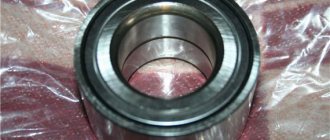
Typically, the inner ring remains and the bearing breaks. The ring is knocked off with a chisel.
Now you can remove the bearing ring using the same mounting blades
Using a screwdriver, pry up and pull out the retaining ring.
Use a puller to press out the bearing.
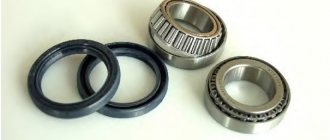
When starting to replace a part, the seating surface must be properly prepared by cleaning it. After cleaning, apply engine oil or the previously mentioned liquid.
A new bearing is installed in the fist. Press it in with a puller and install the locking element.
The last step is to install the steering knuckle in place. All that remains is to tighten everything correctly so that the car drives quietly and gives true comfort to the driver.
According to the instruction manual, the tightening torque of the front wheel bearing should be 88.3 - 107.9 Nm. This is official information provided by the manufacturer, and therefore you should not improvise, since a lot depends on the effort applied. We can conclude that the procedure is not simple, but there is nothing supernatural in it, and therefore you will even be able to save your own money.
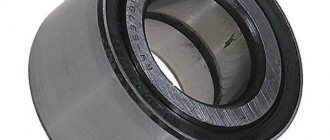
The front wheel bearing torque is the force with which the hub nut is tightened. Units of measurement – N*M (or kgf*m). The front bearings have internal axial clearance, which is necessary for proper operation of the bearing, namely:
- preventing angular displacement of rings;
- reduction of friction of rolling elements and raceways;
- correct distribution of internal stresses on separators and cages.
- compensation of thermal expansion.
- increasing the contact angle for axial loads.
In turn, the axial internal clearance of a double-row ball bearing is the amount by which the inner rings move relative to the outer one. In order for the axial clearance to be within the tolerance, the ball bearing (or roller) is adjusted, this is done by correctly tightening the hub nut.
Familiarize yourself with the mounting and arrangement of the bearing with the front hub, as well as with the design of the wheel ball bearing.
The video also shows the process of adjusting the backlash by the locknut tension level: